Pluots, Apriums, and the Flavorful World of Hybrid Fruit
Watermelon Girl Explores Summer Fruit Through Traditional Chinese Medicine
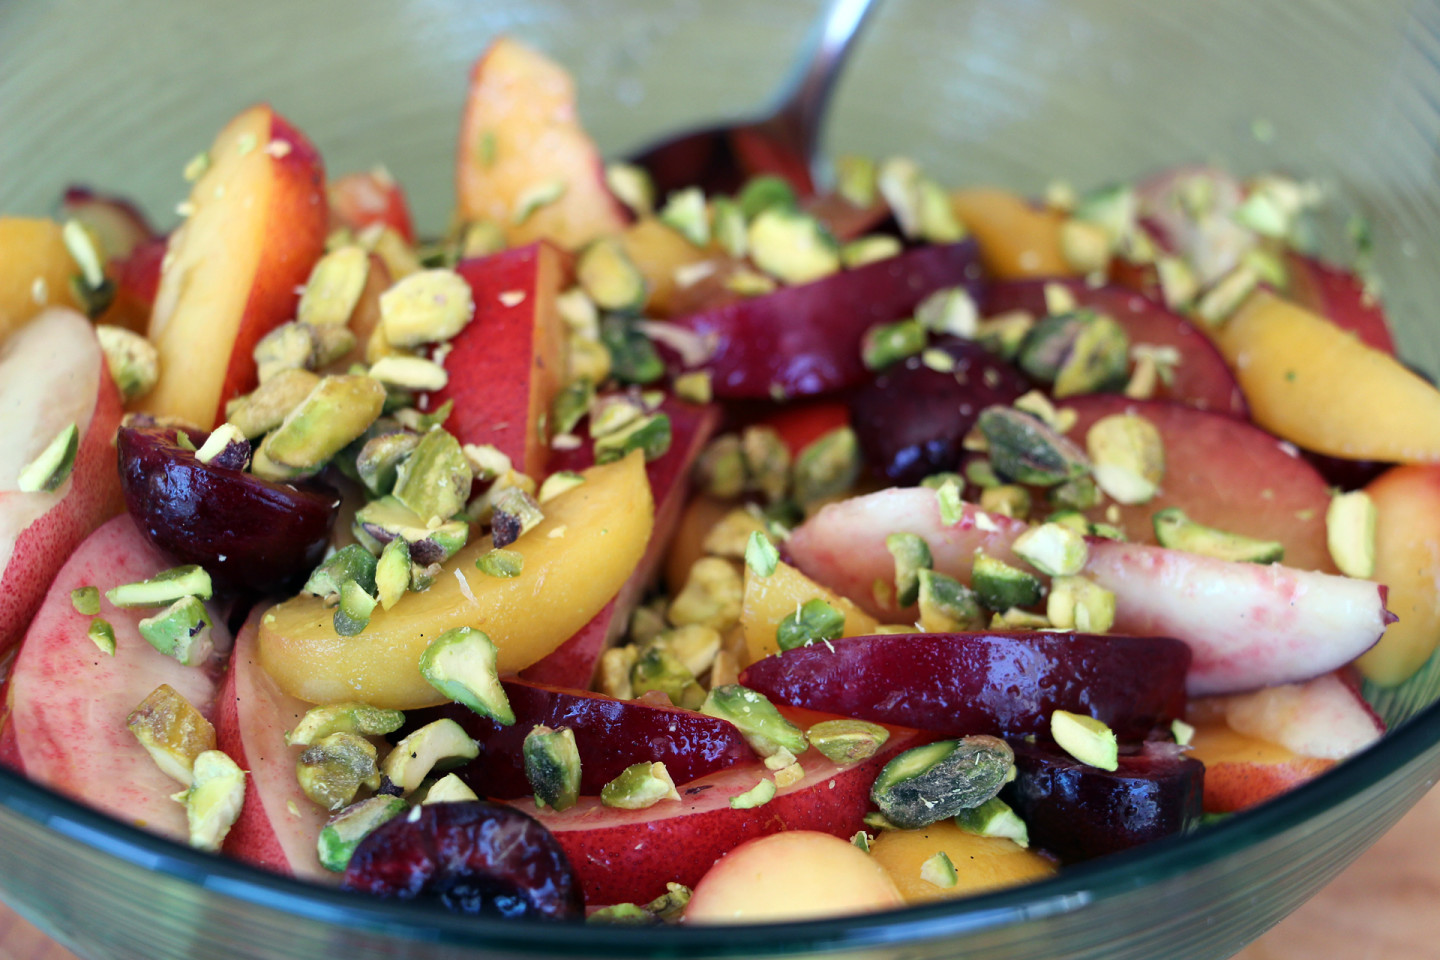
A Bounty of Summer Stone Fruit in a Salad
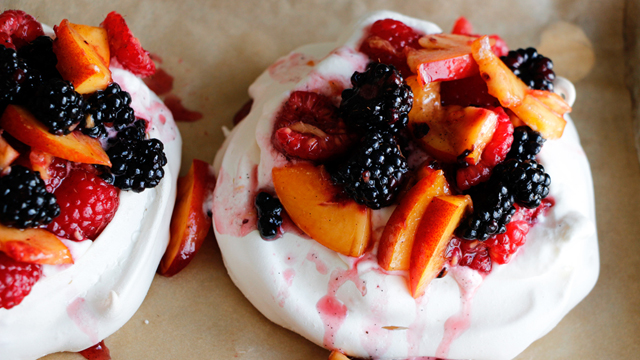
Bet You Can't Stop Eating These: Vanilla Pavlovas with Summer Nectarines, Berries, and Cream
Fruit Recall Hits Trader Joe's, Costco, Wal-Mart Stores
On the Trail of Durian, Southeast Asia's 'Crème Brûlée on a Tree'
This GMO Apple Won't Brown. Will That Sour The Fruit's Image?
To Grow Sweeter Produce, California Farmers Turn Off The Water
Sponsored
window.__IS_SSR__=true
window.__INITIAL_STATE__={"attachmentsReducer":{"audio_0":{"type":"attachments","id":"audio_0","imgSizes":{"kqedFullSize":{"file":"https://ww2.kqed.org/news/wp-content/themes/KQED-unified/img/audio_bgs/background0.jpg"}}},"audio_1":{"type":"attachments","id":"audio_1","imgSizes":{"kqedFullSize":{"file":"https://ww2.kqed.org/news/wp-content/themes/KQED-unified/img/audio_bgs/background1.jpg"}}},"audio_2":{"type":"attachments","id":"audio_2","imgSizes":{"kqedFullSize":{"file":"https://ww2.kqed.org/news/wp-content/themes/KQED-unified/img/audio_bgs/background2.jpg"}}},"audio_3":{"type":"attachments","id":"audio_3","imgSizes":{"kqedFullSize":{"file":"https://ww2.kqed.org/news/wp-content/themes/KQED-unified/img/audio_bgs/background3.jpg"}}},"audio_4":{"type":"attachments","id":"audio_4","imgSizes":{"kqedFullSize":{"file":"https://ww2.kqed.org/news/wp-content/themes/KQED-unified/img/audio_bgs/background4.jpg"}}},"placeholder":{"type":"attachments","id":"placeholder","imgSizes":{"thumbnail":{"file":"https://ww2.kqed.org/wp-content/uploads/sites/10/2018/01/GettyImages-896326950-160x96.jpg","width":160,"height":96,"mimeType":"image/jpeg"},"medium":{"file":"https://ww2.kqed.org/wp-content/uploads/sites/10/2018/01/GettyImages-896326950-800x478.jpg","width":800,"height":478,"mimeType":"image/jpeg"},"large":{"file":"https://ww2.kqed.org/wp-content/uploads/sites/10/2018/01/GettyImages-896326950-1020x610.jpg","width":1020,"height":610,"mimeType":"image/jpeg"},"fd-lrg":{"file":"https://ww2.kqed.org/wp-content/uploads/sites/10/2018/01/GettyImages-896326950-1920x1148.jpg","width":1920,"height":1148,"mimeType":"image/jpeg"},"fd-med":{"file":"https://ww2.kqed.org/wp-content/uploads/sites/10/2018/01/GettyImages-896326950-1180x705.jpg","width":1180,"height":705,"mimeType":"image/jpeg"},"fd-sm":{"file":"https://ww2.kqed.org/wp-content/uploads/sites/10/2018/01/GettyImages-896326950-960x574.jpg","width":960,"height":574,"mimeType":"image/jpeg"},"post-thumbnail":{"file":"https://ww2.kqed.org/wp-content/uploads/sites/10/2018/01/GettyImages-896326950-672x372.jpg","width":672,"height":372,"mimeType":"image/jpeg"},"twentyfourteen-full-width":{"file":"https://ww2.kqed.org/wp-content/uploads/sites/10/2018/01/GettyImages-896326950-1038x576.jpg","width":1038,"height":576,"mimeType":"image/jpeg"},"xxsmall":{"file":"https://ww2.kqed.org/wp-content/uploads/sites/10/2018/01/GettyImages-896326950-240x143.jpg","width":240,"height":143,"mimeType":"image/jpeg"},"xsmall":{"file":"https://ww2.kqed.org/wp-content/uploads/sites/10/2018/01/GettyImages-896326950-375x224.jpg","width":375,"height":224,"mimeType":"image/jpeg"},"small":{"file":"https://ww2.kqed.org/wp-content/uploads/sites/10/2018/01/GettyImages-896326950-520x311.jpg","width":520,"height":311,"mimeType":"image/jpeg"},"xlarge":{"file":"https://ww2.kqed.org/wp-content/uploads/sites/10/2018/01/GettyImages-896326950-1180x705.jpg","width":1180,"height":705,"mimeType":"image/jpeg"},"full-width":{"file":"https://ww2.kqed.org/wp-content/uploads/sites/10/2018/01/GettyImages-896326950-1920x1148.jpg","width":1920,"height":1148,"mimeType":"image/jpeg"},"guest-author-32":{"file":"https://ww2.kqed.org/wp-content/uploads/sites/10/2018/01/GettyImages-896326950-32x32.jpg","width":32,"height":32,"mimeType":"image/jpeg"},"guest-author-50":{"file":"https://ww2.kqed.org/wp-content/uploads/sites/10/2018/01/GettyImages-896326950-50x50.jpg","width":50,"height":50,"mimeType":"image/jpeg"},"guest-author-64":{"file":"https://ww2.kqed.org/wp-content/uploads/sites/10/2018/01/GettyImages-896326950-64x64.jpg","width":64,"height":64,"mimeType":"image/jpeg"},"guest-author-96":{"file":"https://ww2.kqed.org/wp-content/uploads/sites/10/2018/01/GettyImages-896326950-96x96.jpg","width":96,"height":96,"mimeType":"image/jpeg"},"guest-author-128":{"file":"https://ww2.kqed.org/wp-content/uploads/sites/10/2018/01/GettyImages-896326950-128x128.jpg","width":128,"height":128,"mimeType":"image/jpeg"},"detail":{"file":"https://ww2.kqed.org/wp-content/uploads/sites/10/2018/01/GettyImages-896326950-150x150.jpg","width":150,"height":150,"mimeType":"image/jpeg"},"kqedFullSize":{"file":"https://ww2.kqed.org/wp-content/uploads/sites/10/2018/01/GettyImages-896326950-e1514998105161.jpg","width":1920,"height":1148}}},"bayareabites_137659":{"type":"attachments","id":"bayareabites_137659","meta":{"index":"attachments_1591205162","site":"bayareabites","id":"137659","found":true},"title":"jpepinmff-apricotclafoutis-1920x1080","publishDate":1593653927,"status":"inherit","parent":138943,"modified":1600097704,"caption":"Jacques Pepin's clafoutis.","credit":"Jacques Pepin","description":null,"imgSizes":{"medium":{"file":"https://ww2.kqed.org/app/uploads/sites/24/2020/07/jpepinmff-apricotclafoutis-1920x1080-1-800x450.jpg","width":800,"height":450,"mimeType":"image/jpeg"},"large":{"file":"https://ww2.kqed.org/app/uploads/sites/24/2020/07/jpepinmff-apricotclafoutis-1920x1080-1-1020x574.jpg","width":1020,"height":574,"mimeType":"image/jpeg"},"thumbnail":{"file":"https://ww2.kqed.org/app/uploads/sites/24/2020/07/jpepinmff-apricotclafoutis-1920x1080-1-160x90.jpg","width":160,"height":90,"mimeType":"image/jpeg"},"medium_large":{"file":"https://ww2.kqed.org/app/uploads/sites/24/2020/07/jpepinmff-apricotclafoutis-1920x1080-1-768x432.jpg","width":768,"height":432,"mimeType":"image/jpeg"},"1536x1536":{"file":"https://ww2.kqed.org/app/uploads/sites/24/2020/07/jpepinmff-apricotclafoutis-1920x1080-1-1536x864.jpg","width":1536,"height":864,"mimeType":"image/jpeg"},"post-thumbnail":{"file":"https://ww2.kqed.org/app/uploads/sites/24/2020/07/jpepinmff-apricotclafoutis-1920x1080-1-672x372.jpg","width":672,"height":372,"mimeType":"image/jpeg"},"twentyfourteen-full-width":{"file":"https://ww2.kqed.org/app/uploads/sites/24/2020/07/jpepinmff-apricotclafoutis-1920x1080-1-1038x576.jpg","width":1038,"height":576,"mimeType":"image/jpeg"},"kqedFullSize":{"file":"https://ww2.kqed.org/app/uploads/sites/24/2020/07/jpepinmff-apricotclafoutis-1920x1080-1.jpg","width":1791,"height":1008}},"fetchFailed":false,"isLoading":false},"bayareabites_130070":{"type":"attachments","id":"bayareabites_130070","meta":{"index":"attachments_1591205162","site":"bayareabites","id":"130070","found":true},"title":"Plumcots","publishDate":1534180556,"status":"inherit","parent":130068,"modified":1534180582,"caption":"Plumcots","credit":"CUESA","description":"Plumcots","imgSizes":{"thumbnail":{"file":"https://ww2.kqed.org/app/uploads/sites/24/2018/08/plumcot_0-160x107.jpg","width":160,"height":107,"mimeType":"image/jpeg"},"post-thumbnail":{"file":"https://ww2.kqed.org/app/uploads/sites/24/2018/08/plumcot_0-610x372.jpg","width":610,"height":372,"mimeType":"image/jpeg"},"xxsmall":{"file":"https://ww2.kqed.org/app/uploads/sites/24/2018/08/plumcot_0-240x160.jpg","width":240,"height":160,"mimeType":"image/jpeg"},"xsmall":{"file":"https://ww2.kqed.org/app/uploads/sites/24/2018/08/plumcot_0-375x250.jpg","width":375,"height":250,"mimeType":"image/jpeg"},"small":{"file":"https://ww2.kqed.org/app/uploads/sites/24/2018/08/plumcot_0-520x347.jpg","width":520,"height":347,"mimeType":"image/jpeg"},"guest-author-32":{"file":"https://ww2.kqed.org/app/uploads/sites/24/2018/08/plumcot_0-32x32.jpg","width":32,"height":32,"mimeType":"image/jpeg"},"guest-author-50":{"file":"https://ww2.kqed.org/app/uploads/sites/24/2018/08/plumcot_0-50x50.jpg","width":50,"height":50,"mimeType":"image/jpeg"},"guest-author-64":{"file":"https://ww2.kqed.org/app/uploads/sites/24/2018/08/plumcot_0-64x64.jpg","width":64,"height":64,"mimeType":"image/jpeg"},"guest-author-96":{"file":"https://ww2.kqed.org/app/uploads/sites/24/2018/08/plumcot_0-96x96.jpg","width":96,"height":96,"mimeType":"image/jpeg"},"guest-author-128":{"file":"https://ww2.kqed.org/app/uploads/sites/24/2018/08/plumcot_0-128x128.jpg","width":128,"height":128,"mimeType":"image/jpeg"},"detail":{"file":"https://ww2.kqed.org/app/uploads/sites/24/2018/08/plumcot_0-150x150.jpg","width":150,"height":150,"mimeType":"image/jpeg"},"kqedFullSize":{"file":"https://ww2.kqed.org/app/uploads/sites/24/2018/08/plumcot_0.jpg","width":610,"height":407}},"fetchFailed":false,"isLoading":false},"bayareabites_110732":{"type":"attachments","id":"bayareabites_110732","meta":{"index":"attachments_1591205162","site":"bayareabites","id":"110732","found":true},"title":"1.tcmmeetswater","publishDate":1468448696,"status":"inherit","parent":110730,"modified":1468452815,"caption":"Watermelon girl meets Chinese medicine","credit":"Lila Volkas","description":null,"imgSizes":{"thumbnail":{"file":"https://ww2.kqed.org/app/uploads/sites/24/2016/07/1.tcmmeetswater-400x304.jpg","width":400,"height":304,"mimeType":"image/jpeg"},"medium":{"file":"https://ww2.kqed.org/app/uploads/sites/24/2016/07/1.tcmmeetswater-800x607.jpg","width":800,"height":607,"mimeType":"image/jpeg"},"medium_large":{"file":"https://ww2.kqed.org/app/uploads/sites/24/2016/07/1.tcmmeetswater-768x583.jpg","width":768,"height":583,"mimeType":"image/jpeg"},"large":{"file":"https://ww2.kqed.org/app/uploads/sites/24/2016/07/1.tcmmeetswater-1440x1093.jpg","width":1440,"height":1093,"mimeType":"image/jpeg"},"fd-lrg":{"file":"https://ww2.kqed.org/app/uploads/sites/24/2016/07/1.tcmmeetswater-1920x1457.jpg","width":1920,"height":1457,"mimeType":"image/jpeg"},"fd-med":{"file":"https://ww2.kqed.org/app/uploads/sites/24/2016/07/1.tcmmeetswater-1180x896.jpg","width":1180,"height":896,"mimeType":"image/jpeg"},"fd-sm":{"file":"https://ww2.kqed.org/app/uploads/sites/24/2016/07/1.tcmmeetswater-960x729.jpg","width":960,"height":729,"mimeType":"image/jpeg"},"post-thumbnail":{"file":"https://ww2.kqed.org/app/uploads/sites/24/2016/07/1.tcmmeetswater-672x372.jpg","width":672,"height":372,"mimeType":"image/jpeg"},"twentyfourteen-full-width":{"file":"https://ww2.kqed.org/app/uploads/sites/24/2016/07/1.tcmmeetswater-1038x576.jpg","width":1038,"height":576,"mimeType":"image/jpeg"},"cat_post_thumb_sizecategory-posts-2":{"file":"https://ww2.kqed.org/app/uploads/sites/24/2016/07/1.tcmmeetswater-150x150.jpg","width":150,"height":150,"mimeType":"image/jpeg"},"guest-author-32":{"file":"https://ww2.kqed.org/app/uploads/sites/24/2016/07/1.tcmmeetswater-32x32.jpg","width":32,"height":32,"mimeType":"image/jpeg"},"guest-author-50":{"file":"https://ww2.kqed.org/app/uploads/sites/24/2016/07/1.tcmmeetswater-50x50.jpg","width":50,"height":50,"mimeType":"image/jpeg"},"guest-author-64":{"file":"https://ww2.kqed.org/app/uploads/sites/24/2016/07/1.tcmmeetswater-64x64.jpg","width":64,"height":64,"mimeType":"image/jpeg"},"guest-author-96":{"file":"https://ww2.kqed.org/app/uploads/sites/24/2016/07/1.tcmmeetswater-96x96.jpg","width":96,"height":96,"mimeType":"image/jpeg"},"guest-author-128":{"file":"https://ww2.kqed.org/app/uploads/sites/24/2016/07/1.tcmmeetswater-128x128.jpg","width":128,"height":128,"mimeType":"image/jpeg"},"detail":{"file":"https://ww2.kqed.org/app/uploads/sites/24/2016/07/1.tcmmeetswater-150x150.jpg","width":150,"height":150,"mimeType":"image/jpeg"},"kqedFullSize":{"file":"https://ww2.kqed.org/app/uploads/sites/24/2016/07/1.tcmmeetswater.jpg","width":2103,"height":1596}},"fetchFailed":false,"isLoading":false},"bayareabites_97632":{"type":"attachments","id":"bayareabites_97632","meta":{"index":"attachments_1591205162","site":"bayareabites","id":"97632","found":true},"title":"Summer Stone Fruit Salad","publishDate":1435884017,"status":"inherit","parent":97547,"modified":1435941852,"caption":"Summer Stone Fruit Salad","credit":"Wendy Goodfriend","description":null,"imgSizes":{"thumbnail":{"file":"https://ww2.kqed.org/app/uploads/sites/24/2015/07/fruit-salad-final-400x267.jpg","width":400,"height":267,"mimeType":"image/jpeg"},"medium":{"file":"https://ww2.kqed.org/app/uploads/sites/24/2015/07/fruit-salad-final-800x533.jpg","width":800,"height":533,"mimeType":"image/jpeg"},"large":{"file":"https://ww2.kqed.org/app/uploads/sites/24/2015/07/fruit-salad-final-1440x960.jpg","width":1440,"height":960,"mimeType":"image/jpeg"},"fd-med":{"file":"https://ww2.kqed.org/app/uploads/sites/24/2015/07/fruit-salad-final-1180x787.jpg","width":1180,"height":787,"mimeType":"image/jpeg"},"fd-sm":{"file":"https://ww2.kqed.org/app/uploads/sites/24/2015/07/fruit-salad-final-960x640.jpg","width":960,"height":640,"mimeType":"image/jpeg"},"post-thumbnail":{"file":"https://ww2.kqed.org/app/uploads/sites/24/2015/07/fruit-salad-final-672x372.jpg","width":672,"height":372,"mimeType":"image/jpeg"},"twentyfourteen-full-width":{"file":"https://ww2.kqed.org/app/uploads/sites/24/2015/07/fruit-salad-final-1038x576.jpg","width":1038,"height":576,"mimeType":"image/jpeg"},"guest-author-32":{"file":"https://ww2.kqed.org/app/uploads/sites/24/2015/07/fruit-salad-final-32x32.jpg","width":32,"height":32,"mimeType":"image/jpeg"},"guest-author-64":{"file":"https://ww2.kqed.org/app/uploads/sites/24/2015/07/fruit-salad-final-64x64.jpg","width":64,"height":64,"mimeType":"image/jpeg"},"guest-author-96":{"file":"https://ww2.kqed.org/app/uploads/sites/24/2015/07/fruit-salad-final-96x96.jpg","width":96,"height":96,"mimeType":"image/jpeg"},"guest-author-128":{"file":"https://ww2.kqed.org/app/uploads/sites/24/2015/07/fruit-salad-final-128x128.jpg","width":128,"height":128,"mimeType":"image/jpeg"},"cat_post_thumb_sizecategory-posts-2":{"file":"https://ww2.kqed.org/app/uploads/sites/24/2015/07/fruit-salad-final-150x150.jpg","width":150,"height":150,"mimeType":"image/jpeg"},"detail":{"file":"https://ww2.kqed.org/app/uploads/sites/24/2015/07/fruit-salad-final-75x75.jpg","width":75,"height":75,"mimeType":"image/jpeg"},"kqedFullSize":{"file":"https://ww2.kqed.org/app/uploads/sites/24/2015/07/fruit-salad-final.jpg","width":1920,"height":1280}},"fetchFailed":false,"isLoading":false},"bayareabites_86843":{"type":"attachments","id":"bayareabites_86843","meta":{"index":"attachments_1591205162","site":"bayareabites","id":"86843","found":true},"title":"pavlovas-finish640x360a","publishDate":1409180207,"status":"inherit","parent":86203,"modified":1409180207,"caption":null,"credit":null,"description":null,"imgSizes":{"kqedFullSize":{"file":"https://ww2.kqed.org/app/uploads/sites/24/2014/08/pavlovas-finish640x360a.jpg","width":640,"height":360}},"fetchFailed":false,"isLoading":false},"bayareabites_85143":{"type":"attachments","id":"bayareabites_85143","meta":{"index":"attachments_1591205162","site":"bayareabites","id":"85143","found":true},"title":"sweet-2-eat-recall-cropped","publishDate":1406095142,"status":"inherit","parent":85133,"modified":1406095142,"caption":"View more FDA photos of recalled products","credit":null,"description":null,"imgSizes":{"kqedFullSize":{"file":"https://ww2.kqed.org/app/uploads/sites/24/2014/07/sweet-2-eat-recall-cropped.jpg","width":435,"height":520}},"fetchFailed":false,"isLoading":false},"bayareabites_82398":{"type":"attachments","id":"bayareabites_82398","meta":{"index":"attachments_1591205162","site":"bayareabites","id":"82398","found":true},"title":"durian","publishDate":1400773234,"status":"inherit","parent":82397,"modified":1400773234,"caption":"The inside of the Graveolens, a variety of durian that grows in the southernmost parts of Thailand, is sticky and cheese-like. Photo: Courtesy of Lindsay Gasik","credit":null,"description":"The inside of the Graveolens, a variety of durian that grows in the southernmost parts of Thailand, is sticky and cheese-like.","imgSizes":{"kqedFullSize":{"file":"https://ww2.kqed.org/app/uploads/sites/24/2014/05/red-graveolens-edit1_enl-29f6a7fbca7717830389f8023945803dfbb65a7b.jpg","width":1800,"height":1198}},"fetchFailed":false,"isLoading":false},"bayareabites_76212":{"type":"attachments","id":"bayareabites_76212","meta":{"index":"attachments_1591205162","site":"bayareabites","id":"76212","found":true},"title":"Soon after being sliced, a conventional Granny Smith apple (left) starts to brown, while a newly developed GM Granny Smith stays fresher looking.","publishDate":1389221542,"status":"inherit","parent":76211,"modified":1389221542,"caption":"Soon after being sliced, a conventional Granny Smith apple (left) starts to brown, while a newly developed GM Granny Smith stays fresher looking. Photo courtesy of Okanagan Specialty Fruits Inc.","credit":null,"description":null,"imgSizes":{"kqedFullSize":{"file":"https://ww2.kqed.org/app/uploads/sites/24/2014/01/3306-2-84c22cdc79fc9e599fd91bfc7fe997c45619cb0b-e1389221903818.jpg","width":640,"height":480}},"fetchFailed":false,"isLoading":false},"bayareabites_69002":{"type":"attachments","id":"bayareabites_69002","meta":{"index":"attachments_1591205162","site":"bayareabites","id":"69002","found":true},"title":"dryfarm","publishDate":1377707437,"status":"inherit","parent":68996,"modified":1377707437,"caption":null,"credit":null,"description":"At Happy Boy Farms near Santa Cruz, Calif., Early Girl tomatoes are grown using dry farming methods. The tomatoes have become increasingly popular with chefs and wholesalers.","imgSizes":{"kqedFullSize":{"file":"https://ww2.kqed.org/app/uploads/sites/24/2013/08/happyboy-tomato-sm.jpg","width":624,"height":468}},"fetchFailed":false,"isLoading":false}},"audioPlayerReducer":{"postId":"stream_live"},"authorsReducer":{"byline_bayareabites_130068":{"type":"authors","id":"byline_bayareabites_130068","meta":{"override":true},"slug":"byline_bayareabites_130068","name":"Brie Mazurek, CUESA","isLoading":false},"byline_bayareabites_85133":{"type":"authors","id":"byline_bayareabites_85133","meta":{"override":true},"slug":"byline_bayareabites_85133","name":"Bill Chappell","isLoading":false},"byline_bayareabites_82397":{"type":"authors","id":"byline_bayareabites_82397","meta":{"override":true},"slug":"byline_bayareabites_82397","name":"Alastair Bland","isLoading":false},"byline_bayareabites_76211":{"type":"authors","id":"byline_bayareabites_76211","meta":{"override":true},"slug":"byline_bayareabites_76211","name":"Dan Charles","isLoading":false},"byline_bayareabites_68996":{"type":"authors","id":"byline_bayareabites_68996","meta":{"override":true},"slug":"byline_bayareabites_68996","name":"Alastair Bland","isLoading":false},"ccicerone":{"type":"authors","id":"186","meta":{"index":"authors_1591205172","id":"186","found":true},"name":"ccicerone","firstName":"Carol","lastName":"Cicerone","slug":"ccicerone","email":"ccicerone@kqed.org","display_author_email":false,"staff_mastheads":[],"title":"KQED Contributor","bio":null,"avatar":"https://secure.gravatar.com/avatar/7e822fe06b2268512afa0f25f297110c?s=600&d=blank&r=g","twitter":null,"facebook":null,"instagram":null,"linkedin":null,"sites":[{"site":"arts","roles":["administrator"]},{"site":"news","roles":["subscriber"]},{"site":"about","roles":["administrator"]},{"site":"support","roles":["administrator"]},{"site":"science","roles":["editor"]},{"site":"radio","roles":["editor"]}],"headData":{"title":"ccicerone | KQED","description":"KQED Contributor","ogImgSrc":"https://secure.gravatar.com/avatar/7e822fe06b2268512afa0f25f297110c?s=600&d=blank&r=g","twImgSrc":"https://secure.gravatar.com/avatar/7e822fe06b2268512afa0f25f297110c?s=600&d=blank&r=g"},"isLoading":false,"link":"/author/ccicerone"},"wendy-goodfriend":{"type":"authors","id":"5014","meta":{"index":"authors_1591205172","id":"5014","found":true},"name":"Wendy Goodfriend","firstName":"Wendy","lastName":"Goodfriend","slug":"wendy-goodfriend","email":"wendy@wendygoodfriend.com","display_author_email":false,"staff_mastheads":[],"title":null,"bio":"I was the Senior Digital Producer for KQED Food up until July, 2018. Since 2001, I designed, produced, managed and contributed to mostly food-related websites and blogs for KQED including: KQED.org; KQED Food; Bay Area Bites; Check, Please! Bay Area; Taste This; Celebrity Chefs; seven of Jacques Pepin's TV series websites; and Joanne Weir's Cooking in the City. I initiated the majority of KQED Food's social media feeds and maintained them up until 2017. As far as content creation, photography is my passion and I also shoot video and write stories. My photos have been used in articles for KQED Food, News, Arts, and Science as well as for promotional purposes in print and online. Professional education and training includes: clinical psychology, photography, commercial cooking, web design, information architecture and UX.","avatar":"https://secure.gravatar.com/avatar/dfba64372339cc34cf17e446e6f18fa8?s=600&d=blank&r=g","twitter":null,"facebook":"bayareabites","instagram":null,"linkedin":"wendygoodfriend","sites":[{"site":"jpepinheart","roles":["administrator"]},{"site":"about","roles":["editor"]},{"site":"bayareabites","roles":["subscriber"]},{"site":"science","roles":["administrator"]},{"site":"checkplease","roles":["subscriber"]},{"site":"food","roles":["author"]},{"site":"essentialpepin","roles":["administrator"]}],"headData":{"title":"Wendy Goodfriend | KQED","description":null,"ogImgSrc":"https://secure.gravatar.com/avatar/dfba64372339cc34cf17e446e6f18fa8?s=600&d=blank&r=g","twImgSrc":"https://secure.gravatar.com/avatar/dfba64372339cc34cf17e446e6f18fa8?s=600&d=blank&r=g"},"isLoading":false,"link":"/author/wendy-goodfriend"},"kim-laidlaw":{"type":"authors","id":"5015","meta":{"index":"authors_1591205172","id":"5015","found":true},"name":"Kim Laidlaw","firstName":"Kim","lastName":"Laidlaw","slug":"kim-laidlaw","email":"kim_laidlaw@yahoo.com","display_author_email":false,"staff_mastheads":[],"title":null,"bio":"Kim Laidlaw is a cookbook author, editor, food writer, producer, project manager, and baker who has been in the kitchen covered in flour since she was big enough to stir the biscuit dough. She has over 16 years of experience in book and online publishing, and a lifetime of experience in the kitchen. \r\n\r\nHer first cookbook, Home Baked Comfort, was published in 2011; her second cookbook, Baby & Toddler On the Go, was published in April 2013; and her third cookbook, Williams-Sonoma Dessert of the Day, was published in October 2013. \r\n\r\nShe was the first blogger on KQED’s Bay Area Bites blog, which launched in 2005, and previously worked as a professional baker at La Farine French Bakery in Oakland, CA. She lives in Petaluma with her husband and their child, whom she cooks for everyday. Find out more at \u003ca href=\"http://www.kimlaidlaw.com\">http://www.kimlaidlaw.com\u003c/a>.","avatar":"https://secure.gravatar.com/avatar/284503bc296b6f7822eb38b816292376?s=600&d=blank&r=g","twitter":null,"facebook":"kimilaw","instagram":null,"linkedin":"kimlaidlaw","sites":[{"site":"bayareabites","roles":["contributor"]},{"site":"food","roles":["contributor"]}],"headData":{"title":"Kim Laidlaw | KQED","description":null,"ogImgSrc":"https://secure.gravatar.com/avatar/284503bc296b6f7822eb38b816292376?s=600&d=blank&r=g","twImgSrc":"https://secure.gravatar.com/avatar/284503bc296b6f7822eb38b816292376?s=600&d=blank&r=g"},"isLoading":false,"link":"/author/kim-laidlaw"},"lilavolkas":{"type":"authors","id":"5404","meta":{"index":"authors_1591205172","id":"5404","found":true},"name":"Lila Volkas","firstName":"Lila","lastName":"Volkas","slug":"lilavolkas","email":"lilavolkas@gmail.com","display_author_email":false,"staff_mastheads":[],"title":null,"bio":"Lila Volkas is a Berkeley based Holistic Nutritionist, food writer and illustrator. She received her Nutritional Consulting Certification from Bauman College and offers clients individualized nutritional support. As an illustrator she creates hand drawn and digitally colored illustrations that whimsically capture the essence of her subjects and are easily digested by readers. Much of her inspiration comes from her undeniable love for vegetables, as well her knack for anthropomorphizing what's on her plate. Lila has had several pieces published in KQED’s Bay Area Bites as well as in Edible East Bay Magazine. For more of a taste of Lila's offering, check out her website \u003ca href=\"http://www.lilavolkas.com/\">lilavolkas.com\u003c/a>","avatar":"https://secure.gravatar.com/avatar/e520743544a0600729bc45ff3ab43206?s=600&d=blank&r=g","twitter":null,"facebook":null,"instagram":null,"linkedin":null,"sites":[{"site":"bayareabites","roles":["contributor"]},{"site":"food","roles":["contributor"]}],"headData":{"title":"Lila Volkas | KQED","description":null,"ogImgSrc":"https://secure.gravatar.com/avatar/e520743544a0600729bc45ff3ab43206?s=600&d=blank&r=g","twImgSrc":"https://secure.gravatar.com/avatar/e520743544a0600729bc45ff3ab43206?s=600&d=blank&r=g"},"isLoading":false,"link":"/author/lilavolkas"}},"breakingNewsReducer":{},"campaignFinanceReducer":{},"firebase":{"requesting":{},"requested":{},"timestamps":{},"data":{},"ordered":{},"auth":{"isLoaded":false,"isEmpty":true},"authError":null,"profile":{"isLoaded":false,"isEmpty":true},"listeners":{"byId":{},"allIds":[]},"isInitializing":false,"errors":[]},"navBarReducer":{"navBarId":"arts","fullView":true,"showPlayer":false},"navMenuReducer":{"menus":[{"key":"menu1","items":[{"name":"News","link":"/","type":"title"},{"name":"Politics","link":"/politics"},{"name":"Science","link":"/science"},{"name":"Education","link":"/educationnews"},{"name":"Housing","link":"/housing"},{"name":"Immigration","link":"/immigration"},{"name":"Criminal Justice","link":"/criminaljustice"},{"name":"Silicon Valley","link":"/siliconvalley"},{"name":"Forum","link":"/forum"},{"name":"The California Report","link":"/californiareport"}]},{"key":"menu2","items":[{"name":"Arts & Culture","link":"/arts","type":"title"},{"name":"Critics’ Picks","link":"/thedolist"},{"name":"Cultural Commentary","link":"/artscommentary"},{"name":"Food & Drink","link":"/food"},{"name":"Bay Area Hip-Hop","link":"/bayareahiphop"},{"name":"Rebel Girls","link":"/rebelgirls"},{"name":"Arts Video","link":"/artsvideos"}]},{"key":"menu3","items":[{"name":"Podcasts","link":"/podcasts","type":"title"},{"name":"Bay Curious","link":"/podcasts/baycurious"},{"name":"Rightnowish","link":"/podcasts/rightnowish"},{"name":"The Bay","link":"/podcasts/thebay"},{"name":"On Our Watch","link":"/podcasts/onourwatch"},{"name":"Mindshift","link":"/podcasts/mindshift"},{"name":"Consider This","link":"/podcasts/considerthis"},{"name":"Political Breakdown","link":"/podcasts/politicalbreakdown"}]},{"key":"menu4","items":[{"name":"Live Radio","link":"/radio","type":"title"},{"name":"TV","link":"/tv","type":"title"},{"name":"Events","link":"/events","type":"title"},{"name":"For Educators","link":"/education","type":"title"},{"name":"Support KQED","link":"/support","type":"title"},{"name":"About","link":"/about","type":"title"},{"name":"Help Center","link":"https://kqed-helpcenter.kqed.org/s","type":"title"}]}]},"pagesReducer":{},"postsReducer":{"stream_live":{"type":"live","id":"stream_live","audioUrl":"https://streams.kqed.org/kqedradio","title":"Live Stream","excerpt":"Live Stream information currently unavailable.","link":"/radio","featImg":"","label":{"name":"KQED Live","link":"/"}},"stream_kqedNewscast":{"type":"posts","id":"stream_kqedNewscast","audioUrl":"https://www.kqed.org/.stream/anon/radio/RDnews/newscast.mp3?_=1","title":"KQED Newscast","featImg":"","label":{"name":"88.5 FM","link":"/"}},"bayareabites_137656":{"type":"posts","id":"bayareabites_137656","meta":{"index":"posts_1591205157","site":"bayareabites","id":"137656","score":null,"sort":[1588385430000]},"guestAuthors":[],"slug":"apricot-clafoutis","title":"Apricot Clafoutis","publishDate":1588385430,"format":"standard","headTitle":"Jacques Pepin | Bay Area Bites | KQED Food","labelTerm":{"term":16657,"site":"bayareabites"},"content":"\u003cp>\u003ci>Jacques Pépin: More Fast Food My Way\u003c/i>\u003cbr>\n\u003ca href=\"https://ww2.kqed.org/app/uploads/sites/24/2020/07/211-jpepinmff-apricotclafoutis-recipe.pdf\" target=\"food\" rel=\"noopener noreferrer\">\u003cstrong>Printer-friendly recipe\u003c/strong>\u003c/a> [pdf]\u003c/p>\n\u003cp>A clafoutis is somewhere between a sweet omelet and a custard. Made with fruit, often cherries or apples, it is a classic throughout France, with small variations from region to region and, sometimes, different names. It can be called \u003cem>flan aux fruits\u003c/em> or a \u003cem>flognarde\u003c/em>, but most often is known as clafoutis. My recipe is made with canned apricots. Try different brands: some are much better than others. Serve the clafoutis directly from the skillet or unmold it onto a serving plate and serve in wedges. \u003cem>—Jacques Pépin\u003c/em>\u003c/p>\n\u003cp class=\"recipe\">\u003cstrong>4 servings\u003c/strong>\u003c/p>\n\u003cul>\n\u003cli>3 tablespoons unsalted butter\u003c/li>\n\u003cli>1 can (8.25 ounces) apricot halves in syrup\u003c/li>\n\u003cli>1/4 cup all-purpose flour\u003c/li>\n\u003cli>3 large eggs\u003c/li>\n\u003cli>2 tablespoons sugar\u003c/li>\n\u003cli>1/4 cup sour cream\u003c/li>\n\u003cli>1 tablespoon confectioners' sugar\u003c/li>\n\u003c/ul>\n\u003cp class=\"recipe\">Preheat the oven to 400 degrees. Melt the butter in an 8-inch nonstick skillet.\u003c/p>\n\u003cp class=\"recipe\">Drain the apricots, reserving the syrup. You should have 6 to 8 apricot halves and 1/2 cup syrup. Using a whisk, mix the syrup with the flour in a medium bowl. Add the eggs, sugar, sour cream, and 1 tablespoon of the melted butter from the skillet and mix until you have a smooth batter.\u003c/p>\n\u003cp>[ad fullwidth]\u003c/p>\n\u003cp class=\"recipe\">Pour the batter into the butter remaining in the skillet and arrange the apricot halves on top, spacing them evenly. Place the skillet over high heat for about 2 minutes and then transfer it to the oven. Bake for 18 to 20 minutes, or until lightly browned and puffy. Remove from the oven and sprinkle the confectioners' sugar on top. Cool to lukewarm.\u003c/p>\n\u003cp>\u003c/p>\n\u003cp class=\"recipe\">Serve the clafoutis directly from the skillet in wedges or unmold. To unmold, make certain that the clafoutis is free from the sides of the pan; if necessary, run a sharp knife around the edge to release it. Then place a piece of plastic wrap on top of the dessert and invert it onto a plate. Place another plate on top of the inverted clafoutis and invert it again so the crusty side is on top. Remove the plastic wrap, cut into wedges, and serve.\u003c/p>\n\n","blocks":[],"excerpt":null,"status":"publish","parent":0,"modified":1595012862,"stats":{"hasAudio":false,"hasVideo":false,"hasChartOrMap":false,"iframeSrcs":[],"hasGoogleForm":false,"hasGallery":false,"hasHearkenModule":false,"hasPolis":false,"paragraphCount":4,"wordCount":361},"headData":{"title":"Apricot Clafoutis | KQED","description":"Quick and easy recipes from Jacques Pepin's More Fast Food My Way series. Learn how to make Apricot Clafoutis.","ogTitle":"","ogDescription":"","ogImgId":"","twTitle":"","twDescription":"","twImgId":"","schema":{"@context":"http://schema.org","@type":"Article","headline":"Apricot Clafoutis","datePublished":"2020-05-02T02:10:30.000Z","dateModified":"2020-07-17T19:07:42.000Z","image":"https://cdn.kqed.org/wp-content/uploads/2020/02/KQED-OG-Image@1x.png"}},"disqusIdentifier":"137656 https://ww2.kqed.org/bayareabites/?p=137656","disqusUrl":"https://ww2.kqed.org/bayareabites/2020/05/01/apricot-clafoutis/","disqusTitle":"Apricot Clafoutis","path":"/bayareabites/137656/apricot-clafoutis","audioTrackLength":null,"parsedContent":[{"type":"contentString","content":"\u003cdiv class=\"post-body\">\u003cp>\u003cp>\u003ci>Jacques Pépin: More Fast Food My Way\u003c/i>\u003cbr>\n\u003ca href=\"https://ww2.kqed.org/app/uploads/sites/24/2020/07/211-jpepinmff-apricotclafoutis-recipe.pdf\" target=\"food\" rel=\"noopener noreferrer\">\u003cstrong>Printer-friendly recipe\u003c/strong>\u003c/a> [pdf]\u003c/p>\n\u003cp>A clafoutis is somewhere between a sweet omelet and a custard. Made with fruit, often cherries or apples, it is a classic throughout France, with small variations from region to region and, sometimes, different names. It can be called \u003cem>flan aux fruits\u003c/em> or a \u003cem>flognarde\u003c/em>, but most often is known as clafoutis. My recipe is made with canned apricots. Try different brands: some are much better than others. Serve the clafoutis directly from the skillet or unmold it onto a serving plate and serve in wedges. \u003cem>—Jacques Pépin\u003c/em>\u003c/p>\n\u003cp class=\"recipe\">\u003cstrong>4 servings\u003c/strong>\u003c/p>\n\u003cul>\n\u003cli>3 tablespoons unsalted butter\u003c/li>\n\u003cli>1 can (8.25 ounces) apricot halves in syrup\u003c/li>\n\u003cli>1/4 cup all-purpose flour\u003c/li>\n\u003cli>3 large eggs\u003c/li>\n\u003cli>2 tablespoons sugar\u003c/li>\n\u003cli>1/4 cup sour cream\u003c/li>\n\u003cli>1 tablespoon confectioners' sugar\u003c/li>\n\u003c/ul>\n\u003cp class=\"recipe\">Preheat the oven to 400 degrees. Melt the butter in an 8-inch nonstick skillet.\u003c/p>\n\u003cp class=\"recipe\">Drain the apricots, reserving the syrup. You should have 6 to 8 apricot halves and 1/2 cup syrup. Using a whisk, mix the syrup with the flour in a medium bowl. Add the eggs, sugar, sour cream, and 1 tablespoon of the melted butter from the skillet and mix until you have a smooth batter.\u003c/p>\n\u003cp>\u003c/p>\u003c/div>","attributes":{"named":{},"numeric":[]}},{"type":"component","content":"","name":"ad","attributes":{"named":{"label":"fullwidth"},"numeric":["fullwidth"]}},{"type":"contentString","content":"\u003cdiv class=\"post-body\">\u003cp>\u003c/p>\n\u003cp class=\"recipe\">Pour the batter into the butter remaining in the skillet and arrange the apricot halves on top, spacing them evenly. Place the skillet over high heat for about 2 minutes and then transfer it to the oven. Bake for 18 to 20 minutes, or until lightly browned and puffy. Remove from the oven and sprinkle the confectioners' sugar on top. Cool to lukewarm.\u003c/p>\n\u003cp>\u003c/p>\n\u003cp class=\"recipe\">Serve the clafoutis directly from the skillet in wedges or unmold. To unmold, make certain that the clafoutis is free from the sides of the pan; if necessary, run a sharp knife around the edge to release it. Then place a piece of plastic wrap on top of the dessert and invert it onto a plate. Place another plate on top of the inverted clafoutis and invert it again so the crusty side is on top. Remove the plastic wrap, cut into wedges, and serve.\u003c/p>\n\n\u003c/div>\u003c/p>","attributes":{"named":{},"numeric":[]}}],"link":"/bayareabites/137656/apricot-clafoutis","authors":["186"],"series":["bayareabites_16657"],"categories":["bayareabites_16661"],"tags":["bayareabites_16659","bayareabites_1820","bayareabites_244","bayareabites_242","bayareabites_16756","bayareabites_16658","bayareabites_16660"],"featImg":"bayareabites_137659","label":"bayareabites_16657"},"bayareabites_130068":{"type":"posts","id":"bayareabites_130068","meta":{"index":"posts_1591205157","site":"bayareabites","id":"130068","score":null,"sort":[1534181606000]},"guestAuthors":[],"slug":"pluots-apriums-and-the-flavorful-world-of-hybrid-fruit","title":"Pluots, Apriums, and the Flavorful World of Hybrid Fruit","publishDate":1534181606,"format":"standard","headTitle":"Bay Area Bites | KQED Food","labelTerm":{"site":"bayareabites"},"content":"\u003cp>Once upon a time, there were cherries in the spring, followed by apricots, nectarines, peaches, and plums in the summer, spilling over into fall. Our choices were simple, or so they seemed.\u003c/p>\n\u003cp>Today, stone fruit season brings all of the above and everything in between in a rainbow of colors and flavors: apriums, pluots, nectaplums, peacharines, pluerries, and even peacotums (part peach, part apricot, part plum). Where did these designer breeds come from?\u003c/p>\n\u003cp>In the age of genetic engineering, the term “hybrid” can raise eyebrows and concerns for eaters. \u003ca href=\"https://cuesa.org/seller/blossom-bluff-orchards\">Blossom Bluff Orchards\u003c/a>, an organic fruit farm based in Parlier, is one of a number of Ferry Plaza sellers who grow \u003ca href=\"https://cuesa.org/food/pluots\">pluots\u003c/a> and other modern hybrids. “We get a lot of questions at the stand,” says fourth-generation farmer Bryce Loewen. “I think it’s great that people are thinking about GMOs. They’re worried about that stuff, and rightly so in my opinion.”\u003c/p>\n\u003cfigure id=\"attachment_130071\" class=\"wp-caption aligncenter\" style=\"max-width: 610px\">\u003cimg src=\"https://ww2.kqed.org/bayareabites/wp-content/uploads/sites/24/2018/08/blossom_bluff.jpg\" alt=\"Blossom Bluff Orchards Bryce Loewen and family\" width=\"610\" height=\"407\" class=\"size-full wp-image-130071\" srcset=\"https://ww2.kqed.org/app/uploads/sites/24/2018/08/blossom_bluff.jpg 610w, https://ww2.kqed.org/app/uploads/sites/24/2018/08/blossom_bluff-160x107.jpg 160w, https://ww2.kqed.org/app/uploads/sites/24/2018/08/blossom_bluff-240x160.jpg 240w, https://ww2.kqed.org/app/uploads/sites/24/2018/08/blossom_bluff-375x250.jpg 375w, https://ww2.kqed.org/app/uploads/sites/24/2018/08/blossom_bluff-520x347.jpg 520w\" sizes=\"(max-width: 610px) 100vw, 610px\">\u003cfigcaption class=\"wp-caption-text\">Blossom Bluff Orchards Bryce Loewen and family \u003ccite>(CUESA)\u003c/cite>\u003c/figcaption>\u003c/figure>\n\u003ch2>Family Trees\u003c/h2>\n\u003cp>Hybridization is nothing new, nor was it invented by humans. For thousands of years, new plant varieties have developed in nature through mutation as well as crosses between plants. “A lot of the varieties that have been established for hundreds of years were the result of hybridizing, whether it was prompted by humans or not,” says Bryce.\u003c/p>\n\u003cp>In classical plant breeding, the fruit breeder collects pollen from one variety with desirable traits and applies it to the blossoms of another variety. If the cross is fruitful, the breeder keeps the seeds and plants them. The seedlings are grown out, and several years later the breeder finds out what traits have prevailed. This type of artificial selection can take place between varieties within the same species (intraspecific) or between closely related species (interspecific). Although classical plant breeding methods have become more technologically complex over the years, the basic concept remains the same.\u003c/p>\n\u003cp>[ad fullwidth]\u003c/p>\n\u003cp>In contrast, \u003ca href=\"http://www.motherearthnews.com/real-food/hybrid-seeds-vs-gmos-zb0z1301zsor.aspx\">genetic engineering\u003c/a> is a modern invention developed in the late 20th century. Genetically modified plants are created in a laboratory using high-tech methods to insert genetic material from one plant or organism into the genes of another plant, creating species that would have almost no chance of occurring in nature.\u003c/p>\n\u003cp>Some of the earliest experiments in selective plant breeding were conducted around the turn of the 20th century by pioneering horticulturist \u003ca href=\"http://en.wikipedia.org/wiki/Luther_Burbank\">Luther Burbank\u003c/a>, who developed the first plumcot (a 50/50 plum-apricot hybrid) and the Santa Rosa plum, as well as hundreds of other varieties of fruits and vegetables, on his farm in Sebastopol. While the plumcot was too delicate for commercial success, Burbank broke new ground and planted the seeds for breeders to come.\u003c/p>\n\u003cfigure id=\"attachment_130072\" class=\"wp-caption aligncenter\" style=\"max-width: 600px\">\u003cimg src=\"https://ww2.kqed.org/bayareabites/wp-content/uploads/sites/24/2018/08/zaiger_fruit.jpg\" alt=\"Fruit bowls\" width=\"600\" height=\"381\" class=\"size-full wp-image-130072\" srcset=\"https://ww2.kqed.org/app/uploads/sites/24/2018/08/zaiger_fruit.jpg 600w, https://ww2.kqed.org/app/uploads/sites/24/2018/08/zaiger_fruit-160x102.jpg 160w, https://ww2.kqed.org/app/uploads/sites/24/2018/08/zaiger_fruit-240x152.jpg 240w, https://ww2.kqed.org/app/uploads/sites/24/2018/08/zaiger_fruit-375x238.jpg 375w, https://ww2.kqed.org/app/uploads/sites/24/2018/08/zaiger_fruit-520x330.jpg 520w\" sizes=\"(max-width: 600px) 100vw, 600px\">\u003cfigcaption class=\"wp-caption-text\">Fruit bowls \u003ccite>(Dave Wilson Nursery)\u003c/cite>\u003c/figcaption>\u003c/figure>\n\u003ch2>Flavor King\u003c/h2>\n\u003cp>In the latter half of the 20th century, aesthetics, durability, and storability guided much of plant breeding, which meant flavor took a back seat. But in recent years, there has been a dramatic shift toward sweetness, due in large part to \u003ca href=\"http://www.davewilson.com/product-information-general/about-zaiger-genetics\">Floyd Zaiger\u003c/a>, a man who is considered by many fruit aficionados to be the modern master of interspecific fruit breeding.\u003c/p>\n\u003cp>“If a variety doesn’t have flavor, it doesn’t go anywhere,” says Dennis Tarry, CEO of \u003ca href=\"http://www.davewilson.com/\">Dave Wilson Nursery\u003c/a> in Modesto, the exclusive licensor of varieties introduced by Zaiger. “Much to the betterment of the industry, people actually want to eat their fruit as opposed to letting it rot in a fruit bowl.”\u003c/p>\n\u003cp>In 1989, Zaiger built on Burbank’s work when, after many years of plant breeding, he \u003ca href=\"http://www.gourmet.com/magazine/2000s/2000/09/matchmaker\">introduced and trademarked the pluot\u003c/a>, a plum-leaning stone fruit developed by crossing multiple generations of plum-apricot hybrids, and the aprium, another plum-apricot hybrid that tends toward the apricot side of the spectrum. Flavor King and Dapple Dandy pluots bear Zaiger’s trademark, as do many other popular interspecific and intraspecific varieties.\u003c/p>\n\u003cp>Controlled breeding takes many years of meticulous work, and there is no guarantee that the biological cross will yield the desired fruit. “It’s such a shotgun approach,” says Tarry. “Zaiger plants 50,000 to 60,000 of these crosses a year. We might wind up with six varieties that actually have characteristics that the fruit industry might find appealing. It’s a terrible labor of love to go through all that effort.” \u003c/p>\n\u003cp>Pushing the envelope of interspecific plant breeding, in 2007 Zaiger patented the \u003ca href=\"http://www.sfgate.com/homeandgarden/article/Peacotum-a-triple-treat-from-the-garden-3180956.php\">Bella Gold peacotum\u003c/a> in 2007. A three-way cross, the peacotum combines the sweetness of a peach with a hint of the plum’s tartness, all wrapped in an apricot-like fuzzy skin.\u003c/p>\n\u003cp>When Blossom Bluff Orchards started bringing peacotums to farmers markets several years ago, the fruit were met with curiosity and quickly embraced. “Unlike some pluots, they really stand out,” said Bryce. “They’re very obviously something different, and the flavor is hard to compare.”\u003c/p>\n\u003cfigure id=\"attachment_130073\" class=\"wp-caption aligncenter\" style=\"max-width: 610px\">\u003cimg src=\"https://ww2.kqed.org/bayareabites/wp-content/uploads/sites/24/2018/08/Damson_plum_fruit.jpg\" alt=\"Damson plums\" width=\"610\" height=\"407\" class=\"size-full wp-image-130073\" srcset=\"https://ww2.kqed.org/app/uploads/sites/24/2018/08/Damson_plum_fruit.jpg 610w, https://ww2.kqed.org/app/uploads/sites/24/2018/08/Damson_plum_fruit-160x107.jpg 160w, https://ww2.kqed.org/app/uploads/sites/24/2018/08/Damson_plum_fruit-240x160.jpg 240w, https://ww2.kqed.org/app/uploads/sites/24/2018/08/Damson_plum_fruit-375x250.jpg 375w, https://ww2.kqed.org/app/uploads/sites/24/2018/08/Damson_plum_fruit-520x347.jpg 520w\" sizes=\"(max-width: 610px) 100vw, 610px\">\u003cfigcaption class=\"wp-caption-text\">Damson plums \u003ccite>(Jonathan Billinger)\u003c/cite>\u003c/figcaption>\u003c/figure>\n\u003ch2>Back to Basics\u003c/h2>\n\u003cp>Staying ahead of stone fruit trends is not the only priority at Blossom Bluff, which grows upwards of 120 varieties. The Loewens are always seeking out cultivars that have unique flavor profiles and market demand, while filling in any gaps in their harvest calendar.\u003c/p>\n\u003cp>“We’re constantly looking at new varieties, but we’re also seeking out old ones,” says Bryce. One exaple is the classic yellow-fleshed Le Grande nectarine, which was developed near Parlier in the 1940s. “It was a gold standard for nectarines for a long time. We didn’t have that variety, but \u003ca href=\"http://www.masumoto.com/about-us/\">Mas Masumoto\u003c/a>, who’s just down the road from us, gave us scion wood from his trees to graft.”\u003c/p>\n\u003cp>The Loewens have also grown \u003ca href=\"http://en.wikipedia.org/wiki/Damson\">Damson plums\u003c/a>, an English subspecies with a long history. Damsons are not the sweetest of stone fruit, but their distinctive blue-purple skin and complex, somewhat astringent flavor have made them a favorite among jam makers.\u003c/p>\n\u003cp>Zaiger continues to dream up new stone fruit crosses to grace future orchards, just as nature and growers have been conspiring for centuries to bring out the best in summer’s harvest. “It’s hard to find a plum that doesn’t have some suspected crosses,” says Tarry. “Even the Santa Rosa plum, which we’ve loved for decades, is believed to have some apricot blood in it.”\u003c/p>\n\u003cp>\u003ci>Learn more in \u003ca href=\"https://cuesa.org/article/taste-sunshine-farmers-market-guide-stone-fruit\">CUESA’s Farmers Market Guide to Stone Fruit\u003c/a>. Look for Blossom Bluff Orchards at the Ferry Plaza Farmers Market on Saturdays. This article was updated from a \u003ca href=\"https://www.kqed.org/bayareabites/68950/getting-to-the-bottom-of-the-peacotum\">previously published version\u003c/a>.\u003c/i>\u003c/p>\n\u003cp>[ad floatright]\u003c/p>\n\u003cp>\u003ci>This article originally appeared on \u003ca href=\"https://cuesa.org/article/pluots-apriums-and-flavorful-world-hybrid-fruit\">CUESA\u003c/a>.\u003c/i>\u003c/p>\n\n","blocks":[],"excerpt":"Today, stone fruit season brings a rainbow of colors and flavors: apriums, pluots, nectaplums, peacharines, pluerries, and even peacotums.","status":"publish","parent":0,"modified":1534181606,"stats":{"hasAudio":false,"hasVideo":false,"hasChartOrMap":false,"iframeSrcs":[],"hasGoogleForm":false,"hasGallery":false,"hasHearkenModule":false,"hasPolis":false,"paragraphCount":21,"wordCount":1119},"headData":{"title":"Pluots, Apriums, and the Flavorful World of Hybrid Fruit | KQED","description":"Today, stone fruit season brings a rainbow of colors and flavors: apriums, pluots, nectaplums, peacharines, pluerries, and even peacotums.","ogTitle":"","ogDescription":"","ogImgId":"","twTitle":"","twDescription":"","twImgId":"","schema":{"@context":"http://schema.org","@type":"Article","headline":"Pluots, Apriums, and the Flavorful World of Hybrid Fruit","datePublished":"2018-08-13T17:33:26.000Z","dateModified":"2018-08-13T17:33:26.000Z","image":"https://cdn.kqed.org/wp-content/uploads/2020/02/KQED-OG-Image@1x.png"}},"disqusIdentifier":"130068 https://ww2.kqed.org/bayareabites/?p=130068","disqusUrl":"https://ww2.kqed.org/bayareabites/2018/08/13/pluots-apriums-and-the-flavorful-world-of-hybrid-fruit/","disqusTitle":"Pluots, Apriums, and the Flavorful World of Hybrid Fruit","nprByline":"Brie Mazurek, CUESA","path":"/bayareabites/130068/pluots-apriums-and-the-flavorful-world-of-hybrid-fruit","audioTrackLength":null,"parsedContent":[{"type":"contentString","content":"\u003cdiv class=\"post-body\">\u003cp>\u003cp>Once upon a time, there were cherries in the spring, followed by apricots, nectarines, peaches, and plums in the summer, spilling over into fall. Our choices were simple, or so they seemed.\u003c/p>\n\u003cp>Today, stone fruit season brings all of the above and everything in between in a rainbow of colors and flavors: apriums, pluots, nectaplums, peacharines, pluerries, and even peacotums (part peach, part apricot, part plum). Where did these designer breeds come from?\u003c/p>\n\u003cp>In the age of genetic engineering, the term “hybrid” can raise eyebrows and concerns for eaters. \u003ca href=\"https://cuesa.org/seller/blossom-bluff-orchards\">Blossom Bluff Orchards\u003c/a>, an organic fruit farm based in Parlier, is one of a number of Ferry Plaza sellers who grow \u003ca href=\"https://cuesa.org/food/pluots\">pluots\u003c/a> and other modern hybrids. “We get a lot of questions at the stand,” says fourth-generation farmer Bryce Loewen. “I think it’s great that people are thinking about GMOs. They’re worried about that stuff, and rightly so in my opinion.”\u003c/p>\n\u003cfigure id=\"attachment_130071\" class=\"wp-caption aligncenter\" style=\"max-width: 610px\">\u003cimg src=\"https://ww2.kqed.org/bayareabites/wp-content/uploads/sites/24/2018/08/blossom_bluff.jpg\" alt=\"Blossom Bluff Orchards Bryce Loewen and family\" width=\"610\" height=\"407\" class=\"size-full wp-image-130071\" srcset=\"https://ww2.kqed.org/app/uploads/sites/24/2018/08/blossom_bluff.jpg 610w, https://ww2.kqed.org/app/uploads/sites/24/2018/08/blossom_bluff-160x107.jpg 160w, https://ww2.kqed.org/app/uploads/sites/24/2018/08/blossom_bluff-240x160.jpg 240w, https://ww2.kqed.org/app/uploads/sites/24/2018/08/blossom_bluff-375x250.jpg 375w, https://ww2.kqed.org/app/uploads/sites/24/2018/08/blossom_bluff-520x347.jpg 520w\" sizes=\"(max-width: 610px) 100vw, 610px\">\u003cfigcaption class=\"wp-caption-text\">Blossom Bluff Orchards Bryce Loewen and family \u003ccite>(CUESA)\u003c/cite>\u003c/figcaption>\u003c/figure>\n\u003ch2>Family Trees\u003c/h2>\n\u003cp>Hybridization is nothing new, nor was it invented by humans. For thousands of years, new plant varieties have developed in nature through mutation as well as crosses between plants. “A lot of the varieties that have been established for hundreds of years were the result of hybridizing, whether it was prompted by humans or not,” says Bryce.\u003c/p>\n\u003cp>In classical plant breeding, the fruit breeder collects pollen from one variety with desirable traits and applies it to the blossoms of another variety. If the cross is fruitful, the breeder keeps the seeds and plants them. The seedlings are grown out, and several years later the breeder finds out what traits have prevailed. This type of artificial selection can take place between varieties within the same species (intraspecific) or between closely related species (interspecific). Although classical plant breeding methods have become more technologically complex over the years, the basic concept remains the same.\u003c/p>\n\u003cp>\u003c/p>\u003c/div>","attributes":{"named":{},"numeric":[]}},{"type":"component","content":"","name":"ad","attributes":{"named":{"label":"fullwidth"},"numeric":["fullwidth"]}},{"type":"contentString","content":"\u003cdiv class=\"post-body\">\u003cp>\u003c/p>\n\u003cp>In contrast, \u003ca href=\"http://www.motherearthnews.com/real-food/hybrid-seeds-vs-gmos-zb0z1301zsor.aspx\">genetic engineering\u003c/a> is a modern invention developed in the late 20th century. Genetically modified plants are created in a laboratory using high-tech methods to insert genetic material from one plant or organism into the genes of another plant, creating species that would have almost no chance of occurring in nature.\u003c/p>\n\u003cp>Some of the earliest experiments in selective plant breeding were conducted around the turn of the 20th century by pioneering horticulturist \u003ca href=\"http://en.wikipedia.org/wiki/Luther_Burbank\">Luther Burbank\u003c/a>, who developed the first plumcot (a 50/50 plum-apricot hybrid) and the Santa Rosa plum, as well as hundreds of other varieties of fruits and vegetables, on his farm in Sebastopol. While the plumcot was too delicate for commercial success, Burbank broke new ground and planted the seeds for breeders to come.\u003c/p>\n\u003cfigure id=\"attachment_130072\" class=\"wp-caption aligncenter\" style=\"max-width: 600px\">\u003cimg src=\"https://ww2.kqed.org/bayareabites/wp-content/uploads/sites/24/2018/08/zaiger_fruit.jpg\" alt=\"Fruit bowls\" width=\"600\" height=\"381\" class=\"size-full wp-image-130072\" srcset=\"https://ww2.kqed.org/app/uploads/sites/24/2018/08/zaiger_fruit.jpg 600w, https://ww2.kqed.org/app/uploads/sites/24/2018/08/zaiger_fruit-160x102.jpg 160w, https://ww2.kqed.org/app/uploads/sites/24/2018/08/zaiger_fruit-240x152.jpg 240w, https://ww2.kqed.org/app/uploads/sites/24/2018/08/zaiger_fruit-375x238.jpg 375w, https://ww2.kqed.org/app/uploads/sites/24/2018/08/zaiger_fruit-520x330.jpg 520w\" sizes=\"(max-width: 600px) 100vw, 600px\">\u003cfigcaption class=\"wp-caption-text\">Fruit bowls \u003ccite>(Dave Wilson Nursery)\u003c/cite>\u003c/figcaption>\u003c/figure>\n\u003ch2>Flavor King\u003c/h2>\n\u003cp>In the latter half of the 20th century, aesthetics, durability, and storability guided much of plant breeding, which meant flavor took a back seat. But in recent years, there has been a dramatic shift toward sweetness, due in large part to \u003ca href=\"http://www.davewilson.com/product-information-general/about-zaiger-genetics\">Floyd Zaiger\u003c/a>, a man who is considered by many fruit aficionados to be the modern master of interspecific fruit breeding.\u003c/p>\n\u003cp>“If a variety doesn’t have flavor, it doesn’t go anywhere,” says Dennis Tarry, CEO of \u003ca href=\"http://www.davewilson.com/\">Dave Wilson Nursery\u003c/a> in Modesto, the exclusive licensor of varieties introduced by Zaiger. “Much to the betterment of the industry, people actually want to eat their fruit as opposed to letting it rot in a fruit bowl.”\u003c/p>\n\u003cp>In 1989, Zaiger built on Burbank’s work when, after many years of plant breeding, he \u003ca href=\"http://www.gourmet.com/magazine/2000s/2000/09/matchmaker\">introduced and trademarked the pluot\u003c/a>, a plum-leaning stone fruit developed by crossing multiple generations of plum-apricot hybrids, and the aprium, another plum-apricot hybrid that tends toward the apricot side of the spectrum. Flavor King and Dapple Dandy pluots bear Zaiger’s trademark, as do many other popular interspecific and intraspecific varieties.\u003c/p>\n\u003cp>Controlled breeding takes many years of meticulous work, and there is no guarantee that the biological cross will yield the desired fruit. “It’s such a shotgun approach,” says Tarry. “Zaiger plants 50,000 to 60,000 of these crosses a year. We might wind up with six varieties that actually have characteristics that the fruit industry might find appealing. It’s a terrible labor of love to go through all that effort.” \u003c/p>\n\u003cp>Pushing the envelope of interspecific plant breeding, in 2007 Zaiger patented the \u003ca href=\"http://www.sfgate.com/homeandgarden/article/Peacotum-a-triple-treat-from-the-garden-3180956.php\">Bella Gold peacotum\u003c/a> in 2007. A three-way cross, the peacotum combines the sweetness of a peach with a hint of the plum’s tartness, all wrapped in an apricot-like fuzzy skin.\u003c/p>\n\u003cp>When Blossom Bluff Orchards started bringing peacotums to farmers markets several years ago, the fruit were met with curiosity and quickly embraced. “Unlike some pluots, they really stand out,” said Bryce. “They’re very obviously something different, and the flavor is hard to compare.”\u003c/p>\n\u003cfigure id=\"attachment_130073\" class=\"wp-caption aligncenter\" style=\"max-width: 610px\">\u003cimg src=\"https://ww2.kqed.org/bayareabites/wp-content/uploads/sites/24/2018/08/Damson_plum_fruit.jpg\" alt=\"Damson plums\" width=\"610\" height=\"407\" class=\"size-full wp-image-130073\" srcset=\"https://ww2.kqed.org/app/uploads/sites/24/2018/08/Damson_plum_fruit.jpg 610w, https://ww2.kqed.org/app/uploads/sites/24/2018/08/Damson_plum_fruit-160x107.jpg 160w, https://ww2.kqed.org/app/uploads/sites/24/2018/08/Damson_plum_fruit-240x160.jpg 240w, https://ww2.kqed.org/app/uploads/sites/24/2018/08/Damson_plum_fruit-375x250.jpg 375w, https://ww2.kqed.org/app/uploads/sites/24/2018/08/Damson_plum_fruit-520x347.jpg 520w\" sizes=\"(max-width: 610px) 100vw, 610px\">\u003cfigcaption class=\"wp-caption-text\">Damson plums \u003ccite>(Jonathan Billinger)\u003c/cite>\u003c/figcaption>\u003c/figure>\n\u003ch2>Back to Basics\u003c/h2>\n\u003cp>Staying ahead of stone fruit trends is not the only priority at Blossom Bluff, which grows upwards of 120 varieties. The Loewens are always seeking out cultivars that have unique flavor profiles and market demand, while filling in any gaps in their harvest calendar.\u003c/p>\n\u003cp>“We’re constantly looking at new varieties, but we’re also seeking out old ones,” says Bryce. One exaple is the classic yellow-fleshed Le Grande nectarine, which was developed near Parlier in the 1940s. “It was a gold standard for nectarines for a long time. We didn’t have that variety, but \u003ca href=\"http://www.masumoto.com/about-us/\">Mas Masumoto\u003c/a>, who’s just down the road from us, gave us scion wood from his trees to graft.”\u003c/p>\n\u003cp>The Loewens have also grown \u003ca href=\"http://en.wikipedia.org/wiki/Damson\">Damson plums\u003c/a>, an English subspecies with a long history. Damsons are not the sweetest of stone fruit, but their distinctive blue-purple skin and complex, somewhat astringent flavor have made them a favorite among jam makers.\u003c/p>\n\u003cp>Zaiger continues to dream up new stone fruit crosses to grace future orchards, just as nature and growers have been conspiring for centuries to bring out the best in summer’s harvest. “It’s hard to find a plum that doesn’t have some suspected crosses,” says Tarry. “Even the Santa Rosa plum, which we’ve loved for decades, is believed to have some apricot blood in it.”\u003c/p>\n\u003cp>\u003ci>Learn more in \u003ca href=\"https://cuesa.org/article/taste-sunshine-farmers-market-guide-stone-fruit\">CUESA’s Farmers Market Guide to Stone Fruit\u003c/a>. Look for Blossom Bluff Orchards at the Ferry Plaza Farmers Market on Saturdays. This article was updated from a \u003ca href=\"https://www.kqed.org/bayareabites/68950/getting-to-the-bottom-of-the-peacotum\">previously published version\u003c/a>.\u003c/i>\u003c/p>\n\u003cp>\u003c/p>\u003c/div>","attributes":{"named":{},"numeric":[]}},{"type":"component","content":"","name":"ad","attributes":{"named":{"label":"floatright"},"numeric":["floatright"]}},{"type":"contentString","content":"\u003cdiv class=\"post-body\">\u003cp>\u003c/p>\n\u003cp>\u003ci>This article originally appeared on \u003ca href=\"https://cuesa.org/article/pluots-apriums-and-flavorful-world-hybrid-fruit\">CUESA\u003c/a>.\u003c/i>\u003c/p>\n\n\u003c/div>\u003c/p>","attributes":{"named":{},"numeric":[]}}],"link":"/bayareabites/130068/pluots-apriums-and-the-flavorful-world-of-hybrid-fruit","authors":["byline_bayareabites_130068"],"categories":["bayareabites_109","bayareabites_12276","bayareabites_1874","bayareabites_95","bayareabites_2090","bayareabites_2554"],"tags":["bayareabites_237","bayareabites_2172","bayareabites_244"],"featImg":"bayareabites_130070","label":"bayareabites"},"bayareabites_110730":{"type":"posts","id":"bayareabites_110730","meta":{"index":"posts_1591205157","site":"bayareabites","id":"110730","score":null,"sort":[1469489912000]},"guestAuthors":[],"slug":"watermelon-girl-explores-summer-fruit-through-traditional-chinese-medicine","title":"Watermelon Girl Explores Summer Fruit Through Traditional Chinese Medicine ","publishDate":1469489912,"format":"standard","headTitle":"Bay Area Bites | KQED Food","labelTerm":{"site":"bayareabites"},"content":"\u003cp>“I spit seeds at bad guys!” I say as Super Watermelon Girl to a woman dressed up like a ladybug at Piedmont Avenue’s annual Halloween parade. Elementary school girls in the '90s often went through obsessions with horses, soccer or The Spice Girls. My infatuation, however, was with watermelon. I adored anything watermelon, from erasers to ice cream to the giant stuffed watermelon, Melly, my mother sewed me for my birthday. I even AOL Instant Messengered my friends from the screen name watermelOgrl (watermelongrl was taken). The first day of 7\u003csup>th\u003c/sup> grade, however, I decided it was time to shed my Watermelon Girl identity and step into a more “grown-up” phase of preteenhood. I put all my watermelon items in my “special box” that lived in my closet, a container where all the past versions of Lila hibernated.\u003c/p>\n\u003cfigure id=\"attachment_110733\" class=\"wp-caption aligncenter\" style=\"max-width: 2544px\">\u003cimg src=\"http://ww2.kqed.org/bayareabites/wp-content/uploads/sites/24/2016/07/2.watermleonpattern.jpg\" alt=\"Watermelon girl’s favorite things\" width=\"2544\" height=\"1774\" class=\"size-full wp-image-110733\" srcset=\"https://ww2.kqed.org/app/uploads/sites/24/2016/07/2.watermleonpattern.jpg 2544w, https://ww2.kqed.org/app/uploads/sites/24/2016/07/2.watermleonpattern-400x279.jpg 400w, https://ww2.kqed.org/app/uploads/sites/24/2016/07/2.watermleonpattern-800x558.jpg 800w, https://ww2.kqed.org/app/uploads/sites/24/2016/07/2.watermleonpattern-768x536.jpg 768w, https://ww2.kqed.org/app/uploads/sites/24/2016/07/2.watermleonpattern-1440x1004.jpg 1440w, https://ww2.kqed.org/app/uploads/sites/24/2016/07/2.watermleonpattern-1180x823.jpg 1180w, https://ww2.kqed.org/app/uploads/sites/24/2016/07/2.watermleonpattern-960x669.jpg 960w\" sizes=\"(max-width: 2544px) 100vw, 2544px\">\u003cfigcaption class=\"wp-caption-text\">Watermelon girl’s favorite things \u003ccite>(Lila Volkas)\u003c/cite>\u003c/figcaption>\u003c/figure>\n\u003cp>As I prepare to attend \u003ca href=\"https://www.baumancollege.org/programs/nutrition-consultant/\" target=\"_blank\">Bauman College\u003c/a> this fall to become a Holistic Nutrition consultant, I acknowledge the now adult Watermelon Girl who is ready to step into her own food-related super powers. One of the reasons I was drawn to this program is that I have been fascinated with the concept of food as medicine, which I explored in my article \u003ca href=\"http://ww2.kqed.org/bayareabites/2015/06/09/ayurveda-a-journey-towards-balance-using-food-as-medicine/\">Ayurveda: A Journey Towards Balance Using Food As Medicine\u003c/a>.\u003c/p>\n\u003cp>Following my curiosity on this subject, I recently attended an “Everyday Food as Medicine” workshop at the \u003ca href=\"http://www.qulturecollective.com/\" target=\"_blank\">Qulture Collective\u003c/a> in Oakland led by Mamie Chow L. Ac., acupuncturist and food as medicine consultant. She spoke about practical ways to apply traditional Eastern wisdom to our busy, modern lives. The way Chow described Traditional Chinese Medicine’s view of food gave me a new perspective on the foods I eat. To learn more, I read Paul Pitchford’s \u003cem>\u003ca href=\"https://www.amazon.com/Healing-Whole-Foods-Traditions-Nutrition/dp/1556434308\" target=\"_blank\">Healing with Whole Foods: Asian Traditions and Modern Nutrition\u003c/a>\u003c/em>. As the bountiful piles of watermelon roll into Berkeley Bowl for the summer, I’m inspired to share what I have learned about the medicinal qualities of fruit, so others can feel that vibrancy that exists within the food we eat even after it leaves the soil or the tree.\u003c/p>\n\u003cp>In her workshop, Chow explained how traditional Chinese medicine’s approach to food and nutrition revolves around the balance of yin and yang. Yang encompasses Qi (energy), warming, day and sun while Yin refers to rest, cooling, night, and moon. Chow told the workshop attendees that every food has an action, a temperature and a flavor. The action of a food can promote organ expansion, contraction, moistening, drying, relaxation or strengthening. The temperature of a food can be placed on a spectrum from cold to hot.\u003c/p>\n\u003cfigure id=\"attachment_110734\" class=\"wp-caption aligncenter\" style=\"max-width: 2036px\">\u003cimg src=\"http://ww2.kqed.org/bayareabites/wp-content/uploads/sites/24/2016/07/3.tempoffood.jpg\" alt=\"Spectrum of food temperatures\" width=\"2036\" height=\"1612\" class=\"size-full wp-image-110734\" srcset=\"https://ww2.kqed.org/app/uploads/sites/24/2016/07/3.tempoffood.jpg 2036w, https://ww2.kqed.org/app/uploads/sites/24/2016/07/3.tempoffood-400x317.jpg 400w, https://ww2.kqed.org/app/uploads/sites/24/2016/07/3.tempoffood-800x633.jpg 800w, https://ww2.kqed.org/app/uploads/sites/24/2016/07/3.tempoffood-768x608.jpg 768w, https://ww2.kqed.org/app/uploads/sites/24/2016/07/3.tempoffood-1440x1140.jpg 1440w, https://ww2.kqed.org/app/uploads/sites/24/2016/07/3.tempoffood-1180x934.jpg 1180w, https://ww2.kqed.org/app/uploads/sites/24/2016/07/3.tempoffood-960x760.jpg 960w\" sizes=\"(max-width: 2036px) 100vw, 2036px\">\u003cfigcaption class=\"wp-caption-text\">Spectrum of food temperatures \u003ccite>(Lila Volkas)\u003c/cite>\u003c/figcaption>\u003c/figure>\n\u003cp>And the flavor of a food can be salty, bitter, spicy, sour or sweet.\u003c/p>\n\u003cp>[ad fullwidth]\u003c/p>\n\u003cp>“Consuming fruit gives our body a break from foods that take more effort to digest,” says Paul Pitchford, in his book that unites Western research on health and nutrition with the traditions of Eastern medicine. He also mentions that most fruit is alkalizing with its cooling and cleansing properties, which can help balance the over-consumption of rich foods in the American diet.\u003c/p>\n\u003cp>Chow shares the benefits of “consuming the rainbow” through eating different colors of fruits (and vegetables). Each fruit has different antioxidants that help cleanse the body from the toxic oxidized agents we are exposed to such as rancid oil, charred meat, plastic bags, containers and packaging. Chow explains that fruit digests at a different rate than other foods and therefore is most beneficial when eaten by itself.\u003c/p>\n\u003cfigure id=\"attachment_110735\" class=\"wp-caption aligncenter\" style=\"max-width: 1776px\">\u003cimg src=\"http://ww2.kqed.org/bayareabites/wp-content/uploads/sites/24/2016/07/4.foodrainbow.jpg\" alt=\"Food rainbow\" width=\"1776\" height=\"1186\" class=\"size-full wp-image-110735\" srcset=\"https://ww2.kqed.org/app/uploads/sites/24/2016/07/4.foodrainbow.jpg 1776w, https://ww2.kqed.org/app/uploads/sites/24/2016/07/4.foodrainbow-400x267.jpg 400w, https://ww2.kqed.org/app/uploads/sites/24/2016/07/4.foodrainbow-800x534.jpg 800w, https://ww2.kqed.org/app/uploads/sites/24/2016/07/4.foodrainbow-768x513.jpg 768w, https://ww2.kqed.org/app/uploads/sites/24/2016/07/4.foodrainbow-1440x962.jpg 1440w, https://ww2.kqed.org/app/uploads/sites/24/2016/07/4.foodrainbow-1180x788.jpg 1180w, https://ww2.kqed.org/app/uploads/sites/24/2016/07/4.foodrainbow-960x641.jpg 960w\" sizes=\"(max-width: 1776px) 100vw, 1776px\">\u003cfigcaption class=\"wp-caption-text\">Food rainbow \u003ccite>(Lila Volkas)\u003c/cite>\u003c/figcaption>\u003c/figure>\n\u003cp>Americans love to eat fruit with pancakes, ice cream and yogurt, which can stifle digestion and produce “dampness.” I learned that traditional Chinese medicine’s concept of “dampness” points to a sluggish digestive ability. There are many factors that can contribute to “dampness,” one of them being diet. Chow gives some possible symptoms of “dampness” such as, easy weight gain, inflammation, fatigue (especially after eating), chronic yeast infections and skin problems. I took away that when it comes to fruit, you want to let your strawberry have your taste buds’ undivided attention.\u003c/p>\n\u003cfigure id=\"attachment_110736\" class=\"wp-caption aligncenter\" style=\"max-width: 1972px\">\u003cimg src=\"http://ww2.kqed.org/bayareabites/wp-content/uploads/sites/24/2016/07/5.strawberry.jpg\" alt=\"Chow suggests one should eat fruit by itself\" width=\"1972\" height=\"1464\" class=\"size-full wp-image-110736\" srcset=\"https://ww2.kqed.org/app/uploads/sites/24/2016/07/5.strawberry.jpg 1972w, https://ww2.kqed.org/app/uploads/sites/24/2016/07/5.strawberry-400x297.jpg 400w, https://ww2.kqed.org/app/uploads/sites/24/2016/07/5.strawberry-800x594.jpg 800w, https://ww2.kqed.org/app/uploads/sites/24/2016/07/5.strawberry-768x570.jpg 768w, https://ww2.kqed.org/app/uploads/sites/24/2016/07/5.strawberry-1440x1069.jpg 1440w, https://ww2.kqed.org/app/uploads/sites/24/2016/07/5.strawberry-1180x876.jpg 1180w, https://ww2.kqed.org/app/uploads/sites/24/2016/07/5.strawberry-960x713.jpg 960w\" sizes=\"(max-width: 1972px) 100vw, 1972px\">\u003cfigcaption class=\"wp-caption-text\">Chow suggests one should eat fruit by itself \u003ccite>(Lila Volkas)\u003c/cite>\u003c/figcaption>\u003c/figure>\n\u003cp>Too much fruit, however, can also cause “dampness.” In the Everyday Food as Medicine workshop, Chow mentioned the importance of moderation. A simple way to measure how much of any one kind of fruit to consume for the day is to enjoy what can fit in the palm of your hand. The ideal time to eat fruit is as an afternoon snack, but even though it seems contradictory, a Chinese folk remedy says, “One should eat exactly five strawberries before every meal to aid in digestion,” Chow adds.\u003c/p>\n\u003cp>Traditional Chinese medicine supports living in harmony with your environment and you can check out CUESA’s \u003ca href=\"http://www.cuesa.org/eat-seasonally/charts/fruit\">seasonal fruit and nuts chart\u003c/a> (a non-profit whose mission is to educate urban consumers about sustainable agriculture) to find out when specific fruits are in season.\u003c/p>\n\u003cp>\u003cstrong>Here are some fanciful scenarios to help you remember the qualities of different summer fruit:\u003c/strong>\u003c/p>\n\u003cfigure id=\"attachment_110737\" class=\"wp-caption aligncenter\" style=\"max-width: 2712px\">\u003cimg src=\"http://ww2.kqed.org/bayareabites/wp-content/uploads/sites/24/2016/07/6.apcherpea.jpg\" alt=\"Apricot, cherry and peach scenario\" width=\"2712\" height=\"1095\" class=\"size-full wp-image-110737\" srcset=\"https://ww2.kqed.org/app/uploads/sites/24/2016/07/6.apcherpea.jpg 2712w, https://ww2.kqed.org/app/uploads/sites/24/2016/07/6.apcherpea-400x162.jpg 400w, https://ww2.kqed.org/app/uploads/sites/24/2016/07/6.apcherpea-800x323.jpg 800w, https://ww2.kqed.org/app/uploads/sites/24/2016/07/6.apcherpea-768x310.jpg 768w, https://ww2.kqed.org/app/uploads/sites/24/2016/07/6.apcherpea-1440x581.jpg 1440w, https://ww2.kqed.org/app/uploads/sites/24/2016/07/6.apcherpea-1180x476.jpg 1180w, https://ww2.kqed.org/app/uploads/sites/24/2016/07/6.apcherpea-960x388.jpg 960w\" sizes=\"(max-width: 2712px) 100vw, 2712px\">\u003cfigcaption class=\"wp-caption-text\">Apricot, cherry and peach scenario \u003ccite>(Lila Volkas)\u003c/cite>\u003c/figcaption>\u003c/figure>\n\u003cp>\u003cstrong>Apricots\u003c/strong> may help you out on your next bird watching trip. With their neutral temperature they are said to help your eyesight and increase yin fluids. A few apricots might quench your thirst and soothe your dry throat as you observe that eagle’s nest with your newly enhanced vision.\u003c/p>\n\u003cp>\u003cstrong>Cherries\u003c/strong> are perfect for the Bay Area’s summer fog. Since they have a warming temperature they are suitable for those cloudy days at the beach. But don’t fret! Pitchford writes that cherries tonify the spleen, which is associated with the emotion of worry. So maybe your beach birthday party didn’t have all that much sun. You can keep your self-worth intact by enjoying some of these red jewels that help “hold in your “essence” and qi,” as Chow puts it.\u003c/p>\n\u003cp>\u003cstrong>Peaches\u003c/strong> are excellent after a long, hot and dusty hike. They are cooling by nature and can promote blood circulation and nourish body fluids. Pitchford says they are great for dry conditions of the lungs. After trekking in the sun for many hours, your warm tuna fish sandwich looked a little dicey, but you ate it anyway. They can also help gastrointestinal inflammation for the ride home.\u003c/p>\n\u003cfigure id=\"attachment_110739\" class=\"wp-caption aligncenter\" style=\"max-width: 2712px\">\u003cimg src=\"http://ww2.kqed.org/bayareabites/wp-content/uploads/sites/24/2016/07/7.rasstrawandwat.jpg\" alt=\"Raspberry, strawberry and watermelon scenario\" width=\"2712\" height=\"1020\" class=\"size-full wp-image-110739\" srcset=\"https://ww2.kqed.org/app/uploads/sites/24/2016/07/7.rasstrawandwat.jpg 2712w, https://ww2.kqed.org/app/uploads/sites/24/2016/07/7.rasstrawandwat-400x150.jpg 400w, https://ww2.kqed.org/app/uploads/sites/24/2016/07/7.rasstrawandwat-800x301.jpg 800w, https://ww2.kqed.org/app/uploads/sites/24/2016/07/7.rasstrawandwat-768x289.jpg 768w, https://ww2.kqed.org/app/uploads/sites/24/2016/07/7.rasstrawandwat-1440x542.jpg 1440w, https://ww2.kqed.org/app/uploads/sites/24/2016/07/7.rasstrawandwat-1180x444.jpg 1180w, https://ww2.kqed.org/app/uploads/sites/24/2016/07/7.rasstrawandwat-960x361.jpg 960w\" sizes=\"(max-width: 2712px) 100vw, 2712px\">\u003cfigcaption class=\"wp-caption-text\">Raspberry, strawberry and watermelon scenario \u003ccite>(Lila Volkas)\u003c/cite>\u003c/figcaption>\u003c/figure>\n\u003cp>\u003cstrong>Raspberries\u003c/strong> will come in handy when you’re camping. They are neutral in temperature and are help treat frequent urination especially at night, Pitchford writes. If you don’t want your slumber to be disturbed in your sleeping bag, you may want to consider a dessert of raspberries before you hit the sack.\u003c/p>\n\u003cp>\u003cstrong>Strawberries\u003c/strong> are fit for the peppy summer camp counselor shouting cheers all day long in the sun. As a cooling fruit, Pitchford explains that strawberries moisten the lungs and can be used for thirst, sore throat and voice hoarseness. They are also great for skin. If you’re feeling crafty you can make a strawberry puree facial.\u003c/p>\n\u003cp>\u003cstrong>Watermelon\u003c/strong> is best suited to ease the feeling of cranky-heat. Suppose you are celebrating at a friend’s BBQ. Its possible you may have had one too many beers, got a little bit sunburned and ate a few overly charred burgers. Eating watermelon can cool your stomach, sooth irritability and promote fluid creation.\u003c/p>\n\u003cp>[ad floatright]\u003c/p>\n\u003cp>After learning about the medicinal qualities of watermelon, I realize that my preteen obsession may have had something to do with their ability to quell the emotions from endless middle school drama. Now, I can eat watermelon, knowing it will soothe the effects of the summer heat (and if all else fails, I can always spit seeds at bad guys).\u003c/p>\n\u003cfigure id=\"attachment_110740\" class=\"wp-caption aligncenter\" style=\"max-width: 784px\">\u003cimg src=\"http://ww2.kqed.org/bayareabites/wp-content/uploads/sites/24/2016/07/8.EPSON004.jpg\" alt=\"Lila as Super Watermelon Girl\" width=\"784\" height=\"1376\" class=\"size-full wp-image-110740\" srcset=\"https://ww2.kqed.org/app/uploads/sites/24/2016/07/8.EPSON004.jpg 784w, https://ww2.kqed.org/app/uploads/sites/24/2016/07/8.EPSON004-400x702.jpg 400w, https://ww2.kqed.org/app/uploads/sites/24/2016/07/8.EPSON004-768x1348.jpg 768w\" sizes=\"(max-width: 784px) 100vw, 784px\">\u003cfigcaption class=\"wp-caption-text\">Lila as Super Watermelon Girl \u003ccite>(Courtesy Lila Volkas)\u003c/cite>\u003c/figcaption>\u003c/figure>\n\n","blocks":[],"excerpt":"An infatuation with watermelon inspires an exploration of traditional Chinese medicine’s perspective on the medicinal qualities of fruit.\r\n","status":"publish","parent":0,"modified":1469576612,"stats":{"hasAudio":false,"hasVideo":false,"hasChartOrMap":false,"iframeSrcs":[],"hasGoogleForm":false,"hasGallery":false,"hasHearkenModule":false,"hasPolis":false,"paragraphCount":20,"wordCount":1340},"headData":{"title":"Watermelon Girl Explores Summer Fruit Through Traditional Chinese Medicine | KQED","description":"An infatuation with watermelon inspires an exploration of traditional Chinese medicine’s perspective on the medicinal qualities of fruit.\r\n","ogTitle":"","ogDescription":"","ogImgId":"","twTitle":"","twDescription":"","twImgId":"","schema":{"@context":"http://schema.org","@type":"Article","headline":"Watermelon Girl Explores Summer Fruit Through Traditional Chinese Medicine ","datePublished":"2016-07-25T23:38:32.000Z","dateModified":"2016-07-26T23:43:32.000Z","image":"https://cdn.kqed.org/wp-content/uploads/2020/02/KQED-OG-Image@1x.png"}},"disqusIdentifier":"110730 http://ww2.kqed.org/bayareabites/?p=110730","disqusUrl":"https://ww2.kqed.org/bayareabites/2016/07/25/watermelon-girl-explores-summer-fruit-through-traditional-chinese-medicine/","disqusTitle":"Watermelon Girl Explores Summer Fruit Through Traditional Chinese Medicine ","path":"/bayareabites/110730/watermelon-girl-explores-summer-fruit-through-traditional-chinese-medicine","audioTrackLength":null,"parsedContent":[{"type":"contentString","content":"\u003cdiv class=\"post-body\">\u003cp>\u003cp>“I spit seeds at bad guys!” I say as Super Watermelon Girl to a woman dressed up like a ladybug at Piedmont Avenue’s annual Halloween parade. Elementary school girls in the '90s often went through obsessions with horses, soccer or The Spice Girls. My infatuation, however, was with watermelon. I adored anything watermelon, from erasers to ice cream to the giant stuffed watermelon, Melly, my mother sewed me for my birthday. I even AOL Instant Messengered my friends from the screen name watermelOgrl (watermelongrl was taken). The first day of 7\u003csup>th\u003c/sup> grade, however, I decided it was time to shed my Watermelon Girl identity and step into a more “grown-up” phase of preteenhood. I put all my watermelon items in my “special box” that lived in my closet, a container where all the past versions of Lila hibernated.\u003c/p>\n\u003cfigure id=\"attachment_110733\" class=\"wp-caption aligncenter\" style=\"max-width: 2544px\">\u003cimg src=\"http://ww2.kqed.org/bayareabites/wp-content/uploads/sites/24/2016/07/2.watermleonpattern.jpg\" alt=\"Watermelon girl’s favorite things\" width=\"2544\" height=\"1774\" class=\"size-full wp-image-110733\" srcset=\"https://ww2.kqed.org/app/uploads/sites/24/2016/07/2.watermleonpattern.jpg 2544w, https://ww2.kqed.org/app/uploads/sites/24/2016/07/2.watermleonpattern-400x279.jpg 400w, https://ww2.kqed.org/app/uploads/sites/24/2016/07/2.watermleonpattern-800x558.jpg 800w, https://ww2.kqed.org/app/uploads/sites/24/2016/07/2.watermleonpattern-768x536.jpg 768w, https://ww2.kqed.org/app/uploads/sites/24/2016/07/2.watermleonpattern-1440x1004.jpg 1440w, https://ww2.kqed.org/app/uploads/sites/24/2016/07/2.watermleonpattern-1180x823.jpg 1180w, https://ww2.kqed.org/app/uploads/sites/24/2016/07/2.watermleonpattern-960x669.jpg 960w\" sizes=\"(max-width: 2544px) 100vw, 2544px\">\u003cfigcaption class=\"wp-caption-text\">Watermelon girl’s favorite things \u003ccite>(Lila Volkas)\u003c/cite>\u003c/figcaption>\u003c/figure>\n\u003cp>As I prepare to attend \u003ca href=\"https://www.baumancollege.org/programs/nutrition-consultant/\" target=\"_blank\">Bauman College\u003c/a> this fall to become a Holistic Nutrition consultant, I acknowledge the now adult Watermelon Girl who is ready to step into her own food-related super powers. One of the reasons I was drawn to this program is that I have been fascinated with the concept of food as medicine, which I explored in my article \u003ca href=\"http://ww2.kqed.org/bayareabites/2015/06/09/ayurveda-a-journey-towards-balance-using-food-as-medicine/\">Ayurveda: A Journey Towards Balance Using Food As Medicine\u003c/a>.\u003c/p>\n\u003cp>Following my curiosity on this subject, I recently attended an “Everyday Food as Medicine” workshop at the \u003ca href=\"http://www.qulturecollective.com/\" target=\"_blank\">Qulture Collective\u003c/a> in Oakland led by Mamie Chow L. Ac., acupuncturist and food as medicine consultant. She spoke about practical ways to apply traditional Eastern wisdom to our busy, modern lives. The way Chow described Traditional Chinese Medicine’s view of food gave me a new perspective on the foods I eat. To learn more, I read Paul Pitchford’s \u003cem>\u003ca href=\"https://www.amazon.com/Healing-Whole-Foods-Traditions-Nutrition/dp/1556434308\" target=\"_blank\">Healing with Whole Foods: Asian Traditions and Modern Nutrition\u003c/a>\u003c/em>. As the bountiful piles of watermelon roll into Berkeley Bowl for the summer, I’m inspired to share what I have learned about the medicinal qualities of fruit, so others can feel that vibrancy that exists within the food we eat even after it leaves the soil or the tree.\u003c/p>\n\u003cp>In her workshop, Chow explained how traditional Chinese medicine’s approach to food and nutrition revolves around the balance of yin and yang. Yang encompasses Qi (energy), warming, day and sun while Yin refers to rest, cooling, night, and moon. Chow told the workshop attendees that every food has an action, a temperature and a flavor. The action of a food can promote organ expansion, contraction, moistening, drying, relaxation or strengthening. The temperature of a food can be placed on a spectrum from cold to hot.\u003c/p>\n\u003cfigure id=\"attachment_110734\" class=\"wp-caption aligncenter\" style=\"max-width: 2036px\">\u003cimg src=\"http://ww2.kqed.org/bayareabites/wp-content/uploads/sites/24/2016/07/3.tempoffood.jpg\" alt=\"Spectrum of food temperatures\" width=\"2036\" height=\"1612\" class=\"size-full wp-image-110734\" srcset=\"https://ww2.kqed.org/app/uploads/sites/24/2016/07/3.tempoffood.jpg 2036w, https://ww2.kqed.org/app/uploads/sites/24/2016/07/3.tempoffood-400x317.jpg 400w, https://ww2.kqed.org/app/uploads/sites/24/2016/07/3.tempoffood-800x633.jpg 800w, https://ww2.kqed.org/app/uploads/sites/24/2016/07/3.tempoffood-768x608.jpg 768w, https://ww2.kqed.org/app/uploads/sites/24/2016/07/3.tempoffood-1440x1140.jpg 1440w, https://ww2.kqed.org/app/uploads/sites/24/2016/07/3.tempoffood-1180x934.jpg 1180w, https://ww2.kqed.org/app/uploads/sites/24/2016/07/3.tempoffood-960x760.jpg 960w\" sizes=\"(max-width: 2036px) 100vw, 2036px\">\u003cfigcaption class=\"wp-caption-text\">Spectrum of food temperatures \u003ccite>(Lila Volkas)\u003c/cite>\u003c/figcaption>\u003c/figure>\n\u003cp>And the flavor of a food can be salty, bitter, spicy, sour or sweet.\u003c/p>\n\u003cp>\u003c/p>\u003c/div>","attributes":{"named":{},"numeric":[]}},{"type":"component","content":"","name":"ad","attributes":{"named":{"label":"fullwidth"},"numeric":["fullwidth"]}},{"type":"contentString","content":"\u003cdiv class=\"post-body\">\u003cp>\u003c/p>\n\u003cp>“Consuming fruit gives our body a break from foods that take more effort to digest,” says Paul Pitchford, in his book that unites Western research on health and nutrition with the traditions of Eastern medicine. He also mentions that most fruit is alkalizing with its cooling and cleansing properties, which can help balance the over-consumption of rich foods in the American diet.\u003c/p>\n\u003cp>Chow shares the benefits of “consuming the rainbow” through eating different colors of fruits (and vegetables). Each fruit has different antioxidants that help cleanse the body from the toxic oxidized agents we are exposed to such as rancid oil, charred meat, plastic bags, containers and packaging. Chow explains that fruit digests at a different rate than other foods and therefore is most beneficial when eaten by itself.\u003c/p>\n\u003cfigure id=\"attachment_110735\" class=\"wp-caption aligncenter\" style=\"max-width: 1776px\">\u003cimg src=\"http://ww2.kqed.org/bayareabites/wp-content/uploads/sites/24/2016/07/4.foodrainbow.jpg\" alt=\"Food rainbow\" width=\"1776\" height=\"1186\" class=\"size-full wp-image-110735\" srcset=\"https://ww2.kqed.org/app/uploads/sites/24/2016/07/4.foodrainbow.jpg 1776w, https://ww2.kqed.org/app/uploads/sites/24/2016/07/4.foodrainbow-400x267.jpg 400w, https://ww2.kqed.org/app/uploads/sites/24/2016/07/4.foodrainbow-800x534.jpg 800w, https://ww2.kqed.org/app/uploads/sites/24/2016/07/4.foodrainbow-768x513.jpg 768w, https://ww2.kqed.org/app/uploads/sites/24/2016/07/4.foodrainbow-1440x962.jpg 1440w, https://ww2.kqed.org/app/uploads/sites/24/2016/07/4.foodrainbow-1180x788.jpg 1180w, https://ww2.kqed.org/app/uploads/sites/24/2016/07/4.foodrainbow-960x641.jpg 960w\" sizes=\"(max-width: 1776px) 100vw, 1776px\">\u003cfigcaption class=\"wp-caption-text\">Food rainbow \u003ccite>(Lila Volkas)\u003c/cite>\u003c/figcaption>\u003c/figure>\n\u003cp>Americans love to eat fruit with pancakes, ice cream and yogurt, which can stifle digestion and produce “dampness.” I learned that traditional Chinese medicine’s concept of “dampness” points to a sluggish digestive ability. There are many factors that can contribute to “dampness,” one of them being diet. Chow gives some possible symptoms of “dampness” such as, easy weight gain, inflammation, fatigue (especially after eating), chronic yeast infections and skin problems. I took away that when it comes to fruit, you want to let your strawberry have your taste buds’ undivided attention.\u003c/p>\n\u003cfigure id=\"attachment_110736\" class=\"wp-caption aligncenter\" style=\"max-width: 1972px\">\u003cimg src=\"http://ww2.kqed.org/bayareabites/wp-content/uploads/sites/24/2016/07/5.strawberry.jpg\" alt=\"Chow suggests one should eat fruit by itself\" width=\"1972\" height=\"1464\" class=\"size-full wp-image-110736\" srcset=\"https://ww2.kqed.org/app/uploads/sites/24/2016/07/5.strawberry.jpg 1972w, https://ww2.kqed.org/app/uploads/sites/24/2016/07/5.strawberry-400x297.jpg 400w, https://ww2.kqed.org/app/uploads/sites/24/2016/07/5.strawberry-800x594.jpg 800w, https://ww2.kqed.org/app/uploads/sites/24/2016/07/5.strawberry-768x570.jpg 768w, https://ww2.kqed.org/app/uploads/sites/24/2016/07/5.strawberry-1440x1069.jpg 1440w, https://ww2.kqed.org/app/uploads/sites/24/2016/07/5.strawberry-1180x876.jpg 1180w, https://ww2.kqed.org/app/uploads/sites/24/2016/07/5.strawberry-960x713.jpg 960w\" sizes=\"(max-width: 1972px) 100vw, 1972px\">\u003cfigcaption class=\"wp-caption-text\">Chow suggests one should eat fruit by itself \u003ccite>(Lila Volkas)\u003c/cite>\u003c/figcaption>\u003c/figure>\n\u003cp>Too much fruit, however, can also cause “dampness.” In the Everyday Food as Medicine workshop, Chow mentioned the importance of moderation. A simple way to measure how much of any one kind of fruit to consume for the day is to enjoy what can fit in the palm of your hand. The ideal time to eat fruit is as an afternoon snack, but even though it seems contradictory, a Chinese folk remedy says, “One should eat exactly five strawberries before every meal to aid in digestion,” Chow adds.\u003c/p>\n\u003cp>Traditional Chinese medicine supports living in harmony with your environment and you can check out CUESA’s \u003ca href=\"http://www.cuesa.org/eat-seasonally/charts/fruit\">seasonal fruit and nuts chart\u003c/a> (a non-profit whose mission is to educate urban consumers about sustainable agriculture) to find out when specific fruits are in season.\u003c/p>\n\u003cp>\u003cstrong>Here are some fanciful scenarios to help you remember the qualities of different summer fruit:\u003c/strong>\u003c/p>\n\u003cfigure id=\"attachment_110737\" class=\"wp-caption aligncenter\" style=\"max-width: 2712px\">\u003cimg src=\"http://ww2.kqed.org/bayareabites/wp-content/uploads/sites/24/2016/07/6.apcherpea.jpg\" alt=\"Apricot, cherry and peach scenario\" width=\"2712\" height=\"1095\" class=\"size-full wp-image-110737\" srcset=\"https://ww2.kqed.org/app/uploads/sites/24/2016/07/6.apcherpea.jpg 2712w, https://ww2.kqed.org/app/uploads/sites/24/2016/07/6.apcherpea-400x162.jpg 400w, https://ww2.kqed.org/app/uploads/sites/24/2016/07/6.apcherpea-800x323.jpg 800w, https://ww2.kqed.org/app/uploads/sites/24/2016/07/6.apcherpea-768x310.jpg 768w, https://ww2.kqed.org/app/uploads/sites/24/2016/07/6.apcherpea-1440x581.jpg 1440w, https://ww2.kqed.org/app/uploads/sites/24/2016/07/6.apcherpea-1180x476.jpg 1180w, https://ww2.kqed.org/app/uploads/sites/24/2016/07/6.apcherpea-960x388.jpg 960w\" sizes=\"(max-width: 2712px) 100vw, 2712px\">\u003cfigcaption class=\"wp-caption-text\">Apricot, cherry and peach scenario \u003ccite>(Lila Volkas)\u003c/cite>\u003c/figcaption>\u003c/figure>\n\u003cp>\u003cstrong>Apricots\u003c/strong> may help you out on your next bird watching trip. With their neutral temperature they are said to help your eyesight and increase yin fluids. A few apricots might quench your thirst and soothe your dry throat as you observe that eagle’s nest with your newly enhanced vision.\u003c/p>\n\u003cp>\u003cstrong>Cherries\u003c/strong> are perfect for the Bay Area’s summer fog. Since they have a warming temperature they are suitable for those cloudy days at the beach. But don’t fret! Pitchford writes that cherries tonify the spleen, which is associated with the emotion of worry. So maybe your beach birthday party didn’t have all that much sun. You can keep your self-worth intact by enjoying some of these red jewels that help “hold in your “essence” and qi,” as Chow puts it.\u003c/p>\n\u003cp>\u003cstrong>Peaches\u003c/strong> are excellent after a long, hot and dusty hike. They are cooling by nature and can promote blood circulation and nourish body fluids. Pitchford says they are great for dry conditions of the lungs. After trekking in the sun for many hours, your warm tuna fish sandwich looked a little dicey, but you ate it anyway. They can also help gastrointestinal inflammation for the ride home.\u003c/p>\n\u003cfigure id=\"attachment_110739\" class=\"wp-caption aligncenter\" style=\"max-width: 2712px\">\u003cimg src=\"http://ww2.kqed.org/bayareabites/wp-content/uploads/sites/24/2016/07/7.rasstrawandwat.jpg\" alt=\"Raspberry, strawberry and watermelon scenario\" width=\"2712\" height=\"1020\" class=\"size-full wp-image-110739\" srcset=\"https://ww2.kqed.org/app/uploads/sites/24/2016/07/7.rasstrawandwat.jpg 2712w, https://ww2.kqed.org/app/uploads/sites/24/2016/07/7.rasstrawandwat-400x150.jpg 400w, https://ww2.kqed.org/app/uploads/sites/24/2016/07/7.rasstrawandwat-800x301.jpg 800w, https://ww2.kqed.org/app/uploads/sites/24/2016/07/7.rasstrawandwat-768x289.jpg 768w, https://ww2.kqed.org/app/uploads/sites/24/2016/07/7.rasstrawandwat-1440x542.jpg 1440w, https://ww2.kqed.org/app/uploads/sites/24/2016/07/7.rasstrawandwat-1180x444.jpg 1180w, https://ww2.kqed.org/app/uploads/sites/24/2016/07/7.rasstrawandwat-960x361.jpg 960w\" sizes=\"(max-width: 2712px) 100vw, 2712px\">\u003cfigcaption class=\"wp-caption-text\">Raspberry, strawberry and watermelon scenario \u003ccite>(Lila Volkas)\u003c/cite>\u003c/figcaption>\u003c/figure>\n\u003cp>\u003cstrong>Raspberries\u003c/strong> will come in handy when you’re camping. They are neutral in temperature and are help treat frequent urination especially at night, Pitchford writes. If you don’t want your slumber to be disturbed in your sleeping bag, you may want to consider a dessert of raspberries before you hit the sack.\u003c/p>\n\u003cp>\u003cstrong>Strawberries\u003c/strong> are fit for the peppy summer camp counselor shouting cheers all day long in the sun. As a cooling fruit, Pitchford explains that strawberries moisten the lungs and can be used for thirst, sore throat and voice hoarseness. They are also great for skin. If you’re feeling crafty you can make a strawberry puree facial.\u003c/p>\n\u003cp>\u003cstrong>Watermelon\u003c/strong> is best suited to ease the feeling of cranky-heat. Suppose you are celebrating at a friend’s BBQ. Its possible you may have had one too many beers, got a little bit sunburned and ate a few overly charred burgers. Eating watermelon can cool your stomach, sooth irritability and promote fluid creation.\u003c/p>\n\u003cp>\u003c/p>\u003c/div>","attributes":{"named":{},"numeric":[]}},{"type":"component","content":"","name":"ad","attributes":{"named":{"label":"floatright"},"numeric":["floatright"]}},{"type":"contentString","content":"\u003cdiv class=\"post-body\">\u003cp>\u003c/p>\n\u003cp>After learning about the medicinal qualities of watermelon, I realize that my preteen obsession may have had something to do with their ability to quell the emotions from endless middle school drama. Now, I can eat watermelon, knowing it will soothe the effects of the summer heat (and if all else fails, I can always spit seeds at bad guys).\u003c/p>\n\u003cfigure id=\"attachment_110740\" class=\"wp-caption aligncenter\" style=\"max-width: 784px\">\u003cimg src=\"http://ww2.kqed.org/bayareabites/wp-content/uploads/sites/24/2016/07/8.EPSON004.jpg\" alt=\"Lila as Super Watermelon Girl\" width=\"784\" height=\"1376\" class=\"size-full wp-image-110740\" srcset=\"https://ww2.kqed.org/app/uploads/sites/24/2016/07/8.EPSON004.jpg 784w, https://ww2.kqed.org/app/uploads/sites/24/2016/07/8.EPSON004-400x702.jpg 400w, https://ww2.kqed.org/app/uploads/sites/24/2016/07/8.EPSON004-768x1348.jpg 768w\" sizes=\"(max-width: 784px) 100vw, 784px\">\u003cfigcaption class=\"wp-caption-text\">Lila as Super Watermelon Girl \u003ccite>(Courtesy Lila Volkas)\u003c/cite>\u003c/figcaption>\u003c/figure>\n\n\u003c/div>\u003c/p>","attributes":{"named":{},"numeric":[]}}],"link":"/bayareabites/110730/watermelon-girl-explores-summer-fruit-through-traditional-chinese-medicine","authors":["5404"],"categories":["bayareabites_11028","bayareabites_1245"],"tags":["bayareabites_14441","bayareabites_9222","bayareabites_244","bayareabites_2355"],"featImg":"bayareabites_110732","label":"bayareabites"},"bayareabites_97547":{"type":"posts","id":"bayareabites_97547","meta":{"index":"posts_1591205157","site":"bayareabites","id":"97547","score":null,"sort":[1435954273000]},"guestAuthors":[],"slug":"a-bounty-of-summer-stone-fruit-in-a-salad","title":"A Bounty of Summer Stone Fruit in a Salad","publishDate":1435954273,"format":"standard","headTitle":"Bay Area Bites | KQED Food","labelTerm":{"site":"bayareabites"},"content":"\u003cp>I think there’s just about nothing as perfect as biting into a fragrantly ripe, excessively juicy nectarine, where the juices just run down your face and drip off your chin. Or possibly lying on a picnic blanket under a big sprawling tree in the summer sun, popping cherries into my mouth. Or maybe biting into a tart-sweet plum that both makes your lips pucker and your mouth water for the push-pull balance of tangy and syrupy.\u003c/p>\n\u003cp>I look forward with great anticipation to summer’s fruit every spring, and mourn it’s departure come late fall. If I had to choose one perfect season, it would, without a shadow of a doubt, be the summer. \u003c/p>\n\u003cp>And while I love each of these stone fruits on their own, I also love tossing them together in this perfectly simple salad. It’s a great finish to a big barbecue, a foolproof addition to a summer brunch, and excellent for a picnic. \u003c/p>\n\u003cp>Make the orange-vanilla syrup up to 3 days in advance, but cut and toss the fruit the same day you serve it.\u003c/p>\n\u003cfigure id=\"attachment_97635\" class=\"wp-caption aligncenter\" style=\"max-width: 1920px\">\u003cimg src=\"http://ww2.kqed.org/bayareabites/wp-content/uploads/sites/24/2015/07/fruit-salad-nectarines.jpg\" alt=\"Nectarines, plums and apricots for the Summer Stone Fruit Salad\" width=\"1920\" height=\"1280\" class=\"size-full wp-image-97635\" srcset=\"https://ww2.kqed.org/app/uploads/sites/24/2015/07/fruit-salad-nectarines.jpg 1920w, https://ww2.kqed.org/app/uploads/sites/24/2015/07/fruit-salad-nectarines-400x267.jpg 400w, https://ww2.kqed.org/app/uploads/sites/24/2015/07/fruit-salad-nectarines-800x533.jpg 800w, https://ww2.kqed.org/app/uploads/sites/24/2015/07/fruit-salad-nectarines-1440x960.jpg 1440w, https://ww2.kqed.org/app/uploads/sites/24/2015/07/fruit-salad-nectarines-1180x787.jpg 1180w, https://ww2.kqed.org/app/uploads/sites/24/2015/07/fruit-salad-nectarines-960x640.jpg 960w\" sizes=\"(max-width: 1920px) 100vw, 1920px\">\u003cfigcaption class=\"wp-caption-text\">Nectarines, plums and apricots for the Summer Stone Fruit Salad \u003ccite>(Wendy Goodfriend)\u003c/cite>\u003c/figcaption>\u003c/figure>\n\u003ch3>Recipe: Summer Stone Fruit Salad\u003c/h3>\n\u003cp>\u003cem>Serves 6 to 8\u003c/em>\u003c/p>\n\u003cul>\n\u003cstrong>Ingredients:\u003c/strong>\n\u003cli>1/4 cup sugar\u003c/li>\n\u003cli>Juice and zest of 1 orange\u003c/li>\n\u003cli>1/2 vanilla bean, halved lengthwise and seeds scraped out\u003c/li>\n\u003cli>4 ripe nectarines or peeled peaches, pitted and cut into 1/4-inch slices\u003c/li>\n\u003cli>4 ripe apricots, pitted and cut into 1/4-inch slices\u003c/li>\n\u003cli>4 ripe plums, pitted and cut into 1/4-inch slices\u003c/li>\n\u003cli>2 cups pitted, halved sweet cherries (I used a mix of Bing and Rainier)\u003c/li>\n\u003cli>2 tbsp finely chopped pistachios\u003c/li>\n\u003c/ul>\n\u003cp>[gallery type=\"slideshow\" link=\"none\" size=\"full\" ids=\"97626,97627,97634,97641,97640,97636,97637\"]\u003c/p>\n\u003col>\n\u003cstrong>Instructions:\u003c/strong>\n\u003cli>In a small saucepan over medium heat, stir together the sugar and orange zest and juice. Add the vanilla bean pod and seeds. Bring to a boil and cook until the mixture becomes syrupy, about 2 minutes. Remove from the heat and set aside to cool to room temperature, then refrigerate until chilled.\u003c/li>\n\u003cli>In a large serving bowl, toss together the fruit. Strain the chilled syrup into a liquid measuring jug and drizzle the fruit with the syrup. Toss gently, garnish with the pistachios, and serve.\u003c/li>\n\u003c/ol>\n\u003cfigure id=\"attachment_97633\" class=\"wp-caption aligncenter\" style=\"max-width: 1920px\">\u003cimg src=\"http://ww2.kqed.org/bayareabites/wp-content/uploads/sites/24/2015/07/fruit-salad-final1.jpg\" alt=\"Serve Summer Stone Fruit Salad.\" width=\"1920\" height=\"1280\" class=\"size-full wp-image-97633\" srcset=\"https://ww2.kqed.org/app/uploads/sites/24/2015/07/fruit-salad-final1.jpg 1920w, https://ww2.kqed.org/app/uploads/sites/24/2015/07/fruit-salad-final1-400x267.jpg 400w, https://ww2.kqed.org/app/uploads/sites/24/2015/07/fruit-salad-final1-800x533.jpg 800w, https://ww2.kqed.org/app/uploads/sites/24/2015/07/fruit-salad-final1-1440x960.jpg 1440w, https://ww2.kqed.org/app/uploads/sites/24/2015/07/fruit-salad-final1-1180x787.jpg 1180w, https://ww2.kqed.org/app/uploads/sites/24/2015/07/fruit-salad-final1-960x640.jpg 960w\" sizes=\"(max-width: 1920px) 100vw, 1920px\">\u003cfigcaption class=\"wp-caption-text\">Serve Summer Stone Fruit Salad. \u003ccite>(Wendy Goodfriend)\u003c/cite>\u003c/figcaption>\u003c/figure>\n\u003cp>[ad fullwidth]\u003c/p>\u003cp>\u003c/p>\n","blocks":[],"excerpt":"When summer brings ripe, juicy peaches, nectarines, apricots, plums, and cherries, put them all together in this gorgeous fruit salad.","status":"publish","parent":0,"modified":1497994211,"stats":{"hasAudio":false,"hasVideo":false,"hasChartOrMap":false,"iframeSrcs":[],"hasGoogleForm":false,"hasGallery":true,"hasHearkenModule":false,"hasPolis":false,"paragraphCount":8,"wordCount":397},"headData":{"title":"A Bounty of Summer Stone Fruit in a Salad | KQED","description":"When summer brings ripe, juicy peaches, nectarines, apricots, plums, and cherries, put them all together in this gorgeous fruit salad.","ogTitle":"","ogDescription":"","ogImgId":"","twTitle":"","twDescription":"","twImgId":"","schema":{"@context":"http://schema.org","@type":"Article","headline":"A Bounty of Summer Stone Fruit in a Salad","datePublished":"2015-07-03T20:11:13.000Z","dateModified":"2017-06-20T21:30:11.000Z","image":"https://cdn.kqed.org/wp-content/uploads/2020/02/KQED-OG-Image@1x.png"}},"disqusIdentifier":"97547 http://ww2.kqed.org/bayareabites/?p=97547","disqusUrl":"https://ww2.kqed.org/bayareabites/2015/07/03/a-bounty-of-summer-stone-fruit-in-a-salad/","disqusTitle":"A Bounty of Summer Stone Fruit in a Salad","path":"/bayareabites/97547/a-bounty-of-summer-stone-fruit-in-a-salad","audioTrackLength":null,"parsedContent":[{"type":"contentString","content":"\u003cdiv class=\"post-body\">\u003cp>\u003cp>I think there’s just about nothing as perfect as biting into a fragrantly ripe, excessively juicy nectarine, where the juices just run down your face and drip off your chin. Or possibly lying on a picnic blanket under a big sprawling tree in the summer sun, popping cherries into my mouth. Or maybe biting into a tart-sweet plum that both makes your lips pucker and your mouth water for the push-pull balance of tangy and syrupy.\u003c/p>\n\u003cp>I look forward with great anticipation to summer’s fruit every spring, and mourn it’s departure come late fall. If I had to choose one perfect season, it would, without a shadow of a doubt, be the summer. \u003c/p>\n\u003cp>And while I love each of these stone fruits on their own, I also love tossing them together in this perfectly simple salad. It’s a great finish to a big barbecue, a foolproof addition to a summer brunch, and excellent for a picnic. \u003c/p>\n\u003cp>Make the orange-vanilla syrup up to 3 days in advance, but cut and toss the fruit the same day you serve it.\u003c/p>\n\u003cfigure id=\"attachment_97635\" class=\"wp-caption aligncenter\" style=\"max-width: 1920px\">\u003cimg src=\"http://ww2.kqed.org/bayareabites/wp-content/uploads/sites/24/2015/07/fruit-salad-nectarines.jpg\" alt=\"Nectarines, plums and apricots for the Summer Stone Fruit Salad\" width=\"1920\" height=\"1280\" class=\"size-full wp-image-97635\" srcset=\"https://ww2.kqed.org/app/uploads/sites/24/2015/07/fruit-salad-nectarines.jpg 1920w, https://ww2.kqed.org/app/uploads/sites/24/2015/07/fruit-salad-nectarines-400x267.jpg 400w, https://ww2.kqed.org/app/uploads/sites/24/2015/07/fruit-salad-nectarines-800x533.jpg 800w, https://ww2.kqed.org/app/uploads/sites/24/2015/07/fruit-salad-nectarines-1440x960.jpg 1440w, https://ww2.kqed.org/app/uploads/sites/24/2015/07/fruit-salad-nectarines-1180x787.jpg 1180w, https://ww2.kqed.org/app/uploads/sites/24/2015/07/fruit-salad-nectarines-960x640.jpg 960w\" sizes=\"(max-width: 1920px) 100vw, 1920px\">\u003cfigcaption class=\"wp-caption-text\">Nectarines, plums and apricots for the Summer Stone Fruit Salad \u003ccite>(Wendy Goodfriend)\u003c/cite>\u003c/figcaption>\u003c/figure>\n\u003ch3>Recipe: Summer Stone Fruit Salad\u003c/h3>\n\u003cp>\u003cem>Serves 6 to 8\u003c/em>\u003c/p>\n\u003cul>\n\u003cstrong>Ingredients:\u003c/strong>\n\u003cli>1/4 cup sugar\u003c/li>\n\u003cli>Juice and zest of 1 orange\u003c/li>\n\u003cli>1/2 vanilla bean, halved lengthwise and seeds scraped out\u003c/li>\n\u003cli>4 ripe nectarines or peeled peaches, pitted and cut into 1/4-inch slices\u003c/li>\n\u003cli>4 ripe apricots, pitted and cut into 1/4-inch slices\u003c/li>\n\u003cli>4 ripe plums, pitted and cut into 1/4-inch slices\u003c/li>\n\u003cli>2 cups pitted, halved sweet cherries (I used a mix of Bing and Rainier)\u003c/li>\n\u003cli>2 tbsp finely chopped pistachios\u003c/li>\n\u003c/ul>\n\u003cp>\u003c/p>\u003c/div>","attributes":{"named":{},"numeric":[]}},{"type":"component","content":"","name":"gallery","attributes":{"named":{"type":"slideshow","link":"none","size":"full","ids":"97626,97627,97634,97641,97640,97636,97637","label":""},"numeric":[]}},{"type":"contentString","content":"\u003cdiv class=\"post-body\">\u003cp>\u003c/p>\n\u003col>\n\u003cstrong>Instructions:\u003c/strong>\n\u003cli>In a small saucepan over medium heat, stir together the sugar and orange zest and juice. Add the vanilla bean pod and seeds. Bring to a boil and cook until the mixture becomes syrupy, about 2 minutes. Remove from the heat and set aside to cool to room temperature, then refrigerate until chilled.\u003c/li>\n\u003cli>In a large serving bowl, toss together the fruit. Strain the chilled syrup into a liquid measuring jug and drizzle the fruit with the syrup. Toss gently, garnish with the pistachios, and serve.\u003c/li>\n\u003c/ol>\n\u003cfigure id=\"attachment_97633\" class=\"wp-caption aligncenter\" style=\"max-width: 1920px\">\u003cimg src=\"http://ww2.kqed.org/bayareabites/wp-content/uploads/sites/24/2015/07/fruit-salad-final1.jpg\" alt=\"Serve Summer Stone Fruit Salad.\" width=\"1920\" height=\"1280\" class=\"size-full wp-image-97633\" srcset=\"https://ww2.kqed.org/app/uploads/sites/24/2015/07/fruit-salad-final1.jpg 1920w, https://ww2.kqed.org/app/uploads/sites/24/2015/07/fruit-salad-final1-400x267.jpg 400w, https://ww2.kqed.org/app/uploads/sites/24/2015/07/fruit-salad-final1-800x533.jpg 800w, https://ww2.kqed.org/app/uploads/sites/24/2015/07/fruit-salad-final1-1440x960.jpg 1440w, https://ww2.kqed.org/app/uploads/sites/24/2015/07/fruit-salad-final1-1180x787.jpg 1180w, https://ww2.kqed.org/app/uploads/sites/24/2015/07/fruit-salad-final1-960x640.jpg 960w\" sizes=\"(max-width: 1920px) 100vw, 1920px\">\u003cfigcaption class=\"wp-caption-text\">Serve Summer Stone Fruit Salad. \u003ccite>(Wendy Goodfriend)\u003c/cite>\u003c/figcaption>\u003c/figure>\n\u003cp>\u003c/p>\u003c/div>","attributes":{"named":{},"numeric":[]}},{"type":"component","content":"","name":"ad","attributes":{"named":{"label":"fullwidth"},"numeric":["fullwidth"]}},{"type":"contentString","content":"\u003cdiv class=\"post-body\">\u003cp>\u003c/p>\u003cp>\u003c/p>\n\u003c/div>\u003c/p>","attributes":{"named":{},"numeric":[]}}],"link":"/bayareabites/97547/a-bounty-of-summer-stone-fruit-in-a-salad","authors":["5015","5014"],"categories":["bayareabites_12869","bayareabites_12550","bayareabites_1763","bayareabites_12","bayareabites_14362","bayareabites_1873"],"tags":["bayareabites_2273","bayareabites_307","bayareabites_244","bayareabites_2357","bayareabites_8293","bayareabites_2036","bayareabites_348","bayareabites_1815","bayareabites_1209","bayareabites_218"],"featImg":"bayareabites_97632","label":"bayareabites"},"bayareabites_86203":{"type":"posts","id":"bayareabites_86203","meta":{"index":"posts_1591205157","site":"bayareabites","id":"86203","score":null,"sort":[1409238753000]},"guestAuthors":[],"slug":"bet-you-cant-stop-eating-these-vanilla-pavlovas-with-summer-nectarines-berries-and-cream","title":"Bet You Can't Stop Eating These: Vanilla Pavlovas with Summer Nectarines, Berries, and Cream","publishDate":1409238753,"format":"aside","headTitle":"Bay Area Bites | KQED Food","labelTerm":{"site":"bayareabites"},"content":"\u003cfigure id=\"attachment_86834\" class=\"wp-caption aligncenter\" style=\"max-width: 1000px\">\u003ca href=\"http://ww2.kqed.org/bayareabites/wp-content/uploads/sites/24/2014/08/pavlovas-finish1000.jpg\">\u003cimg src=\"http://ww2.kqed.org/bayareabites/wp-content/uploads/sites/24/2014/08/pavlovas-finish1000.jpg\" alt=\"Crispy-Chewy Vanilla Pavlovas with Whipped Cream and Vanilla-Scented Nectarines and Berries. Photo: Wendy Goodfriend\" width=\"1000\" height=\"667\" class=\"size-full wp-image-86834\">\u003c/a>\u003cfigcaption class=\"wp-caption-text\">Crispy-Chewy Vanilla Pavlovas with Whipped Cream and Vanilla-Scented Nectarines and Berries. Photo: \u003ca href=\"http://ww2.kqed.org/bayareabites/author/wendy-goodfriend/\">Wendy Goodfriend\u003c/a>\u003c/figcaption>\u003c/figure>\n\u003cp>\u003cstrong>Warning:\u003c/strong> this dessert will make you completely lose control. You will take one bite, then another, then another, and before you know it you will have eaten two of the enticing little flirts. Not that that happened to me. Nope. \u003c/p>\n\u003cp>\u003ca href=\"http://en.wikipedia.org/wiki/Pavlova_(food)\" target=\"_blank\">\u003cstrong>Pavlova\u003c/strong>\u003c/a>, a dessert that originated in New Zealand or Australia (but is loved the world over) and named after Russian ballerina Anna Pavlova, consists of a crisp-on-the-outside and chewy-on-the-inside vanilla meringue nest that embraces billowy whipped cream. Sometimes, it features layers of tart citrus curd and whipped cream. The whole darn thing is often topped off with juicy, ripe fruit.\u003c/p>\n\u003cp>Here, I’ve made these light-as-a-feather, pillowy meringues into individual desserts, but you can make one large one if you like. The whipped cream adds a lovely contrast of texture. And the sweet summer berries and nectarines, delicately scented with vanilla bean seeds, give it flavorful freshness.\u003c/p>\n\u003cp>You can use just about any fruit for these, just be sure it’s of the season, fragrant, and perfectly ripe. These do not hold well so once you put them together you’ll want to serve them right away.\u003c/p>\n\u003cp>Take note! \u003cstrong>These are gluten-free!\u003c/strong>\u003c/p>\n\u003cfigure id=\"attachment_86841\" class=\"wp-caption aligncenter\" style=\"max-width: 1000px\">\u003ca href=\"http://ww2.kqed.org/bayareabites/wp-content/uploads/sites/24/2014/08/pavlovas-ingredients1000.jpg\">\u003cimg src=\"http://ww2.kqed.org/bayareabites/wp-content/uploads/sites/24/2014/08/pavlovas-ingredients1000.jpg\" alt=\"Ingredients for Crispy-Chewy Vanilla Pavlovas with Whipped Cream and Vanilla-Scented Nectarines and Berries. Photo: Wendy Goodfriend\" width=\"1000\" height=\"667\" class=\"size-full wp-image-86841\">\u003c/a>\u003cfigcaption class=\"wp-caption-text\">Ingredients for Crispy-Chewy Vanilla Pavlovas with Whipped Cream and Vanilla-Scented Nectarines and Berries. Photo: Wendy Goodfriend\u003c/figcaption>\u003c/figure>\n\u003ch3>Recipe: Crispy-Chewy Vanilla Pavlovas with Whipped Cream and Vanilla-Scented Nectarines and Berries\u003c/h3>\n\u003cp>\u003cem>Makes 6 to 8 servings\u003c/em>\u003c/p>\n\u003cul>\n\u003cstrong>Ingredients:\u003c/strong>\n\u003cp>\u003cem>Meringue\u003c/em>\u003c/p>\n\u003cli>4 large egg whites\u003c/li>\n\u003cli>Pinch of kosher salt\u003c/li>\n\u003cli>1 cup superfine sugar\u003c/li>\n\u003cli>1 tsp cornstarch\u003c/li>\n\u003cli>1 tsp vanilla extract\u003c/li>\n\u003cli>1/2 tsp white vinegar\u003c/li>\n\u003c/ul>\n\u003cul>\n\u003cem>Fruit and whipped cream\u003c/em>\n\u003cli>2 ripe nectarines or peeled peaches, halved, seeded, and cut into thin slices\u003c/li>\n\u003cli>12 oz fresh berries, such as raspberries or blackberries, halved if very large\u003c/li>\n\u003cli>4 tbsp superfine sugar\u003c/li>\n\u003cli>1/2 vanilla bean pod\u003c/li>\n\u003cli>1 cup heavy cream\u003c/li>\n\u003cli>1 tsp vanilla extract\u003c/li>\n\u003c/ul>\n\u003col>\n\u003cstrong>Instructions:\u003c/strong>\n\u003cli>To make the meringue, preheat the oven to 325F. Line a large rimmed baking sheet with parchment paper.\u003c/li>\n\u003cli>In the bowl of a mixer fitted with the whip attachment, beat the egg whites and salt on medium speed until they start to get foamy. Slowly add the 1 cup sugar, beating until the whites are stiff and glossy. Sift the cornstarch over the mixture and add the vanilla and vinegar. Beat just until incorporated. Do not overbeat.\u003c/li>\n\u003cfigure id=\"attachment_86842\" class=\"wp-caption aligncenter\" style=\"max-width: 1000px\">\u003ca href=\"http://ww2.kqed.org/bayareabites/wp-content/uploads/sites/24/2014/08/pavlovas-whipped1000.jpg\">\u003cimg src=\"http://ww2.kqed.org/bayareabites/wp-content/uploads/sites/24/2014/08/pavlovas-whipped1000.jpg\" alt=\"Beat until the whites are stiff and glossy. Photo: Wendy Goodfriend\" width=\"1000\" height=\"667\" class=\"size-full wp-image-86842\">\u003c/a>\u003cfigcaption class=\"wp-caption-text\">Beat until the whites are stiff and glossy. Photo: Wendy Goodfriend\u003c/figcaption>\u003c/figure>\n\u003cli>Spoon 6 to 8 dollops of the meringue onto the prepared baking sheet, dividing the mixture evenly and spacing them at least 1 or 2 inches apart. If you want to make 1 large meringue, spoon the entire mixture onto the prepared baking sheet. Use the back of the spoon to create an indentation in the center of each mound.\u003c/li>\n\u003cfigure id=\"attachment_86840\" class=\"wp-caption aligncenter\" style=\"max-width: 1000px\">\u003ca href=\"http://ww2.kqed.org/bayareabites/wp-content/uploads/sites/24/2014/08/pavlovas-hole1000.jpg\">\u003cimg src=\"http://ww2.kqed.org/bayareabites/wp-content/uploads/sites/24/2014/08/pavlovas-hole1000.jpg\" alt=\"Use the back of the spoon to create an indentation in the center of each mound. Photo: Wendy Goodfriend\" width=\"1000\" height=\"667\" class=\"size-full wp-image-86840\">\u003c/a>\u003cfigcaption class=\"wp-caption-text\">Use the back of the spoon to create an indentation in the center of each mound. Photo: Wendy Goodfriend\u003c/figcaption>\u003c/figure>\n\u003cli>Bake for 5 minutes, then reduce the oven temperature to 250F. Bake until crisp, about 1 hour for the individual meringues, or 1 1/2 hours for the large meringue. Turn off the oven and leave the meringue in the oven to cool completely, at least 2 hours or up to overnight.\u003c/li>\n\u003cfigure id=\"attachment_86829\" class=\"wp-caption aligncenter\" style=\"max-width: 1000px\">\u003ca href=\"http://ww2.kqed.org/bayareabites/wp-content/uploads/sites/24/2014/08/pavlovas-baking1000.jpg\">\u003cimg src=\"http://ww2.kqed.org/bayareabites/wp-content/uploads/sites/24/2014/08/pavlovas-baking1000.jpg\" alt=\"Bake until crisp, about 1 hour for the individual meringues. Photo: Wendy Goodfriend\" width=\"1000\" height=\"667\" class=\"size-full wp-image-86829\">\u003c/a>\u003cfigcaption class=\"wp-caption-text\">Bake until crisp, about 1 hour for the individual meringues. Photo: Wendy Goodfriend\u003c/figcaption>\u003c/figure>\n\u003cli>In a bowl, add the nectarine slices and berries. Sprinkle with 3 tbsp sugar. Using a small paring knife, split the vanilla bean in half lengthwise. Using the back of the knife, scrape out the seeds and add to the bowl of fruit. Toss until well combined. Let sit for about 30 minutes to macerate.\u003c/li>\n\u003cfigure id=\"attachment_86839\" class=\"wp-caption aligncenter\" style=\"max-width: 1000px\">\u003ca href=\"http://ww2.kqed.org/bayareabites/wp-content/uploads/sites/24/2014/08/pavlovas-fruit1000.jpg\">\u003cimg src=\"http://ww2.kqed.org/bayareabites/wp-content/uploads/sites/24/2014/08/pavlovas-fruit1000.jpg\" alt=\"In a bowl, add the nectarine slices and berries. Sprinkle with 3 tbsp sugar. Photo: Wendy Goodfriend\" width=\"1000\" height=\"667\" class=\"size-full wp-image-86839\">\u003c/a>\u003cfigcaption class=\"wp-caption-text\">In a bowl, add the nectarine slices and berries. Sprinkle with 3 tbsp sugar. Photo: Wendy Goodfriend\u003c/figcaption>\u003c/figure>\n\u003cli>In a bowl, beat the cream, 2 tbsp sugar, and vanilla extract until medium-soft peaks form. Do not overbeat.\u003c/li>\n\u003cfigure id=\"attachment_86832\" class=\"wp-caption aligncenter\" style=\"max-width: 1000px\">\u003ca href=\"http://ww2.kqed.org/bayareabites/wp-content/uploads/sites/24/2014/08/pavlovas-fillhole1000b.jpg\">\u003cimg src=\"http://ww2.kqed.org/bayareabites/wp-content/uploads/sites/24/2014/08/pavlovas-fillhole1000b.jpg\" alt=\"Spoon whipped cream into the meringues. Photo: Wendy Goodfriend\" width=\"1000\" height=\"667\" class=\"size-full wp-image-86832\">\u003c/a>\u003cfigcaption class=\"wp-caption-text\">Spoon whipped cream into the meringues. Photo: Wendy Goodfriend\u003c/figcaption>\u003c/figure>\n\u003cfigure id=\"attachment_86827\" class=\"wp-caption aligncenter\" style=\"max-width: 1000px\">\u003ca href=\"http://ww2.kqed.org/bayareabites/wp-content/uploads/sites/24/2014/08/pavlovas-addfruit1000.jpg\">\u003cimg src=\"http://ww2.kqed.org/bayareabites/wp-content/uploads/sites/24/2014/08/pavlovas-addfruit1000.jpg\" alt=\"Top with spoonfuls of the fruit with juices. Photo: Wendy Goodfriend\" width=\"1000\" height=\"667\" class=\"size-full wp-image-86827\">\u003c/a>\u003cfigcaption class=\"wp-caption-text\">Top with spoonfuls of the fruit with juices. Photo: Wendy Goodfriend\u003c/figcaption>\u003c/figure>\n\u003cli>To serve, divide the individual meringues among dessert plates (or place the large one on a serving platter). Divide the whipped cream amongst them, then top with spoonfuls of the fruit with juices. Serve right away.\u003c/li>\n\u003cfigure id=\"attachment_86837\" class=\"wp-caption aligncenter\" style=\"max-width: 1000px\">\u003ca href=\"http://ww2.kqed.org/bayareabites/wp-content/uploads/sites/24/2014/08/pavlovas-finish1000c.jpg\">\u003cimg src=\"http://ww2.kqed.org/bayareabites/wp-content/uploads/sites/24/2014/08/pavlovas-finish1000c.jpg\" alt=\"Crispy-Chewy Vanilla Pavlovas with Whipped Cream and Vanilla-Scented Nectarines and Berries. Photo: Wendy Goodfriend\" width=\"1000\" height=\"667\" class=\"size-full wp-image-86837\">\u003c/a>\u003cfigcaption class=\"wp-caption-text\">Serve the Crispy-Chewy Vanilla Pavlovas with Whipped Cream and Vanilla-Scented Nectarines and Berries right away. Photo: \u003ca href=\"http://ww2.kqed.org/bayareabites/author/wendy-goodfriend/\">Wendy Goodfriend\u003c/a>\u003c/figcaption>\u003c/figure>\n\u003c/ol>\n\u003cp>[ad fullwidth]\u003c/p>\u003cp>\u003c/p>\n","blocks":[],"excerpt":"Crispy-chewy meringue nests envelop whipped cream and vanilla-scented summer fruit for an ethereal, and gluten-free dessert that is impossible to stop eating.","status":"publish","parent":0,"modified":1555456510,"stats":{"hasAudio":false,"hasVideo":false,"hasChartOrMap":false,"iframeSrcs":[],"hasGoogleForm":false,"hasGallery":false,"hasHearkenModule":false,"hasPolis":false,"paragraphCount":9,"wordCount":734},"headData":{"title":"Bet You Can't Stop Eating These: Vanilla Pavlovas with Summer Nectarines, Berries, and Cream | KQED","description":"Crispy-chewy meringue nests envelop whipped cream and vanilla-scented summer fruit for an ethereal, and gluten-free dessert that is impossible to stop eating.","ogTitle":"","ogDescription":"","ogImgId":"","twTitle":"","twDescription":"","twImgId":"","schema":{"@context":"http://schema.org","@type":"Article","headline":"Bet You Can't Stop Eating These: Vanilla Pavlovas with Summer Nectarines, Berries, and Cream","datePublished":"2014-08-28T15:12:33.000Z","dateModified":"2019-04-16T23:15:10.000Z","image":"https://cdn.kqed.org/wp-content/uploads/2020/02/KQED-OG-Image@1x.png"}},"disqusIdentifier":"86203 http://blogs.kqed.org/bayareabites/?p=86203","disqusUrl":"https://ww2.kqed.org/bayareabites/2014/08/28/bet-you-cant-stop-eating-these-vanilla-pavlovas-with-summer-nectarines-berries-and-cream/","disqusTitle":"Bet You Can't Stop Eating These: Vanilla Pavlovas with Summer Nectarines, Berries, and Cream","path":"/bayareabites/86203/bet-you-cant-stop-eating-these-vanilla-pavlovas-with-summer-nectarines-berries-and-cream","audioTrackLength":null,"parsedContent":[{"type":"contentString","content":"\u003cdiv class=\"post-body\">\u003cp>\u003cfigure id=\"attachment_86834\" class=\"wp-caption aligncenter\" style=\"max-width: 1000px\">\u003ca href=\"http://ww2.kqed.org/bayareabites/wp-content/uploads/sites/24/2014/08/pavlovas-finish1000.jpg\">\u003cimg src=\"http://ww2.kqed.org/bayareabites/wp-content/uploads/sites/24/2014/08/pavlovas-finish1000.jpg\" alt=\"Crispy-Chewy Vanilla Pavlovas with Whipped Cream and Vanilla-Scented Nectarines and Berries. Photo: Wendy Goodfriend\" width=\"1000\" height=\"667\" class=\"size-full wp-image-86834\">\u003c/a>\u003cfigcaption class=\"wp-caption-text\">Crispy-Chewy Vanilla Pavlovas with Whipped Cream and Vanilla-Scented Nectarines and Berries. Photo: \u003ca href=\"http://ww2.kqed.org/bayareabites/author/wendy-goodfriend/\">Wendy Goodfriend\u003c/a>\u003c/figcaption>\u003c/figure>\n\u003cp>\u003cstrong>Warning:\u003c/strong> this dessert will make you completely lose control. You will take one bite, then another, then another, and before you know it you will have eaten two of the enticing little flirts. Not that that happened to me. Nope. \u003c/p>\n\u003cp>\u003ca href=\"http://en.wikipedia.org/wiki/Pavlova_(food)\" target=\"_blank\">\u003cstrong>Pavlova\u003c/strong>\u003c/a>, a dessert that originated in New Zealand or Australia (but is loved the world over) and named after Russian ballerina Anna Pavlova, consists of a crisp-on-the-outside and chewy-on-the-inside vanilla meringue nest that embraces billowy whipped cream. Sometimes, it features layers of tart citrus curd and whipped cream. The whole darn thing is often topped off with juicy, ripe fruit.\u003c/p>\n\u003cp>Here, I’ve made these light-as-a-feather, pillowy meringues into individual desserts, but you can make one large one if you like. The whipped cream adds a lovely contrast of texture. And the sweet summer berries and nectarines, delicately scented with vanilla bean seeds, give it flavorful freshness.\u003c/p>\n\u003cp>You can use just about any fruit for these, just be sure it’s of the season, fragrant, and perfectly ripe. These do not hold well so once you put them together you’ll want to serve them right away.\u003c/p>\n\u003cp>Take note! \u003cstrong>These are gluten-free!\u003c/strong>\u003c/p>\n\u003cfigure id=\"attachment_86841\" class=\"wp-caption aligncenter\" style=\"max-width: 1000px\">\u003ca href=\"http://ww2.kqed.org/bayareabites/wp-content/uploads/sites/24/2014/08/pavlovas-ingredients1000.jpg\">\u003cimg src=\"http://ww2.kqed.org/bayareabites/wp-content/uploads/sites/24/2014/08/pavlovas-ingredients1000.jpg\" alt=\"Ingredients for Crispy-Chewy Vanilla Pavlovas with Whipped Cream and Vanilla-Scented Nectarines and Berries. Photo: Wendy Goodfriend\" width=\"1000\" height=\"667\" class=\"size-full wp-image-86841\">\u003c/a>\u003cfigcaption class=\"wp-caption-text\">Ingredients for Crispy-Chewy Vanilla Pavlovas with Whipped Cream and Vanilla-Scented Nectarines and Berries. Photo: Wendy Goodfriend\u003c/figcaption>\u003c/figure>\n\u003ch3>Recipe: Crispy-Chewy Vanilla Pavlovas with Whipped Cream and Vanilla-Scented Nectarines and Berries\u003c/h3>\n\u003cp>\u003cem>Makes 6 to 8 servings\u003c/em>\u003c/p>\n\u003cul>\n\u003cstrong>Ingredients:\u003c/strong>\n\u003cp>\u003cem>Meringue\u003c/em>\u003c/p>\n\u003cli>4 large egg whites\u003c/li>\n\u003cli>Pinch of kosher salt\u003c/li>\n\u003cli>1 cup superfine sugar\u003c/li>\n\u003cli>1 tsp cornstarch\u003c/li>\n\u003cli>1 tsp vanilla extract\u003c/li>\n\u003cli>1/2 tsp white vinegar\u003c/li>\n\u003c/ul>\n\u003cul>\n\u003cem>Fruit and whipped cream\u003c/em>\n\u003cli>2 ripe nectarines or peeled peaches, halved, seeded, and cut into thin slices\u003c/li>\n\u003cli>12 oz fresh berries, such as raspberries or blackberries, halved if very large\u003c/li>\n\u003cli>4 tbsp superfine sugar\u003c/li>\n\u003cli>1/2 vanilla bean pod\u003c/li>\n\u003cli>1 cup heavy cream\u003c/li>\n\u003cli>1 tsp vanilla extract\u003c/li>\n\u003c/ul>\n\u003col>\n\u003cstrong>Instructions:\u003c/strong>\n\u003cli>To make the meringue, preheat the oven to 325F. Line a large rimmed baking sheet with parchment paper.\u003c/li>\n\u003cli>In the bowl of a mixer fitted with the whip attachment, beat the egg whites and salt on medium speed until they start to get foamy. Slowly add the 1 cup sugar, beating until the whites are stiff and glossy. Sift the cornstarch over the mixture and add the vanilla and vinegar. Beat just until incorporated. Do not overbeat.\u003c/li>\n\u003cfigure id=\"attachment_86842\" class=\"wp-caption aligncenter\" style=\"max-width: 1000px\">\u003ca href=\"http://ww2.kqed.org/bayareabites/wp-content/uploads/sites/24/2014/08/pavlovas-whipped1000.jpg\">\u003cimg src=\"http://ww2.kqed.org/bayareabites/wp-content/uploads/sites/24/2014/08/pavlovas-whipped1000.jpg\" alt=\"Beat until the whites are stiff and glossy. Photo: Wendy Goodfriend\" width=\"1000\" height=\"667\" class=\"size-full wp-image-86842\">\u003c/a>\u003cfigcaption class=\"wp-caption-text\">Beat until the whites are stiff and glossy. Photo: Wendy Goodfriend\u003c/figcaption>\u003c/figure>\n\u003cli>Spoon 6 to 8 dollops of the meringue onto the prepared baking sheet, dividing the mixture evenly and spacing them at least 1 or 2 inches apart. If you want to make 1 large meringue, spoon the entire mixture onto the prepared baking sheet. Use the back of the spoon to create an indentation in the center of each mound.\u003c/li>\n\u003cfigure id=\"attachment_86840\" class=\"wp-caption aligncenter\" style=\"max-width: 1000px\">\u003ca href=\"http://ww2.kqed.org/bayareabites/wp-content/uploads/sites/24/2014/08/pavlovas-hole1000.jpg\">\u003cimg src=\"http://ww2.kqed.org/bayareabites/wp-content/uploads/sites/24/2014/08/pavlovas-hole1000.jpg\" alt=\"Use the back of the spoon to create an indentation in the center of each mound. Photo: Wendy Goodfriend\" width=\"1000\" height=\"667\" class=\"size-full wp-image-86840\">\u003c/a>\u003cfigcaption class=\"wp-caption-text\">Use the back of the spoon to create an indentation in the center of each mound. Photo: Wendy Goodfriend\u003c/figcaption>\u003c/figure>\n\u003cli>Bake for 5 minutes, then reduce the oven temperature to 250F. Bake until crisp, about 1 hour for the individual meringues, or 1 1/2 hours for the large meringue. Turn off the oven and leave the meringue in the oven to cool completely, at least 2 hours or up to overnight.\u003c/li>\n\u003cfigure id=\"attachment_86829\" class=\"wp-caption aligncenter\" style=\"max-width: 1000px\">\u003ca href=\"http://ww2.kqed.org/bayareabites/wp-content/uploads/sites/24/2014/08/pavlovas-baking1000.jpg\">\u003cimg src=\"http://ww2.kqed.org/bayareabites/wp-content/uploads/sites/24/2014/08/pavlovas-baking1000.jpg\" alt=\"Bake until crisp, about 1 hour for the individual meringues. Photo: Wendy Goodfriend\" width=\"1000\" height=\"667\" class=\"size-full wp-image-86829\">\u003c/a>\u003cfigcaption class=\"wp-caption-text\">Bake until crisp, about 1 hour for the individual meringues. Photo: Wendy Goodfriend\u003c/figcaption>\u003c/figure>\n\u003cli>In a bowl, add the nectarine slices and berries. Sprinkle with 3 tbsp sugar. Using a small paring knife, split the vanilla bean in half lengthwise. Using the back of the knife, scrape out the seeds and add to the bowl of fruit. Toss until well combined. Let sit for about 30 minutes to macerate.\u003c/li>\n\u003cfigure id=\"attachment_86839\" class=\"wp-caption aligncenter\" style=\"max-width: 1000px\">\u003ca href=\"http://ww2.kqed.org/bayareabites/wp-content/uploads/sites/24/2014/08/pavlovas-fruit1000.jpg\">\u003cimg src=\"http://ww2.kqed.org/bayareabites/wp-content/uploads/sites/24/2014/08/pavlovas-fruit1000.jpg\" alt=\"In a bowl, add the nectarine slices and berries. Sprinkle with 3 tbsp sugar. Photo: Wendy Goodfriend\" width=\"1000\" height=\"667\" class=\"size-full wp-image-86839\">\u003c/a>\u003cfigcaption class=\"wp-caption-text\">In a bowl, add the nectarine slices and berries. Sprinkle with 3 tbsp sugar. Photo: Wendy Goodfriend\u003c/figcaption>\u003c/figure>\n\u003cli>In a bowl, beat the cream, 2 tbsp sugar, and vanilla extract until medium-soft peaks form. Do not overbeat.\u003c/li>\n\u003cfigure id=\"attachment_86832\" class=\"wp-caption aligncenter\" style=\"max-width: 1000px\">\u003ca href=\"http://ww2.kqed.org/bayareabites/wp-content/uploads/sites/24/2014/08/pavlovas-fillhole1000b.jpg\">\u003cimg src=\"http://ww2.kqed.org/bayareabites/wp-content/uploads/sites/24/2014/08/pavlovas-fillhole1000b.jpg\" alt=\"Spoon whipped cream into the meringues. Photo: Wendy Goodfriend\" width=\"1000\" height=\"667\" class=\"size-full wp-image-86832\">\u003c/a>\u003cfigcaption class=\"wp-caption-text\">Spoon whipped cream into the meringues. Photo: Wendy Goodfriend\u003c/figcaption>\u003c/figure>\n\u003cfigure id=\"attachment_86827\" class=\"wp-caption aligncenter\" style=\"max-width: 1000px\">\u003ca href=\"http://ww2.kqed.org/bayareabites/wp-content/uploads/sites/24/2014/08/pavlovas-addfruit1000.jpg\">\u003cimg src=\"http://ww2.kqed.org/bayareabites/wp-content/uploads/sites/24/2014/08/pavlovas-addfruit1000.jpg\" alt=\"Top with spoonfuls of the fruit with juices. Photo: Wendy Goodfriend\" width=\"1000\" height=\"667\" class=\"size-full wp-image-86827\">\u003c/a>\u003cfigcaption class=\"wp-caption-text\">Top with spoonfuls of the fruit with juices. Photo: Wendy Goodfriend\u003c/figcaption>\u003c/figure>\n\u003cli>To serve, divide the individual meringues among dessert plates (or place the large one on a serving platter). Divide the whipped cream amongst them, then top with spoonfuls of the fruit with juices. Serve right away.\u003c/li>\n\u003cfigure id=\"attachment_86837\" class=\"wp-caption aligncenter\" style=\"max-width: 1000px\">\u003ca href=\"http://ww2.kqed.org/bayareabites/wp-content/uploads/sites/24/2014/08/pavlovas-finish1000c.jpg\">\u003cimg src=\"http://ww2.kqed.org/bayareabites/wp-content/uploads/sites/24/2014/08/pavlovas-finish1000c.jpg\" alt=\"Crispy-Chewy Vanilla Pavlovas with Whipped Cream and Vanilla-Scented Nectarines and Berries. Photo: Wendy Goodfriend\" width=\"1000\" height=\"667\" class=\"size-full wp-image-86837\">\u003c/a>\u003cfigcaption class=\"wp-caption-text\">Serve the Crispy-Chewy Vanilla Pavlovas with Whipped Cream and Vanilla-Scented Nectarines and Berries right away. Photo: \u003ca href=\"http://ww2.kqed.org/bayareabites/author/wendy-goodfriend/\">Wendy Goodfriend\u003c/a>\u003c/figcaption>\u003c/figure>\n\u003c/ol>\n\u003cp>\u003c/p>\u003c/div>","attributes":{"named":{},"numeric":[]}},{"type":"component","content":"","name":"ad","attributes":{"named":{"label":"fullwidth"},"numeric":["fullwidth"]}},{"type":"contentString","content":"\u003cdiv class=\"post-body\">\u003cp>\u003c/p>\u003cp>\u003c/p>\n\u003c/div>\u003c/p>","attributes":{"named":{},"numeric":[]}}],"link":"/bayareabites/86203/bet-you-cant-stop-eating-these-vanilla-pavlovas-with-summer-nectarines-berries-and-cream","authors":["5015","5014"],"categories":["bayareabites_1516","bayareabites_752","bayareabites_1653","bayareabites_12550","bayareabites_1763","bayareabites_1246","bayareabites_12"],"tags":["bayareabites_13695","bayareabites_1182","bayareabites_49","bayareabites_244","bayareabites_138","bayareabites_11034","bayareabites_11765","bayareabites_13696","bayareabites_8293","bayareabites_13694","bayareabites_3682"],"featImg":"bayareabites_86843","label":"bayareabites"},"bayareabites_85133":{"type":"posts","id":"bayareabites_85133","meta":{"index":"posts_1591205157","site":"bayareabites","id":"85133","score":null,"sort":[1406095445000]},"guestAuthors":[],"slug":"fruit-recall-hits-trader-joes-costco-wal-mart-stores","title":"Fruit Recall Hits Trader Joe's, Costco, Wal-Mart Stores","publishDate":1406095445,"format":"aside","headTitle":"Bay Area Bites | KQED Food","labelTerm":{"site":"bayareabites"},"content":"\u003cfigure id=\"attachment_85143\" class=\"wp-caption alignleft\" style=\"max-width: 250px\">\u003ca href=\"http://www.fda.gov/Safety/Recalls/ucm405945.htm\">\u003cimg src=\"http://ww2.kqed.org/bayareabites/wp-content/uploads/sites/24/2014/07/sweet-2-eat-recall-cropped.jpg\" alt=\"View photos of recalled products at FDA site\" width=\"250\" class=\"size-full wp-image-85143\">\u003c/a>\u003cfigcaption class=\"wp-caption-text\">\u003ca href=\"http://www.fda.gov/Safety/Recalls/ucm405945.htm\">View photos of recalled products at FDA site\u003c/a>\u003c/figcaption>\u003c/figure>\n\u003cp>by \u003ca href=\"http://www.npr.org/people/14562108/bill-chappell\" target=\"_blank\">Bill Chappell\u003c/a>, \u003ca href=\"http://www.npr.org/blogs/thetwo-way/2014/07/22/334111630/fruit-recall-hits-trader-joe-s-costco-walmart-stores\" target=\"_blank\">The Two-Way at NPR News\u003c/a> (7/22/14)\u003c/p>\n\u003cp>Fears of possible listeria contamination have led to a national recall of whole peaches, nectarines and other fruits packed by a California company. No illnesses have been reported, but the Wawona Packing Company has told retailers such as Wal-Mart, Costco and Trader Joe's to pull its products.\u003c/p>\n\u003cp>The recall applies to \"certain lots of whole peaches (white and yellow), nectarines (white and yellow), plums and pluots packed between June 1, 2014 through July 12, 2014,\" according to a recall bulletin from the \u003ca href=\"http://www.fda.gov/Safety/Recalls/ucm405943.htm\">Food and Drug Administration\u003c/a>.\u003c/p>\n\u003cp>The FDA has posted \u003ca href=\"http://www.fda.gov/Safety/Recalls/ucm405945.htm\">product images\u003c/a> of the recalled fruits' packaging.\u003c/p>\n\u003cp>\"Fruit sold as individual pieces should have a sticker on it; the recalled product stickers will read 'Sweet2Eat,' \" Wawona says.\u003c/p>\n\u003cp>[ad fullwidth]\u003c/p>\n\u003cp>Wawona sells produce to national wholesalers; as of Tuesday, \"\u003ca href=\"http://www.costco.com/wcsstore/CostcoUSBCCatalogAssetStore/Attachment/recalls/140721-Wawona-Packing-Co-FDA-PRESS-RELEASE.pdf\" target=\"_blank\">Costco\u003c/a>, \u003ca href=\"http://www.traderjoes.com/about/customer-updates-responses.asp?i=108\" target=\"_blank\">Trader Joe's\u003c/a>, \u003ca href=\"https://www.kroger.com/recall_alerts\" target=\"_blank\">Kroger\u003c/a> and the \u003ca href=\"http://corporate.walmart.com/recalls\" target=\"_blank\">Walmart Corp\u003c/a>. — which operates Walmart and Sam's Club stores, have all posted notices about the fruit recall on their websites,\" \u003ca href=\"http://www.cnn.com/2014/07/22/health/costco-fruit-recall/index.html?sr=fb072214fruitrecall12pStorylink\">CNN reports\u003c/a>.\u003c/p>\n\u003cp>Wawona reportedly detected listeria in tests of its own equipment after being alerted to a possible contamination by an Australian customer; it says it has eliminated the problem at its plant. The company posted a \u003ca href=\"http://www.wawonapacking.com/RecallDatesAndCodes.pdf\">list of \"lot codes\"\u003c/a> to help identify the produce in question.\u003c/p>\n\u003cp>\"We are aware of no illnesses related to the consumption of these products\" company President Brent Smittcamp said in a news release. \"By taking the precautionary step of recalling product, we will minimize even the slightest risk to public health, and that is our priority.\"\u003c/p>\n\u003cp>\u003cem>Listeria monocytogenes\u003c/em> can cause serious illnesses and even death in those at the most risk: young children and those with weakened immune systems. It can also pose serious risks to pregnant women.\u003c/p>\n\u003cp>In 2011, listeria \u003ca href=\"http://www.npr.org/blogs/thesalt/2013/08/14/211784739/listeria-outbreak-still-haunts-colorados-cantaloupe-growers\">killed 33 people in 28 states\u003c/a> — a devastating outbreak that stands as one of the most deadly in U.S. history.\u003c/p>\n\u003cp>As the National Institutes of Health \u003ca href=\"http://www.nlm.nih.gov/medlineplus/listeriainfections.html\">reminds us\u003c/a>, listeria is a bacteria that can pose particular problems because it can keep growing even in foods that are refrigerated.\u003c/p>\n\u003cp>The FDA adds, \"Consumers with questions may contact Wawona Packing at 1-888-232-9912, M-F, 8am-5pm ET, or visit \u003ca href=\"http://www.wawonapacking.com/\" target=\"_blank\">www.wawonapacking.com\u003c/a>.\" \u003c/p>\n\u003cp>\u003c/p>\n\u003cp>\u003cem>Copyright 2014 \u003ca href=\"http://www.npr.org/\" target=\"_blank\">NPR\u003c/a>.\u003c/em> \u003c/p>\n\n","blocks":[],"excerpt":"The recall applies to \"certain lots of whole peaches (white and yellow), nectarines (white and yellow), plums and pluots\" from a California packing company, the FDA says.","status":"publish","parent":0,"modified":1406095445,"stats":{"hasAudio":false,"hasVideo":false,"hasChartOrMap":false,"iframeSrcs":[],"hasGoogleForm":false,"hasGallery":false,"hasHearkenModule":false,"hasPolis":false,"paragraphCount":15,"wordCount":385},"headData":{"title":"Fruit Recall Hits Trader Joe's, Costco, Wal-Mart Stores | KQED","description":"The recall applies to "certain lots of whole peaches (white and yellow), nectarines (white and yellow), plums and pluots" from a California packing company, the FDA says.","ogTitle":"","ogDescription":"","ogImgId":"","twTitle":"","twDescription":"","twImgId":"","schema":{"@context":"http://schema.org","@type":"Article","headline":"Fruit Recall Hits Trader Joe's, Costco, Wal-Mart Stores","datePublished":"2014-07-23T06:04:05.000Z","dateModified":"2014-07-23T06:04:05.000Z","image":"https://cdn.kqed.org/wp-content/uploads/2020/02/KQED-OG-Image@1x.png"}},"disqusIdentifier":"85133 http://blogs.kqed.org/bayareabites/?p=85133","disqusUrl":"https://ww2.kqed.org/bayareabites/2014/07/22/fruit-recall-hits-trader-joes-costco-wal-mart-stores/","disqusTitle":"Fruit Recall Hits Trader Joe's, Costco, Wal-Mart Stores","nprByline":"Bill Chappell","nprStoryId":"334111630","nprApiLink":"http://api.npr.org/query?id=334111630&apiKey=MDAxOTAwOTE4MDEyMTkxMDAzNjczZDljZA004","nprHtmlLink":"http://www.npr.org/blogs/thetwo-way/2014/07/22/334111630/fruit-recall-hits-trader-joe-s-costco-walmart-stores?ft=3&f=334111630","nprRetrievedStory":"1","nprPubDate":"Tue, 22 Jul 2014 20:13:00 -0400","nprStoryDate":"Tue, 22 Jul 2014 20:03:00 -0400","nprLastModifiedDate":"Tue, 22 Jul 2014 20:13:23 -0400","path":"/bayareabites/85133/fruit-recall-hits-trader-joes-costco-wal-mart-stores","audioTrackLength":null,"parsedContent":[{"type":"contentString","content":"\u003cdiv class=\"post-body\">\u003cp>\u003cfigure id=\"attachment_85143\" class=\"wp-caption alignleft\" style=\"max-width: 250px\">\u003ca href=\"http://www.fda.gov/Safety/Recalls/ucm405945.htm\">\u003cimg src=\"http://ww2.kqed.org/bayareabites/wp-content/uploads/sites/24/2014/07/sweet-2-eat-recall-cropped.jpg\" alt=\"View photos of recalled products at FDA site\" width=\"250\" class=\"size-full wp-image-85143\">\u003c/a>\u003cfigcaption class=\"wp-caption-text\">\u003ca href=\"http://www.fda.gov/Safety/Recalls/ucm405945.htm\">View photos of recalled products at FDA site\u003c/a>\u003c/figcaption>\u003c/figure>\n\u003cp>by \u003ca href=\"http://www.npr.org/people/14562108/bill-chappell\" target=\"_blank\">Bill Chappell\u003c/a>, \u003ca href=\"http://www.npr.org/blogs/thetwo-way/2014/07/22/334111630/fruit-recall-hits-trader-joe-s-costco-walmart-stores\" target=\"_blank\">The Two-Way at NPR News\u003c/a> (7/22/14)\u003c/p>\n\u003cp>Fears of possible listeria contamination have led to a national recall of whole peaches, nectarines and other fruits packed by a California company. No illnesses have been reported, but the Wawona Packing Company has told retailers such as Wal-Mart, Costco and Trader Joe's to pull its products.\u003c/p>\n\u003cp>The recall applies to \"certain lots of whole peaches (white and yellow), nectarines (white and yellow), plums and pluots packed between June 1, 2014 through July 12, 2014,\" according to a recall bulletin from the \u003ca href=\"http://www.fda.gov/Safety/Recalls/ucm405943.htm\">Food and Drug Administration\u003c/a>.\u003c/p>\n\u003cp>The FDA has posted \u003ca href=\"http://www.fda.gov/Safety/Recalls/ucm405945.htm\">product images\u003c/a> of the recalled fruits' packaging.\u003c/p>\n\u003cp>\"Fruit sold as individual pieces should have a sticker on it; the recalled product stickers will read 'Sweet2Eat,' \" Wawona says.\u003c/p>\n\u003cp>\u003c/p>\u003c/div>","attributes":{"named":{},"numeric":[]}},{"type":"component","content":"","name":"ad","attributes":{"named":{"label":"fullwidth"},"numeric":["fullwidth"]}},{"type":"contentString","content":"\u003cdiv class=\"post-body\">\u003cp>\u003c/p>\n\u003cp>Wawona sells produce to national wholesalers; as of Tuesday, \"\u003ca href=\"http://www.costco.com/wcsstore/CostcoUSBCCatalogAssetStore/Attachment/recalls/140721-Wawona-Packing-Co-FDA-PRESS-RELEASE.pdf\" target=\"_blank\">Costco\u003c/a>, \u003ca href=\"http://www.traderjoes.com/about/customer-updates-responses.asp?i=108\" target=\"_blank\">Trader Joe's\u003c/a>, \u003ca href=\"https://www.kroger.com/recall_alerts\" target=\"_blank\">Kroger\u003c/a> and the \u003ca href=\"http://corporate.walmart.com/recalls\" target=\"_blank\">Walmart Corp\u003c/a>. — which operates Walmart and Sam's Club stores, have all posted notices about the fruit recall on their websites,\" \u003ca href=\"http://www.cnn.com/2014/07/22/health/costco-fruit-recall/index.html?sr=fb072214fruitrecall12pStorylink\">CNN reports\u003c/a>.\u003c/p>\n\u003cp>Wawona reportedly detected listeria in tests of its own equipment after being alerted to a possible contamination by an Australian customer; it says it has eliminated the problem at its plant. The company posted a \u003ca href=\"http://www.wawonapacking.com/RecallDatesAndCodes.pdf\">list of \"lot codes\"\u003c/a> to help identify the produce in question.\u003c/p>\n\u003cp>\"We are aware of no illnesses related to the consumption of these products\" company President Brent Smittcamp said in a news release. \"By taking the precautionary step of recalling product, we will minimize even the slightest risk to public health, and that is our priority.\"\u003c/p>\n\u003cp>\u003cem>Listeria monocytogenes\u003c/em> can cause serious illnesses and even death in those at the most risk: young children and those with weakened immune systems. It can also pose serious risks to pregnant women.\u003c/p>\n\u003cp>In 2011, listeria \u003ca href=\"http://www.npr.org/blogs/thesalt/2013/08/14/211784739/listeria-outbreak-still-haunts-colorados-cantaloupe-growers\">killed 33 people in 28 states\u003c/a> — a devastating outbreak that stands as one of the most deadly in U.S. history.\u003c/p>\n\u003cp>As the National Institutes of Health \u003ca href=\"http://www.nlm.nih.gov/medlineplus/listeriainfections.html\">reminds us\u003c/a>, listeria is a bacteria that can pose particular problems because it can keep growing even in foods that are refrigerated.\u003c/p>\n\u003cp>The FDA adds, \"Consumers with questions may contact Wawona Packing at 1-888-232-9912, M-F, 8am-5pm ET, or visit \u003ca href=\"http://www.wawonapacking.com/\" target=\"_blank\">www.wawonapacking.com\u003c/a>.\" \u003c/p>\n\u003cp>\u003c/p>\n\u003cp>\u003cem>Copyright 2014 \u003ca href=\"http://www.npr.org/\" target=\"_blank\">NPR\u003c/a>.\u003c/em> \u003c/p>\n\n\u003c/div>\u003c/p>","attributes":{"named":{},"numeric":[]}}],"link":"/bayareabites/85133/fruit-recall-hits-trader-joes-costco-wal-mart-stores","authors":["byline_bayareabites_85133"],"categories":["bayareabites_1245","bayareabites_10916","bayareabites_2035"],"tags":["bayareabites_13609","bayareabites_11936","bayareabites_2608","bayareabites_244","bayareabites_12219","bayareabites_8293","bayareabites_2267","bayareabites_348","bayareabites_10713","bayareabites_888","bayareabites_11465","bayareabites_1829","bayareabites_13608"],"featImg":"bayareabites_85143","label":"bayareabites"},"bayareabites_82397":{"type":"posts","id":"bayareabites_82397","meta":{"index":"posts_1591205157","site":"bayareabites","id":"82397","score":null,"sort":[1400773869000]},"guestAuthors":[],"slug":"on-the-trail-of-durian-southeast-asias-creme-brulee-on-a-tree","title":"On the Trail of Durian, Southeast Asia's 'Crème Brûlée on a Tree'","publishDate":1400773869,"format":"aside","headTitle":"Bay Area Bites | KQED Food","labelTerm":{"site":"bayareabites"},"content":"\u003cfigure id=\"attachment_82398\" class=\"wp-caption aligncenter\" style=\"max-width: 1800px\">\u003ca href=\"http://ww2.kqed.org/bayareabites/wp-content/uploads/sites/24/2014/05/red-graveolens-edit1_enl-29f6a7fbca7717830389f8023945803dfbb65a7b.jpg\">\u003cimg class=\"size-full wp-image-82398\" src=\"http://ww2.kqed.org/bayareabites/wp-content/uploads/sites/24/2014/05/red-graveolens-edit1_enl-29f6a7fbca7717830389f8023945803dfbb65a7b.jpg\" alt=\"The inside of the Graveolens, a variety of durian that grows in the southernmost parts of Thailand, is sticky and cheese-like. Photo: Courtesy of Lindsay Gasik\" width=\"1800\" height=\"1198\">\u003c/a>\u003cfigcaption class=\"wp-caption-text\">The inside of the Graveolens, a variety of durian that grows in the southernmost parts of Thailand, is sticky and cheese-like. Photo: Courtesy of Lindsay Gasik\u003c/figcaption>\u003c/figure>\n\u003cp>Post by Alastair Bland, \u003ca href=\"http://www.npr.org/blogs/thesalt/2014/05/21/314529503/on-the-trail-of-durian-southeast-asias-cr-me-br-l-e-on-a-tree\" target=\"_blank\" rel=\"noopener\">The Salt at NPR Food\u003c/a> (5/21/2014)\u003c/p>\n\u003cp>What if a single taste of one fruit — in this case, the durian — changed the course of your entire life?\u003c/p>\n\u003cp>That's what happened to Lindsay Gasik and Rob Culclasure, a young couple who visited an Asian grocery store in Eugene, Ore., in 2009 in search of the football-sized fruit with thick, spiky skin. They were curious to try it after hearing that the durian's pungent smell and custard-like flesh had the power to drive people delirious with craving.\u003c/p>\n\u003cfigure id=\"attachment_82399\" class=\"wp-caption aligncenter\" style=\"max-width: 1500px\">\u003ca href=\"http://ww2.kqed.org/bayareabites/wp-content/uploads/sites/24/2014/05/profile-pic-edit-82f3a2cec9f74cc04f66a9528c155a1a345200c3.jpg\">\u003cimg class=\"size-full wp-image-82399\" src=\"http://ww2.kqed.org/bayareabites/wp-content/uploads/sites/24/2014/05/profile-pic-edit-82f3a2cec9f74cc04f66a9528c155a1a345200c3.jpg\" alt=\"Lindsay Gasik and Rob Culclasure moved to Asia in 2012 to pursue durians. Photo: Courtesy of Lindsay Gasik\" width=\"1500\" height=\"1124\">\u003c/a>\u003cfigcaption class=\"wp-caption-text\">Lindsay Gasik and Rob Culclasure moved to Asia in 2012 to pursue durians. Photo: Courtesy of Lindsay Gasik\u003c/figcaption>\u003c/figure>\n\u003cp>The moment Gasik and Culclasure inhaled the fruit's gassy aroma of fermented pineapple and onion and tasted its cool, creamy, vanilla-flavored flesh, they were hopelessly hooked. Now, after years of traveling through Southeast Asia tracking down and eating durian almost daily, they have become experts on the fruit. And for other travelers who catch durian fever, Gasik has written a \u003ca href=\"http://www.yearofthedurian.com/p/our-ebooks.html#.U3zZc3JdXTo\">durian travel guide to Thailand\u003c/a>, which comes out in June.\u003c/p>\n\u003cp>Five years into their obsession, Gasik tells The Salt they're as enthralled with the durian as ever.\u003c/p>\n\u003cp>[ad fullwidth]\u003c/p>\n\u003cp>\"It's very sensual — the thorny texture, intense aroma, bizarre appearance and amazing range of flavors found in no other fruit or natural food,\" Gasik tells us by email from Bangkok. \"Durian is the only fruit in the world that I know of that combines a very high sugar content with a high fat content. It's like crème brûlée on a tree.\"\u003c/p>\n\u003cfigure id=\"attachment_82400\" class=\"wp-caption aligncenter\" style=\"max-width: 1599px\">\u003ca href=\"http://ww2.kqed.org/bayareabites/wp-content/uploads/sites/24/2014/05/durian-tree-83ad8d1bc9d21a01cbc793a420c25f3d3c1dd58e.jpg\">\u003cimg class=\"size-full wp-image-82400\" src=\"http://ww2.kqed.org/bayareabites/wp-content/uploads/sites/24/2014/05/durian-tree-83ad8d1bc9d21a01cbc793a420c25f3d3c1dd58e.jpg\" alt=\"Durian fruit hangs from a tree. Courtesy of Lindsay Gasik\" width=\"1599\" height=\"1198\">\u003c/a>\u003cfigcaption class=\"wp-caption-text\">Durian fruit hangs from a tree. Courtesy of Lindsay Gasik\u003c/figcaption>\u003c/figure>\n\u003cp>Since the couple departed for Asia in 2012 to pursue durians nearly full-time, they've eaten the fruit in 13 countries, including Malaysia, Vietnam, Myanmar and Australia. Along the way, they visited remote orchards and wild jungles and enjoyed all-you-can-eat durian feasts at roadside stands. And they documented it all on their blog, \u003ca href=\"http://www.yearofthedurian.com/p/first-durian-start-here.html#.U3Zce2FOWT0\" target=\"_blank\" rel=\"noopener\">Year of the Durian\u003c/a>.\u003c/p>\n\u003cp>Thailand, they say, is ground zero for durian diversity and abundance. More than 200 varieties are grown here, and the country's orchards produce more durians by far than any other nation.\u003c/p>\n\u003cp>Thing is, most visitors to Thailand never experience the country's traditional durian culture of roadside stands and small farms open to the public.\u003c/p>\n\u003cp>\"So few travelers venture away from the tourist-friendly beaches and neon cities that great swaths of the country are left virtually untouched by the tourism industry and its vices,\" Gasik writes in \u003cem>The Durian Tourist's Guide to Thailand\u003c/em>. \"This is where durian grows.\"\u003c/p>\n\u003cp>The guide provides everything you need to know for a durian-centric vacation, like how to harvest the fruit on organic farms, avoid durians that have been doused by pesticides and even arrange lodging in idyllic orchard guesthouses.\u003c/p>\n\u003cp>In Nakhon Nayok, durian seekers can find an organic orchard where a dedicated farmer has preserved 50 rare varieties of the fruit, while Chantaburi province may be worth a visit for the annual World Durian Festival.\u003c/p>\n\u003cp>Seasons in the tropics are unpredictable, and fruit trees can be, too. This means you can't find durians just anywhere, anytime. In central and eastern Thailand, Gasik's guidebook tells us, durians are usually available March through June; in the south, durians ripen and drop from the trees almost all year long.\u003c/p>\n\u003cfigure id=\"attachment_82401\" class=\"wp-caption aligncenter\" style=\"max-width: 1200px\">\u003ca href=\"http://ww2.kqed.org/bayareabites/wp-content/uploads/sites/24/2014/05/longlaplae-edit_enl-9bf8b92f000fc53f7aac5c630221292efa1c2db1.jpg\">\u003cimg class=\"size-full wp-image-82401\" src=\"http://ww2.kqed.org/bayareabites/wp-content/uploads/sites/24/2014/05/longlaplae-edit_enl-9bf8b92f000fc53f7aac5c630221292efa1c2db1.jpg\" alt=\"The Longlaplae is a milder tasting durian with almost no aroma. Photo: Courtesy of Lindsay Gasik\" width=\"1200\" height=\"790\">\u003c/a>\u003cfigcaption class=\"wp-caption-text\">The Longlaplae is a milder tasting durian with almost no aroma. Photo: Courtesy of Lindsay Gasik\u003c/figcaption>\u003c/figure>\n\u003cp>The guide also provides some vocabulary and phraseology basics. \"\u003cem>Chun/Pom thong gan ja gin turian\u003c/em>,\" for instance, means \"I want to eat durian.\" That should help get you moving in the right direction once you've left the Bangkok airport.\u003c/p>\n\u003cp>You'll want Gasik's tips on the tact and etiquette of eating durians in Thailand, too.\u003c/p>\n\u003cp>\"[Eating durian with bare hands] is considered fairly bad manners,\" Gasik writes, so many locals use rubber gloves. If you have to go bare, don't shake hands or touch anyone until you've washed your hands.\u003c/p>\n\u003cfigure id=\"attachment_82402\" class=\"wp-caption aligncenter\" style=\"max-width: 1500px\">\u003ca href=\"http://ww2.kqed.org/bayareabites/wp-content/uploads/sites/24/2014/05/puangmanee-inside-edit-cbb5a9dacdc8775af41bb3fe6ecc2cf30b33ddd8.jpg\">\u003cimg class=\"size-full wp-image-82402\" src=\"http://ww2.kqed.org/bayareabites/wp-content/uploads/sites/24/2014/05/puangmanee-inside-edit-cbb5a9dacdc8775af41bb3fe6ecc2cf30b33ddd8.jpg\" alt=\"According to Gasik, the Puangmanee durian's flesh has "a smooth, chocolatey sensation." Courtesy of Lindsay Gasik\" width=\"1500\" height=\"1124\">\u003c/a>\u003cfigcaption class=\"wp-caption-text\">According to Gasik, the Puangmanee durian's flesh has \"a smooth, chocolatey sensation.\" Courtesy of Lindsay Gasik\u003c/figcaption>\u003c/figure>\n\u003cp>Nor should you take a durian into a closed public space; many people – even people who've been around durian their whole life — simply cannot bear the smell.\u003c/p>\n\u003cp>For durian beginners, the Monthong, a sweet and creamy variety grown for export to countries like the U.S., is a good starting point. The Longlaplae, too, has a mild, milky flavor and virtually no aroma.\u003c/p>\n\u003cp>But there's much, much more out there for those willing to venture deeper into the durian flavor spectrum.\u003c/p>\n\u003cp>\"Thai durians come in flavors ranging from vanilla or butterscotch custard to milk chocolate, caramelized onions, or even a sulfurous egg-iness relished by those with a thing for the savory,\" Gasik writes.\u003c/p>\n\u003cp>The Puangmanee durian – found in the Chantaburi province – has yellow-orange flesh \"with a smooth, chocolatey sensation.\"\u003c/p>\n\u003cp>The Ganyao, one of the most prized durians, has \"yellow, very dry, thick and smooth [flesh], comparable to an extremely rich frosting or moist cake.\"\u003c/p>\n\u003cp>In the southernmost part of the country, there's a rare durian called the \u003ca href=\"http://www.yearofthedurian.com/2013/05/durio-graveolens.html#.U3k9P2FOWT0\" target=\"_blank\" rel=\"noopener\">Graveolens\u003c/a> with what Gasik describes as \"lipstick red flesh\" so rich, sticky and cheese-like that it can be difficult to swallow.\u003c/p>\n\u003cp>More intrepid seekers of the fruit can find wild durians \u003ca href=\"http://www.yearofthedurian.com/2013/04/durio-kinabaluensis.html#.U3bqOWFOWT0\" target=\"_blank\" rel=\"noopener\">in the jungle\u003c/a> growing from seed and without varietal names; they're referred to collectively as \u003cem>thurian ban\u003c/em>.\u003c/p>\n\u003cp>And even Gasik and Culclasure have more new durians to taste. This summer, they're hoping for a chance at \"elephant dung durian.\"\u003c/p>\n\u003cp>Elephants often eat fallen durians off the ground, Gasik explains, and sometimes the entire fruit manages to pass through the animal unbroken. The flesh of these durians supposedly goes through a further ripening process that amplifies the taste.\u003c/p>\n\u003cp>\"There's a guy in Malaysia who says he'll have some in July,\" Gasik says. \"I'm really, really excited.\"\u003c/p>\n\u003cp>\u003c/p>\n\u003cp>\u003cem>Copyright 2014 \u003ca href=\"http://www.npr.org/\" target=\"_blank\" rel=\"noopener\">NPR\u003c/a>. \u003c/em>\u003c/p>\n\n","blocks":[],"excerpt":"A young couple got hooked on durians after one life-changing bite in 2009. And after two years of tracking the stinky sweet fruit through Southeast Asia, they've become experts on durian tourism.","status":"publish","parent":0,"modified":1550604184,"stats":{"hasAudio":false,"hasVideo":false,"hasChartOrMap":false,"iframeSrcs":[],"hasGoogleForm":false,"hasGallery":false,"hasHearkenModule":false,"hasPolis":false,"paragraphCount":30,"wordCount":1041},"headData":{"title":"On the Trail of Durian, Southeast Asia's 'Crème Brûlée on a Tree' | KQED","description":"A young couple got hooked on durians after one life-changing bite in 2009. And after two years of tracking the stinky sweet fruit through Southeast Asia, they've become experts on durian tourism.","ogTitle":"","ogDescription":"","ogImgId":"","twTitle":"","twDescription":"","twImgId":"","schema":{"@context":"http://schema.org","@type":"Article","headline":"On the Trail of Durian, Southeast Asia's 'Crème Brûlée on a Tree'","datePublished":"2014-05-22T15:51:09.000Z","dateModified":"2019-02-19T19:23:04.000Z","image":"https://cdn.kqed.org/wp-content/uploads/2020/02/KQED-OG-Image@1x.png"}},"disqusIdentifier":"82397 http://blogs.kqed.org/bayareabites/?p=82397","disqusUrl":"https://ww2.kqed.org/bayareabites/2014/05/22/on-the-trail-of-durian-southeast-asias-creme-brulee-on-a-tree/","disqusTitle":"On the Trail of Durian, Southeast Asia's 'Crème Brûlée on a Tree'","nprByline":"Alastair Bland","nprStoryId":"314529503","nprApiLink":"http://api.npr.org/query?id=314529503&apiKey=MDAxOTAwOTE4MDEyMTkxMDAzNjczZDljZA004","nprHtmlLink":"http://www.npr.org/blogs/thesalt/2014/05/21/314529503/on-the-trail-of-durian-southeast-asias-cr-me-br-l-e-on-a-tree?ft=3&f=314529503","nprRetrievedStory":"1","nprPubDate":"Wed, 21 May 2014 14:52:00 -0400","nprStoryDate":"Wed, 21 May 2014 13:39:00 -0400","nprLastModifiedDate":"Wed, 21 May 2014 14:52:59 -0400","path":"/bayareabites/82397/on-the-trail-of-durian-southeast-asias-creme-brulee-on-a-tree","audioTrackLength":null,"parsedContent":[{"type":"contentString","content":"\u003cdiv class=\"post-body\">\u003cp>\u003cfigure id=\"attachment_82398\" class=\"wp-caption aligncenter\" style=\"max-width: 1800px\">\u003ca href=\"http://ww2.kqed.org/bayareabites/wp-content/uploads/sites/24/2014/05/red-graveolens-edit1_enl-29f6a7fbca7717830389f8023945803dfbb65a7b.jpg\">\u003cimg class=\"size-full wp-image-82398\" src=\"http://ww2.kqed.org/bayareabites/wp-content/uploads/sites/24/2014/05/red-graveolens-edit1_enl-29f6a7fbca7717830389f8023945803dfbb65a7b.jpg\" alt=\"The inside of the Graveolens, a variety of durian that grows in the southernmost parts of Thailand, is sticky and cheese-like. Photo: Courtesy of Lindsay Gasik\" width=\"1800\" height=\"1198\">\u003c/a>\u003cfigcaption class=\"wp-caption-text\">The inside of the Graveolens, a variety of durian that grows in the southernmost parts of Thailand, is sticky and cheese-like. Photo: Courtesy of Lindsay Gasik\u003c/figcaption>\u003c/figure>\n\u003cp>Post by Alastair Bland, \u003ca href=\"http://www.npr.org/blogs/thesalt/2014/05/21/314529503/on-the-trail-of-durian-southeast-asias-cr-me-br-l-e-on-a-tree\" target=\"_blank\" rel=\"noopener\">The Salt at NPR Food\u003c/a> (5/21/2014)\u003c/p>\n\u003cp>What if a single taste of one fruit — in this case, the durian — changed the course of your entire life?\u003c/p>\n\u003cp>That's what happened to Lindsay Gasik and Rob Culclasure, a young couple who visited an Asian grocery store in Eugene, Ore., in 2009 in search of the football-sized fruit with thick, spiky skin. They were curious to try it after hearing that the durian's pungent smell and custard-like flesh had the power to drive people delirious with craving.\u003c/p>\n\u003cfigure id=\"attachment_82399\" class=\"wp-caption aligncenter\" style=\"max-width: 1500px\">\u003ca href=\"http://ww2.kqed.org/bayareabites/wp-content/uploads/sites/24/2014/05/profile-pic-edit-82f3a2cec9f74cc04f66a9528c155a1a345200c3.jpg\">\u003cimg class=\"size-full wp-image-82399\" src=\"http://ww2.kqed.org/bayareabites/wp-content/uploads/sites/24/2014/05/profile-pic-edit-82f3a2cec9f74cc04f66a9528c155a1a345200c3.jpg\" alt=\"Lindsay Gasik and Rob Culclasure moved to Asia in 2012 to pursue durians. Photo: Courtesy of Lindsay Gasik\" width=\"1500\" height=\"1124\">\u003c/a>\u003cfigcaption class=\"wp-caption-text\">Lindsay Gasik and Rob Culclasure moved to Asia in 2012 to pursue durians. Photo: Courtesy of Lindsay Gasik\u003c/figcaption>\u003c/figure>\n\u003cp>The moment Gasik and Culclasure inhaled the fruit's gassy aroma of fermented pineapple and onion and tasted its cool, creamy, vanilla-flavored flesh, they were hopelessly hooked. Now, after years of traveling through Southeast Asia tracking down and eating durian almost daily, they have become experts on the fruit. And for other travelers who catch durian fever, Gasik has written a \u003ca href=\"http://www.yearofthedurian.com/p/our-ebooks.html#.U3zZc3JdXTo\">durian travel guide to Thailand\u003c/a>, which comes out in June.\u003c/p>\n\u003cp>Five years into their obsession, Gasik tells The Salt they're as enthralled with the durian as ever.\u003c/p>\n\u003cp>\u003c/p>\u003c/div>","attributes":{"named":{},"numeric":[]}},{"type":"component","content":"","name":"ad","attributes":{"named":{"label":"fullwidth"},"numeric":["fullwidth"]}},{"type":"contentString","content":"\u003cdiv class=\"post-body\">\u003cp>\u003c/p>\n\u003cp>\"It's very sensual — the thorny texture, intense aroma, bizarre appearance and amazing range of flavors found in no other fruit or natural food,\" Gasik tells us by email from Bangkok. \"Durian is the only fruit in the world that I know of that combines a very high sugar content with a high fat content. It's like crème brûlée on a tree.\"\u003c/p>\n\u003cfigure id=\"attachment_82400\" class=\"wp-caption aligncenter\" style=\"max-width: 1599px\">\u003ca href=\"http://ww2.kqed.org/bayareabites/wp-content/uploads/sites/24/2014/05/durian-tree-83ad8d1bc9d21a01cbc793a420c25f3d3c1dd58e.jpg\">\u003cimg class=\"size-full wp-image-82400\" src=\"http://ww2.kqed.org/bayareabites/wp-content/uploads/sites/24/2014/05/durian-tree-83ad8d1bc9d21a01cbc793a420c25f3d3c1dd58e.jpg\" alt=\"Durian fruit hangs from a tree. Courtesy of Lindsay Gasik\" width=\"1599\" height=\"1198\">\u003c/a>\u003cfigcaption class=\"wp-caption-text\">Durian fruit hangs from a tree. Courtesy of Lindsay Gasik\u003c/figcaption>\u003c/figure>\n\u003cp>Since the couple departed for Asia in 2012 to pursue durians nearly full-time, they've eaten the fruit in 13 countries, including Malaysia, Vietnam, Myanmar and Australia. Along the way, they visited remote orchards and wild jungles and enjoyed all-you-can-eat durian feasts at roadside stands. And they documented it all on their blog, \u003ca href=\"http://www.yearofthedurian.com/p/first-durian-start-here.html#.U3Zce2FOWT0\" target=\"_blank\" rel=\"noopener\">Year of the Durian\u003c/a>.\u003c/p>\n\u003cp>Thailand, they say, is ground zero for durian diversity and abundance. More than 200 varieties are grown here, and the country's orchards produce more durians by far than any other nation.\u003c/p>\n\u003cp>Thing is, most visitors to Thailand never experience the country's traditional durian culture of roadside stands and small farms open to the public.\u003c/p>\n\u003cp>\"So few travelers venture away from the tourist-friendly beaches and neon cities that great swaths of the country are left virtually untouched by the tourism industry and its vices,\" Gasik writes in \u003cem>The Durian Tourist's Guide to Thailand\u003c/em>. \"This is where durian grows.\"\u003c/p>\n\u003cp>The guide provides everything you need to know for a durian-centric vacation, like how to harvest the fruit on organic farms, avoid durians that have been doused by pesticides and even arrange lodging in idyllic orchard guesthouses.\u003c/p>\n\u003cp>In Nakhon Nayok, durian seekers can find an organic orchard where a dedicated farmer has preserved 50 rare varieties of the fruit, while Chantaburi province may be worth a visit for the annual World Durian Festival.\u003c/p>\n\u003cp>Seasons in the tropics are unpredictable, and fruit trees can be, too. This means you can't find durians just anywhere, anytime. In central and eastern Thailand, Gasik's guidebook tells us, durians are usually available March through June; in the south, durians ripen and drop from the trees almost all year long.\u003c/p>\n\u003cfigure id=\"attachment_82401\" class=\"wp-caption aligncenter\" style=\"max-width: 1200px\">\u003ca href=\"http://ww2.kqed.org/bayareabites/wp-content/uploads/sites/24/2014/05/longlaplae-edit_enl-9bf8b92f000fc53f7aac5c630221292efa1c2db1.jpg\">\u003cimg class=\"size-full wp-image-82401\" src=\"http://ww2.kqed.org/bayareabites/wp-content/uploads/sites/24/2014/05/longlaplae-edit_enl-9bf8b92f000fc53f7aac5c630221292efa1c2db1.jpg\" alt=\"The Longlaplae is a milder tasting durian with almost no aroma. Photo: Courtesy of Lindsay Gasik\" width=\"1200\" height=\"790\">\u003c/a>\u003cfigcaption class=\"wp-caption-text\">The Longlaplae is a milder tasting durian with almost no aroma. Photo: Courtesy of Lindsay Gasik\u003c/figcaption>\u003c/figure>\n\u003cp>The guide also provides some vocabulary and phraseology basics. \"\u003cem>Chun/Pom thong gan ja gin turian\u003c/em>,\" for instance, means \"I want to eat durian.\" That should help get you moving in the right direction once you've left the Bangkok airport.\u003c/p>\n\u003cp>You'll want Gasik's tips on the tact and etiquette of eating durians in Thailand, too.\u003c/p>\n\u003cp>\"[Eating durian with bare hands] is considered fairly bad manners,\" Gasik writes, so many locals use rubber gloves. If you have to go bare, don't shake hands or touch anyone until you've washed your hands.\u003c/p>\n\u003cfigure id=\"attachment_82402\" class=\"wp-caption aligncenter\" style=\"max-width: 1500px\">\u003ca href=\"http://ww2.kqed.org/bayareabites/wp-content/uploads/sites/24/2014/05/puangmanee-inside-edit-cbb5a9dacdc8775af41bb3fe6ecc2cf30b33ddd8.jpg\">\u003cimg class=\"size-full wp-image-82402\" src=\"http://ww2.kqed.org/bayareabites/wp-content/uploads/sites/24/2014/05/puangmanee-inside-edit-cbb5a9dacdc8775af41bb3fe6ecc2cf30b33ddd8.jpg\" alt=\"According to Gasik, the Puangmanee durian's flesh has "a smooth, chocolatey sensation." Courtesy of Lindsay Gasik\" width=\"1500\" height=\"1124\">\u003c/a>\u003cfigcaption class=\"wp-caption-text\">According to Gasik, the Puangmanee durian's flesh has \"a smooth, chocolatey sensation.\" Courtesy of Lindsay Gasik\u003c/figcaption>\u003c/figure>\n\u003cp>Nor should you take a durian into a closed public space; many people – even people who've been around durian their whole life — simply cannot bear the smell.\u003c/p>\n\u003cp>For durian beginners, the Monthong, a sweet and creamy variety grown for export to countries like the U.S., is a good starting point. The Longlaplae, too, has a mild, milky flavor and virtually no aroma.\u003c/p>\n\u003cp>But there's much, much more out there for those willing to venture deeper into the durian flavor spectrum.\u003c/p>\n\u003cp>\"Thai durians come in flavors ranging from vanilla or butterscotch custard to milk chocolate, caramelized onions, or even a sulfurous egg-iness relished by those with a thing for the savory,\" Gasik writes.\u003c/p>\n\u003cp>The Puangmanee durian – found in the Chantaburi province – has yellow-orange flesh \"with a smooth, chocolatey sensation.\"\u003c/p>\n\u003cp>The Ganyao, one of the most prized durians, has \"yellow, very dry, thick and smooth [flesh], comparable to an extremely rich frosting or moist cake.\"\u003c/p>\n\u003cp>In the southernmost part of the country, there's a rare durian called the \u003ca href=\"http://www.yearofthedurian.com/2013/05/durio-graveolens.html#.U3k9P2FOWT0\" target=\"_blank\" rel=\"noopener\">Graveolens\u003c/a> with what Gasik describes as \"lipstick red flesh\" so rich, sticky and cheese-like that it can be difficult to swallow.\u003c/p>\n\u003cp>More intrepid seekers of the fruit can find wild durians \u003ca href=\"http://www.yearofthedurian.com/2013/04/durio-kinabaluensis.html#.U3bqOWFOWT0\" target=\"_blank\" rel=\"noopener\">in the jungle\u003c/a> growing from seed and without varietal names; they're referred to collectively as \u003cem>thurian ban\u003c/em>.\u003c/p>\n\u003cp>And even Gasik and Culclasure have more new durians to taste. This summer, they're hoping for a chance at \"elephant dung durian.\"\u003c/p>\n\u003cp>Elephants often eat fallen durians off the ground, Gasik explains, and sometimes the entire fruit manages to pass through the animal unbroken. The flesh of these durians supposedly goes through a further ripening process that amplifies the taste.\u003c/p>\n\u003cp>\"There's a guy in Malaysia who says he'll have some in July,\" Gasik says. \"I'm really, really excited.\"\u003c/p>\n\u003cp>\u003c/p>\n\u003cp>\u003cem>Copyright 2014 \u003ca href=\"http://www.npr.org/\" target=\"_blank\" rel=\"noopener\">NPR\u003c/a>. \u003c/em>\u003c/p>\n\n\u003c/div>\u003c/p>","attributes":{"named":{},"numeric":[]}}],"link":"/bayareabites/82397/on-the-trail-of-durian-southeast-asias-creme-brulee-on-a-tree","authors":["byline_bayareabites_82397"],"categories":["bayareabites_2998","bayareabites_2254","bayareabites_10916","bayareabites_61"],"tags":["bayareabites_13399","bayareabites_244","bayareabites_2932"],"featImg":"bayareabites_82398","label":"bayareabites"},"bayareabites_76211":{"type":"posts","id":"bayareabites_76211","meta":{"index":"posts_1591205157","site":"bayareabites","id":"76211","score":null,"sort":[1389222228000]},"guestAuthors":[],"slug":"this-gmo-apple-wont-brown-will-that-sour-the-fruits-image","title":"This GMO Apple Won't Brown. Will That Sour The Fruit's Image?","publishDate":1389222228,"format":"aside","headTitle":"Bay Area Bites | KQED Food","labelTerm":{"site":"bayareabites"},"content":"\u003cfigure id=\"attachment_76212\" class=\"wp-caption aligncenter\" style=\"max-width: 640px\">\u003ca href=\"http://ww2.kqed.org/bayareabites/wp-content/uploads/sites/24/2014/01/3306-2-84c22cdc79fc9e599fd91bfc7fe997c45619cb0b-e1389221903818.jpg\">\u003cimg src=\"http://ww2.kqed.org/bayareabites/wp-content/uploads/sites/24/2014/01/3306-2-84c22cdc79fc9e599fd91bfc7fe997c45619cb0b-e1389221903818.jpg\" alt=\"Soon after being sliced, a conventional Granny Smith apple (left) starts to brown, while a newly developed GM Granny Smith stays fresher looking. Photo courtesy of Okanagan Specialty Fruits Inc.\" width=\"640\" height=\"480\" class=\"size-full wp-image-76212\">\u003c/a>\u003cfigcaption class=\"wp-caption-text\">Soon after being sliced, a conventional Granny Smith apple (left) starts to brown, while a newly developed GM Granny Smith stays fresher looking. Photo courtesy of Okanagan Specialty Fruits Inc.\u003c/figcaption>\u003c/figure>\n\u003cp>\u003cstrong>Listen to the Story\u003c/strong> on \u003ca href=\"http://www.npr.org/blogs/thesalt/2014/01/08/260782518/this-gmo-apple-wont-brown-will-that-sour-the-fruits-image\">All Things Considered\u003c/a> [audio src=\"http://pd.npr.org/anon.npr-mp3/npr/atc/2014/01/20140108_atc_gmo_apple.mp3\"] \u003c/p>\n\u003cp>Post by \u003ca href=\"http://www.npr.org/people/143160021/daniel-charles\">Dan Charles\u003c/a>, \u003ca href=\"http://www.npr.org/blogs/thesalt/2014/01/08/260782518/this-gmo-apple-wont-brown-will-that-sour-the-fruits-image\">The Salt at NPR Food\u003c/a> (1/8/14)\u003c/p>\n\u003cp>If you (or your children) turn up your nose at brown apple slices, would you prefer fresh-looking ones that have been genetically engineered?\u003c/p>\n\u003cp>Neal Carter, president of \u003ca href=\"http://www.okspecialtyfruits.com/\">Okanagan Specialty Fruits\u003c/a>, in British Columbia, Canada, certainly hopes so. His company has created the new, non-browning, \u003ca href=\"http://www.arcticapples.com/\">\"Arctic\" apples\u003c/a>, and he's hoping for big orders from despairing parents and food service companies alike. Food service companies, he says, would no longer have to treat their sliced apples with antioxidant chemicals like calcium ascorbate to keep them looking fresh.\u003c/p>\n\u003cp>The cost savings \"can be huge,\" he says. \"Right now, to make fresh-cut apple slices and put them in the bag, 35 or 40 percent of the cost is the antioxident treatment. So you could make a fresh-cut apple slice 30 percent cheaper.\"\u003c/p>\n\u003cp>[ad fullwidth]\u003c/p>\n\u003cp>The new apples are waiting for approval from the U.S. Department of Agriculture. But they face opposition — including from apple producers who worry that this new product will taint the apple's wholesome, all-natural image.\u003c/p>\n\u003cp>\"Our concern is marketing,\" says Christian Schlect, president of the \u003ca href=\"http://www.nwhort.org/\">Northwest Horticultural Council\u003c/a>, which represents apple growers in the major apple-producing areas of the Pacific Northwest.\u003c/p>\n\u003cp>Schlect sees a risk that consumers who are viscerally opposed to genetic engineering will avoid apples entirely, and the industry will have to spend precious time and money keeping GMO apples separate from their conventional cousins.\u003c/p>\n\u003cp>The non-browning trait was created by inserting extra copies of genes that the apple already possessed. These genes normally create an enzyme called polyphenol oxidase, which is responsible for the chemical reaction that causes browning.\u003c/p>\n\u003cp>Yet when extra copies of the gene are added, the apple reacts by shutting down all of them, stopping production of the enzyme and preventing the browning reaction. (Like any apple, these apples eventually will go brown from normal rotting. It's the immediate \"enzymatic browning\" that's blocked.)\u003c/p>\n\u003cp>Okanagan Specialty Fruits licensed this technique from the Australian research institute where it was first discovered.\u003c/p>\n\u003cp>At the moment, there are non-browning versions of Golden Delicious and Granny Smith apples. The U.S. Department of Agriculture has allowed Okanagan Specialty Fruits to produce them in test plots covering a few acres in the states of New York and Washington. Carter says his company now is working to put the trait in Fuji and Gala apples, too.\u003c/p>\n\u003cp>The USDA has studied the apple and released a \u003ca href=\"http://www.regulations.gov/#!documentDetail;D=APHIS-2012-0025-1937\">preliminary conclusion\u003c/a> that Arctic apples are pretty much as harmless as conventional ones. That assessment is now open for public comment, and thousands of people have taken advantage of the opportunity — most of them fiercely opposed to it.\u003c/p>\n\u003cp>Even if the USDA approved the apples within a few months, as Carter hopes, it would take several years before commercial quantities of non-browning apples could show up in grocery stores.\u003c/p>\n\u003cp>Okanagan Specialty Fruits does not plan to grow large quantities of apples itself. It will license its variety to commercial growers, charging them a one-time fee of $1,500 per acre of trees. Carter says this is comparable to the license fees that growers currently pay for the right to produce patented varieties such as Gala or Fuji.\u003c/p>\n\u003cp>Carter is convinced that most consumers will be curious to try the apple. The company conducted focus groups in four U.S. cities, from San Francisco to Raleigh, N.C. The company showed consumers the apple, explained that it was genetically engineered, and asked them, \"Would you buy it?\"\u003c/p>\n\u003cp>\"Typically, it's about 80-20,\" says Carter. \"80 percent say, 'Fantastic, bring it on.' And 20 percent say, 'Hmm. I don't think I like genetic engineering.' But they all eat it. Even if they were a nay-sayer that was never going to eat any GM fruit, they will eat a slice. It's not like we have to ask them to eat a slice. They will ask if they can eat a slice.\"\u003c/p>\n\u003cp>Carter thinks it may be more difficult convincing grocery stores to stock the new apple. Even if only a minority of their customers are viscerally opposed to it, grocery stores are risk-averse, and don't want to drive away any business at all.\u003c/p>\n\u003cp>\u003c/p>\n\u003cp>\u003cem>Copyright 2014 \u003ca href=\"http://www.npr.org/\">NPR\u003c/a>.\u003c/em> \u003c/p>\n\n","blocks":[],"excerpt":"A small Canadian company has created a genetically engineered apple that doesn't go brown when you slice it. It's waiting for approval from the U.S. Department of Agriculture. But some apple producers are worried that this new product will taint the apple's wholesome, all-natural image.","status":"publish","parent":0,"modified":1389222228,"stats":{"hasAudio":true,"hasVideo":false,"hasChartOrMap":false,"iframeSrcs":[],"hasGoogleForm":false,"hasGallery":false,"hasHearkenModule":false,"hasPolis":false,"paragraphCount":21,"wordCount":774},"headData":{"title":"This GMO Apple Won't Brown. Will That Sour The Fruit's Image? | KQED","description":"A small Canadian company has created a genetically engineered apple that doesn't go brown when you slice it. It's waiting for approval from the U.S. Department of Agriculture. But some apple producers are worried that this new product will taint the apple's wholesome, all-natural image.","ogTitle":"","ogDescription":"","ogImgId":"","twTitle":"","twDescription":"","twImgId":"","schema":{"@context":"http://schema.org","@type":"Article","headline":"This GMO Apple Won't Brown. Will That Sour The Fruit's Image?","datePublished":"2014-01-08T23:03:48.000Z","dateModified":"2014-01-08T23:03:48.000Z","image":"https://cdn.kqed.org/wp-content/uploads/2020/02/KQED-OG-Image@1x.png"}},"disqusIdentifier":"76211 http://blogs.kqed.org/bayareabites/?p=76211","disqusUrl":"https://ww2.kqed.org/bayareabites/2014/01/08/this-gmo-apple-wont-brown-will-that-sour-the-fruits-image/","disqusTitle":"This GMO Apple Won't Brown. Will That Sour The Fruit's Image?","nprByline":"Dan Charles","nprStoryId":"260782518","nprApiLink":"http://api.npr.org/query?id=260782518&apiKey=MDAxOTAwOTE4MDEyMTkxMDAzNjczZDljZA004","nprHtmlLink":"http://www.npr.org/blogs/thesalt/2014/01/08/260782518/this-gmo-apple-wont-brown-will-that-sour-the-fruits-image?ft=3&f=260782518","nprRetrievedStory":"1","nprPubDate":"Wed, 08 Jan 2014 17:31:00 -0500","nprStoryDate":"Wed, 08 Jan 2014 16:00:00 -0500","nprLastModifiedDate":"Wed, 08 Jan 2014 17:31:02 -0500","nprAudio":"http://pd.npr.org/anon.npr-mp3/npr/atc/2014/01/20140108_atc_gmo_apple.mp3?orgId=1&topicId=1053&ft=3&f=260782518","nprAudioM3u":"http://api.npr.org/m3u/1260879149-4241a6.m3u?orgId=1&topicId=1053&ft=3&f=260782518","path":"/bayareabites/76211/this-gmo-apple-wont-brown-will-that-sour-the-fruits-image","audioUrl":"http://pd.npr.org/anon.npr-mp3/npr/atc/2014/01/20140108_atc_gmo_apple.mp3","audioDuration":null,"audioTrackLength":null,"parsedContent":[{"type":"contentString","content":"\u003cdiv class=\"post-body\">\u003cp>\u003cfigure id=\"attachment_76212\" class=\"wp-caption aligncenter\" style=\"max-width: 640px\">\u003ca href=\"http://ww2.kqed.org/bayareabites/wp-content/uploads/sites/24/2014/01/3306-2-84c22cdc79fc9e599fd91bfc7fe997c45619cb0b-e1389221903818.jpg\">\u003cimg src=\"http://ww2.kqed.org/bayareabites/wp-content/uploads/sites/24/2014/01/3306-2-84c22cdc79fc9e599fd91bfc7fe997c45619cb0b-e1389221903818.jpg\" alt=\"Soon after being sliced, a conventional Granny Smith apple (left) starts to brown, while a newly developed GM Granny Smith stays fresher looking. Photo courtesy of Okanagan Specialty Fruits Inc.\" width=\"640\" height=\"480\" class=\"size-full wp-image-76212\">\u003c/a>\u003cfigcaption class=\"wp-caption-text\">Soon after being sliced, a conventional Granny Smith apple (left) starts to brown, while a newly developed GM Granny Smith stays fresher looking. Photo courtesy of Okanagan Specialty Fruits Inc.\u003c/figcaption>\u003c/figure>\n\u003cp>\u003cstrong>Listen to the Story\u003c/strong> on \u003ca href=\"http://www.npr.org/blogs/thesalt/2014/01/08/260782518/this-gmo-apple-wont-brown-will-that-sour-the-fruits-image\">All Things Considered\u003c/a> \u003c/p>\u003c/div>","attributes":{"named":{},"numeric":[]}},{"type":"component","content":"","name":"audio","attributes":{"named":{"src":"http://pd.npr.org/anon.npr-mp3/npr/atc/2014/01/20140108_atc_gmo_apple.mp3","label":""},"numeric":[]}},{"type":"contentString","content":"\u003cdiv class=\"post-body\">\u003cp> \u003c/p>\n\u003cp>Post by \u003ca href=\"http://www.npr.org/people/143160021/daniel-charles\">Dan Charles\u003c/a>, \u003ca href=\"http://www.npr.org/blogs/thesalt/2014/01/08/260782518/this-gmo-apple-wont-brown-will-that-sour-the-fruits-image\">The Salt at NPR Food\u003c/a> (1/8/14)\u003c/p>\n\u003cp>If you (or your children) turn up your nose at brown apple slices, would you prefer fresh-looking ones that have been genetically engineered?\u003c/p>\n\u003cp>Neal Carter, president of \u003ca href=\"http://www.okspecialtyfruits.com/\">Okanagan Specialty Fruits\u003c/a>, in British Columbia, Canada, certainly hopes so. His company has created the new, non-browning, \u003ca href=\"http://www.arcticapples.com/\">\"Arctic\" apples\u003c/a>, and he's hoping for big orders from despairing parents and food service companies alike. Food service companies, he says, would no longer have to treat their sliced apples with antioxidant chemicals like calcium ascorbate to keep them looking fresh.\u003c/p>\n\u003cp>The cost savings \"can be huge,\" he says. \"Right now, to make fresh-cut apple slices and put them in the bag, 35 or 40 percent of the cost is the antioxident treatment. So you could make a fresh-cut apple slice 30 percent cheaper.\"\u003c/p>\n\u003cp>\u003c/p>\u003c/div>","attributes":{"named":{},"numeric":[]}},{"type":"component","content":"","name":"ad","attributes":{"named":{"label":"fullwidth"},"numeric":["fullwidth"]}},{"type":"contentString","content":"\u003cdiv class=\"post-body\">\u003cp>\u003c/p>\n\u003cp>The new apples are waiting for approval from the U.S. Department of Agriculture. But they face opposition — including from apple producers who worry that this new product will taint the apple's wholesome, all-natural image.\u003c/p>\n\u003cp>\"Our concern is marketing,\" says Christian Schlect, president of the \u003ca href=\"http://www.nwhort.org/\">Northwest Horticultural Council\u003c/a>, which represents apple growers in the major apple-producing areas of the Pacific Northwest.\u003c/p>\n\u003cp>Schlect sees a risk that consumers who are viscerally opposed to genetic engineering will avoid apples entirely, and the industry will have to spend precious time and money keeping GMO apples separate from their conventional cousins.\u003c/p>\n\u003cp>The non-browning trait was created by inserting extra copies of genes that the apple already possessed. These genes normally create an enzyme called polyphenol oxidase, which is responsible for the chemical reaction that causes browning.\u003c/p>\n\u003cp>Yet when extra copies of the gene are added, the apple reacts by shutting down all of them, stopping production of the enzyme and preventing the browning reaction. (Like any apple, these apples eventually will go brown from normal rotting. It's the immediate \"enzymatic browning\" that's blocked.)\u003c/p>\n\u003cp>Okanagan Specialty Fruits licensed this technique from the Australian research institute where it was first discovered.\u003c/p>\n\u003cp>At the moment, there are non-browning versions of Golden Delicious and Granny Smith apples. The U.S. Department of Agriculture has allowed Okanagan Specialty Fruits to produce them in test plots covering a few acres in the states of New York and Washington. Carter says his company now is working to put the trait in Fuji and Gala apples, too.\u003c/p>\n\u003cp>The USDA has studied the apple and released a \u003ca href=\"http://www.regulations.gov/#!documentDetail;D=APHIS-2012-0025-1937\">preliminary conclusion\u003c/a> that Arctic apples are pretty much as harmless as conventional ones. That assessment is now open for public comment, and thousands of people have taken advantage of the opportunity — most of them fiercely opposed to it.\u003c/p>\n\u003cp>Even if the USDA approved the apples within a few months, as Carter hopes, it would take several years before commercial quantities of non-browning apples could show up in grocery stores.\u003c/p>\n\u003cp>Okanagan Specialty Fruits does not plan to grow large quantities of apples itself. It will license its variety to commercial growers, charging them a one-time fee of $1,500 per acre of trees. Carter says this is comparable to the license fees that growers currently pay for the right to produce patented varieties such as Gala or Fuji.\u003c/p>\n\u003cp>Carter is convinced that most consumers will be curious to try the apple. The company conducted focus groups in four U.S. cities, from San Francisco to Raleigh, N.C. The company showed consumers the apple, explained that it was genetically engineered, and asked them, \"Would you buy it?\"\u003c/p>\n\u003cp>\"Typically, it's about 80-20,\" says Carter. \"80 percent say, 'Fantastic, bring it on.' And 20 percent say, 'Hmm. I don't think I like genetic engineering.' But they all eat it. Even if they were a nay-sayer that was never going to eat any GM fruit, they will eat a slice. It's not like we have to ask them to eat a slice. They will ask if they can eat a slice.\"\u003c/p>\n\u003cp>Carter thinks it may be more difficult convincing grocery stores to stock the new apple. Even if only a minority of their customers are viscerally opposed to it, grocery stores are risk-averse, and don't want to drive away any business at all.\u003c/p>\n\u003cp>\u003c/p>\n\u003cp>\u003cem>Copyright 2014 \u003ca href=\"http://www.npr.org/\">NPR\u003c/a>.\u003c/em> \u003c/p>\n\n\u003c/div>\u003c/p>","attributes":{"named":{},"numeric":[]}}],"link":"/bayareabites/76211/this-gmo-apple-wont-brown-will-that-sour-the-fruits-image","authors":["byline_bayareabites_76211"],"categories":["bayareabites_1874","bayareabites_4084","bayareabites_1245","bayareabites_10916","bayareabites_34"],"tags":["bayareabites_469","bayareabites_11270","bayareabites_244","bayareabites_11354","bayareabites_10771","bayareabites_10787","bayareabites_12891","bayareabites_10921","bayareabites_8913"],"featImg":"bayareabites_76212","label":"bayareabites"},"bayareabites_68996":{"type":"posts","id":"bayareabites_68996","meta":{"index":"posts_1591205157","site":"bayareabites","id":"68996","score":null,"sort":[1377707748000]},"guestAuthors":[],"slug":"to-grow-sweeter-produce-california-farmers-turn-off-the-water","title":"To Grow Sweeter Produce, California Farmers Turn Off The Water","publishDate":1377707748,"format":"aside","headTitle":"Bay Area Bites | KQED Food","labelTerm":{"site":"bayareabites"},"content":"\u003cp>Post by Alastair Bland, \u003ca href=\"http://www.npr.org/blogs/thesalt/2013/08/23/214884366/to-grow-sweeter-produce-california-farmers-turn-off-the-water\">The Salt at NPR Food\u003c/a> (8/28/13)\u003c/p>\n\u003cfigure id=\"attachment_69003\" class=\"wp-caption aligncenter\" style=\"max-width: 1120px\">\u003ca href=\"http://ww2.kqed.org/bayareabites/wp-content/uploads/sites/24/2013/08/happyboy-tomato.jpg\">\u003cimg src=\"http://ww2.kqed.org/bayareabites/wp-content/uploads/sites/24/2013/08/happyboy-tomato.jpg\" alt=\"At Happy Boy Farms near Santa Cruz, Calif., Early Girl tomatoes are grown using dry farming methods. The tomatoes have become increasingly popular with chefs and wholesalers. Photo: Courtesy Jen Lynne/Happy Boy Farms\" width=\"1120\" height=\"840\" class=\"size-full wp-image-69003\">\u003c/a>\u003cfigcaption class=\"wp-caption-text\">At Happy Boy Farms near Santa Cruz, Calif., Early Girl tomatoes are grown using dry farming methods. The tomatoes have become increasingly popular with chefs and wholesalers. Photo: Courtesy Jen Lynne/Happy Boy Farms\u003c/figcaption>\u003c/figure>\n\u003cp>A week without water can easily kill the average person.\u003c/p>\n\u003cp>But a garden that goes unwatered for months may produce sweeter, more flavorful fruits than anything available in most mainstream supermarkets--even in the scorching heat of a California summer. Commercial growers call it \"dry farming,\" and throughout the state, this unconventional technique seems to be catching on among small producers of tomatoes, apples, grapes, melons, and potatoes.\u003c/p>\n\u003cp>At \u003ca href=\"http://www.happyboyfarms.com/\">Happy Boy Farms\u003c/a>, near Santa Cruz, sales director Jen Lynne believes dry farming could be an important agricultural practice in the future, when water will likely be a less abundant resource.\u003c/p>\n\u003cp>But the taste of her dry-farmed Early Girl tomatoes is the main reason chefs, wholesalers and individuals around the country are increasingly calling to place orders. She notes that many calls come from places where rains falls through the summer, making dry farming impossible.\u003c/p>\n\u003cp>[ad fullwidth]\u003c/p>\n\u003cp>\"Once you taste a dry-farmed tomato, you'll never want anything else,\" she says, adding that she could be selling hundreds of 14-pound cases per day if her 10-acre tomato field could meet the demand.\u003c/p>\n\u003cp>At Whole Foods Market in Sebastopol, about 50 miles north of San Francisco, dry-farmed tomatoes have become a shopper attraction, according to produce buyer Allan Timpe.\u003c/p>\n\u003cp>\"People definitely come here to get them,\" he says. \"Once someone tastes a dry-farmed tomato, you've got a customer for life.\"\u003c/p>\n\u003cp>Timpe also carries locally grown, dry-farmed potatoes, which he says \"are dense and really flavorful.\"\u003c/p>\n\u003cp>The idea behind dry farming is that by restricting a plant's water intake, its fruits wind up with less water content and a greater density of sugar and other flavor compounds. But the practice isn't as simple as just cutting off the water.\u003cstrong> \u003c/strong>First, dry farming in sandy soil, through which water drains easily, doesn't work. Just as importantly, the plants, or trees, must be dry-farmed from the time they're planted.\u003c/p>\n\u003cp>\"We get the plants going with a little water, then cut it off after a few weeks,\" says Kevin McEnnis, who dry farms Early Girl tomatoes at \u003ca href=\"http://www.quetzalfarm.com/practices.htm\">Quetzal Farm\u003c/a> in Santa Rosa.\u003c/p>\n\u003cp>Then, he explains, as the young but quickly growing vines become thirsty, they send their roots deeper underground than they otherwise would to find moisture, which can remain in the soil all year.\u003c/p>\n\u003cp>A technique that also helps dry farmers lock water underground is frequently tilling the top foot of soil into a fluffy dust layer. Underground moisture that creeps upward through the earth cannot break through this layer, and it remains below the surface.\u003c/p>\n\u003cp>But farming without irrigation has a major drawback: dramatically reduced yields.\u003c/p>\n\u003cp>Stan Devoto, a farmer in Northern California, says his dry-farmed trees produce 12 to 15 tons of apples per acre per year. Irrigated trees, on the other hand, may bear 40 or 50 tons. And McEnnis says he harvests about four tons of tomatoes off his acre of vines each summer and fall, whereas conventional growers may reap 40 tons per acre.\u003c/p>\n\u003cp>Indeed, in most areas of conventional agriculture, dry farming is unprofitable and unusual. Exceptions include most European wine grapes — which local winemaking laws actually require be grown without irrigation — and much of America's grain production.\u003c/p>\n\u003cp>\u003ca href=\"http://ucanr.edu/?facultyid=2365\">Paul Vossen\u003c/a>, a University of California farm adviser in Sonoma County, says many people who dry farm do so only because they have no water with which to irrigate their land. \"They do it because they have to, and so they'll make it part of their marketing strategy,\" he says.\u003c/p>\n\u003cp>But winemaker Will Bucklin, of \u003ca href=\"http://www.buckzin.com/\">Old Hill Ranch\u003c/a> in the Sonoma Valley, has an underground water supply. Still, he dry farms 15 acres of old-vine Syrah, Zinfandel and other varieties — one of just a few California winemakers currently dry farming. His grapes are smaller, and yields at harvest time slightly lower, than on irrigated vineyards.\u003c/p>\n\u003cp>\"But the small size of the berries means there is a lower juice-to-skin ratio,\" Bucklin says.\u003c/p>\n\u003cp>Since grape skins contain flavor-making tannins and polyphenols, dry farming can — at least in theory — produce richer, more intense wines. Bucklin concedes that he isn't certain that a novice taster, or even an expert one, could tell a dry-farmed wine from a conventional one in a blind tasting.\u003c/p>\n\u003cp>But in a highly populated state where water tables are dropping and rivers dwindling to trickles, Bucklin is confident, at least, of one thing:\u003c/p>\n\u003cp>\"I'm using a lot less water than my neighbor.\" \u003c/p>\n\u003cp>\u003c/p>\n\u003cp>\u003cem>Copyright 2013 \u003ca href=\"http://www.npr.org/\">NPR\u003c/a>.\u003c/em> \u003c/p>\n\n","blocks":[],"excerpt":"California's small producers of tomatoes, grapes and other crops are increasingly taking up dry farming, which involves growing crops without watering them for months. The technique, which obviously saves water, can produce more flavorful crops.","status":"publish","parent":0,"modified":1377707748,"stats":{"hasAudio":false,"hasVideo":false,"hasChartOrMap":false,"iframeSrcs":[],"hasGoogleForm":false,"hasGallery":false,"hasHearkenModule":false,"hasPolis":false,"paragraphCount":25,"wordCount":808},"headData":{"title":"To Grow Sweeter Produce, California Farmers Turn Off The Water | KQED","description":"California's small producers of tomatoes, grapes and other crops are increasingly taking up dry farming, which involves growing crops without watering them for months. The technique, which obviously saves water, can produce more flavorful crops.","ogTitle":"","ogDescription":"","ogImgId":"","twTitle":"","twDescription":"","twImgId":"","schema":{"@context":"http://schema.org","@type":"Article","headline":"To Grow Sweeter Produce, California Farmers Turn Off The Water","datePublished":"2013-08-28T16:35:48.000Z","dateModified":"2013-08-28T16:35:48.000Z","image":"https://cdn.kqed.org/wp-content/uploads/2020/02/KQED-OG-Image@1x.png"}},"disqusIdentifier":"68996 http://blogs.kqed.org/bayareabites/?p=68996","disqusUrl":"https://ww2.kqed.org/bayareabites/2013/08/28/to-grow-sweeter-produce-california-farmers-turn-off-the-water/","disqusTitle":"To Grow Sweeter Produce, California Farmers Turn Off The Water","nprByline":"Alastair Bland","nprStoryId":"214884366","nprApiLink":"http://api.npr.org/query?id=214884366&apiKey=MDAxOTAwOTE4MDEyMTkxMDAzNjczZDljZA004","nprHtmlLink":"http://www.npr.org/blogs/thesalt/2013/08/23/214884366/to-grow-sweeter-produce-california-farmers-turn-off-the-water?ft=3&f=214884366","nprRetrievedStory":"1","nprPubDate":"Wed, 28 Aug 2013 11:38:00 -0400","nprStoryDate":"Wed, 28 Aug 2013 10:20:00 -0400","nprLastModifiedDate":"Wed, 28 Aug 2013 11:38:11 -0400","path":"/bayareabites/68996/to-grow-sweeter-produce-california-farmers-turn-off-the-water","audioTrackLength":null,"parsedContent":[{"type":"contentString","content":"\u003cdiv class=\"post-body\">\u003cp>\u003cp>Post by Alastair Bland, \u003ca href=\"http://www.npr.org/blogs/thesalt/2013/08/23/214884366/to-grow-sweeter-produce-california-farmers-turn-off-the-water\">The Salt at NPR Food\u003c/a> (8/28/13)\u003c/p>\n\u003cfigure id=\"attachment_69003\" class=\"wp-caption aligncenter\" style=\"max-width: 1120px\">\u003ca href=\"http://ww2.kqed.org/bayareabites/wp-content/uploads/sites/24/2013/08/happyboy-tomato.jpg\">\u003cimg src=\"http://ww2.kqed.org/bayareabites/wp-content/uploads/sites/24/2013/08/happyboy-tomato.jpg\" alt=\"At Happy Boy Farms near Santa Cruz, Calif., Early Girl tomatoes are grown using dry farming methods. The tomatoes have become increasingly popular with chefs and wholesalers. Photo: Courtesy Jen Lynne/Happy Boy Farms\" width=\"1120\" height=\"840\" class=\"size-full wp-image-69003\">\u003c/a>\u003cfigcaption class=\"wp-caption-text\">At Happy Boy Farms near Santa Cruz, Calif., Early Girl tomatoes are grown using dry farming methods. The tomatoes have become increasingly popular with chefs and wholesalers. Photo: Courtesy Jen Lynne/Happy Boy Farms\u003c/figcaption>\u003c/figure>\n\u003cp>A week without water can easily kill the average person.\u003c/p>\n\u003cp>But a garden that goes unwatered for months may produce sweeter, more flavorful fruits than anything available in most mainstream supermarkets--even in the scorching heat of a California summer. Commercial growers call it \"dry farming,\" and throughout the state, this unconventional technique seems to be catching on among small producers of tomatoes, apples, grapes, melons, and potatoes.\u003c/p>\n\u003cp>At \u003ca href=\"http://www.happyboyfarms.com/\">Happy Boy Farms\u003c/a>, near Santa Cruz, sales director Jen Lynne believes dry farming could be an important agricultural practice in the future, when water will likely be a less abundant resource.\u003c/p>\n\u003cp>But the taste of her dry-farmed Early Girl tomatoes is the main reason chefs, wholesalers and individuals around the country are increasingly calling to place orders. She notes that many calls come from places where rains falls through the summer, making dry farming impossible.\u003c/p>\n\u003cp>\u003c/p>\u003c/div>","attributes":{"named":{},"numeric":[]}},{"type":"component","content":"","name":"ad","attributes":{"named":{"label":"fullwidth"},"numeric":["fullwidth"]}},{"type":"contentString","content":"\u003cdiv class=\"post-body\">\u003cp>\u003c/p>\n\u003cp>\"Once you taste a dry-farmed tomato, you'll never want anything else,\" she says, adding that she could be selling hundreds of 14-pound cases per day if her 10-acre tomato field could meet the demand.\u003c/p>\n\u003cp>At Whole Foods Market in Sebastopol, about 50 miles north of San Francisco, dry-farmed tomatoes have become a shopper attraction, according to produce buyer Allan Timpe.\u003c/p>\n\u003cp>\"People definitely come here to get them,\" he says. \"Once someone tastes a dry-farmed tomato, you've got a customer for life.\"\u003c/p>\n\u003cp>Timpe also carries locally grown, dry-farmed potatoes, which he says \"are dense and really flavorful.\"\u003c/p>\n\u003cp>The idea behind dry farming is that by restricting a plant's water intake, its fruits wind up with less water content and a greater density of sugar and other flavor compounds. But the practice isn't as simple as just cutting off the water.\u003cstrong> \u003c/strong>First, dry farming in sandy soil, through which water drains easily, doesn't work. Just as importantly, the plants, or trees, must be dry-farmed from the time they're planted.\u003c/p>\n\u003cp>\"We get the plants going with a little water, then cut it off after a few weeks,\" says Kevin McEnnis, who dry farms Early Girl tomatoes at \u003ca href=\"http://www.quetzalfarm.com/practices.htm\">Quetzal Farm\u003c/a> in Santa Rosa.\u003c/p>\n\u003cp>Then, he explains, as the young but quickly growing vines become thirsty, they send their roots deeper underground than they otherwise would to find moisture, which can remain in the soil all year.\u003c/p>\n\u003cp>A technique that also helps dry farmers lock water underground is frequently tilling the top foot of soil into a fluffy dust layer. Underground moisture that creeps upward through the earth cannot break through this layer, and it remains below the surface.\u003c/p>\n\u003cp>But farming without irrigation has a major drawback: dramatically reduced yields.\u003c/p>\n\u003cp>Stan Devoto, a farmer in Northern California, says his dry-farmed trees produce 12 to 15 tons of apples per acre per year. Irrigated trees, on the other hand, may bear 40 or 50 tons. And McEnnis says he harvests about four tons of tomatoes off his acre of vines each summer and fall, whereas conventional growers may reap 40 tons per acre.\u003c/p>\n\u003cp>Indeed, in most areas of conventional agriculture, dry farming is unprofitable and unusual. Exceptions include most European wine grapes — which local winemaking laws actually require be grown without irrigation — and much of America's grain production.\u003c/p>\n\u003cp>\u003ca href=\"http://ucanr.edu/?facultyid=2365\">Paul Vossen\u003c/a>, a University of California farm adviser in Sonoma County, says many people who dry farm do so only because they have no water with which to irrigate their land. \"They do it because they have to, and so they'll make it part of their marketing strategy,\" he says.\u003c/p>\n\u003cp>But winemaker Will Bucklin, of \u003ca href=\"http://www.buckzin.com/\">Old Hill Ranch\u003c/a> in the Sonoma Valley, has an underground water supply. Still, he dry farms 15 acres of old-vine Syrah, Zinfandel and other varieties — one of just a few California winemakers currently dry farming. His grapes are smaller, and yields at harvest time slightly lower, than on irrigated vineyards.\u003c/p>\n\u003cp>\"But the small size of the berries means there is a lower juice-to-skin ratio,\" Bucklin says.\u003c/p>\n\u003cp>Since grape skins contain flavor-making tannins and polyphenols, dry farming can — at least in theory — produce richer, more intense wines. Bucklin concedes that he isn't certain that a novice taster, or even an expert one, could tell a dry-farmed wine from a conventional one in a blind tasting.\u003c/p>\n\u003cp>But in a highly populated state where water tables are dropping and rivers dwindling to trickles, Bucklin is confident, at least, of one thing:\u003c/p>\n\u003cp>\"I'm using a lot less water than my neighbor.\" \u003c/p>\n\u003cp>\u003c/p>\n\u003cp>\u003cem>Copyright 2013 \u003ca href=\"http://www.npr.org/\">NPR\u003c/a>.\u003c/em> \u003c/p>\n\n\u003c/div>\u003c/p>","attributes":{"named":{},"numeric":[]}}],"link":"/bayareabites/68996/to-grow-sweeter-produce-california-farmers-turn-off-the-water","authors":["byline_bayareabites_68996"],"categories":["bayareabites_109","bayareabites_1874","bayareabites_4084","bayareabites_1875","bayareabites_10916"],"tags":["bayareabites_129","bayareabites_12282","bayareabites_8395","bayareabites_244","bayareabites_12281","bayareabites_12283","bayareabites_141","bayareabites_10921","bayareabites_1344"],"featImg":"bayareabites_69002","label":"bayareabites"}},"programsReducer":{"possible":{"id":"possible","title":"Possible","info":"Possible is hosted by entrepreneur Reid Hoffman and writer Aria Finger. Together in Possible, Hoffman and Finger lead enlightening discussions about building a brighter collective future. The show features interviews with visionary guests like Trevor Noah, Sam Altman and Janette Sadik-Khan. Possible paints an optimistic portrait of the world we can create through science, policy, business, art and our shared humanity. It asks: What if everything goes right for once? How can we get there? Each episode also includes a short fiction story generated by advanced AI GPT-4, serving as a thought-provoking springboard to speculate how humanity could leverage technology for good.","airtime":"SUN 2pm","imageSrc":"https://cdn.kqed.org/wp-content/uploads/2024/04/Possible-Podcast-Tile-360x360-1.jpg","officialWebsiteLink":"https://www.possible.fm/","meta":{"site":"news","source":"Possible"},"link":"/radio/program/possible","subscribe":{"apple":"https://podcasts.apple.com/us/podcast/possible/id1677184070","spotify":"https://open.spotify.com/show/730YpdUSNlMyPQwNnyjp4k"}},"1a":{"id":"1a","title":"1A","info":"1A is home to the national conversation. 1A brings on great guests and frames the best debate in ways that make you think, share and engage.","airtime":"MON-THU 11pm-12am","imageSrc":"https://ww2.kqed.org/radio/wp-content/uploads/sites/50/2018/04/1a.jpg","officialWebsiteLink":"https://the1a.org/","meta":{"site":"news","source":"npr"},"link":"/radio/program/1a","subscribe":{"npr":"https://rpb3r.app.goo.gl/RBrW","apple":"https://itunes.apple.com/WebObjects/MZStore.woa/wa/viewPodcast?s=143441&mt=2&id=1188724250&at=11l79Y&ct=nprdirectory","tuneIn":"https://tunein.com/radio/1A-p947376/","rss":"https://feeds.npr.org/510316/podcast.xml"}},"all-things-considered":{"id":"all-things-considered","title":"All Things Considered","info":"Every weekday, \u003cem>All Things Considered\u003c/em> hosts Robert Siegel, Audie Cornish, Ari Shapiro, and Kelly McEvers present the program's trademark mix of news, interviews, commentaries, reviews, and offbeat features. Michel Martin hosts on the weekends.","airtime":"MON-FRI 1pm-2pm, 4:30pm-6:30pm\u003cbr />SAT-SUN 5pm-6pm","imageSrc":"https://cdn.kqed.org/wp-content/uploads/2024/04/All-Things-Considered-Podcast-Tile-360x360-1.jpg","officialWebsiteLink":"https://www.npr.org/programs/all-things-considered/","meta":{"site":"news","source":"npr"},"link":"/radio/program/all-things-considered"},"american-suburb-podcast":{"id":"american-suburb-podcast","title":"American Suburb: The Podcast","tagline":"The flip side of gentrification, told through one town","info":"Gentrification is changing cities across America, forcing people from neighborhoods they have long called home. Call them the displaced. Now those priced out of the Bay Area are looking for a better life in an unlikely place. American Suburb follows this migration to one California town along the Delta, 45 miles from San Francisco. But is this once sleepy suburb ready for them?","imageSrc":"https://cdn.kqed.org/wp-content/uploads/2024/04/American-Suburb-Podcast-Tile-703x703-1.jpg","officialWebsiteLink":"/news/series/american-suburb-podcast","meta":{"site":"news","source":"kqed","order":"13"},"link":"/news/series/american-suburb-podcast/","subscribe":{"npr":"https://rpb3r.app.goo.gl/RBrW","apple":"https://itunes.apple.com/WebObjects/MZStore.woa/wa/viewPodcast?mt=2&id=1287748328","tuneIn":"https://tunein.com/radio/American-Suburb-p1086805/","rss":"https://ww2.kqed.org/news/series/american-suburb-podcast/feed/podcast","google":"https://podcasts.google.com/feed/aHR0cHM6Ly9mZWVkcy5tZWdhcGhvbmUuZm0vS1FJTkMzMDExODgxNjA5"}},"baycurious":{"id":"baycurious","title":"Bay Curious","tagline":"Exploring the Bay Area, one question at a time","info":"KQED’s new podcast, Bay Curious, gets to the bottom of the mysteries — both profound and peculiar — that give the Bay Area its unique identity. And we’ll do it with your help! You ask the questions. You decide what Bay Curious investigates. And you join us on the journey to find the answers.","imageSrc":"https://cdn.kqed.org/wp-content/uploads/2024/04/Bay-Curious-Podcast-Tile-703x703-1.jpg","imageAlt":"\"KQED Bay Curious","officialWebsiteLink":"/news/series/baycurious","meta":{"site":"news","source":"kqed","order":"4"},"link":"/podcasts/baycurious","subscribe":{"apple":"https://podcasts.apple.com/us/podcast/bay-curious/id1172473406","npr":"https://www.npr.org/podcasts/500557090/bay-curious","rss":"https://ww2.kqed.org/news/category/bay-curious-podcast/feed/podcast","google":"https://podcasts.google.com/feed/aHR0cHM6Ly93dzIua3FlZC5vcmcvbmV3cy9jYXRlZ29yeS9iYXktY3VyaW91cy1wb2RjYXN0L2ZlZWQvcG9kY2FzdA","stitcher":"https://www.stitcher.com/podcast/kqed/bay-curious","spotify":"https://open.spotify.com/show/6O76IdmhixfijmhTZLIJ8k"}},"bbc-world-service":{"id":"bbc-world-service","title":"BBC World Service","info":"The day's top stories from BBC News compiled twice daily in the week, once at weekends.","airtime":"MON-FRI 9pm-10pm, TUE-FRI 1am-2am","imageSrc":"https://cdn.kqed.org/wp-content/uploads/2024/04/BBC-World-Service-Podcast-Tile-360x360-1.jpg","officialWebsiteLink":"https://www.bbc.co.uk/sounds/play/live:bbc_world_service","meta":{"site":"news","source":"BBC World Service"},"link":"/radio/program/bbc-world-service","subscribe":{"apple":"https://itunes.apple.com/us/podcast/global-news-podcast/id135067274?mt=2","tuneIn":"https://tunein.com/radio/BBC-World-Service-p455581/","rss":"https://podcasts.files.bbci.co.uk/p02nq0gn.rss"}},"code-switch-life-kit":{"id":"code-switch-life-kit","title":"Code Switch / Life Kit","info":"\u003cem>Code Switch\u003c/em>, which listeners will hear in the first part of the hour, has fearless and much-needed conversations about race. Hosted by journalists of color, the show tackles the subject of race head-on, exploring how it impacts every part of society — from politics and pop culture to history, sports and more.\u003cbr />\u003cbr />\u003cem>Life Kit\u003c/em>, which will be in the second part of the hour, guides you through spaces and feelings no one prepares you for — from finances to mental health, from workplace microaggressions to imposter syndrome, from relationships to parenting. The show features experts with real world experience and shares their knowledge. Because everyone needs a little help being human.\u003cbr />\u003cbr />\u003ca href=\"https://www.npr.org/podcasts/510312/codeswitch\">\u003cem>Code Switch\u003c/em> offical site and podcast\u003c/a>\u003cbr />\u003ca href=\"https://www.npr.org/lifekit\">\u003cem>Life Kit\u003c/em> offical site and podcast\u003c/a>\u003cbr />","airtime":"SUN 9pm-10pm","imageSrc":"https://cdn.kqed.org/wp-content/uploads/2024/04/Code-Switch-Life-Kit-Podcast-Tile-360x360-1.jpg","meta":{"site":"radio","source":"npr"},"link":"/radio/program/code-switch-life-kit","subscribe":{"apple":"https://podcasts.apple.com/podcast/1112190608?mt=2&at=11l79Y&ct=nprdirectory","google":"https://podcasts.google.com/feed/aHR0cHM6Ly93d3cubnByLm9yZy9yc3MvcG9kY2FzdC5waHA_aWQ9NTEwMzEy","spotify":"https://open.spotify.com/show/3bExJ9JQpkwNhoHvaIIuyV","rss":"https://feeds.npr.org/510312/podcast.xml"}},"commonwealth-club":{"id":"commonwealth-club","title":"Commonwealth Club of California Podcast","info":"The Commonwealth Club of California is the nation's oldest and largest public affairs forum. As a non-partisan forum, The Club brings to the public airwaves diverse viewpoints on important topics. The Club's weekly radio broadcast - the oldest in the U.S., dating back to 1924 - is carried across the nation on public radio stations and is now podcasting. Our website archive features audio of our recent programs, as well as selected speeches from our long and distinguished history. This podcast feed is usually updated twice a week and is always un-edited.","airtime":"THU 10pm, FRI 1am","imageSrc":"https://cdn.kqed.org/wp-content/uploads/2024/04/Commonwealth-Club-Podcast-Tile-360x360-1.jpg","officialWebsiteLink":"https://www.commonwealthclub.org/podcasts","meta":{"site":"news","source":"Commonwealth Club of California"},"link":"/radio/program/commonwealth-club","subscribe":{"apple":"https://itunes.apple.com/us/podcast/commonwealth-club-of-california-podcast/id976334034?mt=2","google":"https://podcasts.google.com/feed/aHR0cDovL3d3dy5jb21tb253ZWFsdGhjbHViLm9yZy9hdWRpby9wb2RjYXN0L3dlZWtseS54bWw","tuneIn":"https://tunein.com/radio/Commonwealth-Club-of-California-p1060/"}},"considerthis":{"id":"considerthis","title":"Consider This","tagline":"Make sense of the day","info":"Make sense of the day. Every weekday afternoon, Consider This helps you consider the major stories of the day in less than 15 minutes, featuring the reporting and storytelling resources of NPR. Plus, KQED’s Bianca Taylor brings you the local KQED news you need to know.","imageSrc":"https://cdn.kqed.org/wp-content/uploads/2024/04/Consider-This-Podcast-Tile-703x703-1.jpg","imageAlt":"Consider This from NPR and KQED","officialWebsiteLink":"/podcasts/considerthis","meta":{"site":"news","source":"kqed","order":"7"},"link":"/podcasts/considerthis","subscribe":{"apple":"https://podcasts.apple.com/podcast/id1503226625?mt=2&at=11l79Y&ct=nprdirectory","npr":"https://rpb3r.app.goo.gl/coronavirusdaily","google":"https://podcasts.google.com/feed/aHR0cHM6Ly9mZWVkcy5ucHIub3JnLzUxMDM1NS9wb2RjYXN0LnhtbA","spotify":"https://open.spotify.com/show/3Z6JdCS2d0eFEpXHKI6WqH"}},"forum":{"id":"forum","title":"Forum","tagline":"The conversation starts here","info":"KQED’s live call-in program discussing local, state, national and international issues, as well as in-depth interviews.","airtime":"MON-FRI 9am-11am, 10pm-11pm","imageSrc":"https://cdn.kqed.org/wp-content/uploads/2024/04/Forum-Podcast-Tile-703x703-1.jpg","imageAlt":"KQED Forum with Mina Kim and Alexis Madrigal","officialWebsiteLink":"/forum","meta":{"site":"news","source":"kqed","order":"8"},"link":"/forum","subscribe":{"apple":"https://podcasts.apple.com/us/podcast/kqeds-forum/id73329719","google":"https://podcasts.google.com/feed/aHR0cHM6Ly9mZWVkcy5tZWdhcGhvbmUuZm0vS1FJTkM5NTU3MzgxNjMz","npr":"https://www.npr.org/podcasts/432307980/forum","stitcher":"https://www.stitcher.com/podcast/kqedfm-kqeds-forum-podcast","rss":"https://feeds.megaphone.fm/KQINC9557381633"}},"freakonomics-radio":{"id":"freakonomics-radio","title":"Freakonomics Radio","info":"Freakonomics Radio is a one-hour award-winning podcast and public-radio project hosted by Stephen Dubner, with co-author Steve Levitt as a regular guest. It is produced in partnership with WNYC.","imageSrc":"https://ww2.kqed.org/news/wp-content/uploads/sites/10/2018/05/freakonomicsRadio.png","officialWebsiteLink":"http://freakonomics.com/","airtime":"SUN 1am-2am, SAT 3pm-4pm","meta":{"site":"radio","source":"WNYC"},"link":"/radio/program/freakonomics-radio","subscribe":{"npr":"https://rpb3r.app.goo.gl/4s8b","apple":"https://itunes.apple.com/us/podcast/freakonomics-radio/id354668519","tuneIn":"https://tunein.com/podcasts/WNYC-Podcasts/Freakonomics-Radio-p272293/","rss":"https://feeds.feedburner.com/freakonomicsradio"}},"fresh-air":{"id":"fresh-air","title":"Fresh Air","info":"Hosted by Terry Gross, \u003cem>Fresh Air from WHYY\u003c/em> is the Peabody Award-winning weekday magazine of contemporary arts and issues. One of public radio's most popular programs, Fresh Air features intimate conversations with today's biggest luminaries.","airtime":"MON-FRI 7pm-8pm","imageSrc":"https://cdn.kqed.org/wp-content/uploads/2024/04/Fresh-Air-Podcast-Tile-360x360-1.jpg","officialWebsiteLink":"https://www.npr.org/programs/fresh-air/","meta":{"site":"radio","source":"npr"},"link":"/radio/program/fresh-air","subscribe":{"npr":"https://rpb3r.app.goo.gl/4s8b","apple":"https://itunes.apple.com/WebObjects/MZStore.woa/wa/viewPodcast?s=143441&mt=2&id=214089682&at=11l79Y&ct=nprdirectory","tuneIn":"https://tunein.com/radio/Fresh-Air-p17/","rss":"https://feeds.npr.org/381444908/podcast.xml"}},"here-and-now":{"id":"here-and-now","title":"Here & Now","info":"A live production of NPR and WBUR Boston, in collaboration with stations across the country, Here & Now reflects the fluid world of news as it's happening in the middle of the day, with timely, in-depth news, interviews and conversation. Hosted by Robin Young, Jeremy Hobson and Tonya Mosley.","airtime":"MON-THU 11am-12pm","imageSrc":"https://cdn.kqed.org/wp-content/uploads/2024/04/Here-And-Now-Podcast-Tile-360x360-1.jpg","officialWebsiteLink":"http://www.wbur.org/hereandnow","meta":{"site":"news","source":"npr"},"link":"/radio/program/here-and-now","subsdcribe":{"apple":"https://itunes.apple.com/WebObjects/MZStore.woa/wa/viewPodcast?mt=2&id=426698661","tuneIn":"https://tunein.com/radio/Here--Now-p211/","rss":"https://feeds.npr.org/510051/podcast.xml"}},"how-i-built-this":{"id":"how-i-built-this","title":"How I Built This with Guy Raz","info":"Guy Raz dives into the stories behind some of the world's best known companies. How I Built This weaves a narrative journey about innovators, entrepreneurs and idealists—and the movements they built.","imageSrc":"https://ww2.kqed.org/news/wp-content/uploads/sites/10/2018/05/howIBuiltThis.png","officialWebsiteLink":"https://www.npr.org/podcasts/510313/how-i-built-this","airtime":"SUN 7:30pm-8pm","meta":{"site":"news","source":"npr"},"link":"/radio/program/how-i-built-this","subscribe":{"npr":"https://rpb3r.app.goo.gl/3zxy","apple":"https://itunes.apple.com/us/podcast/how-i-built-this-with-guy-raz/id1150510297?mt=2","tuneIn":"https://tunein.com/podcasts/Arts--Culture-Podcasts/How-I-Built-This-p910896/","rss":"https://feeds.npr.org/510313/podcast.xml"}},"inside-europe":{"id":"inside-europe","title":"Inside Europe","info":"Inside Europe, a one-hour weekly news magazine hosted by Helen Seeney and Keith Walker, explores the topical issues shaping the continent. No other part of the globe has experienced such dynamic political and social change in recent years.","airtime":"SAT 3am-4am","imageSrc":"https://cdn.kqed.org/wp-content/uploads/2024/04/Inside-Europe-Podcast-Tile-300x300-1.jpg","meta":{"site":"news","source":"Deutsche Welle"},"link":"/radio/program/inside-europe","subscribe":{"apple":"https://itunes.apple.com/us/podcast/inside-europe/id80106806?mt=2","tuneIn":"https://tunein.com/radio/Inside-Europe-p731/","rss":"https://partner.dw.com/xml/podcast_inside-europe"}},"latino-usa":{"id":"latino-usa","title":"Latino USA","airtime":"MON 1am-2am, SUN 6pm-7pm","info":"Latino USA, the radio journal of news and culture, is the only national, English-language radio program produced from a Latino perspective.","imageSrc":"https://ww2.kqed.org/radio/wp-content/uploads/sites/50/2018/04/latinoUsa.jpg","officialWebsiteLink":"http://latinousa.org/","meta":{"site":"news","source":"npr"},"link":"/radio/program/latino-usa","subscribe":{"npr":"https://rpb3r.app.goo.gl/xtTd","apple":"https://itunes.apple.com/WebObjects/MZStore.woa/wa/viewPodcast?s=143441&mt=2&id=79681317&at=11l79Y&ct=nprdirectory","tuneIn":"https://tunein.com/radio/Latino-USA-p621/","rss":"https://feeds.npr.org/510016/podcast.xml"}},"live-from-here-highlights":{"id":"live-from-here-highlights","title":"Live from Here Highlights","info":"Chris Thile steps to the mic as the host of Live from Here (formerly A Prairie Home Companion), a live public radio variety show. Download Chris’s Song of the Week plus other highlights from the broadcast. Produced by American Public Media.","airtime":"SAT 6pm-8pm, SUN 11am-1pm","imageSrc":"https://cdn.kqed.org/wp-content/uploads/2024/04/Live-From-Here-Podcast-Tile-360x360-1.jpg","officialWebsiteLink":"https://www.livefromhere.org/","meta":{"site":"arts","source":"american public media"},"link":"/radio/program/live-from-here-highlights","subscribe":{"apple":"https://itunes.apple.com/us/podcast/id1167173941","tuneIn":"https://tunein.com/radio/Live-from-Here-Highlights-p921744/","rss":"https://feeds.publicradio.org/public_feeds/a-prairie-home-companion-highlights/rss/rss"}},"marketplace":{"id":"marketplace","title":"Marketplace","info":"Our flagship program, helmed by Kai Ryssdal, examines what the day in money delivered, through stories, conversations, newsworthy numbers and more. Updated Monday through Friday at about 3:30 p.m. PT.","airtime":"MON-FRI 4pm-4:30pm, MON-WED 6:30pm-7pm","imageSrc":"https://cdn.kqed.org/wp-content/uploads/2024/04/Marketplace-Podcast-Tile-360x360-1.jpg","officialWebsiteLink":"https://www.marketplace.org/","meta":{"site":"news","source":"American Public Media"},"link":"/radio/program/marketplace","subscribe":{"apple":"https://itunes.apple.com/WebObjects/MZStore.woa/wa/viewPodcast?s=143441&mt=2&id=201853034&at=11l79Y&ct=nprdirectory","tuneIn":"https://tunein.com/radio/APM-Marketplace-p88/","rss":"https://feeds.publicradio.org/public_feeds/marketplace-pm/rss/rss"}},"mindshift":{"id":"mindshift","title":"MindShift","tagline":"A podcast about the future of learning and how we raise our kids","info":"The MindShift podcast explores the innovations in education that are shaping how kids learn. Hosts Ki Sung and Katrina Schwartz introduce listeners to educators, researchers, parents and students who are developing effective ways to improve how kids learn. We cover topics like how fed-up administrators are developing surprising tactics to deal with classroom disruptions; how listening to podcasts are helping kids develop reading skills; the consequences of overparenting; and why interdisciplinary learning can engage students on all ends of the traditional achievement spectrum. This podcast is part of the MindShift education site, a division of KQED News. KQED is an NPR/PBS member station based in San Francisco. You can also visit the MindShift website for episodes and supplemental blog posts or tweet us \u003ca href=\"https://twitter.com/MindShiftKQED\">@MindShiftKQED\u003c/a> or visit us at \u003ca href=\"/mindshift\">MindShift.KQED.org\u003c/a>","imageSrc":"https://cdn.kqed.org/wp-content/uploads/2024/04/Mindshift-Podcast-Tile-703x703-1.jpg","imageAlt":"KQED MindShift: How We Will Learn","officialWebsiteLink":"/mindshift/","meta":{"site":"news","source":"kqed","order":"2"},"link":"/podcasts/mindshift","subscribe":{"apple":"https://podcasts.apple.com/us/podcast/mindshift-podcast/id1078765985","google":"https://podcasts.google.com/feed/aHR0cHM6Ly9mZWVkcy5tZWdhcGhvbmUuZm0vS1FJTkM1NzY0NjAwNDI5","npr":"https://www.npr.org/podcasts/464615685/mind-shift-podcast","stitcher":"https://www.stitcher.com/podcast/kqed/stories-teachers-share","spotify":"https://open.spotify.com/show/0MxSpNYZKNprFLCl7eEtyx"}},"morning-edition":{"id":"morning-edition","title":"Morning Edition","info":"\u003cem>Morning Edition\u003c/em> takes listeners around the country and the world with multi-faceted stories and commentaries every weekday. Hosts Steve Inskeep, David Greene and Rachel Martin bring you the latest breaking news and features to prepare you for the day.","airtime":"MON-FRI 3am-9am","imageSrc":"https://cdn.kqed.org/wp-content/uploads/2024/04/Morning-Edition-Podcast-Tile-360x360-1.jpg","officialWebsiteLink":"https://www.npr.org/programs/morning-edition/","meta":{"site":"news","source":"npr"},"link":"/radio/program/morning-edition"},"onourwatch":{"id":"onourwatch","title":"On Our Watch","tagline":"Police secrets, unsealed","info":"For decades, the process for how police police themselves has been inconsistent – if not opaque. In some states, like California, these proceedings were completely hidden. After a new police transparency law unsealed scores of internal affairs files, our reporters set out to examine these cases and the shadow world of police discipline. On Our Watch brings listeners into the rooms where officers are questioned and witnesses are interrogated to find out who this system is really protecting. Is it the officers, or the public they've sworn to serve?","imageSrc":"https://cdn.kqed.org/wp-content/uploads/2024/04/On-Our-Watch-Podcast-Tile-703x703-1.jpg","imageAlt":"On Our Watch from NPR and KQED","officialWebsiteLink":"/podcasts/onourwatch","meta":{"site":"news","source":"kqed","order":"1"},"link":"/podcasts/onourwatch","subscribe":{"apple":"https://podcasts.apple.com/podcast/id1567098962","google":"https://podcasts.google.com/feed/aHR0cHM6Ly9mZWVkcy5ucHIub3JnLzUxMDM2MC9wb2RjYXN0LnhtbD9zYz1nb29nbGVwb2RjYXN0cw","npr":"https://rpb3r.app.goo.gl/onourwatch","spotify":"https://open.spotify.com/show/0OLWoyizopu6tY1XiuX70x","tuneIn":"https://tunein.com/radio/On-Our-Watch-p1436229/","stitcher":"https://www.stitcher.com/show/on-our-watch","rss":"https://feeds.npr.org/510360/podcast.xml"}},"on-the-media":{"id":"on-the-media","title":"On The Media","info":"Our weekly podcast explores how the media 'sausage' is made, casts an incisive eye on fluctuations in the marketplace of ideas, and examines threats to the freedom of information and expression in America and abroad. For one hour a week, the show tries to lift the veil from the process of \"making media,\" especially news media, because it's through that lens that we see the world and the world sees us","airtime":"SUN 2pm-3pm, MON 12am-1am","imageSrc":"https://ww2.kqed.org/radio/wp-content/uploads/sites/50/2018/04/onTheMedia.png","officialWebsiteLink":"https://www.wnycstudios.org/shows/otm","meta":{"site":"news","source":"wnyc"},"link":"/radio/program/on-the-media","subscribe":{"apple":"https://itunes.apple.com/us/podcast/on-the-media/id73330715?mt=2","tuneIn":"https://tunein.com/radio/On-the-Media-p69/","rss":"http://feeds.wnyc.org/onthemedia"}},"our-body-politic":{"id":"our-body-politic","title":"Our Body Politic","info":"Presented by KQED, KCRW and KPCC, and created and hosted by award-winning journalist Farai Chideya, Our Body Politic is unapologetically centered on reporting on not just how women of color experience the major political events of today, but how they’re impacting those very issues.","airtime":"SAT 6pm-7pm, SUN 1am-2am","imageSrc":"https://cdn.kqed.org/wp-content/uploads/2024/04/Our-Body-Politic-Podcast-Tile-360x360-1.jpg","officialWebsiteLink":"https://our-body-politic.simplecast.com/","meta":{"site":"news","source":"kcrw"},"link":"/radio/program/our-body-politic","subscribe":{"apple":"https://podcasts.apple.com/us/podcast/our-body-politic/id1533069868","google":"https://podcasts.google.com/feed/aHR0cHM6Ly9mZWVkcy5zaW1wbGVjYXN0LmNvbS9feGFQaHMxcw","spotify":"https://open.spotify.com/show/4ApAiLT1kV153TttWAmqmc","rss":"https://feeds.simplecast.com/_xaPhs1s","tuneIn":"https://tunein.com/podcasts/News--Politics-Podcasts/Our-Body-Politic-p1369211/"}},"pbs-newshour":{"id":"pbs-newshour","title":"PBS NewsHour","info":"Analysis, background reports and updates from the PBS NewsHour putting today's news in context.","airtime":"MON-FRI 3pm-4pm","imageSrc":"https://cdn.kqed.org/wp-content/uploads/2024/04/PBS-News-Hour-Podcast-Tile-360x360-1.jpg","officialWebsiteLink":"https://www.pbs.org/newshour/","meta":{"site":"news","source":"pbs"},"link":"/radio/program/pbs-newshour","subscribe":{"apple":"https://itunes.apple.com/us/podcast/pbs-newshour-full-show/id394432287?mt=2","tuneIn":"https://tunein.com/radio/PBS-NewsHour---Full-Show-p425698/","rss":"https://www.pbs.org/newshour/feeds/rss/podcasts/show"}},"perspectives":{"id":"perspectives","title":"Perspectives","tagline":"KQED's series of of daily listener commentaries since 1991","info":"KQED's series of of daily listener commentaries since 1991.","imageSrc":"https://cdn.kqed.org/wp-content/uploads/2024/04/Perspectives-Podcast-Tile-703x703-1.jpg","officialWebsiteLink":"/perspectives/","meta":{"site":"radio","source":"kqed","order":"15"},"link":"/perspectives","subscribe":{"apple":"https://podcasts.apple.com/us/podcast/id73801135","npr":"https://www.npr.org/podcasts/432309616/perspectives","rss":"https://ww2.kqed.org/perspectives/category/perspectives/feed/","google":"https://podcasts.google.com/feed/aHR0cHM6Ly93dzIua3FlZC5vcmcvcGVyc3BlY3RpdmVzL2NhdGVnb3J5L3BlcnNwZWN0aXZlcy9mZWVkLw"}},"planet-money":{"id":"planet-money","title":"Planet Money","info":"The economy explained. Imagine you could call up a friend and say, Meet me at the bar and tell me what's going on with the economy. Now imagine that's actually a fun evening.","airtime":"SUN 3pm-4pm","imageSrc":"https://ww2.kqed.org/radio/wp-content/uploads/sites/50/2018/04/planetmoney.jpg","officialWebsiteLink":"https://www.npr.org/sections/money/","meta":{"site":"news","source":"npr"},"link":"/radio/program/planet-money","subscribe":{"npr":"https://rpb3r.app.goo.gl/M4f5","apple":"https://itunes.apple.com/us/podcast/planet-money/id290783428?mt=2","tuneIn":"https://tunein.com/podcasts/Business--Economics-Podcasts/Planet-Money-p164680/","rss":"https://feeds.npr.org/510289/podcast.xml"}},"politicalbreakdown":{"id":"politicalbreakdown","title":"Political Breakdown","tagline":"Politics from a personal perspective","info":"Political Breakdown is a new series that explores the political intersection of California and the nation. Each week hosts Scott Shafer and Marisa Lagos are joined with a new special guest to unpack politics -- with personality — and offer an insider’s glimpse at how politics happens.","airtime":"THU 6:30pm-7pm","imageSrc":"https://cdn.kqed.org/wp-content/uploads/2024/04/Political-Breakdown-2024-Podcast-Tile-703x703-1.jpg","imageAlt":"KQED Political Breakdown","officialWebsiteLink":"/podcasts/politicalbreakdown","meta":{"site":"radio","source":"kqed","order":"11"},"link":"/podcasts/politicalbreakdown","subscribe":{"apple":"https://podcasts.apple.com/us/podcast/political-breakdown/id1327641087","google":"https://podcasts.google.com/feed/aHR0cHM6Ly9mZWVkcy5tZWdhcGhvbmUuZm0vS1FJTkM5Nzk2MzI2MTEx","npr":"https://www.npr.org/podcasts/572155894/political-breakdown","stitcher":"https://www.stitcher.com/podcast/kqed/political-breakdown","spotify":"https://open.spotify.com/show/07RVyIjIdk2WDuVehvBMoN","rss":"https://ww2.kqed.org/news/tag/political-breakdown/feed/podcast"}},"pri-the-world":{"id":"pri-the-world","title":"PRI's The World: Latest Edition","info":"Each weekday, host Marco Werman and his team of producers bring you the world's most interesting stories in an hour of radio that reminds us just how small our planet really is.","airtime":"MON-FRI 2pm-3pm","imageSrc":"https://cdn.kqed.org/wp-content/uploads/2024/04/The-World-Podcast-Tile-360x360-1.jpg","officialWebsiteLink":"https://www.pri.org/programs/the-world","meta":{"site":"news","source":"PRI"},"link":"/radio/program/pri-the-world","subscribe":{"apple":"https://itunes.apple.com/us/podcast/pris-the-world-latest-edition/id278196007?mt=2","tuneIn":"https://tunein.com/podcasts/News--Politics-Podcasts/PRIs-The-World-p24/","rss":"http://feeds.feedburner.com/pri/theworld"}},"radiolab":{"id":"radiolab","title":"Radiolab","info":"A two-time Peabody Award-winner, Radiolab is an investigation told through sounds and stories, and centered around one big idea. In the Radiolab world, information sounds like music and science and culture collide. Hosted by Jad Abumrad and Robert Krulwich, the show is designed for listeners who demand skepticism, but appreciate wonder. WNYC Studios is the producer of other leading podcasts including Freakonomics Radio, Death, Sex & Money, On the Media and many more.","airtime":"SUN 12am-1am, SAT 2pm-3pm","imageSrc":"https://ww2.kqed.org/radio/wp-content/uploads/sites/50/2018/04/radiolab1400.png","officialWebsiteLink":"https://www.wnycstudios.org/shows/radiolab/","meta":{"site":"science","source":"WNYC"},"link":"/radio/program/radiolab","subscribe":{"apple":"https://itunes.apple.com/us/podcast/radiolab/id152249110?mt=2","tuneIn":"https://tunein.com/radio/RadioLab-p68032/","rss":"https://feeds.wnyc.org/radiolab"}},"reveal":{"id":"reveal","title":"Reveal","info":"Created by The Center for Investigative Reporting and PRX, Reveal is public radios first one-hour weekly radio show and podcast dedicated to investigative reporting. Credible, fact based and without a partisan agenda, Reveal combines the power and artistry of driveway moment storytelling with data-rich reporting on critically important issues. The result is stories that inform and inspire, arming our listeners with information to right injustices, hold the powerful accountable and improve lives.Reveal is hosted by Al Letson and showcases the award-winning work of CIR and newsrooms large and small across the nation. In a radio and podcast market crowded with choices, Reveal focuses on important and often surprising stories that illuminate the world for our listeners.","airtime":"SAT 4pm-5pm","imageSrc":"https://ww2.kqed.org/radio/wp-content/uploads/sites/50/2018/04/reveal300px.png","officialWebsiteLink":"https://www.revealnews.org/episodes/","meta":{"site":"news","source":"npr"},"link":"/radio/program/reveal","subscribe":{"apple":"https://itunes.apple.com/us/podcast/reveal/id886009669","tuneIn":"https://tunein.com/radio/Reveal-p679597/","rss":"http://feeds.revealradio.org/revealpodcast"}},"says-you":{"id":"says-you","title":"Says You!","info":"Public radio's game show of bluff and bluster, words and whimsy. The warmest, wittiest cocktail party - it's spirited and civil, brainy and boisterous, peppered with musical interludes. Fast paced and playful, it's the most fun you can have with language without getting your mouth washed out with soap. Our motto: It's not important to know the answers, it's important to like the answers!","airtime":"SUN 4pm-5pm","imageSrc":"https://cdn.kqed.org/wp-content/uploads/2024/04/Says-You-Podcast-Tile-360x360-1.jpg","officialWebsiteLink":"http://www.saysyouradio.com/","meta":{"site":"comedy","source":"Pipit and Finch"},"link":"/radio/program/says-you","subscribe":{"apple":"https://itunes.apple.com/us/podcast/says-you!/id1050199826","tuneIn":"https://tunein.com/radio/Says-You-p480/","rss":"https://saysyou.libsyn.com/rss"}},"science-friday":{"id":"science-friday","title":"Science Friday","info":"Science Friday is a weekly science talk show, broadcast live over public radio stations nationwide. Each week, the show focuses on science topics that are in the news and tries to bring an educated, balanced discussion to bear on the scientific issues at hand. Panels of expert guests join host Ira Flatow, a veteran science journalist, to discuss science and to take questions from listeners during the call-in portion of the program.","airtime":"FRI 11am-1pm","imageSrc":"https://cdn.kqed.org/wp-content/uploads/2024/04/Science-Friday-Podcast-Tile-360x360-1.jpg","officialWebsiteLink":"https://www.wnycstudios.org/shows/science-friday","meta":{"site":"news","source":"npr"},"link":"/radio/program/science-friday","subscribe":{"apple":"https://itunes.apple.com/WebObjects/MZStore.woa/wa/viewPodcast?s=143441&mt=2&id=73329284&at=11l79Y&ct=nprdirectory","tuneIn":"https://tunein.com/radio/Science-Friday-p394/","rss":"http://feeds.wnyc.org/science-friday"}},"science-podcast":{"id":"science-podcast","title":"KQED Science News","tagline":"From the lab, to your ears","info":"KQED Science explores science and environment news, trends, and events from the Bay Area and beyond.","imageSrc":"https://cdn.kqed.org/wp-content/uploads/2024/04/Science-News-Podcast-Tile-703x703-1.jpg","officialWebsiteLink":"https://ww2.kqed.org/science/category/science-podcast/","meta":{"site":"science","source":"kqed","order":"17"},"link":"/science/category/science-podcast","subscribe":{"apple":"https://podcasts.apple.com/us/podcast/kqed-science-news/id214663465","google":"https://podcasts.google.com/feed/aHR0cDovL2Jsb2dzLmtxZWQub3JnL3NjaWVuY2UvZmVlZC8","stitcher":"https://www.stitcher.com/podcast/kqed-science-news","rss":"https://ww2.kqed.org/science/category/science-podcast/feed/podcast"}},"selected-shorts":{"id":"selected-shorts","title":"Selected Shorts","info":"Spellbinding short stories by established and emerging writers take on a new life when they are performed by stars of the stage and screen.","airtime":"SAT 8pm-9pm","imageSrc":"https://cdn.kqed.org/wp-content/uploads/2024/04/Selected-Shorts-Podcast-Tile-360x360-1.jpg","officialWebsiteLink":"https://www.pri.org/programs/selected-shorts","meta":{"site":"arts","source":"pri"},"link":"/radio/program/selected-shorts","subscribe":{"apple":"https://itunes.apple.com/WebObjects/MZStore.woa/wa/viewPodcast?s=143441&mt=2&id=253191824&at=11l79Y&ct=nprdirectory","tuneIn":"https://tunein.com/radio/Selected-Shorts-p31792/","rss":"https://feeds.megaphone.fm/selectedshorts"}},"snap-judgment":{"id":"snap-judgment","title":"Snap Judgment","info":"Snap Judgment (Storytelling, with a BEAT) mixes real stories with killer beats to produce cinematic, dramatic, kick-ass radio. Snap’s raw, musical brand of storytelling dares listeners to see the world through the eyes of another. WNYC studios is the producer of leading podcasts including Radiolab, Freakonomics Radio, Note To Self, Here’s The Thing With Alec Baldwin, and more.","airtime":"SAT 1pm-2pm, 9pm-10pm","imageSrc":"https://ww2.kqed.org/radio/wp-content/uploads/sites/50/2018/04/snapJudgement.jpg","officialWebsiteLink":"https://snapjudgment.org","meta":{"site":"arts","source":"WNYC"},"link":"/radio/program/snap-judgment","subscribe":{"apple":"https://itunes.apple.com/WebObjects/MZStore.woa/wa/viewPodcast?s=143441&mt=2&id=283657561&at=11l79Y&ct=nprdirectory","tuneIn":"https://tunein.com/radio/Snap-Judgment-p243817/","rss":"https://feeds.feedburner.com/snapjudgment-wnyc"}},"soldout":{"id":"soldout","title":"SOLD OUT: Rethinking Housing in America","tagline":"A new future for housing","info":"Sold Out: Rethinking Housing in America","imageSrc":"https://cdn.kqed.org/wp-content/uploads/2024/04/Sold-Out-Podcast-Tile-703x703-1.jpg","imageAlt":"KQED Sold Out: Rethinking Housing in America","officialWebsiteLink":"/podcasts/soldout","meta":{"site":"news","source":"kqed","order":3},"link":"/podcasts/soldout","subscribe":{"npr":"https://www.npr.org/podcasts/911586047/s-o-l-d-o-u-t-a-new-future-for-housing","apple":"https://podcasts.apple.com/us/podcast/introducing-sold-out-rethinking-housing-in-america/id1531354937","rss":"https://feeds.megaphone.fm/soldout","spotify":"https://open.spotify.com/show/38dTBSk2ISFoPiyYNoKn1X","stitcher":"https://www.stitcher.com/podcast/kqed/sold-out-rethinking-housing-in-america","tunein":"https://tunein.com/radio/SOLD-OUT-Rethinking-Housing-in-America-p1365871/","google":"https://podcasts.google.com/feed/aHR0cHM6Ly9mZWVkcy5tZWdhcGhvbmUuZm0vc29sZG91dA"}},"ted-radio-hour":{"id":"ted-radio-hour","title":"TED Radio Hour","info":"The TED Radio Hour is a journey through fascinating ideas, astonishing inventions, fresh approaches to old problems, and new ways to think and create.","airtime":"SUN 3pm-4pm, SAT 10pm-11pm","imageSrc":"https://ww2.kqed.org/radio/wp-content/uploads/sites/50/2018/04/tedRadioHour.jpg","officialWebsiteLink":"https://www.npr.org/programs/ted-radio-hour/?showDate=2018-06-22","meta":{"site":"news","source":"npr"},"link":"/radio/program/ted-radio-hour","subscribe":{"npr":"https://rpb3r.app.goo.gl/8vsS","apple":"https://itunes.apple.com/WebObjects/MZStore.woa/wa/viewPodcast?s=143441&mt=2&id=523121474&at=11l79Y&ct=nprdirectory","tuneIn":"https://tunein.com/radio/TED-Radio-Hour-p418021/","rss":"https://feeds.npr.org/510298/podcast.xml"}},"tech-nation":{"id":"tech-nation","title":"Tech Nation Radio Podcast","info":"Tech Nation is a weekly public radio program, hosted by Dr. Moira Gunn. Founded in 1993, it has grown from a simple interview show to a multi-faceted production, featuring conversations with noted technology and science leaders, and a weekly science and technology-related commentary.","airtime":"FRI 10pm","imageSrc":"https://cdn.kqed.org/wp-content/uploads/2024/04/Tech-Nation-Radio-Podcast-Tile-360x360-1.jpg","officialWebsiteLink":"http://technation.podomatic.com/","meta":{"site":"science","source":"Tech Nation Media"},"link":"/radio/program/tech-nation","subscribe":{"rss":"https://technation.podomatic.com/rss2.xml"}},"thebay":{"id":"thebay","title":"The Bay","tagline":"Local news to keep you rooted","info":"Host Devin Katayama walks you through the biggest story of the day with reporters and newsmakers.","imageSrc":"https://cdn.kqed.org/wp-content/uploads/2024/04/The-Bay-Podcast-Tile-703x703-1.jpg","imageAlt":"\"KQED The Bay","officialWebsiteLink":"/podcasts/thebay","meta":{"site":"radio","source":"kqed","order":"6"},"link":"/podcasts/thebay","subscribe":{"apple":"https://podcasts.apple.com/us/podcast/the-bay/id1350043452","google":"https://podcasts.google.com/feed/aHR0cHM6Ly9mZWVkcy5tZWdhcGhvbmUuZm0vS1FJTkM4MjU5Nzg2MzI3","npr":"https://www.npr.org/podcasts/586725995/the-bay","stitcher":"https://www.stitcher.com/podcast/kqed/the-bay","spotify":"https://open.spotify.com/show/4BIKBKIujizLHlIlBNaAqQ","rss":"https://feeds.megaphone.fm/KQINC8259786327"}},"californiareport":{"id":"californiareport","title":"The California Report","tagline":"California, day by day","info":"KQED’s statewide radio news program providing daily coverage of issues, trends and public policy decisions.","imageSrc":"https://cdn.kqed.org/wp-content/uploads/2024/04/The-California-Report-Podcast-Tile-703x703-1.jpg","imageAlt":"KQED The California Report","officialWebsiteLink":"/californiareport","meta":{"site":"news","source":"kqed","order":"9"},"link":"/californiareport","subscribe":{"apple":"https://podcasts.apple.com/us/podcast/kqeds-the-california-report/id79681292","google":"https://podcasts.google.com/feed/aHR0cHM6Ly9mZWVkcy5tZWdhcGhvbmUuZm0vS1FJTkM1MDAyODE4NTgz","npr":"https://www.npr.org/podcasts/432285393/the-california-report","stitcher":"https://www.stitcher.com/podcast/kqedfm-kqeds-the-california-report-podcast-8838","rss":"https://ww2.kqed.org/news/tag/tcram/feed/podcast"}},"californiareportmagazine":{"id":"californiareportmagazine","title":"The California Report Magazine","tagline":"Your state, your stories","info":"Every week, The California Report Magazine takes you on a road trip for the ears: to visit the places and meet the people who make California unique. The in-depth storytelling podcast from the California Report.","airtime":"FRI 4:30pm-5pm, 6:30pm-7pm, 11pm-11:30pm","imageSrc":"https://cdn.kqed.org/wp-content/uploads/2024/04/The-California-Report-Magazine-Podcast-Tile-703x703-1.jpg","officialWebsiteLink":"/californiareportmagazine","meta":{"site":"news","source":"kqed","order":"10"},"link":"/californiareportmagazine","subscribe":{"apple":"https://podcasts.apple.com/us/podcast/the-california-report-magazine/id1314750545","google":"https://podcasts.google.com/feed/aHR0cHM6Ly9mZWVkcy5tZWdhcGhvbmUuZm0vS1FJTkM3NjkwNjk1OTAz","npr":"https://www.npr.org/podcasts/564733126/the-california-report-magazine","stitcher":"https://www.stitcher.com/podcast/kqed/the-california-report-magazine","rss":"https://ww2.kqed.org/news/tag/tcrmag/feed/podcast"}},"theleap":{"id":"theleap","title":"The Leap","tagline":"What if you closed your eyes, and jumped?","info":"Stories about people making dramatic, risky changes, told by award-winning public radio reporter Judy Campbell.","imageSrc":"https://cdn.kqed.org/wp-content/uploads/2024/04/The-Leap-Podcast-Tile-703x703-1.jpg","imageAlt":"KQED The Leap","officialWebsiteLink":"/podcasts/theleap","meta":{"site":"news","source":"kqed","order":"14"},"link":"/podcasts/theleap","subscribe":{"apple":"https://podcasts.apple.com/us/podcast/the-leap/id1046668171","google":"https://podcasts.google.com/feed/aHR0cHM6Ly9mZWVkcy5tZWdhcGhvbmUuZm0vS1FJTkM0NTcwODQ2MjY2","npr":"https://www.npr.org/podcasts/447248267/the-leap","stitcher":"https://www.stitcher.com/podcast/kqed/the-leap","spotify":"https://open.spotify.com/show/3sSlVHHzU0ytLwuGs1SD1U","rss":"https://ww2.kqed.org/news/programs/the-leap/feed/podcast"}},"masters-of-scale":{"id":"masters-of-scale","title":"Masters of Scale","info":"Masters of Scale is an original podcast in which LinkedIn co-founder and Greylock Partner Reid Hoffman sets out to describe and prove theories that explain how great entrepreneurs take their companies from zero to a gazillion in ingenious fashion.","airtime":"Every other Wednesday June 12 through October 16 at 8pm (repeats Thursdays at 2am)","imageSrc":"https://cdn.kqed.org/wp-content/uploads/2024/04/Masters-of-Scale-Podcast-Tile-360x360-1.jpg","officialWebsiteLink":"https://mastersofscale.com/","meta":{"site":"radio","source":"WaitWhat"},"link":"/radio/program/masters-of-scale","subscribe":{"apple":"http://mastersofscale.app.link/","rss":"https://rss.art19.com/masters-of-scale"}},"the-moth-radio-hour":{"id":"the-moth-radio-hour","title":"The Moth Radio Hour","info":"Since its launch in 1997, The Moth has presented thousands of true stories, told live and without notes, to standing-room-only crowds worldwide. Moth storytellers stand alone, under a spotlight, with only a microphone and a roomful of strangers. The storyteller and the audience embark on a high-wire act of shared experience which is both terrifying and exhilarating. Since 2008, The Moth podcast has featured many of our favorite stories told live on Moth stages around the country. For information on all of our programs and live events, visit themoth.org.","airtime":"SAT 8pm-9pm and SUN 11am-12pm","imageSrc":"https://ww2.kqed.org/radio/wp-content/uploads/sites/50/2018/04/theMoth.jpg","officialWebsiteLink":"https://themoth.org/","meta":{"site":"arts","source":"prx"},"link":"/radio/program/the-moth-radio-hour","subscribe":{"apple":"https://itunes.apple.com/us/podcast/the-moth-podcast/id275699983?mt=2","tuneIn":"https://tunein.com/radio/The-Moth-p273888/","rss":"http://feeds.themoth.org/themothpodcast"}},"the-new-yorker-radio-hour":{"id":"the-new-yorker-radio-hour","title":"The New Yorker Radio Hour","info":"The New Yorker Radio Hour is a weekly program presented by the magazine's editor, David Remnick, and produced by WNYC Studios and The New Yorker. Each episode features a diverse mix of interviews, profiles, storytelling, and an occasional burst of humor inspired by the magazine, and shaped by its writers, artists, and editors. This isn't a radio version of a magazine, but something all its own, reflecting the rich possibilities of audio storytelling and conversation. Theme music for the show was composed and performed by Merrill Garbus of tUnE-YArDs.","airtime":"SAT 10am-11am","imageSrc":"https://cdn.kqed.org/wp-content/uploads/2024/04/The-New-Yorker-Podcast-Tile-360x360-1.jpg","officialWebsiteLink":"https://www.wnycstudios.org/shows/tnyradiohour","meta":{"site":"arts","source":"WNYC"},"link":"/radio/program/the-new-yorker-radio-hour","subscribe":{"apple":"https://itunes.apple.com/us/podcast/id1050430296","tuneIn":"https://tunein.com/podcasts/WNYC-Podcasts/New-Yorker-Radio-Hour-p803804/","rss":"https://feeds.feedburner.com/newyorkerradiohour"}},"the-takeaway":{"id":"the-takeaway","title":"The Takeaway","info":"The Takeaway is produced in partnership with its national audience. It delivers perspective and analysis to help us better understand the day’s news. Be a part of the American conversation on-air and online.","airtime":"MON-THU 12pm-1pm","imageSrc":"https://cdn.kqed.org/wp-content/uploads/2024/04/The-Takeaway-Podcast-Tile-360x360-1.jpg","officialWebsiteLink":"https://www.wnycstudios.org/shows/takeaway","meta":{"site":"news","source":"WNYC"},"link":"/radio/program/the-takeaway","subscribe":{"apple":"https://itunes.apple.com/us/podcast/the-takeaway/id363143310?mt=2","tuneIn":"http://tunein.com/radio/The-Takeaway-p150731/","rss":"https://feeds.feedburner.com/takeawaypodcast"}},"this-american-life":{"id":"this-american-life","title":"This American Life","info":"This American Life is a weekly public radio show, heard by 2.2 million people on more than 500 stations. Another 2.5 million people download the weekly podcast. It is hosted by Ira Glass, produced in collaboration with Chicago Public Media, delivered to stations by PRX The Public Radio Exchange, and has won all of the major broadcasting awards.","airtime":"SAT 12pm-1pm, 7pm-8pm","imageSrc":"https://ww2.kqed.org/radio/wp-content/uploads/sites/50/2018/04/thisAmericanLife.png","officialWebsiteLink":"https://www.thisamericanlife.org/","meta":{"site":"news","source":"wbez"},"link":"/radio/program/this-american-life","subscribe":{"apple":"https://itunes.apple.com/WebObjects/MZStore.woa/wa/viewPodcast?s=143441&mt=2&id=201671138&at=11l79Y&ct=nprdirectory","rss":"https://www.thisamericanlife.org/podcast/rss.xml"}},"truthbetold":{"id":"truthbetold","title":"Truth Be Told","tagline":"Advice by and for people of color","info":"We’re the friend you call after a long day, the one who gets it. Through wisdom from some of the greatest thinkers of our time, host Tonya Mosley explores what it means to grow and thrive as a Black person in America, while discovering new ways of being that serve as a portal to more love, more healing, and more joy.","airtime":"","imageSrc":"https://cdn.kqed.org/wp-content/uploads/2024/04/Truth-Be-Told-Podcast-Tile-360x360-1.jpg","imageAlt":"KQED Truth Be Told with Tonya Mosley","officialWebsiteLink":"https://www.kqed.ord/podcasts/truthbetold","meta":{"site":"news","source":"npr","order":"12"},"link":"/podcasts/truthbetold","subscribe":{"apple":"https://podcasts.apple.com/us/podcast/truth-be-told/id1462216572","google":"https://podcasts.google.com/feed/aHR0cHM6Ly93dzIua3FlZC5vcmcvbmV3cy9jYXRlZ29yeS90cnV0aC1iZS10b2xkLXBvZGNhc3QvZmVlZA","npr":"https://www.npr.org/podcasts/719210818/truth-be-told","stitcher":"https://www.stitcher.com/s?fid=398170&refid=stpr","spotify":"https://open.spotify.com/show/587DhwTBxke6uvfwDfaV5N"}},"wait-wait-dont-tell-me":{"id":"wait-wait-dont-tell-me","title":"Wait Wait... Don't Tell Me!","info":"Peter Sagal and Bill Kurtis host the weekly NPR News quiz show alongside some of the best and brightest news and entertainment personalities.","airtime":"SUN 10am-11am, SAT 11am-12pm, SAT 6pm-7pm","imageSrc":"https://cdn.kqed.org/wp-content/uploads/2024/04/Wait-Wait-Podcast-Tile-300x300-1.jpg","officialWebsiteLink":"https://www.npr.org/programs/wait-wait-dont-tell-me/","meta":{"site":"news","source":"npr"},"link":"/radio/program/wait-wait-dont-tell-me","subscribe":{"npr":"https://rpb3r.app.goo.gl/Xogv","apple":"https://itunes.apple.com/WebObjects/MZStore.woa/wa/viewPodcast?s=143441&mt=2&id=121493804&at=11l79Y&ct=nprdirectory","tuneIn":"https://tunein.com/radio/Wait-Wait-Dont-Tell-Me-p46/","rss":"https://feeds.npr.org/344098539/podcast.xml"}},"washington-week":{"id":"washington-week","title":"Washington Week","info":"For 50 years, Washington Week has been the most intelligent and up to date conversation about the most important news stories of the week. Washington Week is the longest-running news and public affairs program on PBS and features journalists -- not pundits -- lending insight and perspective to the week's important news stories.","airtime":"SAT 1:30am-2am","imageSrc":"https://ww2.kqed.org/radio/wp-content/uploads/sites/50/2018/04/washington-week.jpg","officialWebsiteLink":"http://www.pbs.org/weta/washingtonweek/","meta":{"site":"news","source":"pbs"},"link":"/radio/program/washington-week","subscribe":{"apple":"https://itunes.apple.com/us/podcast/washington-week-audio-pbs/id83324702?mt=2","tuneIn":"https://tunein.com/podcasts/Current-Affairs/Washington-Week-p693/","rss":"http://feeds.pbs.org/pbs/weta/washingtonweek-audio"}},"weekend-edition-saturday":{"id":"weekend-edition-saturday","title":"Weekend Edition Saturday","info":"Weekend Edition Saturday wraps up the week's news and offers a mix of analysis and features on a wide range of topics, including arts, sports, entertainment, and human interest stories. The two-hour program is hosted by NPR's Peabody Award-winning Scott Simon.","airtime":"SAT 5am-10am","imageSrc":"https://cdn.kqed.org/wp-content/uploads/2024/04/Weekend-Edition-Podcast-Tile-360x360-1.jpg","officialWebsiteLink":"https://www.npr.org/programs/weekend-edition-saturday/","meta":{"site":"news","source":"npr"},"link":"/radio/program/weekend-edition-saturday"},"weekend-edition-sunday":{"id":"weekend-edition-sunday","title":"Weekend Edition Sunday","info":"Weekend Edition Sunday features interviews with newsmakers, artists, scientists, politicians, musicians, writers, theologians and historians. The program has covered news events from Nelson Mandela's 1990 release from a South African prison to the capture of Saddam Hussein.","airtime":"SUN 5am-10am","imageSrc":"https://cdn.kqed.org/wp-content/uploads/2024/04/Weekend-Edition-Podcast-Tile-360x360-1.jpg","officialWebsiteLink":"https://www.npr.org/programs/weekend-edition-sunday/","meta":{"site":"news","source":"npr"},"link":"/radio/program/weekend-edition-sunday"},"world-affairs":{"id":"world-affairs","title":"World Affairs","info":"The world as we knew it is undergoing a rapid transformation…so what's next? Welcome to WorldAffairs, your guide to a changing world. We give you the context you need to navigate across borders and ideologies. Through sound-rich stories and in-depth interviews, we break down what it means to be a global citizen on a hot, crowded planet. Our hosts, Ray Suarez, Teresa Cotsirilos and Philip Yun help you make sense of an uncertain world, one story at a time.","airtime":"MON 10pm, TUE 1am, SAT 3am","imageSrc":"https://cdn.kqed.org/wp-content/uploads/2024/04/World-Affairs-Podcast-Tile-360x360-1.jpg ","officialWebsiteLink":"https://www.worldaffairs.org/","meta":{"site":"news","source":"World Affairs"},"link":"/radio/program/world-affairs","subscribe":{"apple":"https://itunes.apple.com/us/podcast/world-affairs/id101215657?mt=2","tuneIn":"https://tunein.com/radio/WorldAffairs-p1665/","rss":"https://worldaffairs.libsyn.com/rss"}},"on-shifting-ground":{"id":"on-shifting-ground","title":"On Shifting Ground with Ray Suarez","info":"Geopolitical turmoil. A warming planet. Authoritarians on the rise. We live in a chaotic world that’s rapidly shifting around us. “On Shifting Ground with Ray Suarez” explores international fault lines and how they impact us all. Each week, NPR veteran Ray Suarez hosts conversations with journalists, leaders and policy experts to help us read between the headlines – and give us hope for human resilience.","airtime":"MON 10pm, TUE 1am, SAT 3am","imageSrc":"https://ww2.kqed.org/app/uploads/2022/12/onshiftingground-600x600-1.png","officialWebsiteLink":"https://worldaffairs.org/radio-podcast/","meta":{"site":"news","source":"On Shifting Ground"},"link":"/radio/program/on-shifting-ground","subscribe":{"apple":"https://podcasts.apple.com/ie/podcast/on-shifting-ground/id101215657","rss":"https://feeds.libsyn.com/36668/rss"}},"hidden-brain":{"id":"hidden-brain","title":"Hidden Brain","info":"Shankar Vedantam uses science and storytelling to reveal the unconscious patterns that drive human behavior, shape our choices and direct our relationships.","imageSrc":"https://ww2.kqed.org/radio/wp-content/uploads/sites/50/2018/05/hiddenbrain.jpg","officialWebsiteLink":"https://www.npr.org/series/423302056/hidden-brain","airtime":"SUN 7pm-8pm","meta":{"site":"news","source":"NPR"},"link":"/radio/program/hidden-brain","subscribe":{"apple":"https://itunes.apple.com/us/podcast/hidden-brain/id1028908750?mt=2","tuneIn":"https://tunein.com/podcasts/Science-Podcasts/Hidden-Brain-p787503/","rss":"https://feeds.npr.org/510308/podcast.xml"}},"city-arts":{"id":"city-arts","title":"City Arts & Lectures","info":"A one-hour radio program to hear celebrated writers, artists and thinkers address contemporary ideas and values, often discussing the creative process. Please note: tapes or transcripts are not available","imageSrc":"https://ww2.kqed.org/radio/wp-content/uploads/sites/50/2018/05/cityartsandlecture-300x300.jpg","officialWebsiteLink":"https://www.cityarts.net/","airtime":"SUN 1pm-2pm, TUE 10pm, WED 1am","meta":{"site":"news","source":"City Arts & Lectures"},"link":"https://www.cityarts.net","subscribe":{"tuneIn":"https://tunein.com/radio/City-Arts-and-Lectures-p692/","rss":"https://www.cityarts.net/feed/"}},"white-lies":{"id":"white-lies","title":"White Lies","info":"In 1965, Rev. James Reeb was murdered in Selma, Alabama. Three men were tried and acquitted, but no one was ever held to account. Fifty years later, two journalists from Alabama return to the city where it happened, expose the lies that kept the murder from being solved and uncover a story about guilt and memory that says as much about America today as it does about the past.","imageSrc":"https://cdn.kqed.org/wp-content/uploads/2024/04/White-Lies-Podcast-Tile-360x360-1.jpg","officialWebsiteLink":"https://www.npr.org/podcasts/510343/white-lies","meta":{"site":"news","source":"npr"},"link":"/radio/program/white-lies","subscribe":{"npr":"https://rpb3r.app.goo.gl/whitelies","apple":"https://podcasts.apple.com/podcast/id1462650519?mt=2&at=11l79Y&ct=nprdirectory","google":"https://podcasts.google.com/feed/aHR0cHM6Ly9mZWVkcy5ucHIub3JnLzUxMDM0My9wb2RjYXN0LnhtbA","spotify":"https://open.spotify.com/show/12yZ2j8vxqhc0QZyRES3ft?si=LfWYEK6URA63hueKVxRLAw","rss":"https://feeds.npr.org/510343/podcast.xml"}},"rightnowish":{"id":"rightnowish","title":"Rightnowish","tagline":"Art is where you find it","info":"Rightnowish digs into life in the Bay Area right now… ish. Journalist Pendarvis Harshaw takes us to galleries painted on the sides of liquor stores in West Oakland. We'll dance in warehouses in the Bayview, make smoothies with kids in South Berkeley, and listen to classical music in a 1984 Cutlass Supreme in Richmond. Every week, Pen talks to movers and shakers about how the Bay Area shapes what they create, and how they shape the place we call home.","imageSrc":"https://cdn.kqed.org/wp-content/uploads/2024/04/Rightnowish-Podcast-Tile-500x500-1.jpg","imageAlt":"KQED Rightnowish with Pendarvis Harshaw","officialWebsiteLink":"/podcasts/rightnowish","meta":{"site":"arts","source":"kqed","order":"5"},"link":"/podcasts/rightnowish","subscribe":{"npr":"https://www.npr.org/podcasts/721590300/rightnowish","rss":"https://ww2.kqed.org/arts/programs/rightnowish/feed/podcast","apple":"https://podcasts.apple.com/us/podcast/rightnowish/id1482187648","stitcher":"https://www.stitcher.com/podcast/kqed/rightnowish","google":"https://podcasts.google.com/feed/aHR0cHM6Ly9mZWVkcy5tZWdhcGhvbmUuZm0vS1FJTkMxMjU5MTY3NDc4","spotify":"https://open.spotify.com/show/7kEJuafTzTVan7B78ttz1I"}},"jerrybrown":{"id":"jerrybrown","title":"The Political Mind of Jerry Brown","tagline":"Lessons from a lifetime in politics","info":"The Political Mind of Jerry Brown brings listeners the wisdom of the former Governor, Mayor, and presidential candidate. Scott Shafer interviewed Brown for more than 40 hours, covering the former governor's life and half-century in the political game – and Brown has some lessons he'd like to share. ","imageSrc":"https://cdn.kqed.org/wp-content/uploads/2024/04/The-Political-Mind-of-Jerry-Brown-Podcast-Tile-703x703-1.jpg","imageAlt":"KQED The Political Mind of Jerry Brown","officialWebsiteLink":"/podcasts/jerrybrown","meta":{"site":"news","source":"kqed","order":"16"},"link":"/podcasts/jerrybrown","subscribe":{"npr":"https://www.npr.org/podcasts/790253322/the-political-mind-of-jerry-brown","apple":"https://itunes.apple.com/us/podcast/id1492194549","rss":"https://ww2.kqed.org/news/series/jerrybrown/feed/podcast/","tuneIn":"http://tun.in/pjGcK","stitcher":"https://www.stitcher.com/podcast/kqed/the-political-mind-of-jerry-brown","spotify":"https://open.spotify.com/show/54C1dmuyFyKMFttY6X2j6r?si=K8SgRCoISNK6ZbjpXrX5-w","google":"https://podcasts.google.com/feed/aHR0cHM6Ly93dzIua3FlZC5vcmcvbmV3cy9zZXJpZXMvamVycnlicm93bi9mZWVkL3BvZGNhc3Qv"}},"the-splendid-table":{"id":"the-splendid-table","title":"The Splendid Table","info":"\u003cem>The Splendid Table\u003c/em> hosts our nation's conversations about cooking, sustainability and food culture.","imageSrc":"https://cdn.kqed.org/wp-content/uploads/2024/04/The-Splendid-Table-Podcast-Tile-360x360-1.jpg","officialWebsiteLink":"https://www.splendidtable.org/","airtime":"SUN 10-11 pm","meta":{"site":"radio","source":"npr"},"link":"/radio/program/the-splendid-table"}},"racesReducer":{"5921":{"id":"5921","type":"apRace","location":"State of California","raceName":"U.S. House of Representatives, District 7","raceDescription":"Top candidate wins seat.","raceType":"top2","totalVotes":158422,"precinctsReportPercentage":98.97,"eevp":99,"tabulationStatus":"Tabulation Paused","dateUpdated":"March 22, 2024","timeUpdated":"4:48 PM","source":"AP","candidates":[{"candidateName":"Doris Matsui","candidateIncumbent":true,"candidateParty":"D","voteCount":89456,"isWinner":true},{"candidateName":"Tom Silva","candidateIncumbent":false,"candidateParty":"R","voteCount":48920,"isWinner":true},{"candidateName":"David Mandel","candidateIncumbent":false,"candidateParty":"D","voteCount":20046,"isWinner":false}],"winnerDateTime":"2024-03-09T01:00:38.194Z"},"5922":{"id":"5922","type":"apRace","location":"State of California","raceName":"U.S. House of Representatives, District 8","raceDescription":"Top candidate wins seat.","raceType":"top2","totalVotes":0,"uncontested":true,"precinctsReportPercentage":0,"eevp":0,"tabulationStatus":"Tabulation Paused","dateUpdated":"March 22, 2024","timeUpdated":"4:20 PM","source":"AP","candidates":[{"candidateName":"Rudy Recile","candidateIncumbent":false,"candidateParty":"R","voteCount":0,"isWinner":true},{"candidateName":"John Garamendi","candidateIncumbent":true,"candidateParty":"D","voteCount":0,"isWinner":true}],"winnerDateTime":"2024-03-06T04:00:30.000Z"},"5924":{"id":"5924","type":"apRace","location":"State of California","raceName":"U.S. House of Representatives, District 10","raceDescription":"Top candidate wins seat.","raceType":"top2","totalVotes":185034,"precinctsReportPercentage":99.07,"eevp":99,"tabulationStatus":"Tabulation Paused","dateUpdated":"March 22, 2024","timeUpdated":"4:48 PM","source":"AP","candidates":[{"candidateName":"Mark DeSaulnier","candidateIncumbent":true,"candidateParty":"D","voteCount":121265,"isWinner":true},{"candidateName":"Katherine Piccinini","candidateIncumbent":false,"candidateParty":"R","voteCount":34883,"isWinner":true},{"candidateName":"Nolan Chen","candidateIncumbent":false,"candidateParty":"R","voteCount":19459,"isWinner":false},{"candidateName":"Joe Sweeney","candidateIncumbent":false,"candidateParty":"NPP","voteCount":7606,"isWinner":false},{"candidateName":"Mohamed Elsherbini","candidateIncumbent":false,"candidateParty":"NPP","voteCount":1821,"isWinner":false}],"winnerDateTime":"2024-03-09T01:02:32.415Z"},"5926":{"id":"5926","type":"apRace","location":"State of California","raceName":"U.S. House of Representatives, District 12","raceDescription":"Top candidate wins seat.","raceType":"top2","totalVotes":153801,"precinctsReportPercentage":98.88,"eevp":99,"tabulationStatus":"Tabulation Paused","dateUpdated":"March 20, 2024","timeUpdated":"4:41 PM","source":"AP","candidates":[{"candidateName":"Lateefah Simon","candidateIncumbent":false,"candidateParty":"D","voteCount":85905,"isWinner":true},{"candidateName":"Jennifer Tran","candidateIncumbent":false,"candidateParty":"D","voteCount":22964,"isWinner":true},{"candidateName":"Tony Daysog","candidateIncumbent":false,"candidateParty":"D","voteCount":17197,"isWinner":false},{"candidateName":"Stephen Slauson","candidateIncumbent":false,"candidateParty":"R","voteCount":9699,"isWinner":false},{"candidateName":"Glenn Kaplan","candidateIncumbent":false,"candidateParty":"D","voteCount":6785,"isWinner":false},{"candidateName":"Eric Wilson","candidateIncumbent":false,"candidateParty":"D","voteCount":4243,"isWinner":false},{"candidateName":"Abdur Sikder","candidateIncumbent":false,"candidateParty":"D","voteCount":2847,"isWinner":false},{"candidateName":"Ned Nuerge","candidateIncumbent":false,"candidateParty":"R","voteCount":2532,"isWinner":false},{"candidateName":"Andre Todd","candidateIncumbent":false,"candidateParty":"D","voteCount":1629,"isWinner":false}],"winnerDateTime":"2024-03-16T00:22:36.062Z"},"5928":{"id":"5928","type":"apRace","location":"State of California","raceName":"U.S. House of Representatives, District 14","raceDescription":"Top candidate wins seat.","raceType":"top2","totalVotes":125831,"precinctsReportPercentage":99.14,"eevp":99,"tabulationStatus":"Tabulation Paused","dateUpdated":"March 20, 2024","timeUpdated":"4:41 PM","source":"AP","candidates":[{"candidateName":"Eric Swalwell","candidateIncumbent":true,"candidateParty":"D","voteCount":83989,"isWinner":true},{"candidateName":"Vin Kruttiventi","candidateIncumbent":false,"candidateParty":"R","voteCount":22106,"isWinner":true},{"candidateName":"Alison Hayden","candidateIncumbent":false,"candidateParty":"R","voteCount":11928,"isWinner":false},{"candidateName":"Luis Reynoso","candidateIncumbent":false,"candidateParty":"R","voteCount":7808,"isWinner":false}],"winnerDateTime":"2024-03-12T00:51:36.366Z"},"5930":{"id":"5930","type":"apRace","location":"State of California","raceName":"U.S. House of Representatives, District 16","raceDescription":"Top candidate wins seat.","raceType":"top2","totalVotes":182135,"precinctsReportPercentage":98.91,"eevp":99,"tabulationStatus":"Tabulation Paused","dateUpdated":"April 3, 2024","timeUpdated":"3:04 PM","source":"AP","candidates":[{"candidateName":"Sam Liccardo","candidateIncumbent":false,"candidateParty":"D","voteCount":38489,"isWinner":true},{"candidateName":"Evan Low","candidateIncumbent":false,"candidateParty":"D","voteCount":30249,"isWinner":false},{"candidateName":"Joe Simitian","candidateIncumbent":false,"candidateParty":"D","voteCount":30249,"isWinner":false},{"candidateName":"Peter Ohtaki","candidateIncumbent":false,"candidateParty":"R","voteCount":23275,"isWinner":false},{"candidateName":"Peter Dixon","candidateIncumbent":false,"candidateParty":"D","voteCount":14673,"isWinner":false},{"candidateName":"Rishi Kumar","candidateIncumbent":false,"candidateParty":"D","voteCount":12377,"isWinner":false},{"candidateName":"Karl Ryan","candidateIncumbent":false,"candidateParty":"R","voteCount":11557,"isWinner":false},{"candidateName":"Julie Lythcott-Haims","candidateIncumbent":false,"candidateParty":"D","voteCount":11383,"isWinner":false},{"candidateName":"Ahmed Mostafa","candidateIncumbent":false,"candidateParty":"D","voteCount":5811,"isWinner":false},{"candidateName":"Greg Tanaka","candidateIncumbent":false,"candidateParty":"D","voteCount":2421,"isWinner":false},{"candidateName":"Joby Bernstein","candidateIncumbent":false,"candidateParty":"D","voteCount":1651,"isWinner":false}],"winnerDateTime":"2024-03-12T00:32:05.002Z"},"5931":{"id":"5931","type":"apRace","location":"State of California","raceName":"U.S. House of Representatives, District 17","raceDescription":"Top candidate wins seat.","raceType":"top2","totalVotes":117534,"precinctsReportPercentage":98.92,"eevp":99,"tabulationStatus":"Tabulation Paused","dateUpdated":"March 22, 2024","timeUpdated":"4:20 PM","source":"AP","candidates":[{"candidateName":"Ro Khanna","candidateIncumbent":true,"candidateParty":"D","voteCount":73941,"isWinner":true},{"candidateName":"Anita Chen","candidateIncumbent":false,"candidateParty":"R","voteCount":31539,"isWinner":true},{"candidateName":"Ritesh Tandon","candidateIncumbent":false,"candidateParty":"D","voteCount":5728,"isWinner":false},{"candidateName":"Mario Ramirez","candidateIncumbent":false,"candidateParty":"D","voteCount":4491,"isWinner":false},{"candidateName":"Joe Dehn","candidateIncumbent":false,"candidateParty":"Lib","voteCount":1835,"isWinner":false}],"winnerDateTime":"2024-03-08T01:50:53.956Z"},"5932":{"id":"5932","type":"apRace","location":"State of California","raceName":"U.S. House of Representatives, District 18","raceDescription":"Top candidate wins seat.","raceType":"top2","totalVotes":96302,"precinctsReportPercentage":98.93,"eevp":98.83,"tabulationStatus":"Tabulation Paused","dateUpdated":"March 25, 2024","timeUpdated":"5:47 AM","source":"AP","candidates":[{"candidateName":"Zoe Lofgren","candidateIncumbent":true,"candidateParty":"D","voteCount":49323,"isWinner":true},{"candidateName":"Peter Hernandez","candidateIncumbent":false,"candidateParty":"R","voteCount":31622,"isWinner":true},{"candidateName":"Charlene Nijmeh","candidateIncumbent":false,"candidateParty":"D","voteCount":10614,"isWinner":false},{"candidateName":"Lawrence Milan","candidateIncumbent":false,"candidateParty":"D","voteCount":2712,"isWinner":false},{"candidateName":"Luele Kifle","candidateIncumbent":false,"candidateParty":"D","voteCount":2031,"isWinner":false}],"winnerDateTime":"2024-03-12T00:26:02.706Z"},"5963":{"id":"5963","type":"apRace","location":"State of California","raceName":"State House, District 2","raceDescription":"Top candidate wins seat.","raceType":"top2","totalVotes":139085,"precinctsReportPercentage":98.62,"eevp":98.6,"tabulationStatus":"Tabulation Paused","dateUpdated":"March 22, 2024","timeUpdated":"4:20 PM","source":"AP","candidates":[{"candidateName":"Michael Greer","candidateIncumbent":false,"candidateParty":"R","voteCount":38079,"isWinner":true},{"candidateName":"Chris Rogers","candidateIncumbent":false,"candidateParty":"D","voteCount":27126,"isWinner":true},{"candidateName":"Rusty Hicks","candidateIncumbent":false,"candidateParty":"D","voteCount":25615,"isWinner":false},{"candidateName":"Ariel Kelley","candidateIncumbent":false,"candidateParty":"D","voteCount":19483,"isWinner":false},{"candidateName":"Frankie Myers","candidateIncumbent":false,"candidateParty":"D","voteCount":17694,"isWinner":false},{"candidateName":"Ted Williams","candidateIncumbent":false,"candidateParty":"D","voteCount":9550,"isWinner":false},{"candidateName":"Cynthia Click","candidateIncumbent":false,"candidateParty":"D","voteCount":1538,"isWinner":false}],"winnerDateTime":"2024-03-22T21:38:36.711Z"},"5972":{"id":"5972","type":"apRace","location":"State of California","raceName":"State House, District 11","raceDescription":"Top candidate wins seat.","raceType":"top2","totalVotes":99775,"precinctsReportPercentage":99,"eevp":99,"tabulationStatus":"Tabulation Paused","dateUpdated":"March 22, 2024","timeUpdated":"4:48 PM","source":"AP","candidates":[{"candidateName":"Lori Wilson","candidateIncumbent":true,"candidateParty":"D","voteCount":50085,"isWinner":true},{"candidateName":"Dave Ennis","candidateIncumbent":false,"candidateParty":"R","voteCount":26074,"isWinner":true},{"candidateName":"Wanda Wallis","candidateIncumbent":false,"candidateParty":"R","voteCount":14638,"isWinner":false},{"candidateName":"Jeffrey Flack","candidateIncumbent":false,"candidateParty":"D","voteCount":8978,"isWinner":false}],"winnerDateTime":"2024-03-08T02:01:24.524Z"},"5973":{"id":"5973","type":"apRace","location":"State of California","raceName":"State House, District 12","raceDescription":"Top candidate wins seat.","raceType":"top2","totalVotes":143532,"precinctsReportPercentage":99.19,"eevp":99,"tabulationStatus":"Tabulation Paused","dateUpdated":"March 22, 2024","timeUpdated":"4:38 PM","source":"AP","candidates":[{"candidateName":"Damon Connolly","candidateIncumbent":true,"candidateParty":"D","voteCount":111275,"isWinner":true},{"candidateName":"Andy Podshadley","candidateIncumbent":false,"candidateParty":"R","voteCount":17240,"isWinner":true},{"candidateName":"Eryn Cervantes","candidateIncumbent":false,"candidateParty":"R","voteCount":15017,"isWinner":false}],"winnerDateTime":"2024-03-21T00:25:32.262Z"},"5975":{"id":"5975","type":"apRace","location":"State of California","raceName":"State House, District 14","raceDescription":"Top candidate wins seat.","raceType":"top2","totalVotes":106997,"precinctsReportPercentage":99.06,"eevp":99,"tabulationStatus":"Tabulation Paused","dateUpdated":"March 22, 2024","timeUpdated":"4:48 PM","source":"AP","candidates":[{"candidateName":"Buffy Wicks","candidateIncumbent":true,"candidateParty":"D","voteCount":78678,"isWinner":true},{"candidateName":"Margot Smith","candidateIncumbent":false,"candidateParty":"D","voteCount":18251,"isWinner":true},{"candidateName":"Utkarsh Jain","candidateIncumbent":false,"candidateParty":"R","voteCount":10068,"isWinner":false}],"winnerDateTime":"2024-03-15T01:30:34.539Z"},"5976":{"id":"5976","type":"apRace","location":"State of California","raceName":"State House, District 15","raceDescription":"Top candidate wins seat.","raceType":"top2","totalVotes":97144,"precinctsReportPercentage":98.98,"eevp":99,"tabulationStatus":"Tabulation Paused","dateUpdated":"March 22, 2024","timeUpdated":"4:48 PM","source":"AP","candidates":[{"candidateName":"Sonia Ledo","candidateIncumbent":false,"candidateParty":"R","voteCount":30946,"isWinner":true},{"candidateName":"Anamarie Farias","candidateIncumbent":false,"candidateParty":"D","voteCount":29512,"isWinner":true},{"candidateName":"Monica Wilson","candidateIncumbent":false,"candidateParty":"D","voteCount":24775,"isWinner":false},{"candidateName":"Karen Mitchoff","candidateIncumbent":false,"candidateParty":"D","voteCount":11911,"isWinner":false}],"winnerDateTime":"2024-03-14T00:19:38.858Z"},"5977":{"id":"5977","type":"apRace","location":"State of California","raceName":"State House, District 16","raceDescription":"Top candidate wins seat.","raceType":"top2","totalVotes":0,"uncontested":true,"precinctsReportPercentage":0,"eevp":0,"tabulationStatus":"Tabulation Paused","dateUpdated":"March 22, 2024","timeUpdated":"4:20 PM","source":"AP","candidates":[{"candidateName":"Joseph Rubay","candidateIncumbent":false,"candidateParty":"R","voteCount":0,"isWinner":true},{"candidateName":"Rebecca Bauer-Kahan","candidateIncumbent":true,"candidateParty":"D","voteCount":0,"isWinner":true}],"winnerDateTime":"2024-03-06T04:00:30.000Z"},"5978":{"id":"5978","type":"apRace","location":"State of California","raceName":"State House, District 17","raceDescription":"Top candidate wins seat.","raceType":"top2","totalVotes":111003,"precinctsReportPercentage":98.99,"eevp":99,"tabulationStatus":"Tabulation Paused","dateUpdated":"March 22, 2024","timeUpdated":"8:25 AM","source":"AP","candidates":[{"candidateName":"Matt Haney","candidateIncumbent":true,"candidateParty":"D","voteCount":90915,"isWinner":true},{"candidateName":"Manuel Noris-Barrera","candidateIncumbent":false,"candidateParty":"R","voteCount":13843,"isWinner":true},{"candidateName":"Otto Duke","candidateIncumbent":false,"candidateParty":"D","voteCount":6245,"isWinner":false}],"winnerDateTime":"2024-03-12T00:36:19.697Z"},"5979":{"id":"5979","type":"apRace","location":"State of California","raceName":"State House, District 18","raceDescription":"Top candidate wins seat.","raceType":"top2","totalVotes":86008,"precinctsReportPercentage":99.1,"eevp":99,"tabulationStatus":"Tabulation Paused","dateUpdated":"March 20, 2024","timeUpdated":"4:41 PM","source":"AP","candidates":[{"candidateName":"Mia Bonta","candidateIncumbent":true,"candidateParty":"D","voteCount":73040,"isWinner":true},{"candidateName":"Andre Sandford","candidateIncumbent":false,"candidateParty":"AIP","voteCount":4575,"isWinner":false},{"candidateName":"Mindy Pechenuk","candidateIncumbent":false,"candidateParty":"R","voteCount":4389,"isWinner":false},{"candidateName":"Cheyenne Kenney","candidateIncumbent":false,"candidateParty":"R","voteCount":4004,"isWinner":false}],"winnerDateTime":"2024-03-06T08:03:23.729Z"},"5980":{"id":"5980","type":"apRace","location":"State of California","raceName":"State House, District 19","raceDescription":"Top candidate wins seat.","raceType":"top2","totalVotes":113959,"precinctsReportPercentage":98.8,"eevp":99,"tabulationStatus":"Tabulation Paused","dateUpdated":"March 22, 2024","timeUpdated":"4:20 PM","source":"AP","candidates":[{"candidateName":"Catherine Stefani","candidateIncumbent":false,"candidateParty":"D","voteCount":64960,"isWinner":true},{"candidateName":"David Lee","candidateIncumbent":false,"candidateParty":"D","voteCount":33035,"isWinner":true},{"candidateName":"Nadia Flamenco","candidateIncumbent":false,"candidateParty":"R","voteCount":8335,"isWinner":false},{"candidateName":"Arjun Sodhani","candidateIncumbent":false,"candidateParty":"R","voteCount":7629,"isWinner":false}],"winnerDateTime":"2024-03-11T23:50:23.109Z"},"5981":{"id":"5981","type":"apRace","location":"State of California","raceName":"State House, District 20","raceDescription":"Top candidate wins seat.","raceType":"top2","totalVotes":0,"uncontested":true,"precinctsReportPercentage":0,"eevp":0,"tabulationStatus":"Tabulation Paused","dateUpdated":"March 20, 2024","timeUpdated":"4:36 PM","source":"AP","candidates":[{"candidateName":"Liz Ortega","candidateIncumbent":true,"candidateParty":"D","voteCount":0,"isWinner":true}],"winnerDateTime":"2024-03-06T04:00:30.000Z"},"5982":{"id":"5982","type":"apRace","location":"State of California","raceName":"State House, District 21","raceDescription":"Top candidate wins seat.","raceType":"top2","totalVotes":0,"uncontested":true,"precinctsReportPercentage":0,"eevp":0,"tabulationStatus":"Tabulation Paused","dateUpdated":"March 22, 2024","timeUpdated":"4:20 PM","source":"AP","candidates":[{"candidateName":"Mark Gilham","candidateIncumbent":false,"candidateParty":"R","voteCount":0,"isWinner":true},{"candidateName":"Diane Papan","candidateIncumbent":true,"candidateParty":"D","voteCount":0,"isWinner":true}],"winnerDateTime":"2024-03-06T04:00:30.000Z"},"5984":{"id":"5984","type":"apRace","location":"State of California","raceName":"State House, District 23","raceDescription":"Top candidate wins seat.","raceType":"top2","totalVotes":116963,"precinctsReportPercentage":98.91,"eevp":99,"tabulationStatus":"Tabulation Paused","dateUpdated":"March 22, 2024","timeUpdated":"4:20 PM","source":"AP","candidates":[{"candidateName":"Marc Berman","candidateIncumbent":true,"candidateParty":"D","voteCount":67106,"isWinner":true},{"candidateName":"Lydia Kou","candidateIncumbent":false,"candidateParty":"D","voteCount":23699,"isWinner":true},{"candidateName":"Gus Mattammal","candidateIncumbent":false,"candidateParty":"R","voteCount":13277,"isWinner":false},{"candidateName":"Allan Marson","candidateIncumbent":false,"candidateParty":"R","voteCount":12881,"isWinner":false}],"winnerDateTime":"2024-03-12T01:13:06.280Z"},"5987":{"id":"5987","type":"apRace","location":"State of California","raceName":"State House, District 26","raceDescription":"Top candidate wins seat.","raceType":"top2","totalVotes":72753,"precinctsReportPercentage":99.19,"eevp":99,"tabulationStatus":"Tabulation Paused","dateUpdated":"March 22, 2024","timeUpdated":"4:20 PM","source":"AP","candidates":[{"candidateName":"Patrick Ahrens","candidateIncumbent":false,"candidateParty":"D","voteCount":25036,"isWinner":true},{"candidateName":"Tara Sreekrishnan","candidateIncumbent":false,"candidateParty":"D","voteCount":19600,"isWinner":true},{"candidateName":"Sophie Song","candidateIncumbent":false,"candidateParty":"R","voteCount":15954,"isWinner":false},{"candidateName":"Omar Din","candidateIncumbent":false,"candidateParty":"D","voteCount":8772,"isWinner":false},{"candidateName":"Bob Goodwyn","candidateIncumbent":false,"candidateParty":"Lib","voteCount":2170,"isWinner":false},{"candidateName":"Ashish Garg","candidateIncumbent":false,"candidateParty":"NPP","voteCount":1221,"isWinner":false}],"winnerDateTime":"2024-03-13T21:06:29.070Z"},"5989":{"id":"5989","type":"apRace","location":"State of California","raceName":"State House, District 28","raceDescription":"Top candidate wins seat.","raceType":"top2","totalVotes":0,"uncontested":true,"precinctsReportPercentage":0,"eevp":0,"tabulationStatus":"Tabulation Paused","dateUpdated":"March 22, 2024","timeUpdated":"5:10 PM","source":"AP","candidates":[{"candidateName":"Gail Pellerin","candidateIncumbent":true,"candidateParty":"D","voteCount":0,"isWinner":true},{"candidateName":"Liz Lawler","candidateIncumbent":false,"candidateParty":"R","voteCount":0,"isWinner":true}],"winnerDateTime":"2024-03-06T04:00:30.000Z"},"6010":{"id":"6010","type":"apRace","location":"State of California","raceName":"State House, District 49","raceDescription":"Top candidate wins seat.","raceType":"top2","totalVotes":0,"uncontested":true,"precinctsReportPercentage":0,"eevp":0,"tabulationStatus":"Tabulation Paused","dateUpdated":"March 22, 2024","timeUpdated":"4:36 PM","source":"AP","candidates":[{"candidateName":"Mike Fong","candidateIncumbent":true,"candidateParty":"D","voteCount":0,"isWinner":true},{"candidateName":"Long Liu","candidateIncumbent":false,"candidateParty":"R","voteCount":0,"isWinner":true}],"winnerDateTime":"2024-03-06T04:00:30.000Z"},"6018":{"id":"6018","type":"apRace","location":"State of California","raceName":"U.S. House of Representatives, District 2","raceDescription":"Top candidate wins seat.","raceType":"top2","totalVotes":229348,"precinctsReportPercentage":99.05,"eevp":99,"tabulationStatus":"Tabulation Paused","dateUpdated":"March 22, 2024","timeUpdated":"4:38 PM","source":"AP","candidates":[{"candidateName":"Jared Huffman","candidateIncumbent":true,"candidateParty":"D","voteCount":169005,"isWinner":true},{"candidateName":"Chris Coulombe","candidateIncumbent":false,"candidateParty":"R","voteCount":37372,"isWinner":true},{"candidateName":"Tief Gibbs","candidateIncumbent":false,"candidateParty":"R","voteCount":18437,"isWinner":false},{"candidateName":"Jolian Kangas","candidateIncumbent":false,"candidateParty":"NPP","voteCount":3166,"isWinner":false},{"candidateName":"Jason Brisendine","candidateIncumbent":false,"candidateParty":"NPP","voteCount":1368,"isWinner":false}],"winnerDateTime":"2024-03-12T00:46:10.103Z"},"6020":{"id":"6020","type":"apRace","location":"State of California","raceName":"U.S. House of Representatives, District 4","raceDescription":"Top candidate wins seat.","raceType":"top2","totalVotes":187640,"precinctsReportPercentage":96.32,"eevp":96.36,"tabulationStatus":"Tabulation Paused","dateUpdated":"March 22, 2024","timeUpdated":"4:20 PM","source":"AP","candidates":[{"candidateName":"Mike Thompson","candidateIncumbent":true,"candidateParty":"D","voteCount":118147,"isWinner":true},{"candidateName":"John Munn","candidateIncumbent":false,"candidateParty":"R","voteCount":56232,"isWinner":true},{"candidateName":"Andrew Engdahl","candidateIncumbent":false,"candidateParty":"D","voteCount":11202,"isWinner":false},{"candidateName":"Niket Patwardhan","candidateIncumbent":false,"candidateParty":"NPP","voteCount":2059,"isWinner":false}],"winnerDateTime":"2024-03-07T00:30:57.980Z"},"6025":{"id":"6025","type":"apRace","location":"State of California","raceName":"U.S. House of Representatives, District 9","raceDescription":"Top candidate wins seat.","raceType":"top2","totalVotes":121271,"precinctsReportPercentage":99.17,"eevp":99,"tabulationStatus":"Tabulation Paused","dateUpdated":"March 22, 2024","timeUpdated":"5:10 PM","source":"AP","candidates":[{"candidateName":"Josh Harder","candidateIncumbent":true,"candidateParty":"D","voteCount":60396,"isWinner":true},{"candidateName":"Kevin Lincoln","candidateIncumbent":false,"candidateParty":"R","voteCount":36346,"isWinner":true},{"candidateName":"John McBride","candidateIncumbent":false,"candidateParty":"R","voteCount":15525,"isWinner":false},{"candidateName":"Khalid Jafri","candidateIncumbent":false,"candidateParty":"R","voteCount":9004,"isWinner":false}],"winnerDateTime":"2024-03-12T00:49:44.113Z"},"6031":{"id":"6031","type":"apRace","location":"State of California","raceName":"U.S. House of Representatives, District 15","raceDescription":"Top candidate wins seat.","raceType":"top2","totalVotes":0,"uncontested":true,"precinctsReportPercentage":0,"eevp":0,"tabulationStatus":"Tabulation Paused","dateUpdated":"March 22, 2024","timeUpdated":"4:20 PM","source":"AP","candidates":[{"candidateName":"Anna Kramer","candidateIncumbent":false,"candidateParty":"R","voteCount":0,"isWinner":true},{"candidateName":"Kevin Mullin","candidateIncumbent":true,"candidateParty":"D","voteCount":0,"isWinner":true}],"winnerDateTime":"2024-03-06T04:00:30.000Z"},"6035":{"id":"6035","type":"apRace","location":"State of California","raceName":"U.S. House of Representatives, District 19","raceDescription":"Top candidate wins seat.","raceType":"top2","totalVotes":203670,"precinctsReportPercentage":99.11,"eevp":99,"tabulationStatus":"Tabulation Paused","dateUpdated":"March 25, 2024","timeUpdated":"5:47 AM","source":"AP","candidates":[{"candidateName":"Jimmy Panetta","candidateIncumbent":true,"candidateParty":"D","voteCount":132540,"isWinner":true},{"candidateName":"Jason Anderson","candidateIncumbent":false,"candidateParty":"R","voteCount":58120,"isWinner":true},{"candidateName":"Sean Dougherty","candidateIncumbent":false,"candidateParty":"Grn","voteCount":13010,"isWinner":false}],"winnerDateTime":"2024-03-07T00:23:46.779Z"},"6066":{"id":"6066","type":"apRace","location":"State of California","raceName":"State House, District 3","raceDescription":"Top candidate wins seat.","raceType":"top2","totalVotes":0,"uncontested":true,"precinctsReportPercentage":0,"eevp":0,"tabulationStatus":"Tabulation Paused","dateUpdated":"March 22, 2024","timeUpdated":"5:10 PM","source":"AP","candidates":[{"candidateName":"Jamie Gallagher","candidateIncumbent":true,"candidateParty":"R","voteCount":0,"isWinner":true},{"candidateName":"Aaron Draper","candidateIncumbent":false,"candidateParty":"D","voteCount":0,"isWinner":true}],"winnerDateTime":"2024-03-06T04:00:30.000Z"},"6067":{"id":"6067","type":"apRace","location":"State of California","raceName":"State House, District 4","raceDescription":"Top candidate wins seat.","raceType":"top2","totalVotes":0,"uncontested":true,"precinctsReportPercentage":0,"eevp":0,"tabulationStatus":"Tabulation Paused","dateUpdated":"March 22, 2024","timeUpdated":"4:20 PM","source":"AP","candidates":[{"candidateName":"Cecilia Aguiar-Curry","candidateIncumbent":true,"candidateParty":"D","voteCount":0,"isWinner":true}],"winnerDateTime":"2024-03-06T04:00:30.000Z"},"6087":{"id":"6087","type":"apRace","location":"State of California","raceName":"State House, District 24","raceDescription":"Top candidate wins seat.","raceType":"top2","totalVotes":66643,"precinctsReportPercentage":99.19,"eevp":99,"tabulationStatus":"Tabulation Paused","dateUpdated":"March 22, 2024","timeUpdated":"4:20 PM","source":"AP","candidates":[{"candidateName":"Alex Lee","candidateIncumbent":true,"candidateParty":"D","voteCount":45544,"isWinner":true},{"candidateName":"Bob Brunton","candidateIncumbent":false,"candidateParty":"R","voteCount":14951,"isWinner":true},{"candidateName":"Marti Souza","candidateIncumbent":false,"candidateParty":"R","voteCount":6148,"isWinner":false}],"winnerDateTime":"2024-03-14T23:23:49.770Z"},"6088":{"id":"6088","type":"apRace","location":"State of California","raceName":"State House, District 25","raceDescription":"Top candidate wins seat.","raceType":"top2","totalVotes":69560,"precinctsReportPercentage":99.31,"eevp":99,"tabulationStatus":"Tabulation Paused","dateUpdated":"March 22, 2024","timeUpdated":"4:20 PM","source":"AP","candidates":[{"candidateName":"Ash Kalra","candidateIncumbent":true,"candidateParty":"D","voteCount":35821,"isWinner":true},{"candidateName":"Ted Stroll","candidateIncumbent":false,"candidateParty":"R","voteCount":18255,"isWinner":true},{"candidateName":"Lan Ngo","candidateIncumbent":false,"candidateParty":"D","voteCount":15484,"isWinner":false}],"winnerDateTime":"2024-03-14T02:40:57.200Z"},"6092":{"id":"6092","type":"apRace","location":"State of California","raceName":"State House, District 29","raceDescription":"Top candidate wins seat.","raceType":"top2","totalVotes":0,"uncontested":true,"precinctsReportPercentage":0,"eevp":0,"tabulationStatus":"Tabulation Paused","dateUpdated":"March 25, 2024","timeUpdated":"5:47 AM","source":"AP","candidates":[{"candidateName":"Robert Rivas","candidateIncumbent":true,"candidateParty":"D","voteCount":0,"isWinner":true},{"candidateName":"J.W. Paine","candidateIncumbent":false,"candidateParty":"R","voteCount":0,"isWinner":true}],"winnerDateTime":"2024-03-06T04:00:30.000Z"},"6223":{"id":"6223","type":"apRace","location":"State of California","raceName":"U.S. House of Representatives, District 46","raceDescription":"Top candidate wins seat.","raceType":"top2","totalVotes":0,"uncontested":true,"precinctsReportPercentage":0,"eevp":0,"tabulationStatus":"Tabulation Paused","dateUpdated":"March 22, 2024","timeUpdated":"5:16 PM","source":"AP","candidates":[{"candidateName":"Lou Correa","candidateIncumbent":true,"candidateParty":"D","voteCount":0,"isWinner":true},{"candidateName":"David Pan","candidateIncumbent":false,"candidateParty":"R","voteCount":0,"isWinner":true}],"winnerDateTime":"2024-03-06T04:00:30.000Z"},"6530":{"id":"6530","type":"apRace","location":"State of California","raceName":"State Senate, District 3","raceDescription":"Top candidate wins seat.","raceType":"top2","totalVotes":222193,"precinctsReportPercentage":98.99,"eevp":99,"tabulationStatus":"Tabulation Paused","dateUpdated":"March 22, 2024","timeUpdated":"4:48 PM","source":"AP","candidates":[{"candidateName":"Thom Bogue","candidateIncumbent":false,"candidateParty":"R","voteCount":61776,"isWinner":true},{"candidateName":"Christopher Cabaldon","candidateIncumbent":false,"candidateParty":"D","voteCount":59041,"isWinner":true},{"candidateName":"Rozzana Verder-Aliga","candidateIncumbent":false,"candidateParty":"D","voteCount":45546,"isWinner":false},{"candidateName":"Jackie Elward","candidateIncumbent":false,"candidateParty":"D","voteCount":41127,"isWinner":false},{"candidateName":"Jimih Jones","candidateIncumbent":false,"candidateParty":"R","voteCount":14703,"isWinner":false}],"winnerDateTime":"2024-03-15T01:24:31.539Z"},"6531":{"id":"6531","type":"apRace","location":"State of California","raceName":"State Senate, District 5","raceDescription":"Top candidate wins seat.","raceType":"top2","totalVotes":171623,"precinctsReportPercentage":99.09,"eevp":99,"tabulationStatus":"Tabulation Paused","dateUpdated":"March 22, 2024","timeUpdated":"5:10 PM","source":"AP","candidates":[{"candidateName":"Jim Shoemaker","candidateIncumbent":false,"candidateParty":"R","voteCount":74935,"isWinner":true},{"candidateName":"Jerry McNerney","candidateIncumbent":false,"candidateParty":"D","voteCount":57040,"isWinner":true},{"candidateName":"Carlos Villapudua","candidateIncumbent":false,"candidateParty":"D","voteCount":39648,"isWinner":false}],"winnerDateTime":"2024-03-13T20:07:46.382Z"},"6532":{"id":"6532","type":"apRace","location":"State of California","raceName":"State Senate, District 7","raceDescription":"Top candidate wins seat.","raceType":"top2","totalVotes":192446,"precinctsReportPercentage":98.72,"eevp":98.78,"tabulationStatus":"Tabulation Paused","dateUpdated":"March 22, 2024","timeUpdated":"4:48 PM","source":"AP","candidates":[{"candidateName":"Jesse Arreguín","candidateIncumbent":false,"candidateParty":"D","voteCount":61837,"isWinner":true},{"candidateName":"Jovanka Beckles","candidateIncumbent":false,"candidateParty":"D","voteCount":34025,"isWinner":true},{"candidateName":"Dan Kalb","candidateIncumbent":false,"candidateParty":"D","voteCount":28842,"isWinner":false},{"candidateName":"Kathryn Lybarger","candidateIncumbent":false,"candidateParty":"D","voteCount":28041,"isWinner":false},{"candidateName":"Sandre Swanson","candidateIncumbent":false,"candidateParty":"D","voteCount":22862,"isWinner":false},{"candidateName":"Jeanne Solnordal","candidateIncumbent":false,"candidateParty":"R","voteCount":16839,"isWinner":false}],"winnerDateTime":"2024-03-16T00:58:11.533Z"},"6533":{"id":"6533","type":"apRace","location":"State of California","raceName":"State Senate, District 9","raceDescription":"Top candidate wins seat.","raceType":"top2","totalVotes":0,"uncontested":true,"precinctsReportPercentage":0,"eevp":0,"tabulationStatus":"Tabulation Paused","dateUpdated":"March 22, 2024","timeUpdated":"4:20 PM","source":"AP","candidates":[{"candidateName":"Tim Grayson","candidateIncumbent":false,"candidateParty":"D","voteCount":0,"isWinner":true},{"candidateName":"Marisol Rubio","candidateIncumbent":false,"candidateParty":"D","voteCount":0,"isWinner":true}],"winnerDateTime":"2024-03-06T04:00:30.000Z"},"6534":{"id":"6534","type":"apRace","location":"State of California","raceName":"State Senate, District 11","raceDescription":"Top candidate wins seat.","raceType":"top2","totalVotes":228260,"precinctsReportPercentage":99.09,"eevp":99,"tabulationStatus":"Tabulation Paused","dateUpdated":"March 22, 2024","timeUpdated":"4:20 PM","source":"AP","candidates":[{"candidateName":"Scott Wiener","candidateIncumbent":true,"candidateParty":"D","voteCount":166592,"isWinner":true},{"candidateName":"Yvette Corkrean","candidateIncumbent":false,"candidateParty":"R","voteCount":34438,"isWinner":true},{"candidateName":"Cynthia Cravens","candidateIncumbent":false,"candidateParty":"D","voteCount":18513,"isWinner":false},{"candidateName":"Jing Xiong","candidateIncumbent":false,"candidateParty":"NPP","voteCount":8717,"isWinner":false}],"winnerDateTime":"2024-03-12T02:01:51.597Z"},"6535":{"id":"6535","type":"apRace","location":"State of California","raceName":"State Senate, District 13","raceDescription":"Top candidate wins seat.","raceType":"top2","totalVotes":227191,"precinctsReportPercentage":98.88,"eevp":99,"tabulationStatus":"Tabulation Paused","dateUpdated":"March 22, 2024","timeUpdated":"4:20 PM","source":"AP","candidates":[{"candidateName":"Josh Becker","candidateIncumbent":true,"candidateParty":"D","voteCount":167127,"isWinner":true},{"candidateName":"Alexander Glew","candidateIncumbent":false,"candidateParty":"R","voteCount":42788,"isWinner":true},{"candidateName":"Christina Laskowski","candidateIncumbent":false,"candidateParty":"R","voteCount":17276,"isWinner":false}],"winnerDateTime":"2024-03-12T01:56:24.964Z"},"6536":{"id":"6536","type":"apRace","location":"State of California","raceName":"State Senate, District 15","raceDescription":"Top candidate wins seat.","raceType":"top2","totalVotes":180231,"precinctsReportPercentage":98.81,"eevp":98.95,"tabulationStatus":"Tabulation Paused","dateUpdated":"March 22, 2024","timeUpdated":"4:20 PM","source":"AP","candidates":[{"candidateName":"Dave Cortese","candidateIncumbent":true,"candidateParty":"D","voteCount":124440,"isWinner":true},{"candidateName":"Robert Howell","candidateIncumbent":false,"candidateParty":"R","voteCount":34173,"isWinner":true},{"candidateName":"Tony Loaiza","candidateIncumbent":false,"candidateParty":"R","voteCount":21618,"isWinner":false}],"winnerDateTime":"2024-03-13T01:15:45.365Z"},"6548":{"id":"6548","type":"apRace","location":"State of California","raceName":"State Senate, District 39","raceDescription":"Top candidate wins seat.","raceType":"top2","totalVotes":0,"uncontested":true,"precinctsReportPercentage":0,"eevp":0,"tabulationStatus":"Tabulation Paused","dateUpdated":"March 20, 2024","timeUpdated":"4:55 PM","source":"AP","candidates":[{"candidateName":"Akilah Weber","candidateIncumbent":false,"candidateParty":"D","voteCount":0,"isWinner":true},{"candidateName":"Bob Divine","candidateIncumbent":false,"candidateParty":"R","voteCount":0,"isWinner":true}],"winnerDateTime":"2024-03-06T04:00:30.000Z"},"6611":{"id":"6611","type":"apRace","location":"State of California","raceName":"U.S. House of Representatives, District 11","raceDescription":"Top candidate wins seat.","raceType":"top2","totalVotes":188732,"precinctsReportPercentage":98.89,"eevp":99,"tabulationStatus":"Tabulation Paused","dateUpdated":"March 22, 2024","timeUpdated":"8:25 AM","source":"AP","candidates":[{"candidateName":"Nancy Pelosi","candidateIncumbent":true,"candidateParty":"D","voteCount":138285,"isWinner":true},{"candidateName":"Bruce Lou","candidateIncumbent":false,"candidateParty":"R","voteCount":16285,"isWinner":true},{"candidateName":"Marjorie Mikels","candidateIncumbent":false,"candidateParty":"D","voteCount":9363,"isWinner":false},{"candidateName":"Bianca Von Krieg","candidateIncumbent":false,"candidateParty":"D","voteCount":7634,"isWinner":false},{"candidateName":"Jason Zeng","candidateIncumbent":false,"candidateParty":"R","voteCount":6607,"isWinner":false},{"candidateName":"Jason Boyce","candidateIncumbent":false,"candidateParty":"D","voteCount":4325,"isWinner":false},{"candidateName":"Larry Nichelson","candidateIncumbent":false,"candidateParty":"R","voteCount":3482,"isWinner":false},{"candidateName":"Eve Del Castello","candidateIncumbent":false,"candidateParty":"R","voteCount":2751,"isWinner":false}],"winnerDateTime":"2024-03-12T00:31:55.445Z"},"8589":{"id":"8589","type":"apRace","location":"State of California","raceName":"U.S. Senate, Class I","raceDescription":"Top candidate wins seat.","raceType":"top2","totalVotes":7276537,"precinctsReportPercentage":99,"eevp":99,"tabulationStatus":"Tabulation Paused","dateUpdated":"March 25, 2024","timeUpdated":"5:47 AM","source":"AP","candidates":[{"candidateName":"Adam Schiff","candidateIncumbent":false,"candidateParty":"D","voteCount":2299507,"isWinner":true},{"candidateName":"Steve Garvey","candidateIncumbent":false,"candidateParty":"R","voteCount":2292414,"isWinner":true},{"candidateName":"Katie Porter","candidateIncumbent":false,"candidateParty":"D","voteCount":1115606,"isWinner":false},{"candidateName":"Barbara Lee","candidateIncumbent":false,"candidateParty":"D","voteCount":714408,"isWinner":false},{"candidateName":"Eric Early","candidateIncumbent":false,"candidateParty":"R","voteCount":240723,"isWinner":false},{"candidateName":"James Bradley","candidateIncumbent":false,"candidateParty":"R","voteCount":98180,"isWinner":false},{"candidateName":"Christina Pascucci","candidateIncumbent":false,"candidateParty":"D","voteCount":61755,"isWinner":false},{"candidateName":"Sharleta Bassett","candidateIncumbent":false,"candidateParty":"R","voteCount":54422,"isWinner":false},{"candidateName":"Sarah Liew","candidateIncumbent":false,"candidateParty":"R","voteCount":38483,"isWinner":false},{"candidateName":"Laura Garza ","candidateIncumbent":false,"candidateParty":"NPP","voteCount":34320,"isWinner":false},{"candidateName":"Jonathan Reiss","candidateIncumbent":false,"candidateParty":"R","voteCount":34283,"isWinner":false},{"candidateName":"Sepi Gilani","candidateIncumbent":false,"candidateParty":"D","voteCount":34056,"isWinner":false},{"candidateName":"Gail Lightfoot","candidateIncumbent":false,"candidateParty":"Lib","voteCount":33046,"isWinner":false},{"candidateName":"Denice Gary-Pandol","candidateIncumbent":false,"candidateParty":"R","voteCount":25494,"isWinner":false},{"candidateName":"James Macauley","candidateIncumbent":false,"candidateParty":"R","voteCount":23168,"isWinner":false},{"candidateName":"Harmesh Kumar","candidateIncumbent":false,"candidateParty":"D","voteCount":21522,"isWinner":false},{"candidateName":"David Peterson","candidateIncumbent":false,"candidateParty":"D","voteCount":21076,"isWinner":false},{"candidateName":"Douglas Pierce","candidateIncumbent":false,"candidateParty":"D","voteCount":19371,"isWinner":false},{"candidateName":"Major Singh","candidateIncumbent":false,"candidateParty":"NPP","voteCount":16965,"isWinner":false},{"candidateName":"John Rose","candidateIncumbent":false,"candidateParty":"D","voteCount":14577,"isWinner":false},{"candidateName":"Perry Pound","candidateIncumbent":false,"candidateParty":"D","voteCount":14134,"isWinner":false},{"candidateName":"Raji Rab","candidateIncumbent":false,"candidateParty":"D","voteCount":13558,"isWinner":false},{"candidateName":"Mark Ruzon","candidateIncumbent":false,"candidateParty":"NPP","voteCount":13429,"isWinner":false},{"candidateName":"Forrest Jones","candidateIncumbent":false,"candidateParty":"AIP","voteCount":13027,"isWinner":false},{"candidateName":"Stefan Simchowitz","candidateIncumbent":false,"candidateParty":"R","voteCount":12717,"isWinner":false},{"candidateName":"Martin Veprauskas","candidateIncumbent":false,"candidateParty":"R","voteCount":9714,"isWinner":false},{"candidateName":"Don Grundmann","candidateIncumbent":false,"candidateParty":"NPP","voteCount":6582,"isWinner":false}],"winnerDateTime":"2024-03-06T05:01:46.589Z"},"8686":{"id":"8686","type":"apRace","location":"State of California","raceName":"President,","raceDescription":"Top candidate wins seat.","raceType":"top1","totalVotes":3589127,"precinctsReportPercentage":99,"eevp":99,"tabulationStatus":"Tabulation Paused","dateUpdated":"March 25, 2024","timeUpdated":"5:48 AM","source":"AP","candidates":[{"candidateName":"Joe Biden","candidateIncumbent":true,"candidateParty":"D","voteCount":3200188,"isWinner":true},{"candidateName":"Marianne Williamson","candidateIncumbent":false,"candidateParty":"D","voteCount":145690,"isWinner":false},{"candidateName":"Dean Phillips","candidateIncumbent":false,"candidateParty":"D","voteCount":99981,"isWinner":false},{"candidateName":"Armando Perez-Serrato","candidateIncumbent":false,"candidateParty":"D","voteCount":42925,"isWinner":false},{"candidateName":"Gabriel Cornejo","candidateIncumbent":false,"candidateParty":"D","voteCount":41261,"isWinner":false},{"candidateName":"President Boddie","candidateIncumbent":false,"candidateParty":"D","voteCount":25373,"isWinner":false},{"candidateName":"Stephen Lyons","candidateIncumbent":false,"candidateParty":"D","voteCount":21008,"isWinner":false},{"candidateName":"Eban Cambridge","candidateIncumbent":false,"candidateParty":"D","voteCount":12701,"isWinner":false}],"winnerDateTime":"2024-03-06T04:12:27.559Z"},"8688":{"id":"8688","type":"apRace","location":"State of California","raceName":"President,","raceDescription":"Top candidate wins seat.","raceType":"top1","totalVotes":2466569,"precinctsReportPercentage":99,"eevp":99,"tabulationStatus":"Tabulation Paused","dateUpdated":"March 25, 2024","timeUpdated":"5:47 AM","source":"AP","candidates":[{"candidateName":"Donald Trump","candidateIncumbent":false,"candidateParty":"R","voteCount":1953947,"isWinner":true},{"candidateName":"Nikki Haley","candidateIncumbent":false,"candidateParty":"R","voteCount":430792,"isWinner":false},{"candidateName":"Ron DeSantis","candidateIncumbent":false,"candidateParty":"R","voteCount":35581,"isWinner":false},{"candidateName":"Chris Christie","candidateIncumbent":false,"candidateParty":"R","voteCount":20164,"isWinner":false},{"candidateName":"Vivek Ramaswamy","candidateIncumbent":false,"candidateParty":"R","voteCount":11069,"isWinner":false},{"candidateName":"Rachel Swift","candidateIncumbent":false,"candidateParty":"R","voteCount":4231,"isWinner":false},{"candidateName":"David Stuckenberg","candidateIncumbent":false,"candidateParty":"R","voteCount":3895,"isWinner":false},{"candidateName":"Ryan Binkley","candidateIncumbent":false,"candidateParty":"R","voteCount":3563,"isWinner":false},{"candidateName":"Asa Hutchinson","candidateIncumbent":false,"candidateParty":"R","voteCount":3327,"isWinner":false}],"winnerDateTime":"2024-03-06T04:13:19.766Z"},"81993":{"id":"81993","type":"apRace","location":"State of California","raceName":"U.S. Senate, Class I Unexpired Term","raceDescription":"Top candidate wins seat.","raceType":"top2","totalVotes":7358837,"precinctsReportPercentage":99,"eevp":99,"tabulationStatus":"Tabulation Paused","dateUpdated":"March 25, 2024","timeUpdated":"5:47 AM","source":"AP","candidates":[{"candidateName":"Steve Garvey","candidateIncumbent":false,"candidateParty":"R","voteCount":2444940,"isWinner":true},{"candidateName":"Adam Schiff","candidateIncumbent":false,"candidateParty":"D","voteCount":2155146,"isWinner":true},{"candidateName":"Katie Porter","candidateIncumbent":false,"candidateParty":"D","voteCount":1269194,"isWinner":false},{"candidateName":"Barbara Lee","candidateIncumbent":false,"candidateParty":"D","voteCount":863278,"isWinner":false},{"candidateName":"Eric Early","candidateIncumbent":false,"candidateParty":"R","voteCount":448788,"isWinner":false},{"candidateName":"Christina Pascucci","candidateIncumbent":false,"candidateParty":"D","voteCount":109421,"isWinner":false},{"candidateName":"Sepi Gilani","candidateIncumbent":false,"candidateParty":"D","voteCount":68070,"isWinner":false}],"winnerDateTime":"2024-03-06T04:31:08.186Z"},"82014":{"id":"82014","type":"apRace","location":"State of California","raceName":"Proposition, 1 - Behavioral Health Services Program","raceDescription":"Top candidate wins seat.","raceType":"top1","totalVotes":7221972,"precinctsReportPercentage":99,"eevp":99,"tabulationStatus":"Tabulation Paused","dateUpdated":"March 25, 2024","timeUpdated":"5:47 AM","source":"AP","candidates":[{"candidateName":"Yes","candidateIncumbent":false,"candidateParty":null,"voteCount":3624998,"isWinner":true},{"candidateName":"No","candidateIncumbent":false,"candidateParty":null,"voteCount":3596974,"isWinner":false}],"winnerDateTime":"2024-03-21T00:11:06.265Z"},"timeLoaded":"April 26, 2024 4:02 PM","nationalRacesLoaded":true,"localRacesLoaded":true,"overrides":[{"id":"5921","raceName":"U.S. House of Representatives, District 7","raceDescription":"Top two candidates advance to general election.","raceReadTheStory":""},{"id":"5922","raceName":"U.S. House of Representatives, District 8","raceDescription":"Top two candidates advance to general election.","raceReadTheStory":""},{"id":"5924","raceName":"U.S. House of Representatives, District 10","raceDescription":"Top two candidates advance to general election.","raceReadTheStory":""},{"id":"5926","raceName":"U.S. House of Representatives, District 12","raceDescription":"Top two candidates advance to general election.","raceReadTheStory":"https://www.kqed.org/elections/results/alameda/congress-12th-district"},{"id":"5928","raceName":"U.S. House of Representatives, District 14","raceDescription":"Top two candidates advance to general election.","raceReadTheStory":""},{"id":"5930","raceName":"U.S. House of Representatives, District 16","raceDescription":"Top two candidates advance to general election.","raceReadTheStory":"https://www.kqed.org/elections/results/california/congress-16th-district"},{"id":"5931","raceName":"U.S. House of Representatives, District 17","raceDescription":"Top two candidates advance to general election.","raceReadTheStory":""},{"id":"5932","raceName":"U.S. House of Representatives, District 18","raceDescription":"Top two candidates advance to general election.","raceReadTheStory":""},{"id":"5963","raceName":"State Assembly, District 2","raceDescription":"Top two candidates advance to general election.","raceReadTheStory":""},{"id":"5972","raceName":"State Assembly, District 11","raceDescription":"Top two candidates advance to general election.","raceReadTheStory":""},{"id":"5973","raceName":"State Assembly, District 12","raceDescription":"Top two candidates advance to general election.","raceReadTheStory":""},{"id":"5975","raceName":"State Assembly, District 14","raceDescription":"Top two candidates advance to general election.","raceReadTheStory":""},{"id":"5976","raceName":"State Assembly, District 15","raceDescription":"Top two candidates advance to general election.","raceReadTheStory":"https://www.kqed.org/elections/results/contracosta/state-assembly"},{"id":"5977","raceName":"State Assembly, District 16","raceDescription":"Top two candidates advance to general election.","raceReadTheStory":""},{"id":"5978","raceName":"State Assembly, District 17","raceDescription":"Top two candidates advance to general election.","raceReadTheStory":""},{"id":"5979","raceName":"State Assembly, District 18","raceDescription":"Top two candidates advance to general election.","raceReadTheStory":""},{"id":"5980","raceName":"State Assembly, District 19","raceDescription":"Top two candidates advance to general election.","raceReadTheStory":""},{"id":"5981","raceName":"State Assembly, District 20","raceDescription":"Top two candidates advance to general election.","raceReadTheStory":""},{"id":"5982","raceName":"State Assembly, District 21","raceDescription":"Top two candidates advance to general election.","raceReadTheStory":""},{"id":"5984","raceName":"State Assembly, District 23","raceDescription":"Top two candidates advance to general election.","raceReadTheStory":"https://www.kqed.org/elections/results/california/state-assembly-23rd-district"},{"id":"5987","raceName":"State Assembly, District 26","raceDescription":"Top two candidates advance to general election.","raceReadTheStory":"https://www.kqed.org/elections/results/santaclara/state-assembly-26th-district"},{"id":"5989","raceName":"State Assembly, District 28","raceDescription":"Top two candidates advance to general election.","raceReadTheStory":""},{"id":"6010","raceName":"State Assembly, District 4","raceDescription":"Top two candidates advance to general election.","raceReadTheStory":""},{"id":"6018","raceName":"U.S. House of Representatives, District 2","raceDescription":"Top two candidates advance to general election.","raceReadTheStory":""},{"id":"6020","raceName":"U.S. House of Representatives, District 4","raceDescription":"Top two candidates advance to general election.","raceReadTheStory":""},{"id":"6025","raceName":"U.S. House of Representatives, District 9","raceDescription":"Top two candidates advance to general election.","raceReadTheStory":""},{"id":"6031","raceName":"U.S. House of Representatives, District 15","raceDescription":"Top two candidates advance to general election.","raceReadTheStory":""},{"id":"6035","raceName":"U.S. House of Representatives, District 19","raceDescription":"Top two candidates advance to general election.","raceReadTheStory":""},{"id":"6067","raceName":"State Assembly, District 4","raceDescription":"Top two candidates advance to general election.","raceReadTheStory":""},{"id":"6087","raceName":"State Assembly, District 24","raceDescription":"Top two candidates advance to general election.","raceReadTheStory":""},{"id":"6088","raceName":"State Assembly, District 25","raceDescription":"Top two candidates advance to general election.","raceReadTheStory":""},{"id":"6092","raceName":"State Assembly, District 29","raceDescription":"Top two candidates advance to general election.","raceReadTheStory":""},{"id":"6223","raceName":"U.S. House of Representatives, District 4","raceDescription":"Top two candidates advance to general election.","raceReadTheStory":""},{"id":"6530","raceName":"State Senate, District 3","raceDescription":"Top two candidates advance to general election.","raceReadTheStory":"https://www.kqed.org/elections/results/california/state-senate-3rd-district"},{"id":"6531","raceName":"State Senate, District 5","raceDescription":"Top two candidates advance to general election.","raceReadTheStory":""},{"id":"6532","raceName":"State Senate, District 7","raceDescription":"Top two candidates advance to general election.","raceReadTheStory":"https://www.kqed.org/elections/results/california/state-senate-7th-district"},{"id":"6533","raceName":"State Senate, District 9","raceDescription":"Top two candidates advance to general election.","raceReadTheStory":""},{"id":"6534","raceName":"State Senate, District 11","raceDescription":"Top two candidates advance to general election.","raceReadTheStory":""},{"id":"6535","raceName":"State Senate, District 13","raceDescription":"Top two candidates advance to general election.","raceReadTheStory":""},{"id":"6536","raceName":"State Senate, District 15","raceDescription":"Top two candidates advance to general election.","raceReadTheStory":""},{"id":"6611","raceName":"U.S. House of Representatives, District 11","raceDescription":"Top two candidates advance to general election.","raceReadTheStory":""},{"id":"8589","raceName":"U.S. Senate (Full Term)","raceDescription":"Top two candidates advance to general election.","raceReadTheStory":"https://www.kqed.org/elections/results/california/senator"},{"id":"8686","raceName":"California Democratic Presidential Primary","raceDescription":"Candidates are competing for 496 delegates.","raceReadTheStory":"https://www.kqed.org/elections/results/president/democrat"},{"id":"8688","raceName":"California Republican Presidential Primary","raceDescription":"Candidates are competing for 169 delegates.","raceReadTheStory":"https://kqed.org/elections/results/president/republican"},{"id":"81993","raceName":"U.S. Senate (Partial/Unexpired Term)","raceDescription":"Top two candidates advance to general election."},{"id":"82014","raceName":"Proposition 1","raceDescription":"Bond and mental health reforms. Passes with majority vote.","raceReadTheStory":"https://www.kqed.org/elections/results/california/proposition-1"}],"AlamedaJudge5":{"id":"AlamedaJudge5","type":"localRace","location":"Alameda","raceName":"Superior Court Judge, Office 5","raceDescription":"Top candidate wins seat.","raceReadTheStory":"","raceType":"top1","timeUpdated":"7:02 PM","dateUpdated":"April 1, 2024","totalVotes":200601,"candidates":[{"candidateName":"Terry Wiley","candidateIncumbent":true,"candidateParty":"","voteCount":200601}]},"AlamedaJudge12":{"id":"AlamedaJudge12","type":"localRace","location":"Alameda","raceName":"Superior Court Judge, Office 12","raceDescription":"Top candidate wins seat.","raceReadTheStory":"","raceType":"top1","timeUpdated":"7:02 PM","dateUpdated":"April 1, 2024","totalVotes":240853,"candidates":[{"candidateName":"Mark Fickes","candidateIncumbent":false,"candidateParty":"","voteCount":133009},{"candidateName":"Michael P. Johnson","candidateIncumbent":false,"candidateParty":"","voteCount":107844}]},"AlamedaBoard2":{"id":"AlamedaBoard2","type":"localRace","location":"Alameda","raceName":"Board of Education, Trustee Area 2","raceDescription":"Top candidate wins seat.","raceReadTheStory":"","raceType":"top1","timeUpdated":"7:02 PM","dateUpdated":"April 1, 2024","totalVotes":33580,"candidates":[{"candidateName":"John Lewis","candidateIncumbent":false,"candidateParty":"","voteCount":6943},{"candidateName":"Angela Normand","candidateIncumbent":true,"candidateParty":"","voteCount":26637}]},"AlamedaBoard5":{"id":"AlamedaBoard5","type":"localRace","location":"Alameda","raceName":"Board of Education, Trustee Area 5","raceDescription":"Top candidate wins seat.","raceReadTheStory":"","raceType":"top1","timeUpdated":"7:02 PM","dateUpdated":"April 1, 2024","totalVotes":26072,"candidates":[{"candidateName":"Guadalupe \"Lupe\" Angulo","candidateIncumbent":false,"candidateParty":"","voteCount":7521},{"candidateName":"Janevette Cole","candidateIncumbent":true,"candidateParty":"","voteCount":13338},{"candidateName":"Joe Orlando Ramos","candidateIncumbent":false,"candidateParty":"","voteCount":5213}]},"AlamedaBoard6":{"id":"AlamedaBoard6","type":"localRace","location":"Alameda","raceName":"Board of Education, Trustee Area 6","raceDescription":"Top candidate wins seat.","raceReadTheStory":"","raceType":"top1","timeUpdated":"7:02 PM","dateUpdated":"April 1, 2024","totalVotes":30864,"candidates":[{"candidateName":"John Guerrero","candidateIncumbent":false,"candidateParty":"","voteCount":9989},{"candidateName":"Eileen McDonald","candidateIncumbent":true,"candidateParty":"","voteCount":20875}]},"AlamedaSup1":{"id":"AlamedaSup1","type":"localRace","location":"Alameda","raceName":"Board of Supervisors, District 1","raceDescription":"Candidate with majority vote wins seat. If no candidate reaches majority, top two candidates advance to runoff in general election.","raceReadTheStory":"","raceType":"top1","timeUpdated":"7:02 PM","dateUpdated":"April 1, 2024","totalVotes":41038,"candidates":[{"candidateName":"David Haubert","candidateIncumbent":true,"candidateParty":"","voteCount":41038}]},"AlamedaSup2":{"id":"AlamedaSup2","type":"localRace","location":"Alameda","raceName":"Board of Supervisors, District 2","raceDescription":"Candidate with majority vote wins seat. If no candidate reaches majority, top two candidates advance to runoff in general election.","raceReadTheStory":"","raceType":"top2","timeUpdated":"7:02 PM","dateUpdated":"April 1, 2024","totalVotes":31034,"candidates":[{"candidateName":"Elisa Márquez","candidateIncumbent":true,"candidateParty":"","voteCount":31034}]},"AlamedaSup4":{"id":"AlamedaSup4","type":"localRace","location":"Alameda","raceName":"Board of Supervisors, District 4","raceDescription":"Candidate with majority vote wins seat. If no candidate reaches majority, top two candidates advance to runoff in general election.","raceReadTheStory":"https://www.kqed.org/elections/results/alameda/supervisor-4th-district","raceType":"top2","timeUpdated":"7:02 PM","dateUpdated":"April 1, 2024","totalVotes":57007,"candidates":[{"candidateName":"Jennifer Esteen","candidateIncumbent":false,"candidateParty":"","voteCount":22400},{"candidateName":"Nate Miley","candidateIncumbent":true,"candidateParty":"","voteCount":34607}]},"AlamedaSup5":{"id":"AlamedaSup5","type":"localRace","location":"Alameda","raceName":"Board of Supervisors, District 5","raceDescription":"Candidate with majority vote wins seat. If no candidate reaches majority, top two candidates advance to runoff in general election.","raceReadTheStory":"https://www.kqed.org/elections/results/alameda/supervisor-5th-district","raceType":"top2","timeUpdated":"7:02 PM","dateUpdated":"April 1, 2024","totalVotes":81059,"candidates":[{"candidateName":"Ben Bartlett","candidateIncumbent":false,"candidateParty":"","voteCount":13518},{"candidateName":"Nikki Fortunato Bas","candidateIncumbent":false,"candidateParty":"","voteCount":27597},{"candidateName":"John J. Bauters","candidateIncumbent":false,"candidateParty":"","voteCount":16783},{"candidateName":"Ken Berrick","candidateIncumbent":false,"candidateParty":"","voteCount":7520},{"candidateName":"Omar Farmer","candidateIncumbent":false,"candidateParty":"","voteCount":1240},{"candidateName":"Gregory Hodge","candidateIncumbent":false,"candidateParty":"","voteCount":3419},{"candidateName":"Chris Moore","candidateIncumbent":false,"candidateParty":"","voteCount":7428},{"candidateName":"Gerald Pechenuk","candidateIncumbent":false,"candidateParty":"","voteCount":305},{"candidateName":"Lorrel Plimier","candidateIncumbent":false,"candidateParty":"","voteCount":3249}]},"AlamedaBoard7":{"id":"AlamedaBoard7","type":"localRace","location":"Alameda","raceName":"Flood Control & Water Conservation District Director, Zone 7, Full Term","raceDescription":"Top three candidates win seat.","raceReadTheStory":"","raceType":"top3","timeUpdated":"7:02 PM","dateUpdated":"April 1, 2024","totalVotes":134340,"candidates":[{"candidateName":"Alan Burnham","candidateIncumbent":false,"candidateParty":"","voteCount":15723},{"candidateName":"Sandy Figuers","candidateIncumbent":false,"candidateParty":"","voteCount":22454},{"candidateName":"Laurene K. Green","candidateIncumbent":false,"candidateParty":"","voteCount":30343},{"candidateName":"Kathy Narum","candidateIncumbent":true,"candidateParty":"","voteCount":23833},{"candidateName":"Seema Badar","candidateIncumbent":false,"candidateParty":"","voteCount":7468},{"candidateName":"Catherine Brown","candidateIncumbent":false,"candidateParty":"","voteCount":34519}]},"AlamedaAuditor":{"id":"AlamedaAuditor","type":"localRace","location":"Alameda","raceName":"Oakland Auditor","raceDescription":"Top candidate wins seat.","raceReadTheStory":"","raceType":"top1","timeUpdated":"7:02 PM","dateUpdated":"April 1, 2024","totalVotes":59227,"candidates":[{"candidateName":"Michael Houston","candidateIncumbent":true,"candidateParty":"","voteCount":59227}]},"AlamedaMeasureA":{"id":"AlamedaMeasureA","type":"localRace","location":"Alameda","raceName":"Measure A","raceDescription":"Alameda County. Civil service. Passes with majority vote.","raceReadTheStory":"","raceType":"yesNo","timeUpdated":"7:02 PM","dateUpdated":"April 1, 2024","totalVotes":282335,"candidates":[{"candidateName":"Yes","candidateIncumbent":false,"candidateParty":"","voteCount":167903},{"candidateName":"No","candidateIncumbent":false,"candidateParty":"","voteCount":114432}]},"AlamedaMeasureB":{"id":"AlamedaMeasureB","type":"localRace","location":"Alameda","raceName":"Measure B","raceDescription":"Alameda County. Recall rules. Passes with majority vote.","raceReadTheStory":"https://www.kqed.org/elections/results/alameda/measure-b","raceType":"yesNo","timeUpdated":"7:02 PM","dateUpdated":"April 1, 2024","totalVotes":282683,"candidates":[{"candidateName":"Yes","candidateIncumbent":false,"candidateParty":"","voteCount":182200},{"candidateName":"No","candidateIncumbent":false,"candidateParty":"","voteCount":100483}]},"AlamedaMeasureD":{"id":"AlamedaMeasureD","type":"localRace","location":"Alameda","raceName":"Measure D","raceDescription":"Oakland. Appropriations limit. Passes with majority vote.","raceReadTheStory":"","raceType":"yesNo","timeUpdated":"7:02 PM","dateUpdated":"April 1, 2024","totalVotes":79797,"candidates":[{"candidateName":"Yes","candidateIncumbent":false,"candidateParty":"","voteCount":59852},{"candidateName":"No","candidateIncumbent":false,"candidateParty":"","voteCount":19945}]},"AlamedaMeasureE":{"id":"AlamedaMeasureE","type":"localRace","location":"Alameda","raceName":"Measure E","raceDescription":"Alameda Unified School District. Parcel tax. Passes with 2/3 vote.","raceReadTheStory":"","raceType":"yesNo","timeUpdated":"7:02 PM","dateUpdated":"April 1, 2024","totalVotes":22692,"candidates":[{"candidateName":"Yes","candidateIncumbent":false,"candidateParty":"","voteCount":17280},{"candidateName":"No","candidateIncumbent":false,"candidateParty":"","voteCount":5412}]},"AlamedaMeasureF":{"id":"AlamedaMeasureF","type":"localRace","location":"Alameda","raceName":"Measure F","raceDescription":"Piedmont. Parcel tax. Passes with 2/3 vote.","raceReadTheStory":"","raceType":"yesNo","timeUpdated":"7:02 PM","dateUpdated":"April 1, 2024","totalVotes":4855,"candidates":[{"candidateName":"Yes","candidateIncumbent":false,"candidateParty":"","voteCount":3673},{"candidateName":"No","candidateIncumbent":false,"candidateParty":"","voteCount":1182}]},"AlamedaMeasureG":{"id":"AlamedaMeasureG","type":"localRace","location":"Alameda","raceName":"Measure G","raceDescription":"Albany Unified School District. Parcel tax. Passes with 2/3 vote. ","raceReadTheStory":"","raceType":"yesNo","timeUpdated":"7:02 PM","dateUpdated":"April 1, 2024","totalVotes":5898,"candidates":[{"candidateName":"Yes","candidateIncumbent":false,"candidateParty":"","voteCount":4651},{"candidateName":"No","candidateIncumbent":false,"candidateParty":"","voteCount":1247}]},"AlamedaMeasureH":{"id":"AlamedaMeasureH","type":"localRace","location":"Alameda","raceName":"Measure H","raceDescription":"Berkeley Unified School District. Parcel tax. Passes with 2/3 vote.","raceReadTheStory":"","raceType":"yesNo","timeUpdated":"7:02 PM","dateUpdated":"April 1, 2024","totalVotes":33331,"candidates":[{"candidateName":"Yes","candidateIncumbent":false,"candidateParty":"","voteCount":29418},{"candidateName":"No","candidateIncumbent":false,"candidateParty":"","voteCount":3913}]},"AlamedaMeasureI":{"id":"AlamedaMeasureI","type":"localRace","location":"Alameda","raceName":"Measure I","raceDescription":"Hayward Unified School District. School bond. Passes with 55% vote.","raceReadTheStory":"","raceType":"yesNo","timeUpdated":"7:02 PM","dateUpdated":"April 1, 2024","totalVotes":21929,"candidates":[{"candidateName":"Yes","candidateIncumbent":false,"candidateParty":"","voteCount":14151},{"candidateName":"No","candidateIncumbent":false,"candidateParty":"","voteCount":7778}]},"AlamedaMeasureJ":{"id":"AlamedaMeasureJ","type":"localRace","location":"Alameda","raceName":"Measure J","raceDescription":"San Leandro Unified School District. School bond. Passes with 55% vote.","raceReadTheStory":"","raceType":"yesNo","timeUpdated":"7:02 PM","dateUpdated":"April 1, 2024","totalVotes":12338,"candidates":[{"candidateName":"Yes","candidateIncumbent":false,"candidateParty":"","voteCount":7784},{"candidateName":"No","candidateIncumbent":false,"candidateParty":"","voteCount":4554}]},"CCD2":{"id":"CCD2","type":"localRace","location":"Contra Costa","raceName":"Board of Supervisors, District 2","raceDescription":"Candidate with majority vote wins seat. If no candidate reaches majority, top two candidates advance to runoff in general election.","raceReadTheStory":"","raceType":"yesNo","timeUpdated":"6:45 PM","dateUpdated":"March 28, 2024","totalVotes":45776,"candidates":[{"candidateName":"Candace Andersen","candidateIncumbent":true,"candidateParty":"","voteCount":45776}]},"CCD3":{"id":"CCD3","type":"localRace","location":"Contra Costa","raceName":"Board of Supervisors, District 3","raceDescription":"Candidate with majority vote wins seat. If no candidate reaches majority, top two candidates advance to runoff in general election.","raceReadTheStory":"","raceType":"top1","timeUpdated":"6:45 PM","dateUpdated":"March 28, 2024","totalVotes":25120,"candidates":[{"candidateName":"Diane Burgis","candidateIncumbent":true,"candidateParty":"","voteCount":25120}]},"CCD5":{"id":"CCD5","type":"localRace","location":"Contra Costa","raceName":"Board of Supervisors, District 5","raceDescription":"Candidate with majority vote wins seat. If no candidate reaches majority, top two candidates advance to runoff in general election.","raceReadTheStory":"https://www.kqed.org/elections/results/contracosta/supervisor-5th-district","raceType":"top2","timeUpdated":"6:45 PM","dateUpdated":"March 28, 2024","totalVotes":37045,"candidates":[{"candidateName":"Mike Barbanica","candidateIncumbent":false,"candidateParty":"","voteCount":14338},{"candidateName":"Jelani Killings","candidateIncumbent":false,"candidateParty":"","voteCount":5683},{"candidateName":"Shanelle Scales-Preston","candidateIncumbent":false,"candidateParty":"","voteCount":12993},{"candidateName":"Iztaccuauhtli Hector Gonzalez","candidateIncumbent":false,"candidateParty":"","voteCount":4031}]},"CCMeasureA":{"id":"CCMeasureA","type":"localRace","location":"Contra Costa","raceName":"Measure A","raceDescription":"Martinez. Appoint City Clerk. Passes with a majority vote.","raceReadTheStory":"","raceType":"yesNo","timeUpdated":"6:45 PM","dateUpdated":"March 28, 2024","totalVotes":11513,"candidates":[{"candidateName":"Yes","candidateIncumbent":false,"candidateParty":"","voteCount":7554},{"candidateName":"No","candidateIncumbent":false,"candidateParty":"","voteCount":3959}]},"CCMeasureB":{"id":"CCMeasureB","type":"localRace","location":"Contra Costa","raceName":"Measure B","raceDescription":"Antioch Unified School District. School bond. Passes with 55% vote.","raceReadTheStory":"","raceType":"yesNo","timeUpdated":"6:45 PM","dateUpdated":"March 28, 2024","totalVotes":17971,"candidates":[{"candidateName":"Yes","candidateIncumbent":false,"candidateParty":"","voteCount":10397},{"candidateName":"No","candidateIncumbent":false,"candidateParty":"","voteCount":7574}]},"CCMeasureC":{"id":"CCMeasureC","type":"localRace","location":"Contra Costa","raceName":"Measure C","raceDescription":"Martinez Unified School District. Parcel tax. Passes with 2/3 vote.","raceReadTheStory":"","raceType":"yesNo","timeUpdated":"6:45 PM","dateUpdated":"March 28, 2024","totalVotes":9230,"candidates":[{"candidateName":"Yes","candidateIncumbent":false,"candidateParty":"","voteCount":6917},{"candidateName":"No","candidateIncumbent":false,"candidateParty":"","voteCount":2313}]},"CCMeasureD":{"id":"CCMeasureD","type":"localRace","location":"Contra Costa","raceName":"Measure D","raceDescription":"Moraga School District. School bond. Passes with 55% vote.","raceReadTheStory":"","raceType":"yesNo","timeUpdated":"6:45 PM","dateUpdated":"March 28, 2024","totalVotes":6007,"candidates":[{"candidateName":"Yes","candidateIncumbent":false,"candidateParty":"","voteCount":4052},{"candidateName":"No","candidateIncumbent":false,"candidateParty":"","voteCount":1955}]},"MarinD2":{"id":"MarinD2","type":"localRace","location":"Marin","raceName":"Board of Supervisors, District 2","raceDescription":"Candidate with majority vote wins seat. If no candidate reaches majority, top two candidates advance to runoff in general election.","raceReadTheStory":"https://www.kqed.org/elections/results/marin/supervisor-2nd-district","raceType":"top2","timeUpdated":"6:54 PM","dateUpdated":"March 27, 2024","totalVotes":18466,"candidates":[{"candidateName":"Brian Colbert","candidateIncumbent":false,"candidateParty":"","voteCount":7971},{"candidateName":"Heather McPhail Sridharan","candidateIncumbent":false,"candidateParty":"","voteCount":4851},{"candidateName":"Ryan O'Neil","candidateIncumbent":false,"candidateParty":"","voteCount":2647},{"candidateName":"Gabe Paulson","candidateIncumbent":false,"candidateParty":"","voteCount":2997}]},"MarinD3":{"id":"MarinD3","type":"localRace","location":"Marin","raceName":"Board of Supervisors, District 3","raceDescription":"Candidate with majority vote wins seat. If no candidate reaches majority, top two candidates advance to runoff in general election.","raceReadTheStory":"","raceType":"top1","timeUpdated":"6:54 PM","dateUpdated":"March 27, 2024","totalVotes":13274,"candidates":[{"candidateName":"Stephanie Moulton-Peters","candidateIncumbent":true,"candidateParty":"","voteCount":13274}]},"MarinD4":{"id":"MarinD4","type":"localRace","location":"Marin","raceName":"Board of Supervisors, District 4","raceDescription":"Candidate with majority vote wins seat. If no candidate reaches majority, top two candidates advance to runoff in general election.","raceReadTheStory":"","raceType":"top1","timeUpdated":"6:54 PM","dateUpdated":"March 27, 2024","totalVotes":12986,"candidates":[{"candidateName":"Dennis Rodoni","candidateIncumbent":true,"candidateParty":"","voteCount":10086},{"candidateName":"Francis Drouillard","candidateIncumbent":false,"candidateParty":"","voteCount":2900}]},"MarinLarkspurCC":{"id":"MarinLarkspurCC","type":"localRace","location":"Marin","raceName":"Larkspur City Council (Short Term)","raceDescription":"Top candidate wins seat.","raceReadTheStory":"","raceType":"top1","timeUpdated":"6:54 PM","dateUpdated":"March 27, 2024","totalVotes":4176,"candidates":[{"candidateName":"Stephanie Andre","candidateIncumbent":false,"candidateParty":"","voteCount":2514},{"candidateName":"Claire Paquette","candidateIncumbent":false,"candidateParty":"","voteCount":1008},{"candidateName":"Lana Scott","candidateIncumbent":false,"candidateParty":"","voteCount":654}]},"MarinRossCouncil":{"id":"MarinRossCouncil","type":"localRace","location":"Marin","raceName":"Ross Town Council","raceDescription":"Top three candidates win seat.","raceReadTheStory":"","raceType":"top3","timeUpdated":"6:54 PM","dateUpdated":"March 27, 2024","totalVotes":1740,"candidates":[{"candidateName":"Charles William \"Bill\" Kircher, Jr.","candidateIncumbent":false,"candidateParty":"","voteCount":536},{"candidateName":"Mathew Salter","candidateIncumbent":false,"candidateParty":"","voteCount":502},{"candidateName":"Shadi Aboukhater","candidateIncumbent":false,"candidateParty":"","voteCount":187},{"candidateName":"Teri Dowling","candidateIncumbent":false,"candidateParty":"","voteCount":515}]},"MarinMeasureA":{"id":"MarinMeasureA","type":"localRace","location":"Marin","raceName":"Measure A","raceDescription":"Tamalpais Union High School District. School bond. Passes with 55% vote.","raceReadTheStory":"","raceType":"yesNo","timeUpdated":"6:54 PM","dateUpdated":"March 27, 2024","totalVotes":45345,"candidates":[{"candidateName":"Yes","candidateIncumbent":false,"candidateParty":"","voteCount":24376},{"candidateName":"No","candidateIncumbent":false,"candidateParty":"","voteCount":20969}]},"MarinMeasureB":{"id":"MarinMeasureB","type":"localRace","location":"Marin","raceName":"Measure B","raceDescription":"Petaluma Joint Union High School District. Parcel tax. Passes with 2/3 vote.","raceReadTheStory":"","raceType":"yesNo","timeUpdated":"6:54 PM","dateUpdated":"March 27, 2024","totalVotes":132,"candidates":[{"candidateName":"Yes","candidateIncumbent":false,"candidateParty":"","voteCount":62},{"candidateName":"No","candidateIncumbent":false,"candidateParty":"","voteCount":70}]},"MarinMeasureC":{"id":"MarinMeasureC","type":"localRace","location":"Marin","raceName":"Measure C","raceDescription":"Belvedere. Appropriation limit. Passes with majority vote.","raceReadTheStory":"","raceType":"yesNo","timeUpdated":"6:54 PM","dateUpdated":"March 27, 2024","totalVotes":870,"candidates":[{"candidateName":"Yes","candidateIncumbent":false,"candidateParty":"","voteCount":679},{"candidateName":"No","candidateIncumbent":false,"candidateParty":"","voteCount":191}]},"MarinMeasureD":{"id":"MarinMeasureD","type":"localRace","location":"Marin","raceName":"Measure D","raceDescription":"Larkspur. Rent stabilization. Passes with majority vote.","raceReadTheStory":"https://www.kqed.org/elections/results/marin/measure-d","raceType":"yesNo","timeUpdated":"6:54 PM","dateUpdated":"March 27, 2024","totalVotes":4955,"candidates":[{"candidateName":"Yes","candidateIncumbent":false,"candidateParty":"","voteCount":2573},{"candidateName":"No","candidateIncumbent":false,"candidateParty":"","voteCount":2382}]},"MarinMeasureE":{"id":"MarinMeasureE","type":"localRace","location":"Marin","raceName":"Measure E","raceDescription":"Ross. Special tax. Passes with 2/3 vote.","raceReadTheStory":"https://www.kqed.org/elections/results/marin/measure-e","raceType":"yesNo","timeUpdated":"6:54 PM","dateUpdated":"March 27, 2024","totalVotes":874,"candidates":[{"candidateName":"Yes","candidateIncumbent":false,"candidateParty":"","voteCount":683},{"candidateName":"No","candidateIncumbent":false,"candidateParty":"","voteCount":191}]},"MarinMeasureF":{"id":"MarinMeasureF","type":"localRace","location":"Marin","raceName":"Measure F","raceDescription":"San Anselmo. Flood Control and Water Conservation District. Passes with majority vote.","raceReadTheStory":"","raceType":"yesNo","timeUpdated":"6:54 PM","dateUpdated":"March 27, 2024","totalVotes":5193,"candidates":[{"candidateName":"Yes","candidateIncumbent":false,"candidateParty":"","voteCount":3083},{"candidateName":"No","candidateIncumbent":false,"candidateParty":"","voteCount":2110}]},"MarinMeasureG":{"id":"MarinMeasureG","type":"localRace","location":"Marin","raceName":"Measure G","raceDescription":"Bel Marin Keys Community Services District. Special tax. Passes with 2/3 vote.","raceReadTheStory":"","raceType":"yesNo","timeUpdated":"6:54 PM","dateUpdated":"March 27, 2024","totalVotes":830,"candidates":[{"candidateName":"Yes","candidateIncumbent":false,"candidateParty":"","voteCount":661},{"candidateName":"No","candidateIncumbent":false,"candidateParty":"","voteCount":169}]},"MarinMeasureH":{"id":"MarinMeasureH","type":"localRace","location":"Marin","raceName":"Measure H","raceDescription":"Marinwood Community Services District. Appropriations limit, fire protection. Passes with a majority vote.","raceReadTheStory":"","raceType":"yesNo","timeUpdated":"6:54 PM","dateUpdated":"March 27, 2024","totalVotes":1738,"candidates":[{"candidateName":"Yes","candidateIncumbent":false,"candidateParty":"","voteCount":1369},{"candidateName":"No","candidateIncumbent":false,"candidateParty":"","voteCount":369}]},"MarinMeasureI":{"id":"MarinMeasureI","type":"localRace","location":"Marin","raceName":"Measure I","raceDescription":"Marinwood Community Services District. Appropriations limit, parks. Passes with a majority vote.","raceReadTheStory":"","raceType":"yesNo","timeUpdated":"6:54 PM","dateUpdated":"March 27, 2024","totalVotes":1735,"candidates":[{"candidateName":"Yes","candidateIncumbent":false,"candidateParty":"","voteCount":1336},{"candidateName":"No","candidateIncumbent":false,"candidateParty":"","voteCount":399}]},"NapaD2":{"id":"NapaD2","type":"localRace","location":"Napa","raceName":"Board of Supervisors, District 2","raceDescription":"Candidate with majority vote wins seat. If no candidate reaches majority, top two candidates advance to runoff in general election.","raceReadTheStory":"","raceType":"top1","timeUpdated":"6:50 PM","dateUpdated":"April 3, 2024","totalVotes":8351,"candidates":[{"candidateName":"Liz Alessio","candidateIncumbent":false,"candidateParty":"","voteCount":6340},{"candidateName":"Doris Gentry","candidateIncumbent":false,"candidateParty":"","voteCount":2011}]},"NapaD4":{"id":"NapaD4","type":"localRace","location":"Napa","raceName":"Board of Supervisors, District 4","raceDescription":"Candidate with majority vote wins seat. If no candidate reaches majority, top two candidates advance to runoff in general election.","raceReadTheStory":"https://www.kqed.org/elections/results/napa/supervisor-4th-district","raceType":"top1","timeUpdated":"6:50 PM","dateUpdated":"April 3, 2024","totalVotes":7306,"candidates":[{"candidateName":"Amber Manfree","candidateIncumbent":false,"candidateParty":"","voteCount":3913},{"candidateName":"Pete Mott","candidateIncumbent":false,"candidateParty":"","voteCount":3393}]},"NapaD5":{"id":"NapaD5","type":"localRace","location":"Napa","raceName":"Board of Supervisors, District 5","raceDescription":"Candidate with majority vote wins seat. If no candidate reaches majority, top two candidates advance to runoff in general election.","raceReadTheStory":"https://www.kqed.org/elections/results/napa/supervisor-5th-district","raceType":"top1","timeUpdated":"6:50 PM","dateUpdated":"April 3, 2024","totalVotes":5356,"candidates":[{"candidateName":"Mariam Aboudamous","candidateIncumbent":false,"candidateParty":"","voteCount":2379},{"candidateName":"Belia Ramos","candidateIncumbent":true,"candidateParty":"","voteCount":2977}]},"NapaMeasureD":{"id":"NapaMeasureD","type":"localRace","location":"Napa","raceName":"Measure D","raceDescription":"Howell Mountain Elementary School District. School bond. Passes with 55% vote.","raceReadTheStory":"","raceType":"yesNo","timeUpdated":"6:50 PM","dateUpdated":"April 3, 2024","totalVotes":741,"candidates":[{"candidateName":"Yes","candidateIncumbent":false,"candidateParty":"","voteCount":367},{"candidateName":"No","candidateIncumbent":false,"candidateParty":"","voteCount":374}]},"NapaMeasureU":{"id":"NapaMeasureU","type":"localRace","location":"Napa","raceName":"Measure U","raceDescription":"Lake Berryessa Resort Improvement District. Appropriations limit. Passes with majority vote. ","raceReadTheStory":"","raceType":"yesNo","timeUpdated":"6:50 PM","dateUpdated":"April 3, 2024","totalVotes":86,"candidates":[{"candidateName":"Yes","candidateIncumbent":false,"candidateParty":"","voteCount":63},{"candidateName":"No","candidateIncumbent":false,"candidateParty":"","voteCount":23}]},"NapaMeasureU1":{"id":"NapaMeasureU1","type":"localRace","location":"Napa","raceName":"Measure U","raceDescription":"Yountville. Appropriations limit. Passes with majority vote. ","raceReadTheStory":"","raceType":"yesNo","timeUpdated":"6:50 PM","dateUpdated":"April 3, 2024","totalVotes":925,"candidates":[{"candidateName":"Yes","candidateIncumbent":false,"candidateParty":"","voteCount":793},{"candidateName":"No","candidateIncumbent":false,"candidateParty":"","voteCount":132}]},"SFJudge1":{"id":"SFJudge1","type":"localRace","location":"San Francisco","raceName":"Superior Court Judge, Seat 1","raceDescription":"Candidate with majority vote wins seat. If no candidate reaches majority, top two candidates advance to runoff in general election.","raceReadTheStory":"https://www.kqed.org/elections/results/sanfrancisco/superior-court-seat-1","raceType":"top1","timeUpdated":"6:50 PM","dateUpdated":"March 21, 2024","totalVotes":202960,"candidates":[{"candidateName":"Michael Begert","candidateIncumbent":true,"candidateParty":"","voteCount":124943},{"candidateName":"Chip Zecher","candidateIncumbent":false,"candidateParty":"","voteCount":78017}]},"SFJudge13":{"id":"SFJudge13","type":"localRace","location":"San Francisco","raceName":"Superior Court Judge, Seat 13","raceDescription":"Candidate with majority vote wins seat. If no candidate reaches majority, top two candidates advance to runoff in general election.","raceReadTheStory":"https://www.kqed.org/elections/results/sanfrancisco/superior-court-seat-13","raceType":"top1","timeUpdated":"6:50 PM","dateUpdated":"March 21, 2024","totalVotes":202386,"candidates":[{"candidateName":"Jean Myungjin Roland","candidateIncumbent":false,"candidateParty":"","voteCount":90012},{"candidateName":"Patrick S. Thompson","candidateIncumbent":true,"candidateParty":"","voteCount":112374}]},"SFPropA":{"id":"SFPropA","type":"localRace","location":"San Francisco","raceName":"Proposition A","raceDescription":"Housing bond. Passes with 2/3 vote.","raceReadTheStory":"https://www.kqed.org/elections/results/sanfrancisco/proposition-a","raceType":"yesNo","timeUpdated":"6:50 PM","dateUpdated":"March 21, 2024","totalVotes":225187,"candidates":[{"candidateName":"Yes","candidateIncumbent":false,"candidateParty":"","voteCount":158497},{"candidateName":"No","candidateIncumbent":false,"candidateParty":"","voteCount":66690}]},"SFPropB":{"id":"SFPropB","type":"localRace","location":"San Francisco","raceName":"Proposition B","raceDescription":"Police staffing. Passes with majority vote.","raceReadTheStory":"","raceType":"yesNo","timeUpdated":"6:50 PM","dateUpdated":"March 21, 2024","totalVotes":222954,"candidates":[{"candidateName":"Yes","candidateIncumbent":false,"candidateParty":"","voteCount":61580},{"candidateName":"No","candidateIncumbent":false,"candidateParty":"","voteCount":161374}]},"SFPropC":{"id":"SFPropC","type":"localRace","location":"San Francisco","raceName":"Proposition C","raceDescription":"Transfer tax exemption. Passes with majority vote.","raceReadTheStory":"","raceType":"yesNo","timeUpdated":"6:50 PM","dateUpdated":"March 21, 2024","totalVotes":220349,"candidates":[{"candidateName":"Yes","candidateIncumbent":false,"candidateParty":"","voteCount":116311},{"candidateName":"No","candidateIncumbent":false,"candidateParty":"","voteCount":104038}]},"SFPropD":{"id":"SFPropD","type":"localRace","location":"San Francisco","raceName":"Proposition D","raceDescription":"Ethics laws. Passes with majority vote.","raceReadTheStory":"","raceType":"yesNo","timeUpdated":"6:50 PM","dateUpdated":"March 21, 2024","totalVotes":222615,"candidates":[{"candidateName":"Yes","candidateIncumbent":false,"candidateParty":"","voteCount":198584},{"candidateName":"No","candidateIncumbent":false,"candidateParty":"","voteCount":24031}]},"SFPropE":{"id":"SFPropE","type":"localRace","location":"San Francisco","raceName":"Proposition E","raceDescription":"Police policies. Passes with majority vote.","raceReadTheStory":"https://www.kqed.org/elections/results/sanfrancisco/proposition-e","raceType":"yesNo","timeUpdated":"6:50 PM","dateUpdated":"March 21, 2024","totalVotes":222817,"candidates":[{"candidateName":"Yes","candidateIncumbent":false,"candidateParty":"","voteCount":120529},{"candidateName":"No","candidateIncumbent":false,"candidateParty":"","voteCount":102288}]},"SFPropF":{"id":"SFPropF","type":"localRace","location":"San Francisco","raceName":"Proposition F","raceDescription":"Drug screening. Passes with majority vote.","raceReadTheStory":"https://www.kqed.org/elections/results/sanfrancisco/proposition-f","raceType":"yesNo","timeUpdated":"6:50 PM","dateUpdated":"March 21, 2024","totalVotes":224004,"candidates":[{"candidateName":"Yes","candidateIncumbent":false,"candidateParty":"","voteCount":130214},{"candidateName":"No","candidateIncumbent":false,"candidateParty":"","voteCount":93790}]},"SFPropG":{"id":"SFPropG","type":"localRace","location":"San Francisco","raceName":"Proposition G","raceDescription":"Eighth-grade algebra. Passes with majority vote.","raceReadTheStory":"","raceType":"yesNo","timeUpdated":"6:50 PM","dateUpdated":"March 21, 2024","totalVotes":222704,"candidates":[{"candidateName":"Yes","candidateIncumbent":false,"candidateParty":"","voteCount":182066},{"candidateName":"No","candidateIncumbent":false,"candidateParty":"","voteCount":40638}]},"SMJudge4":{"id":"SMJudge4","type":"localRace","location":"San Mateo","raceName":"Superior Court Judge, Office 4","raceDescription":"Candidate with majority vote wins seat. If no candidate reaches majority, top two candidates advance to runoff in general election.","raceReadTheStory":"","raceType":"top1","timeUpdated":"6:56 PM","dateUpdated":"April 4, 2024","totalVotes":108919,"candidates":[{"candidateName":"Sarah Burdick","candidateIncumbent":false,"candidateParty":"","voteCount":108919}]},"SMD1":{"id":"SMD1","type":"localRace","location":"San Mateo","raceName":"Board of Supervisors, District 1","raceDescription":"Candidate with majority vote wins seat. If no candidate reaches majority, top two candidates advance to runoff in general election.","raceReadTheStory":"https://www.kqed.org/elections/results/sanmateo/supervisor-1st-district","raceType":"top1","timeUpdated":"6:56 PM","dateUpdated":"April 4, 2024","totalVotes":29650,"candidates":[{"candidateName":"Jackie Speier","candidateIncumbent":false,"candidateParty":"","voteCount":20353},{"candidateName":"Ann Schneider","candidateIncumbent":false,"candidateParty":"","voteCount":9297}]},"SMD4":{"id":"SMD4","type":"localRace","location":"San Mateo","raceName":"Board of Supervisors, District 4","raceDescription":"Candidate with majority vote wins seat. If no candidate reaches majority, top two candidates advance to runoff in general election.","raceReadTheStory":"https://www.kqed.org/elections/results/sanmateo/supervisor-4th-district","raceType":"top2","timeUpdated":"6:56 PM","dateUpdated":"April 4, 2024","totalVotes":22725,"candidates":[{"candidateName":"Antonio Lopez","candidateIncumbent":false,"candidateParty":"","voteCount":5730},{"candidateName":"Lisa Gauthier","candidateIncumbent":false,"candidateParty":"","voteCount":10358},{"candidateName":"Celeste Brevard","candidateIncumbent":false,"candidateParty":"","voteCount":1268},{"candidateName":"Paul Bocanegra","candidateIncumbent":false,"candidateParty":"","voteCount":1909},{"candidateName":"Maggie Cornejo","candidateIncumbent":false,"candidateParty":"","voteCount":3460}]},"SMD5":{"id":"SMD5","type":"localRace","location":"San Mateo","raceName":"Board of Supervisors, District 5","raceDescription":"Candidate with majority vote wins seat. If no candidate reaches majority, top two candidates advance to runoff in general election.","raceReadTheStory":"","raceType":"top1","timeUpdated":"6:56 PM","dateUpdated":"April 4, 2024","totalVotes":19937,"candidates":[{"candidateName":"David Canepa","candidateIncumbent":true,"candidateParty":"","voteCount":19937}]},"SMMeasureB":{"id":"SMMeasureB","type":"localRace","location":"San Mateo","raceName":"Measure B","raceDescription":"County Service Area #1 (Highlands). Special tax. Passes with 2/3 vote.","raceReadTheStory":"","raceType":"yesNo","timeUpdated":"6:56 PM","dateUpdated":"April 4, 2024","totalVotes":1549,"candidates":[{"candidateName":"Yes","candidateIncumbent":false,"candidateParty":"","voteCount":1360},{"candidateName":"No","candidateIncumbent":false,"candidateParty":"","voteCount":189}]},"SMMeasureC":{"id":"SMMeasureC","type":"localRace","location":"San Mateo","raceName":"Measure C","raceDescription":"Jefferson Elementary School District. Parcel tax. Passes with 2/3 vote","raceReadTheStory":"","raceType":"yesNo","timeUpdated":"6:56 PM","dateUpdated":"April 4, 2024","totalVotes":12234,"candidates":[{"candidateName":"Yes","candidateIncumbent":false,"candidateParty":"","voteCount":8543},{"candidateName":"No","candidateIncumbent":false,"candidateParty":"","voteCount":3691}]},"SMMeasureE":{"id":"SMMeasureE","type":"localRace","location":"San Mateo","raceName":"Measure E","raceDescription":"Woodside Elementary School District. School bond. Passes with 55% vote.","raceReadTheStory":"","raceType":"yesNo","timeUpdated":"6:56 PM","dateUpdated":"April 4, 2024","totalVotes":1392,"candidates":[{"candidateName":"Yes","candidateIncumbent":false,"candidateParty":"","voteCount":910},{"candidateName":"No","candidateIncumbent":false,"candidateParty":"","voteCount":482}]},"SMMeasureG":{"id":"SMMeasureG","type":"localRace","location":"San Mateo","raceName":"Measure G","raceDescription":"Pacifica School District. School bond. Passes with 55% vote.","raceReadTheStory":"","raceType":"yesNo","timeUpdated":"6:56 PM","dateUpdated":"April 4, 2024","totalVotes":11548,"candidates":[{"candidateName":"Yes","candidateIncumbent":false,"candidateParty":"","voteCount":7067},{"candidateName":"No","candidateIncumbent":false,"candidateParty":"","voteCount":4481}]},"SMMeasureH":{"id":"SMMeasureH","type":"localRace","location":"San Mateo","raceName":"Measure H","raceDescription":"San Carlos School District. School bond. Passes with 55% vote.","raceReadTheStory":"","raceType":"yesNo","timeUpdated":"6:56 PM","dateUpdated":"April 4, 2024","totalVotes":9938,"candidates":[{"candidateName":"Yes","candidateIncumbent":false,"candidateParty":"","voteCount":6283},{"candidateName":"No","candidateIncumbent":false,"candidateParty":"","voteCount":3655}]},"SCJudge5":{"id":"SCJudge5","type":"localRace","location":"Santa Clara","raceName":"Superior Court Judge, Office 5","raceDescription":"Candidate with majority vote wins seat. If no candidate reaches majority, top two candidates advance to runoff in general election.","raceReadTheStory":"","raceType":"top1","timeUpdated":"7:05 PM","dateUpdated":"April 4, 2024","totalVotes":301953,"candidates":[{"candidateName":"Jay Boyarsky","candidateIncumbent":false,"candidateParty":"","voteCount":142549},{"candidateName":"Nicole M. Ford","candidateIncumbent":false,"candidateParty":"","voteCount":52147},{"candidateName":"Johnene Linda Stebbins","candidateIncumbent":false,"candidateParty":"","voteCount":107257}]},"SCD2":{"id":"SCD2","type":"localRace","location":"Santa Clara","raceName":"Board of Supervisors, District 2","raceDescription":"Candidate with majority vote wins seat. If no candidate reaches majority, top two candidates advance to runoff in general election.","raceReadTheStory":"https://www.kqed.org/elections/results/santaclara/supervisor-2nd-district","raceType":"top2","timeUpdated":"7:05 PM","dateUpdated":"April 4, 2024","totalVotes":44059,"candidates":[{"candidateName":"Corina Herrera-Loera","candidateIncumbent":false,"candidateParty":"","voteCount":10519},{"candidateName":"Jennifer Margaret Celaya","candidateIncumbent":false,"candidateParty":"","voteCount":2394},{"candidateName":"Madison Nguyen","candidateIncumbent":false,"candidateParty":"","voteCount":12794},{"candidateName":"Betty Duong","candidateIncumbent":false,"candidateParty":"","voteCount":14031},{"candidateName":"Nelson McElmurry","candidateIncumbent":false,"candidateParty":"","voteCount":4321}]},"SCD3":{"id":"SCD3","type":"localRace","location":"Santa Clara","raceName":"Board of Supervisors, District 3","raceDescription":"Candidate with majority vote wins seat. If no candidate reaches majority, top two candidates advance to runoff in general election.","raceReadTheStory":"","raceType":"top1","timeUpdated":"7:05 PM","dateUpdated":"April 4, 2024","totalVotes":42549,"candidates":[{"candidateName":"Otto Lee","candidateIncumbent":true,"candidateParty":"","voteCount":42549}]},"SCD5":{"id":"SCD5","type":"localRace","location":"Santa Clara","raceName":"Board of Supervisors, District 5","raceDescription":"Candidate with majority vote wins seat. If no candidate reaches majority, top two candidates advance to runoff in general election.","raceReadTheStory":"https://www.kqed.org/elections/results/santaclara/supervisor-5th-district","raceType":"top2","timeUpdated":"7:05 PM","dateUpdated":"April 4, 2024","totalVotes":88712,"candidates":[{"candidateName":"Margaret Abe-Koga","candidateIncumbent":false,"candidateParty":"","voteCount":37172},{"candidateName":"Sally J. Lieber","candidateIncumbent":false,"candidateParty":"","voteCount":21962},{"candidateName":"Barry Chang","candidateIncumbent":false,"candidateParty":"","voteCount":6164},{"candidateName":"Peter C. Fung","candidateIncumbent":false,"candidateParty":"","voteCount":17892},{"candidateName":"Sandy Sans","candidateIncumbent":false,"candidateParty":"","voteCount":5522}]},"SCSJMayor":{"id":"SCSJMayor","type":"localRace","location":"Santa Clara","raceName":"San José Mayor","raceDescription":"Candidate with majority vote wins seat. If no candidate reaches majority, top two candidates advance to runoff in general election.","raceReadTheStory":"","raceType":"top1","timeUpdated":"7:05 PM","dateUpdated":"April 4, 2024","totalVotes":167064,"candidates":[{"candidateName":"Matt Mahan","candidateIncumbent":true,"candidateParty":"","voteCount":144701},{"candidateName":"Tyrone Wade","candidateIncumbent":false,"candidateParty":"","voteCount":22363}]},"SCSJD2":{"id":"SCSJD2","type":"localRace","location":"Santa Clara","raceName":"San José City Council, District 2","raceDescription":"Candidate with majority vote wins seat. If no candidate reaches majority, top two candidates advance to runoff in general election.","raceReadTheStory":"","raceType":"top2","timeUpdated":"7:05 PM","dateUpdated":"April 4, 2024","totalVotes":14131,"candidates":[{"candidateName":"Joe Lopez","candidateIncumbent":false,"candidateParty":"","voteCount":4950},{"candidateName":"Pamela Campos","candidateIncumbent":false,"candidateParty":"","voteCount":3436},{"candidateName":"Vanessa Sandoval","candidateIncumbent":false,"candidateParty":"","voteCount":2719},{"candidateName":"Babu Prasad","candidateIncumbent":false,"candidateParty":"","voteCount":3026}]},"SCSJD4":{"id":"SCSJD4","type":"localRace","location":"Santa Clara","raceName":"San José City Council, District 4","raceDescription":"Candidate with majority vote wins seat. If no candidate reaches majority, top two candidates advance to runoff in general election.","raceReadTheStory":"","raceType":"top1","timeUpdated":"7:05 PM","dateUpdated":"April 4, 2024","totalVotes":14322,"candidates":[{"candidateName":"Kansen Chu","candidateIncumbent":false,"candidateParty":"","voteCount":5931},{"candidateName":"David Cohen","candidateIncumbent":true,"candidateParty":"","voteCount":8391}]},"SCSJD6":{"id":"SCSJD6","type":"localRace","location":"Santa Clara","raceName":"San José City Council, District 6","raceDescription":"Candidate with majority vote wins seat. If no candidate reaches majority, top two candidates advance to runoff in general election.","raceReadTheStory":"","raceType":"top2","timeUpdated":"7:05 PM","dateUpdated":"April 4, 2024","totalVotes":25108,"candidates":[{"candidateName":"David Cohen","candidateIncumbent":false,"candidateParty":"","voteCount":9875},{"candidateName":"Alex Shoor","candidateIncumbent":false,"candidateParty":"","voteCount":3850},{"candidateName":"Angelo \"A.J.\" Pasciuti","candidateIncumbent":false,"candidateParty":"","voteCount":2688},{"candidateName":"Michael Mulcahy","candidateIncumbent":false,"candidateParty":"","voteCount":8695}]},"SCSJD8":{"id":"SCSJD8","type":"localRace","location":"Santa Clara","raceName":"San José City Council, District 8","raceDescription":"Candidate with majority vote wins seat. If no candidate reaches majority, top two candidates advance to runoff in general election.","raceReadTheStory":"","raceType":"top2","timeUpdated":"7:05 PM","dateUpdated":"April 4, 2024","totalVotes":21462,"candidates":[{"candidateName":"Tam Truong","candidateIncumbent":false,"candidateParty":"","voteCount":6982},{"candidateName":"Domingo Candelas","candidateIncumbent":true,"candidateParty":"","voteCount":8466},{"candidateName":"Sukhdev Singh Bainiwal","candidateIncumbent":false,"candidateParty":"","voteCount":5513},{"candidateName":"Surinder Kaur Dhaliwal","candidateIncumbent":false,"candidateParty":"","voteCount":501}]},"SCSJD10":{"id":"SCSJD10","type":"localRace","location":"Santa Clara","raceName":"San José City Council, District 10","raceDescription":"Candidate with majority vote wins seat. If no candidate reaches majority, top two candidates advance to runoff in general election.","raceReadTheStory":"","raceType":"top2","timeUpdated":"7:05 PM","dateUpdated":"April 4, 2024","totalVotes":22799,"candidates":[{"candidateName":"George Casey","candidateIncumbent":false,"candidateParty":"","voteCount":8805},{"candidateName":"Arjun Batra","candidateIncumbent":true,"candidateParty":"","voteCount":8354},{"candidateName":"Lenka Wright","candidateIncumbent":false,"candidateParty":"","voteCount":5640}]},"SCMeasureA":{"id":"SCMeasureA","type":"localRace","location":"Santa Clara","raceName":"Measure A","raceDescription":"Santa Clara. Appointed city clerk. Passes with majority vote.","raceReadTheStory":"","raceType":"yesNo","timeUpdated":"7:05 PM","dateUpdated":"April 4, 2024","totalVotes":20315,"candidates":[{"candidateName":"Yes","candidateIncumbent":false,"candidateParty":"","voteCount":6580},{"candidateName":"No","candidateIncumbent":false,"candidateParty":"","voteCount":13735}]},"SCMeasureB":{"id":"SCMeasureB","type":"localRace","location":"Santa Clara","raceName":"Measure B","raceDescription":"Santa Clara. Appointed police chief. Passes with majority vote.","raceReadTheStory":"","raceType":"yesNo","timeUpdated":"7:05 PM","dateUpdated":"April 4, 2024","totalVotes":20567,"candidates":[{"candidateName":"Yes","candidateIncumbent":false,"candidateParty":"","voteCount":5680},{"candidateName":"No","candidateIncumbent":false,"candidateParty":"","voteCount":14887}]},"SCMeasureC":{"id":"SCMeasureC","type":"localRace","location":"Santa Clara","raceName":"Measure C","raceDescription":"Sunnyvale School District. School bond. Passes with 55% vote.","raceReadTheStory":"","raceType":"yesNo","timeUpdated":"7:05 PM","dateUpdated":"April 4, 2024","totalVotes":14656,"candidates":[{"candidateName":"Yes","candidateIncumbent":false,"candidateParty":"","voteCount":10261},{"candidateName":"No","candidateIncumbent":false,"candidateParty":"","voteCount":4395}]},"SolanoD15":{"id":"SolanoD15","type":"localRace","location":"Solano","raceName":"Superior Court Judge, Department 15","raceDescription":"Candidate with majority vote wins seat. If no candidate reaches majority, top two candidates advance to runoff in general election.","raceReadTheStory":"","raceType":"","timeUpdated":"7:08 PM","dateUpdated":"March 28, 2024","totalVotes":81709,"candidates":[{"candidateName":"Mike Thompson","candidateIncumbent":false,"candidateParty":"","voteCount":36844},{"candidateName":"Bryan J. Kim","candidateIncumbent":false,"candidateParty":"","voteCount":44865}]},"SolanoD1":{"id":"SolanoD1","type":"localRace","location":"Solano","raceName":"Board of Supervisors, District 1","raceDescription":"Candidate with majority vote wins seat. If no candidate reaches majority, top two candidates advance to runoff in general election.","raceReadTheStory":"https://www.kqed.org/elections/results/solano/supervisor-1st-district","raceType":"","timeUpdated":"7:08 PM","dateUpdated":"March 28, 2024","totalVotes":13786,"candidates":[{"candidateName":"Michael Wilson","candidateIncumbent":false,"candidateParty":"","voteCount":6401},{"candidateName":"Cassandra James","candidateIncumbent":false,"candidateParty":"","voteCount":7385}]},"SolanoD2":{"id":"SolanoD2","type":"localRace","location":"Solano","raceName":"Board of Supervisors, District 2","raceDescription":"Candidate with majority vote wins seat. If no candidate reaches majority, top two candidates advance to runoff in general election.","raceReadTheStory":"","raceType":"","timeUpdated":"7:08 PM","dateUpdated":"March 28, 2024","totalVotes":19903,"candidates":[{"candidateName":"Monica Brown","candidateIncumbent":true,"candidateParty":"","voteCount":10951},{"candidateName":"Nora Dizon","candidateIncumbent":false,"candidateParty":"","voteCount":3135},{"candidateName":"Rochelle Sherlock","candidateIncumbent":false,"candidateParty":"","voteCount":5817}]},"SolanoD5":{"id":"SolanoD5","type":"localRace","location":"Solano","raceName":"Board of Supervisors, District 5","raceDescription":"Candidate with majority vote wins seat. If no candidate reaches majority, top two candidates advance to runoff in general election.","raceReadTheStory":"","raceType":"","timeUpdated":"7:08 PM","dateUpdated":"March 28, 2024","totalVotes":17888,"candidates":[{"candidateName":"Mitch Mashburn","candidateIncumbent":true,"candidateParty":"","voteCount":11210},{"candidateName":"Chadwick J. Ledoux","candidateIncumbent":false,"candidateParty":"","voteCount":6678}]},"SolanoEducation":{"id":"SolanoEducation","type":"localRace","location":"Solano","raceName":"Sacramento County Board of Education","raceDescription":"Candidate with majority vote wins seat. If no candidate reaches majority, top two candidates advance to runoff in general election.","raceReadTheStory":"","raceType":"","timeUpdated":"7:08 PM","dateUpdated":"March 28, 2024","totalVotes":3650,"candidates":[{"candidateName":"Heather Davis","candidateIncumbent":true,"candidateParty":"","voteCount":2960},{"candidateName":"Shazleen Khan","candidateIncumbent":false,"candidateParty":"","voteCount":690}]},"SolanoMeasureA":{"id":"SolanoMeasureA","type":"localRace","location":"Solano","raceName":"Measure A","raceDescription":"Benicia. Hotel tax. Passes with majority vote.","raceReadTheStory":"https://www.kqed.org/elections/results/solano/measure-a","raceType":"yesNo","timeUpdated":"7:08 PM","dateUpdated":"March 28, 2024","totalVotes":10136,"candidates":[{"candidateName":"Yes","candidateIncumbent":false,"candidateParty":"","voteCount":7869},{"candidateName":"No","candidateIncumbent":false,"candidateParty":"","voteCount":2267}]},"SolanoMeasureB":{"id":"SolanoMeasureB","type":"localRace","location":"Solano","raceName":"Measure B","raceDescription":"Benicia. Sales tax. Passes with majority vote.","raceReadTheStory":"https://www.kqed.org/elections/results/solano/measure-b","raceType":"yesNo","timeUpdated":"7:08 PM","dateUpdated":"March 28, 2024","totalVotes":10164,"candidates":[{"candidateName":"Yes","candidateIncumbent":false,"candidateParty":"","voteCount":7335},{"candidateName":"No","candidateIncumbent":false,"candidateParty":"","voteCount":2829}]},"SolanoMeasureC":{"id":"SolanoMeasureC","type":"localRace","location":"Solano","raceName":"Measure C","raceDescription":"Benicia Unified School District. School bond. Passes with 55% vote.","raceReadTheStory":"","raceType":"yesNo","timeUpdated":"7:08 PM","dateUpdated":"March 28, 2024","totalVotes":10112,"candidates":[{"candidateName":"Yes","candidateIncumbent":false,"candidateParty":"","voteCount":6316},{"candidateName":"No","candidateIncumbent":false,"candidateParty":"","voteCount":3796}]},"SolanoMeasureN":{"id":"SolanoMeasureN","type":"localRace","location":"Solano","raceName":"Measure N","raceDescription":"Davis Joint Unified School District. Parcel tax. Passes with 2/3 vote.","raceReadTheStory":"","raceType":"yesNo","timeUpdated":"7:08 PM","dateUpdated":"March 28, 2024","totalVotes":15,"candidates":[{"candidateName":"Yes","candidateIncumbent":false,"candidateParty":"","voteCount":5},{"candidateName":"No","candidateIncumbent":false,"candidateParty":"","voteCount":10}]},"SonomaJudge3":{"id":"SonomaJudge3","type":"localRace","location":"Sonoma","raceName":"Superior Court Judge, Office 3","raceDescription":"Candidate with majority vote wins seat. If no candidate reaches majority, top two candidates advance to runoff in general election.","raceReadTheStory":"","raceType":"top1","timeUpdated":"6:51 PM","dateUpdated":"March 29, 2024","totalVotes":115405,"candidates":[{"candidateName":"Kristine M. Burk","candidateIncumbent":false,"candidateParty":"","voteCount":79498},{"candidateName":"Beki Berrey","candidateIncumbent":false,"candidateParty":"","voteCount":35907}]},"SonomaJudge4":{"id":"SonomaJudge4","type":"localRace","location":"Sonoma","raceName":"Superior Court Judge, Office 4","raceDescription":"Candidate with majority vote wins seat. If no candidate reaches majority, top two candidates advance to runoff in general election.","raceReadTheStory":"","raceType":"top1","timeUpdated":"6:51 PM","dateUpdated":"March 29, 2024","totalVotes":86789,"candidates":[{"candidateName":"Paul J. Lozada","candidateIncumbent":false,"candidateParty":"","voteCount":86789}]},"SonomaJudge6":{"id":"SonomaJudge6","type":"localRace","location":"Sonoma","raceName":"Superior Court Judge, Office 6","raceDescription":"Candidate with majority vote wins seat. If no candidate reaches majority, top two candidates advance to runoff in general election.","raceReadTheStory":"","raceType":"top1","timeUpdated":"6:51 PM","dateUpdated":"March 29, 2024","totalVotes":117990,"candidates":[{"candidateName":"Omar Figueroa","candidateIncumbent":false,"candidateParty":"","voteCount":42236},{"candidateName":"Kenneth English","candidateIncumbent":false,"candidateParty":"","voteCount":75754}]},"SonomaD1":{"id":"SonomaD1","type":"localRace","location":"Sonoma","raceName":"Board of Supervisors, District 1","raceDescription":"Candidate with majority vote wins seat. If no candidate reaches majority, top two candidates advance to runoff in general election.","raceReadTheStory":"","raceType":"top1","timeUpdated":"6:51 PM","dateUpdated":"March 29, 2024","totalVotes":30348,"candidates":[{"candidateName":"Rebecca Hermosillo","candidateIncumbent":false,"candidateParty":"","voteCount":23958},{"candidateName":"Jonathan Mathieu","candidateIncumbent":false,"candidateParty":"","voteCount":6390}]},"SonomaD3":{"id":"SonomaD3","type":"localRace","location":"Sonoma","raceName":"Board of Supervisors, District 3","raceDescription":"Candidate with majority vote wins seat. If no candidate reaches majority, top two candidates advance to runoff in general election.","raceReadTheStory":"https://www.kqed.org/elections/results/sonoma/supervisor-3rd-district","raceType":"top1","timeUpdated":"6:51 PM","dateUpdated":"March 29, 2024","totalVotes":16312,"candidates":[{"candidateName":"Chris Coursey","candidateIncumbent":true,"candidateParty":"","voteCount":11346},{"candidateName":"Omar Medina","candidateIncumbent":false,"candidateParty":"","voteCount":4966}]},"SonomaD5":{"id":"SonomaD5","type":"localRace","location":"Sonoma","raceName":"Board of Supervisors, District 5","raceDescription":"Candidate with majority vote wins seat. If no candidate reaches majority, top two candidates advance to runoff in general election.","raceReadTheStory":"","raceType":"top1","timeUpdated":"6:51 PM","dateUpdated":"March 29, 2024","totalVotes":23356,"candidates":[{"candidateName":"Lynda Hopkins","candidateIncumbent":true,"candidateParty":"","voteCount":23356}]},"SonomaMeasureA":{"id":"SonomaMeasureA","type":"localRace","location":"Sonoma","raceName":"Measure A","raceDescription":"Cotati-Rohnert Park Unified School District. Parcel tax. Passes with 2/3 vote.","raceReadTheStory":"","raceType":"yesNo","timeUpdated":"6:51 PM","dateUpdated":"March 29, 2024","totalVotes":13756,"candidates":[{"candidateName":"Yes","candidateIncumbent":false,"candidateParty":"","voteCount":10320},{"candidateName":"No","candidateIncumbent":false,"candidateParty":"","voteCount":3436}]},"SonomaMeasureB":{"id":"SonomaMeasureB","type":"localRace","location":"Sonoma","raceName":"Measure B","raceDescription":"Petaluma Joint Union High School District. Parcel tax. Passes with 2/3 vote.","raceReadTheStory":"","raceType":"yesNo","timeUpdated":"6:51 PM","dateUpdated":"March 29, 2024","totalVotes":24877,"candidates":[{"candidateName":"Yes","candidateIncumbent":false,"candidateParty":"","voteCount":15795},{"candidateName":"No","candidateIncumbent":false,"candidateParty":"","voteCount":9082}]},"SonomaMeasureC":{"id":"SonomaMeasureC","type":"localRace","location":"Sonoma","raceName":"Measure C","raceDescription":"Fort Ross School District. School bond. Passes with 55% vote.","raceReadTheStory":"","raceType":"yesNo","timeUpdated":"6:51 PM","dateUpdated":"March 29, 2024","totalVotes":286,"candidates":[{"candidateName":"Yes","candidateIncumbent":false,"candidateParty":"","voteCount":159},{"candidateName":"No","candidateIncumbent":false,"candidateParty":"","voteCount":127}]},"SonomaMeasureD":{"id":"SonomaMeasureD","type":"localRace","location":"Sonoma","raceName":"Measure D","raceDescription":"Harmony Union School District. School bond. Passes with 55% vote.","raceReadTheStory":"","raceType":"yesNo","timeUpdated":"6:51 PM","dateUpdated":"March 29, 2024","totalVotes":1925,"candidates":[{"candidateName":"Yes","candidateIncumbent":false,"candidateParty":"","voteCount":1089},{"candidateName":"No","candidateIncumbent":false,"candidateParty":"","voteCount":836}]},"SonomaMeasureE":{"id":"SonomaMeasureE","type":"localRace","location":"Sonoma","raceName":"Measure E","raceDescription":"Petaluma City (Elementary) School District. Parcel tax. Passes with 2/3 vote.","raceReadTheStory":"","raceType":"yesNo","timeUpdated":"6:51 PM","dateUpdated":"March 29, 2024","totalVotes":11133,"candidates":[{"candidateName":"Yes","candidateIncumbent":false,"candidateParty":"","voteCount":7622},{"candidateName":"No","candidateIncumbent":false,"candidateParty":"","voteCount":3511}]},"SonomaMeasureG":{"id":"SonomaMeasureG","type":"localRace","location":"Sonoma","raceName":"Measure G","raceDescription":"Rincon Valley Union School District. School bond. Passes with 55% vote.","raceReadTheStory":"","raceType":"yesNo","timeUpdated":"6:51 PM","dateUpdated":"March 29, 2024","totalVotes":14577,"candidates":[{"candidateName":"Yes","candidateIncumbent":false,"candidateParty":"","voteCount":8668},{"candidateName":"No","candidateIncumbent":false,"candidateParty":"","voteCount":5909}]},"SonomaMeasureH":{"id":"SonomaMeasureH","type":"localRace","location":"Sonoma","raceName":"Measure H","raceDescription":"Sonoma County. Sales tax. Passes with majority vote.","raceReadTheStory":"https://www.kqed.org/elections/results/sonoma/measure-h","raceType":"yesNo","timeUpdated":"6:51 PM","dateUpdated":"March 29, 2024","totalVotes":145261,"candidates":[{"candidateName":"Yes","candidateIncumbent":false,"candidateParty":"","voteCount":89646},{"candidateName":"No","candidateIncumbent":false,"candidateParty":"","voteCount":55615}]}},"radioSchedulesReducer":{},"listsReducer":{"posts/bayareabites?tag=fruit":{"isFetching":false,"latestQuery":{"from":0,"postsToRender":9},"tag":null,"vitalsOnly":true,"totalRequested":9,"isLoading":false,"isLoadingMore":true,"total":40,"items":["bayareabites_137656","bayareabites_130068","bayareabites_110730","bayareabites_97547","bayareabites_86203","bayareabites_85133","bayareabites_82397","bayareabites_76211","bayareabites_68996"]}},"recallGuideReducer":{"intros":{},"policy":{},"candidates":{}},"savedPostsReducer":{},"pfsSessionReducer":{},"siteSettingsReducer":{},"subscriptionsReducer":{},"termsReducer":{"about":{"name":"About","type":"terms","id":"about","slug":"about","link":"/about","taxonomy":"site"},"arts":{"name":"Arts & Culture","grouping":["arts","pop","trulyca"],"description":"KQED Arts provides daily in-depth coverage of the Bay Area's music, art, film, performing arts, literature and arts news, as well as cultural commentary and criticism.","type":"terms","id":"arts","slug":"arts","link":"/arts","taxonomy":"site"},"artschool":{"name":"Art School","parent":"arts","type":"terms","id":"artschool","slug":"artschool","link":"/artschool","taxonomy":"site"},"bayareabites":{"name":"KQED food","grouping":["food","bayareabites","checkplease"],"parent":"food","type":"terms","id":"bayareabites","slug":"bayareabites","link":"/food","taxonomy":"site"},"bayareahiphop":{"name":"Bay Area Hiphop","type":"terms","id":"bayareahiphop","slug":"bayareahiphop","link":"/bayareahiphop","taxonomy":"site"},"campaign21":{"name":"Campaign 21","type":"terms","id":"campaign21","slug":"campaign21","link":"/campaign21","taxonomy":"site"},"checkplease":{"name":"KQED food","grouping":["food","bayareabites","checkplease"],"parent":"food","type":"terms","id":"checkplease","slug":"checkplease","link":"/food","taxonomy":"site"},"education":{"name":"Education","grouping":["education"],"type":"terms","id":"education","slug":"education","link":"/education","taxonomy":"site"},"elections":{"name":"Elections","type":"terms","id":"elections","slug":"elections","link":"/elections","taxonomy":"site"},"events":{"name":"Events","type":"terms","id":"events","slug":"events","link":"/events","taxonomy":"site"},"event":{"name":"Event","alias":"events","type":"terms","id":"event","slug":"event","link":"/event","taxonomy":"site"},"filmschoolshorts":{"name":"Film School Shorts","type":"terms","id":"filmschoolshorts","slug":"filmschoolshorts","link":"/filmschoolshorts","taxonomy":"site"},"food":{"name":"KQED food","grouping":["food","bayareabites","checkplease"],"type":"terms","id":"food","slug":"food","link":"/food","taxonomy":"site"},"forum":{"name":"Forum","relatedContentQuery":"posts/forum?","parent":"news","type":"terms","id":"forum","slug":"forum","link":"/forum","taxonomy":"site"},"futureofyou":{"name":"Future of You","grouping":["science","futureofyou"],"parent":"science","type":"terms","id":"futureofyou","slug":"futureofyou","link":"/futureofyou","taxonomy":"site"},"jpepinheart":{"name":"KQED food","relatedContentQuery":"trending/food,bayareabites,checkplease","parent":"food","type":"terms","id":"jpepinheart","slug":"jpepinheart","link":"/food","taxonomy":"site"},"liveblog":{"name":"Live Blog","type":"terms","id":"liveblog","slug":"liveblog","link":"/liveblog","taxonomy":"site"},"livetv":{"name":"Live TV","parent":"tv","type":"terms","id":"livetv","slug":"livetv","link":"/livetv","taxonomy":"site"},"lowdown":{"name":"The Lowdown","relatedContentQuery":"posts/lowdown?","parent":"news","type":"terms","id":"lowdown","slug":"lowdown","link":"/lowdown","taxonomy":"site"},"mindshift":{"name":"Mindshift","parent":"news","description":"MindShift explores the future of education by highlighting the innovative – and sometimes counterintuitive – ways educators and parents are helping all children succeed.","type":"terms","id":"mindshift","slug":"mindshift","link":"/mindshift","taxonomy":"site"},"news":{"name":"News","grouping":["news","forum"],"type":"terms","id":"news","slug":"news","link":"/news","taxonomy":"site"},"perspectives":{"name":"Perspectives","parent":"radio","type":"terms","id":"perspectives","slug":"perspectives","link":"/perspectives","taxonomy":"site"},"podcasts":{"name":"Podcasts","type":"terms","id":"podcasts","slug":"podcasts","link":"/podcasts","taxonomy":"site"},"pop":{"name":"Pop","parent":"arts","type":"terms","id":"pop","slug":"pop","link":"/pop","taxonomy":"site"},"pressroom":{"name":"Pressroom","type":"terms","id":"pressroom","slug":"pressroom","link":"/pressroom","taxonomy":"site"},"quest":{"name":"Quest","parent":"science","type":"terms","id":"quest","slug":"quest","link":"/quest","taxonomy":"site"},"radio":{"name":"Radio","grouping":["forum","perspectives"],"description":"Listen to KQED Public Radio – home of Forum and The California Report – on 88.5 FM in San Francisco, 89.3 FM in Sacramento, 88.3 FM in Santa Rosa and 88.1 FM in Martinez.","type":"terms","id":"radio","slug":"radio","link":"/radio","taxonomy":"site"},"root":{"name":"KQED","image":"https://ww2.kqed.org/app/uploads/2020/02/KQED-OG-Image@1x.png","imageWidth":1200,"imageHeight":630,"headData":{"title":"KQED | News, Radio, Podcasts, TV | Public Media for Northern California","description":"KQED provides public radio, television, and independent reporting on issues that matter to the Bay Area. We’re the NPR and PBS member station for Northern California."},"type":"terms","id":"root","slug":"root","link":"/root","taxonomy":"site"},"science":{"name":"Science","grouping":["science","futureofyou"],"description":"KQED Science brings you award-winning science and environment coverage from the Bay Area and beyond.","type":"terms","id":"science","slug":"science","link":"/science","taxonomy":"site"},"stateofhealth":{"name":"State of Health","parent":"science","type":"terms","id":"stateofhealth","slug":"stateofhealth","link":"/stateofhealth","taxonomy":"site"},"support":{"name":"Support","type":"terms","id":"support","slug":"support","link":"/support","taxonomy":"site"},"thedolist":{"name":"The Do List","parent":"arts","type":"terms","id":"thedolist","slug":"thedolist","link":"/thedolist","taxonomy":"site"},"trulyca":{"name":"Truly CA","grouping":["arts","pop","trulyca"],"parent":"arts","type":"terms","id":"trulyca","slug":"trulyca","link":"/trulyca","taxonomy":"site"},"tv":{"name":"TV","type":"terms","id":"tv","slug":"tv","link":"/tv","taxonomy":"site"},"voterguide":{"name":"Voter Guide","parent":"elections","alias":"elections","type":"terms","id":"voterguide","slug":"voterguide","link":"/voterguide","taxonomy":"site"},"bayareabites_244":{"type":"terms","id":"bayareabites_244","meta":{"index":"terms_1591234321","site":"bayareabites","id":"244","found":true},"relationships":{},"included":{},"name":"fruit","slug":"fruit","taxonomy":"tag","description":null,"featImg":null,"headData":{"title":"fruit Archives | KQED Bay Area Bites","description":null,"ogTitle":null,"ogDescription":null,"ogImgId":null,"twTitle":null,"twDescription":null,"twImgId":null,"imageData":{"ogImageSize":{"file":"https://cdn.kqed.org/wp-content/uploads/2020/02/KQED-OG-Image@1x.png","width":1200,"height":630},"twImageSize":{"file":"https://cdn.kqed.org/wp-content/uploads/2020/02/KQED-OG-Image@1x.png"},"twitterCard":"summary_large_image"}},"ttid":209,"isLoading":false,"link":"/bayareabites/tag/fruit"},"bayareabites_16657":{"type":"terms","id":"bayareabites_16657","meta":{"index":"terms_1591234321","site":"bayareabites","id":"16657","found":true},"relationships":{},"included":{},"name":"Jacques Pepin","slug":"jacques-pepin","taxonomy":"series","description":null,"featImg":null,"headData":{"title":"Jacques Pepin Archives | KQED Bay Area Bites","description":null,"ogTitle":null,"ogDescription":null,"ogImgId":null,"twTitle":null,"twDescription":null,"twImgId":null},"ttid":100987,"isLoading":false,"link":"/bayareabites/series/jacques-pepin"},"bayareabites_16661":{"type":"terms","id":"bayareabites_16661","meta":{"index":"terms_1591234321","site":"bayareabites","id":"16661","found":true},"relationships":{},"included":{},"name":"Jacques Pepin","slug":"jacques-pepin","taxonomy":"category","description":null,"featImg":null,"headData":{"title":"Jacques Pepin Archives | KQED Bay Area Bites","description":null,"ogTitle":null,"ogDescription":null,"ogImgId":null,"twTitle":null,"twDescription":null,"twImgId":null},"ttid":100991,"isLoading":false,"link":"/bayareabites/category/jacques-pepin"},"bayareabites_16659":{"type":"terms","id":"bayareabites_16659","meta":{"index":"terms_1591234321","site":"bayareabites","id":"16659","found":true},"relationships":{},"included":{},"name":"apricot clafoutis","slug":"apricot-clafoutis","taxonomy":"tag","description":null,"featImg":null,"headData":{"title":"apricot clafoutis Archives | KQED Bay Area Bites","description":null,"ogTitle":null,"ogDescription":null,"ogImgId":null,"twTitle":null,"twDescription":null,"twImgId":null},"ttid":100989,"isLoading":false,"link":"/bayareabites/tag/apricot-clafoutis"},"bayareabites_1820":{"type":"terms","id":"bayareabites_1820","meta":{"index":"terms_1591234321","site":"bayareabites","id":"1820","found":true},"relationships":{},"included":{},"name":"desserts","slug":"desserts","taxonomy":"tag","description":null,"featImg":null,"headData":{"title":"desserts Archives | KQED Bay Area Bites","description":null,"ogTitle":null,"ogDescription":null,"ogImgId":null,"twTitle":null,"twDescription":null,"twImgId":null},"ttid":1423,"isLoading":false,"link":"/bayareabites/tag/desserts"},"bayareabites_242":{"type":"terms","id":"bayareabites_242","meta":{"index":"terms_1591234321","site":"bayareabites","id":"242","found":true},"relationships":{},"included":{},"name":"jacques pepin","slug":"jacques-pepin","taxonomy":"tag","description":null,"featImg":null,"headData":{"title":"jacques pepin Archives | KQED Bay Area Bites","description":null,"ogTitle":null,"ogDescription":null,"ogImgId":null,"twTitle":null,"twDescription":null,"twImgId":null},"ttid":207,"isLoading":false,"link":"/bayareabites/tag/jacques-pepin"},"bayareabites_16756":{"type":"terms","id":"bayareabites_16756","meta":{"index":"terms_1591234321","site":"bayareabites","id":"16756","found":true},"relationships":{},"included":{},"name":"Jacques Pepin More Fast Food My Way","slug":"jacquespepinmorefastfood","taxonomy":"tag","description":null,"featImg":null,"headData":{"title":"Jacques Pepin More Fast Food My Way Archives | KQED Bay Area Bites","description":null,"ogTitle":null,"ogDescription":null,"ogImgId":null,"twTitle":null,"twDescription":null,"twImgId":null},"ttid":101086,"isLoading":false,"link":"/bayareabites/tag/jacquespepinmorefastfood"},"bayareabites_16658":{"type":"terms","id":"bayareabites_16658","meta":{"index":"terms_1591234321","site":"bayareabites","id":"16658","found":true},"relationships":{},"included":{},"name":"jprecipe","slug":"jprecipe","taxonomy":"tag","description":null,"featImg":null,"headData":{"title":"jprecipe Archives | KQED Bay Area Bites","description":null,"ogTitle":null,"ogDescription":null,"ogImgId":null,"twTitle":null,"twDescription":null,"twImgId":null},"ttid":100988,"isLoading":false,"link":"/bayareabites/tag/jprecipe"},"bayareabites_16660":{"type":"terms","id":"bayareabites_16660","meta":{"index":"terms_1591234321","site":"bayareabites","id":"16660","found":true},"relationships":{},"included":{},"name":"More Fast Food My Way","slug":"more-fast-food-my-way","taxonomy":"tag","description":null,"featImg":null,"headData":{"title":"More Fast Food My Way Archives | KQED Bay Area Bites","description":null,"ogTitle":null,"ogDescription":null,"ogImgId":null,"twTitle":null,"twDescription":null,"twImgId":null},"ttid":100990,"isLoading":false,"link":"/bayareabites/tag/more-fast-food-my-way"},"bayareabites_109":{"type":"terms","id":"bayareabites_109","meta":{"index":"terms_1591234321","site":"bayareabites","id":"109","found":true},"relationships":{},"included":{},"name":"bay area","slug":"bay-area","taxonomy":"category","description":null,"featImg":null,"headData":{"title":"bay area Archives | KQED Bay Area Bites","description":null,"ogTitle":null,"ogDescription":null,"ogImgId":null,"twTitle":null,"twDescription":null,"twImgId":null},"ttid":73,"isLoading":false,"link":"/bayareabites/category/bay-area"},"bayareabites_12276":{"type":"terms","id":"bayareabites_12276","meta":{"index":"terms_1591234321","site":"bayareabites","id":"12276","found":true},"relationships":{},"included":{},"name":"CUESA","slug":"cuesa","taxonomy":"category","description":null,"featImg":null,"headData":{"title":"CUESA Archives | KQED Bay Area Bites","description":null,"ogTitle":null,"ogDescription":null,"ogImgId":null,"twTitle":null,"twDescription":null,"twImgId":null},"ttid":6738,"isLoading":false,"link":"/bayareabites/category/cuesa"},"bayareabites_1874":{"type":"terms","id":"bayareabites_1874","meta":{"index":"terms_1591234321","site":"bayareabites","id":"1874","found":true},"relationships":{},"included":{},"name":"farmers and farms","slug":"farmers-farmers-markets","taxonomy":"category","description":null,"featImg":null,"headData":{"title":"farmers and farms Archives | KQED Bay Area Bites","description":null,"ogTitle":null,"ogDescription":null,"ogImgId":null,"twTitle":null,"twDescription":null,"twImgId":null},"ttid":1452,"isLoading":false,"link":"/bayareabites/category/farmers-farmers-markets"},"bayareabites_95":{"type":"terms","id":"bayareabites_95","meta":{"index":"terms_1591234321","site":"bayareabites","id":"95","found":true},"relationships":{},"included":{},"name":"farmers markets","slug":"farmers-markets","taxonomy":"category","description":null,"featImg":null,"headData":{"title":"farmers markets Archives | KQED Bay Area Bites","description":null,"ogTitle":null,"ogDescription":null,"ogImgId":null,"twTitle":null,"twDescription":null,"twImgId":null},"ttid":59,"isLoading":false,"link":"/bayareabites/category/farmers-markets"},"bayareabites_2090":{"type":"terms","id":"bayareabites_2090","meta":{"index":"terms_1591234321","site":"bayareabites","id":"2090","found":true},"relationships":{},"included":{},"name":"food history and celebrities","slug":"food-history-and-celebrities","taxonomy":"category","description":null,"featImg":null,"headData":{"title":"food history and celebrities Archives | KQED Bay Area Bites","description":null,"ogTitle":null,"ogDescription":null,"ogImgId":null,"twTitle":null,"twDescription":null,"twImgId":null},"ttid":1561,"isLoading":false,"link":"/bayareabites/category/food-history-and-celebrities"},"bayareabites_2554":{"type":"terms","id":"bayareabites_2554","meta":{"index":"terms_1591234321","site":"bayareabites","id":"2554","found":true},"relationships":{},"included":{},"name":"gardening and urban farming","slug":"gardening-and-urban-farming","taxonomy":"category","description":null,"featImg":null,"headData":{"title":"gardening and urban farming Archives | KQED Bay Area Bites","description":null,"ogTitle":null,"ogDescription":null,"ogImgId":null,"twTitle":null,"twDescription":null,"twImgId":null},"ttid":1016,"isLoading":false,"link":"/bayareabites/category/gardening-and-urban-farming"},"bayareabites_237":{"type":"terms","id":"bayareabites_237","meta":{"index":"terms_1591234321","site":"bayareabites","id":"237","found":true},"relationships":{},"included":{},"name":"cuesa","slug":"cuesa","taxonomy":"tag","description":null,"featImg":null,"headData":{"title":"cuesa Archives | KQED Bay Area Bites","description":null,"ogTitle":null,"ogDescription":null,"ogImgId":null,"twTitle":null,"twDescription":null,"twImgId":null},"ttid":202,"isLoading":false,"link":"/bayareabites/tag/cuesa"},"bayareabites_2172":{"type":"terms","id":"bayareabites_2172","meta":{"index":"terms_1591234321","site":"bayareabites","id":"2172","found":true},"relationships":{},"included":{},"name":"farmers market","slug":"farmers-market","taxonomy":"tag","description":null,"featImg":null,"headData":{"title":"farmers market Archives | KQED Bay Area Bites","description":null,"ogTitle":null,"ogDescription":null,"ogImgId":null,"twTitle":null,"twDescription":null,"twImgId":null},"ttid":1621,"isLoading":false,"link":"/bayareabites/tag/farmers-market"},"bayareabites_11028":{"type":"terms","id":"bayareabites_11028","meta":{"index":"terms_1591234321","site":"bayareabites","id":"11028","found":true},"relationships":{},"included":{},"name":"food art","slug":"food-art","taxonomy":"category","description":null,"featImg":null,"headData":{"title":"food art Archives | KQED Bay Area Bites","description":null,"ogTitle":null,"ogDescription":null,"ogImgId":null,"twTitle":null,"twDescription":null,"twImgId":null},"ttid":7736,"isLoading":false,"link":"/bayareabites/category/food-art"},"bayareabites_1245":{"type":"terms","id":"bayareabites_1245","meta":{"index":"terms_1591234321","site":"bayareabites","id":"1245","found":true},"relationships":{},"included":{},"name":"health and nutrition","slug":"health-and-nutrition","taxonomy":"category","description":null,"featImg":null,"headData":{"title":"health and nutrition Archives | KQED Bay Area Bites","description":null,"ogTitle":null,"ogDescription":null,"ogImgId":null,"twTitle":null,"twDescription":null,"twImgId":null},"ttid":1078,"isLoading":false,"link":"/bayareabites/category/health-and-nutrition"},"bayareabites_14441":{"type":"terms","id":"bayareabites_14441","meta":{"index":"terms_1591234321","site":"bayareabites","id":"14441","found":true},"relationships":{},"included":{},"name":"Chinese Medicine","slug":"chinese-medicine","taxonomy":"tag","description":null,"featImg":null,"headData":{"title":"Chinese Medicine Archives | KQED Bay Area Bites","description":null,"ogTitle":null,"ogDescription":null,"ogImgId":null,"twTitle":null,"twDescription":null,"twImgId":null},"ttid":98817,"isLoading":false,"link":"/bayareabites/tag/chinese-medicine"},"bayareabites_9222":{"type":"terms","id":"bayareabites_9222","meta":{"index":"terms_1591234321","site":"bayareabites","id":"9222","found":true},"relationships":{},"included":{},"name":"Food as Medicine","slug":"food-as-medicine","taxonomy":"tag","description":null,"featImg":null,"headData":{"title":"Food as Medicine Archives | KQED Bay Area Bites","description":null,"ogTitle":null,"ogDescription":null,"ogImgId":null,"twTitle":null,"twDescription":null,"twImgId":null},"ttid":3676,"isLoading":false,"link":"/bayareabites/tag/food-as-medicine"},"bayareabites_2355":{"type":"terms","id":"bayareabites_2355","meta":{"index":"terms_1591234321","site":"bayareabites","id":"2355","found":true},"relationships":{},"included":{},"name":"watermelon","slug":"watermelon","taxonomy":"tag","description":null,"featImg":null,"headData":{"title":"watermelon Archives | KQED Bay Area Bites","description":null,"ogTitle":null,"ogDescription":null,"ogImgId":null,"twTitle":null,"twDescription":null,"twImgId":null},"ttid":1751,"isLoading":false,"link":"/bayareabites/tag/watermelon"},"bayareabites_12869":{"type":"terms","id":"bayareabites_12869","meta":{"index":"terms_1591234321","site":"bayareabites","id":"12869","found":true},"relationships":{},"included":{},"name":"healthy recipes and guides","slug":"healthy-recipes","taxonomy":"category","description":null,"featImg":null,"headData":{"title":"healthy recipes and guides Archives | KQED Bay Area Bites","description":null,"ogTitle":null,"ogDescription":null,"ogImgId":null,"twTitle":null,"twDescription":null,"twImgId":null},"ttid":7332,"isLoading":false,"link":"/bayareabites/category/healthy-recipes"},"bayareabites_12550":{"type":"terms","id":"bayareabites_12550","meta":{"index":"terms_1591234321","site":"bayareabites","id":"12550","found":true},"relationships":{},"included":{},"name":"holiday recipes","slug":"holiday-recipes","taxonomy":"category","description":null,"featImg":null,"headData":{"title":"holiday recipes Archives | KQED Bay Area Bites","description":null,"ogTitle":null,"ogDescription":null,"ogImgId":null,"twTitle":null,"twDescription":null,"twImgId":null},"ttid":7013,"isLoading":false,"link":"/bayareabites/category/holiday-recipes"},"bayareabites_1763":{"type":"terms","id":"bayareabites_1763","meta":{"index":"terms_1591234321","site":"bayareabites","id":"1763","found":true},"relationships":{},"included":{},"name":"holidays and traditions","slug":"holidays-and-traditions","taxonomy":"category","description":null,"featImg":null,"headData":{"title":"holidays and traditions Archives | KQED Bay Area Bites","description":null,"ogTitle":null,"ogDescription":null,"ogImgId":null,"twTitle":null,"twDescription":null,"twImgId":null},"ttid":1254,"isLoading":false,"link":"/bayareabites/category/holidays-and-traditions"},"bayareabites_12":{"type":"terms","id":"bayareabites_12","meta":{"index":"terms_1591234321","site":"bayareabites","id":"12","found":true},"relationships":{},"included":{},"name":"recipes","slug":"recipes","taxonomy":"category","description":null,"featImg":null,"headData":{"title":"recipes Archives | KQED Bay Area Bites","description":null,"ogTitle":null,"ogDescription":null,"ogImgId":null,"twTitle":null,"twDescription":null,"twImgId":null},"ttid":10,"isLoading":false,"link":"/bayareabites/category/recipes"},"bayareabites_14362":{"type":"terms","id":"bayareabites_14362","meta":{"index":"terms_1591234321","site":"bayareabites","id":"14362","found":true},"relationships":{},"included":{},"name":"seasonal recipes","slug":"seasonal-recipes","taxonomy":"category","description":null,"featImg":null,"headData":{"title":"seasonal recipes Archives | KQED Bay Area Bites","description":null,"ogTitle":null,"ogDescription":null,"ogImgId":null,"twTitle":null,"twDescription":null,"twImgId":null},"ttid":98738,"isLoading":false,"link":"/bayareabites/category/seasonal-recipes"},"bayareabites_1873":{"type":"terms","id":"bayareabites_1873","meta":{"index":"terms_1591234321","site":"bayareabites","id":"1873","found":true},"relationships":{},"included":{},"name":"vegetarian and vegan","slug":"vegetarian-and-vegan","taxonomy":"category","description":null,"featImg":null,"headData":{"title":"vegetarian and vegan Archives | KQED Bay Area Bites","description":null,"ogTitle":null,"ogDescription":null,"ogImgId":null,"twTitle":null,"twDescription":null,"twImgId":null},"ttid":1451,"isLoading":false,"link":"/bayareabites/category/vegetarian-and-vegan"},"bayareabites_2273":{"type":"terms","id":"bayareabites_2273","meta":{"index":"terms_1591234321","site":"bayareabites","id":"2273","found":true},"relationships":{},"included":{},"name":"apricots","slug":"apricots","taxonomy":"tag","description":null,"featImg":null,"headData":{"title":"apricots Archives | KQED Bay Area Bites","description":null,"ogTitle":null,"ogDescription":null,"ogImgId":null,"twTitle":null,"twDescription":null,"twImgId":null},"ttid":1693,"isLoading":false,"link":"/bayareabites/tag/apricots"},"bayareabites_307":{"type":"terms","id":"bayareabites_307","meta":{"index":"terms_1591234321","site":"bayareabites","id":"307","found":true},"relationships":{},"included":{},"name":"cherries","slug":"cherries","taxonomy":"tag","description":null,"featImg":null,"headData":{"title":"cherries Archives | KQED Bay Area Bites","description":null,"ogTitle":null,"ogDescription":null,"ogImgId":null,"twTitle":null,"twDescription":null,"twImgId":null},"ttid":272,"isLoading":false,"link":"/bayareabites/tag/cherries"},"bayareabites_2357":{"type":"terms","id":"bayareabites_2357","meta":{"index":"terms_1591234321","site":"bayareabites","id":"2357","found":true},"relationships":{},"included":{},"name":"july 4th","slug":"july-4th","taxonomy":"tag","description":null,"featImg":null,"headData":{"title":"july 4th Archives | KQED Bay Area Bites","description":null,"ogTitle":null,"ogDescription":null,"ogImgId":null,"twTitle":null,"twDescription":null,"twImgId":null},"ttid":1752,"isLoading":false,"link":"/bayareabites/tag/july-4th"},"bayareabites_8293":{"type":"terms","id":"bayareabites_8293","meta":{"index":"terms_1591234321","site":"bayareabites","id":"8293","found":true},"relationships":{},"included":{},"name":"nectarines","slug":"nectarines","taxonomy":"tag","description":null,"featImg":null,"headData":{"title":"nectarines Archives | KQED Bay Area Bites","description":null,"ogTitle":null,"ogDescription":null,"ogImgId":null,"twTitle":null,"twDescription":null,"twImgId":null},"ttid":2746,"isLoading":false,"link":"/bayareabites/tag/nectarines"},"bayareabites_2036":{"type":"terms","id":"bayareabites_2036","meta":{"index":"terms_1591234321","site":"bayareabites","id":"2036","found":true},"relationships":{},"included":{},"name":"pistachio nuts","slug":"pistachio-nuts","taxonomy":"tag","description":null,"featImg":null,"headData":{"title":"pistachio nuts Archives | KQED Bay Area Bites","description":null,"ogTitle":null,"ogDescription":null,"ogImgId":null,"twTitle":null,"twDescription":null,"twImgId":null},"ttid":1535,"isLoading":false,"link":"/bayareabites/tag/pistachio-nuts"},"bayareabites_348":{"type":"terms","id":"bayareabites_348","meta":{"index":"terms_1591234321","site":"bayareabites","id":"348","found":true},"relationships":{},"included":{},"name":"plums","slug":"plums","taxonomy":"tag","description":null,"featImg":null,"headData":{"title":"plums Archives | KQED Bay Area Bites","description":null,"ogTitle":null,"ogDescription":null,"ogImgId":null,"twTitle":null,"twDescription":null,"twImgId":null},"ttid":313,"isLoading":false,"link":"/bayareabites/tag/plums"},"bayareabites_1815":{"type":"terms","id":"bayareabites_1815","meta":{"index":"terms_1591234321","site":"bayareabites","id":"1815","found":true},"relationships":{},"included":{},"name":"salad","slug":"salad","taxonomy":"tag","description":null,"featImg":null,"headData":{"title":"salad Archives | KQED Bay Area Bites","description":null,"ogTitle":null,"ogDescription":null,"ogImgId":null,"twTitle":null,"twDescription":null,"twImgId":null},"ttid":1418,"isLoading":false,"link":"/bayareabites/tag/salad"},"bayareabites_1209":{"type":"terms","id":"bayareabites_1209","meta":{"index":"terms_1591234321","site":"bayareabites","id":"1209","found":true},"relationships":{},"included":{},"name":"stone fruit","slug":"stone-fruit","taxonomy":"tag","description":null,"featImg":null,"headData":{"title":"stone fruit Archives | KQED Bay Area Bites","description":null,"ogTitle":null,"ogDescription":null,"ogImgId":null,"twTitle":null,"twDescription":null,"twImgId":null},"ttid":1065,"isLoading":false,"link":"/bayareabites/tag/stone-fruit"},"bayareabites_218":{"type":"terms","id":"bayareabites_218","meta":{"index":"terms_1591234321","site":"bayareabites","id":"218","found":true},"relationships":{},"included":{},"name":"summer","slug":"summer","taxonomy":"tag","description":null,"featImg":null,"headData":{"title":"summer Archives | KQED Bay Area Bites","description":null,"ogTitle":null,"ogDescription":null,"ogImgId":null,"twTitle":null,"twDescription":null,"twImgId":null},"ttid":183,"isLoading":false,"link":"/bayareabites/tag/summer"},"bayareabites_1516":{"type":"terms","id":"bayareabites_1516","meta":{"index":"terms_1591234321","site":"bayareabites","id":"1516","found":true},"relationships":{},"included":{},"name":"baking and bakeries","slug":"baking-and-bakeries","taxonomy":"category","description":null,"featImg":null,"headData":{"title":"baking and bakeries Archives | KQED Bay Area Bites","description":null,"ogTitle":null,"ogDescription":null,"ogImgId":null,"twTitle":null,"twDescription":null,"twImgId":null},"ttid":1253,"isLoading":false,"link":"/bayareabites/category/baking-and-bakeries"},"bayareabites_752":{"type":"terms","id":"bayareabites_752","meta":{"index":"terms_1591234321","site":"bayareabites","id":"752","found":true},"relationships":{},"included":{},"name":"Bay Area Bites Food + Drink","slug":"food-and-drink","taxonomy":"category","description":null,"featImg":null,"headData":{"title":"Bay Area Bites Food + Drink Archives | KQED Bay Area Bites","description":null,"ogTitle":null,"ogDescription":null,"ogImgId":null,"twTitle":null,"twDescription":null,"twImgId":null},"ttid":1,"isLoading":false,"link":"/bayareabites/category/food-and-drink"},"bayareabites_1653":{"type":"terms","id":"bayareabites_1653","meta":{"index":"terms_1591234321","site":"bayareabites","id":"1653","found":true},"relationships":{},"included":{},"name":"dessert and chocolate","slug":"dessert-and-chocolate","taxonomy":"category","description":null,"featImg":null,"headData":{"title":"dessert and chocolate Archives | KQED Bay Area Bites","description":null,"ogTitle":null,"ogDescription":null,"ogImgId":null,"twTitle":null,"twDescription":null,"twImgId":null},"ttid":12,"isLoading":false,"link":"/bayareabites/category/dessert-and-chocolate"},"bayareabites_1246":{"type":"terms","id":"bayareabites_1246","meta":{"index":"terms_1591234321","site":"bayareabites","id":"1246","found":true},"relationships":{},"included":{},"name":"kids and family","slug":"kids-and-family","taxonomy":"category","description":null,"featImg":null,"headData":{"title":"kids and family Archives | KQED Bay Area Bites","description":null,"ogTitle":null,"ogDescription":null,"ogImgId":null,"twTitle":null,"twDescription":null,"twImgId":null},"ttid":1085,"isLoading":false,"link":"/bayareabites/category/kids-and-family"},"bayareabites_13695":{"type":"terms","id":"bayareabites_13695","meta":{"index":"terms_1591234321","site":"bayareabites","id":"13695","found":true},"relationships":{},"included":{},"name":"anna pavlova","slug":"anna-pavlova","taxonomy":"tag","description":null,"featImg":null,"headData":{"title":"anna pavlova Archives | KQED Bay Area Bites","description":null,"ogTitle":null,"ogDescription":null,"ogImgId":null,"twTitle":null,"twDescription":null,"twImgId":null},"ttid":8167,"isLoading":false,"link":"/bayareabites/tag/anna-pavlova"},"bayareabites_1182":{"type":"terms","id":"bayareabites_1182","meta":{"index":"terms_1591234321","site":"bayareabites","id":"1182","found":true},"relationships":{},"included":{},"name":"berries","slug":"berries","taxonomy":"tag","description":null,"featImg":null,"headData":{"title":"berries Archives | KQED Bay Area Bites","description":null,"ogTitle":null,"ogDescription":null,"ogImgId":null,"twTitle":null,"twDescription":null,"twImgId":null},"ttid":1041,"isLoading":false,"link":"/bayareabites/tag/berries"},"bayareabites_49":{"type":"terms","id":"bayareabites_49","meta":{"index":"terms_1591234321","site":"bayareabites","id":"49","found":true},"relationships":{},"included":{},"name":"dessert","slug":"dessert","taxonomy":"tag","description":null,"featImg":null,"headData":{"title":"dessert Archives | KQED Bay Area Bites","description":null,"ogTitle":null,"ogDescription":null,"ogImgId":null,"twTitle":null,"twDescription":null,"twImgId":null},"ttid":1916,"isLoading":false,"link":"/bayareabites/tag/dessert"},"bayareabites_138":{"type":"terms","id":"bayareabites_138","meta":{"index":"terms_1591234321","site":"bayareabites","id":"138","found":true},"relationships":{},"included":{},"name":"gluten-free","slug":"gluten-free","taxonomy":"tag","description":null,"featImg":null,"headData":{"title":"gluten-free Archives | KQED Bay Area Bites","description":null,"ogTitle":null,"ogDescription":null,"ogImgId":null,"twTitle":null,"twDescription":null,"twImgId":null},"ttid":103,"isLoading":false,"link":"/bayareabites/tag/gluten-free"},"bayareabites_11034":{"type":"terms","id":"bayareabites_11034","meta":{"index":"terms_1591234321","site":"bayareabites","id":"11034","found":true},"relationships":{},"included":{},"name":"gluten-free baking","slug":"gluten-free-baking","taxonomy":"tag","description":null,"featImg":null,"headData":{"title":"gluten-free baking Archives | KQED Bay Area Bites","description":null,"ogTitle":null,"ogDescription":null,"ogImgId":null,"twTitle":null,"twDescription":null,"twImgId":null},"ttid":5493,"isLoading":false,"link":"/bayareabites/tag/gluten-free-baking"},"bayareabites_11765":{"type":"terms","id":"bayareabites_11765","meta":{"index":"terms_1591234321","site":"bayareabites","id":"11765","found":true},"relationships":{},"included":{},"name":"labor day","slug":"labor-day","taxonomy":"tag","description":null,"featImg":null,"headData":{"title":"labor day Archives | KQED Bay Area Bites","description":null,"ogTitle":null,"ogDescription":null,"ogImgId":null,"twTitle":null,"twDescription":null,"twImgId":null},"ttid":6227,"isLoading":false,"link":"/bayareabites/tag/labor-day"},"bayareabites_13696":{"type":"terms","id":"bayareabites_13696","meta":{"index":"terms_1591234321","site":"bayareabites","id":"13696","found":true},"relationships":{},"included":{},"name":"meringues","slug":"meringues","taxonomy":"tag","description":null,"featImg":null,"headData":{"title":"meringues Archives | KQED Bay Area Bites","description":null,"ogTitle":null,"ogDescription":null,"ogImgId":null,"twTitle":null,"twDescription":null,"twImgId":null},"ttid":8168,"isLoading":false,"link":"/bayareabites/tag/meringues"},"bayareabites_13694":{"type":"terms","id":"bayareabites_13694","meta":{"index":"terms_1591234321","site":"bayareabites","id":"13694","found":true},"relationships":{},"included":{},"name":"pavlova","slug":"pavlova","taxonomy":"tag","description":null,"featImg":null,"headData":{"title":"pavlova Archives | KQED Bay Area Bites","description":null,"ogTitle":null,"ogDescription":null,"ogImgId":null,"twTitle":null,"twDescription":null,"twImgId":null},"ttid":8166,"isLoading":false,"link":"/bayareabites/tag/pavlova"},"bayareabites_3682":{"type":"terms","id":"bayareabites_3682","meta":{"index":"terms_1591234321","site":"bayareabites","id":"3682","found":true},"relationships":{},"included":{},"name":"summer recipes","slug":"summer-recipes","taxonomy":"tag","description":null,"featImg":null,"headData":{"title":"summer recipes Archives | KQED Bay Area Bites","description":null,"ogTitle":null,"ogDescription":null,"ogImgId":null,"twTitle":null,"twDescription":null,"twImgId":null},"ttid":2433,"isLoading":false,"link":"/bayareabites/tag/summer-recipes"},"bayareabites_10916":{"type":"terms","id":"bayareabites_10916","meta":{"index":"terms_1591234321","site":"bayareabites","id":"10916","found":true},"relationships":{},"included":{},"name":"NPR food","slug":"npr-food","taxonomy":"category","description":null,"featImg":null,"headData":{"title":"NPR food Archives | KQED Bay Area Bites","description":null,"ogTitle":null,"ogDescription":null,"ogImgId":null,"twTitle":null,"twDescription":null,"twImgId":null},"ttid":5375,"isLoading":false,"link":"/bayareabites/category/npr-food"},"bayareabites_2035":{"type":"terms","id":"bayareabites_2035","meta":{"index":"terms_1591234321","site":"bayareabites","id":"2035","found":true},"relationships":{},"included":{},"name":"politics, activism, food safety","slug":"politics-activism-food-safety","taxonomy":"category","description":null,"featImg":null,"headData":{"title":"politics, activism, food safety Archives | KQED Bay Area Bites","description":null,"ogTitle":null,"ogDescription":null,"ogImgId":null,"twTitle":null,"twDescription":null,"twImgId":null},"ttid":943,"isLoading":false,"link":"/bayareabites/category/politics-activism-food-safety"},"bayareabites_13609":{"type":"terms","id":"bayareabites_13609","meta":{"index":"terms_1591234321","site":"bayareabites","id":"13609","found":true},"relationships":{},"included":{},"name":"CA","slug":"ca","taxonomy":"tag","description":null,"featImg":null,"headData":{"title":"CA Archives | KQED Bay Area Bites","description":null,"ogTitle":null,"ogDescription":null,"ogImgId":null,"twTitle":null,"twDescription":null,"twImgId":null},"ttid":8079,"isLoading":false,"link":"/bayareabites/tag/ca"},"bayareabites_11936":{"type":"terms","id":"bayareabites_11936","meta":{"index":"terms_1591234321","site":"bayareabites","id":"11936","found":true},"relationships":{},"included":{},"name":"Costco","slug":"costco","taxonomy":"tag","description":null,"featImg":null,"headData":{"title":"Costco Archives | KQED Bay Area Bites","description":null,"ogTitle":null,"ogDescription":null,"ogImgId":null,"twTitle":null,"twDescription":null,"twImgId":null},"ttid":6398,"isLoading":false,"link":"/bayareabites/tag/costco"},"bayareabites_2608":{"type":"terms","id":"bayareabites_2608","meta":{"index":"terms_1591234321","site":"bayareabites","id":"2608","found":true},"relationships":{},"included":{},"name":"FDA","slug":"fda","taxonomy":"tag","description":null,"featImg":null,"headData":{"title":"FDA Archives | KQED Bay Area Bites","description":null,"ogTitle":null,"ogDescription":null,"ogImgId":null,"twTitle":null,"twDescription":null,"twImgId":null},"ttid":1862,"isLoading":false,"link":"/bayareabites/tag/fda"},"bayareabites_12219":{"type":"terms","id":"bayareabites_12219","meta":{"index":"terms_1591234321","site":"bayareabites","id":"12219","found":true},"relationships":{},"included":{},"name":"listeria","slug":"listeria","taxonomy":"tag","description":null,"featImg":null,"headData":{"title":"listeria Archives | KQED Bay Area Bites","description":null,"ogTitle":null,"ogDescription":null,"ogImgId":null,"twTitle":null,"twDescription":null,"twImgId":null},"ttid":6681,"isLoading":false,"link":"/bayareabites/tag/listeria"},"bayareabites_2267":{"type":"terms","id":"bayareabites_2267","meta":{"index":"terms_1591234321","site":"bayareabites","id":"2267","found":true},"relationships":{},"included":{},"name":"peaches","slug":"peaches","taxonomy":"tag","description":null,"featImg":null,"headData":{"title":"peaches Archives | KQED Bay Area Bites","description":null,"ogTitle":null,"ogDescription":null,"ogImgId":null,"twTitle":null,"twDescription":null,"twImgId":null},"ttid":1690,"isLoading":false,"link":"/bayareabites/tag/peaches"},"bayareabites_10713":{"type":"terms","id":"bayareabites_10713","meta":{"index":"terms_1591234321","site":"bayareabites","id":"10713","found":true},"relationships":{},"included":{},"name":"pluots","slug":"pluots","taxonomy":"tag","description":null,"featImg":null,"headData":{"title":"pluots Archives | KQED Bay Area Bites","description":null,"ogTitle":null,"ogDescription":null,"ogImgId":null,"twTitle":null,"twDescription":null,"twImgId":null},"ttid":5167,"isLoading":false,"link":"/bayareabites/tag/pluots"},"bayareabites_888":{"type":"terms","id":"bayareabites_888","meta":{"index":"terms_1591234321","site":"bayareabites","id":"888","found":true},"relationships":{},"included":{},"name":"recall","slug":"recall","taxonomy":"tag","description":null,"featImg":null,"headData":{"title":"recall Archives | KQED Bay Area Bites","description":null,"ogTitle":null,"ogDescription":null,"ogImgId":null,"twTitle":null,"twDescription":null,"twImgId":null},"ttid":1537,"isLoading":false,"link":"/bayareabites/tag/recall"},"bayareabites_11465":{"type":"terms","id":"bayareabites_11465","meta":{"index":"terms_1591234321","site":"bayareabites","id":"11465","found":true},"relationships":{},"included":{},"name":"the two-way","slug":"the-two-way","taxonomy":"tag","description":null,"featImg":null,"headData":{"title":"the two-way Archives | KQED Bay Area Bites","description":null,"ogTitle":null,"ogDescription":null,"ogImgId":null,"twTitle":null,"twDescription":null,"twImgId":null},"ttid":5926,"isLoading":false,"link":"/bayareabites/tag/the-two-way"},"bayareabites_1829":{"type":"terms","id":"bayareabites_1829","meta":{"index":"terms_1591234321","site":"bayareabites","id":"1829","found":true},"relationships":{},"included":{},"name":"trader joes","slug":"trader-joes","taxonomy":"tag","description":null,"featImg":null,"headData":{"title":"trader joes Archives | KQED Bay Area Bites","description":null,"ogTitle":null,"ogDescription":null,"ogImgId":null,"twTitle":null,"twDescription":null,"twImgId":null},"ttid":1430,"isLoading":false,"link":"/bayareabites/tag/trader-joes"},"bayareabites_13608":{"type":"terms","id":"bayareabites_13608","meta":{"index":"terms_1591234321","site":"bayareabites","id":"13608","found":true},"relationships":{},"included":{},"name":"Wawona Packing Company","slug":"wawona-packing-company","taxonomy":"tag","description":null,"featImg":null,"headData":{"title":"Wawona Packing Company Archives | KQED Bay Area Bites","description":null,"ogTitle":null,"ogDescription":null,"ogImgId":null,"twTitle":null,"twDescription":null,"twImgId":null},"ttid":8078,"isLoading":false,"link":"/bayareabites/tag/wawona-packing-company"},"bayareabites_2998":{"type":"terms","id":"bayareabites_2998","meta":{"index":"terms_1591234321","site":"bayareabites","id":"2998","found":true},"relationships":{},"included":{},"name":"asian food and drink","slug":"asian-food-and-drink","taxonomy":"category","description":null,"featImg":null,"headData":{"title":"asian food and drink Archives | KQED Bay Area Bites","description":null,"ogTitle":null,"ogDescription":null,"ogImgId":null,"twTitle":null,"twDescription":null,"twImgId":null},"ttid":58,"isLoading":false,"link":"/bayareabites/category/asian-food-and-drink"},"bayareabites_2254":{"type":"terms","id":"bayareabites_2254","meta":{"index":"terms_1591234321","site":"bayareabites","id":"2254","found":true},"relationships":{},"included":{},"name":"books, magazines, newspapers","slug":"books-and-magazines","taxonomy":"category","description":null,"featImg":null,"headData":{"title":"books, magazines, newspapers Archives | KQED Bay Area Bites","description":null,"ogTitle":null,"ogDescription":null,"ogImgId":null,"twTitle":null,"twDescription":null,"twImgId":null},"ttid":11,"isLoading":false,"link":"/bayareabites/category/books-and-magazines"},"bayareabites_61":{"type":"terms","id":"bayareabites_61","meta":{"index":"terms_1591234321","site":"bayareabites","id":"61","found":true},"relationships":{},"included":{},"name":"travel","slug":"travel","taxonomy":"category","description":null,"featImg":null,"headData":{"title":"travel Archives | KQED Bay Area Bites","description":null,"ogTitle":null,"ogDescription":null,"ogImgId":null,"twTitle":null,"twDescription":null,"twImgId":null},"ttid":1216,"isLoading":false,"link":"/bayareabites/category/travel"},"bayareabites_13399":{"type":"terms","id":"bayareabites_13399","meta":{"index":"terms_1591234321","site":"bayareabites","id":"13399","found":true},"relationships":{},"included":{},"name":"durian","slug":"durian","taxonomy":"tag","description":null,"featImg":null,"headData":{"title":"durian Archives | KQED Bay Area Bites","description":null,"ogTitle":null,"ogDescription":null,"ogImgId":null,"twTitle":null,"twDescription":null,"twImgId":null},"ttid":7868,"isLoading":false,"link":"/bayareabites/tag/durian"},"bayareabites_2932":{"type":"terms","id":"bayareabites_2932","meta":{"index":"terms_1591234321","site":"bayareabites","id":"2932","found":true},"relationships":{},"included":{},"name":"thailand","slug":"thailand","taxonomy":"tag","description":null,"featImg":null,"headData":{"title":"thailand Archives | KQED Bay Area Bites","description":null,"ogTitle":null,"ogDescription":null,"ogImgId":null,"twTitle":null,"twDescription":null,"twImgId":null},"ttid":2043,"isLoading":false,"link":"/bayareabites/tag/thailand"},"bayareabites_4084":{"type":"terms","id":"bayareabites_4084","meta":{"index":"terms_1591234321","site":"bayareabites","id":"4084","found":true},"relationships":{},"included":{},"name":"food trends and technology","slug":"food-and-technology","taxonomy":"category","description":null,"featImg":null,"headData":{"title":"food trends and technology Archives | KQED Bay Area Bites","description":null,"ogTitle":null,"ogDescription":null,"ogImgId":null,"twTitle":null,"twDescription":null,"twImgId":null},"ttid":2573,"isLoading":false,"link":"/bayareabites/category/food-and-technology"},"bayareabites_34":{"type":"terms","id":"bayareabites_34","meta":{"index":"terms_1591234321","site":"bayareabites","id":"34","found":true},"relationships":{},"included":{},"name":"radio","slug":"radio","taxonomy":"category","description":null,"featImg":null,"headData":{"title":"radio Archives | KQED Bay Area Bites","description":null,"ogTitle":null,"ogDescription":null,"ogImgId":null,"twTitle":null,"twDescription":null,"twImgId":null},"ttid":1158,"isLoading":false,"link":"/bayareabites/category/radio"},"bayareabites_469":{"type":"terms","id":"bayareabites_469","meta":{"index":"terms_1591234321","site":"bayareabites","id":"469","found":true},"relationships":{},"included":{},"name":"apples","slug":"apples","taxonomy":"tag","description":null,"featImg":null,"headData":{"title":"apples Archives | KQED Bay Area Bites","description":null,"ogTitle":null,"ogDescription":null,"ogImgId":null,"twTitle":null,"twDescription":null,"twImgId":null},"ttid":434,"isLoading":false,"link":"/bayareabites/tag/apples"},"bayareabites_11270":{"type":"terms","id":"bayareabites_11270","meta":{"index":"terms_1591234321","site":"bayareabites","id":"11270","found":true},"relationships":{},"included":{},"name":"dan charles","slug":"dan-charles","taxonomy":"tag","description":null,"featImg":null,"headData":{"title":"dan charles Archives | KQED Bay Area Bites","description":null,"ogTitle":null,"ogDescription":null,"ogImgId":null,"twTitle":null,"twDescription":null,"twImgId":null},"ttid":5729,"isLoading":false,"link":"/bayareabites/tag/dan-charles"},"bayareabites_11354":{"type":"terms","id":"bayareabites_11354","meta":{"index":"terms_1591234321","site":"bayareabites","id":"11354","found":true},"relationships":{},"included":{},"name":"genetically engineered","slug":"genetically-engineered","taxonomy":"tag","description":null,"featImg":null,"headData":{"title":"genetically engineered Archives | KQED Bay Area Bites","description":null,"ogTitle":null,"ogDescription":null,"ogImgId":null,"twTitle":null,"twDescription":null,"twImgId":null},"ttid":5813,"isLoading":false,"link":"/bayareabites/tag/genetically-engineered"},"bayareabites_10771":{"type":"terms","id":"bayareabites_10771","meta":{"index":"terms_1591234321","site":"bayareabites","id":"10771","found":true},"relationships":{},"included":{},"name":"GMO","slug":"gmo","taxonomy":"tag","description":null,"featImg":null,"headData":{"title":"GMO Archives | KQED Bay Area Bites","description":null,"ogTitle":null,"ogDescription":null,"ogImgId":null,"twTitle":null,"twDescription":null,"twImgId":null},"ttid":5225,"isLoading":false,"link":"/bayareabites/tag/gmo"},"bayareabites_10787":{"type":"terms","id":"bayareabites_10787","meta":{"index":"terms_1591234321","site":"bayareabites","id":"10787","found":true},"relationships":{},"included":{},"name":"GMOs","slug":"gmos","taxonomy":"tag","description":null,"featImg":null,"headData":{"title":"GMOs Archives | KQED Bay Area Bites","description":null,"ogTitle":null,"ogDescription":null,"ogImgId":null,"twTitle":null,"twDescription":null,"twImgId":null},"ttid":5241,"isLoading":false,"link":"/bayareabites/tag/gmos"},"bayareabites_12891":{"type":"terms","id":"bayareabites_12891","meta":{"index":"terms_1591234321","site":"bayareabites","id":"12891","found":true},"relationships":{},"included":{},"name":"non-browning trait","slug":"non-browning-trait","taxonomy":"tag","description":null,"featImg":null,"headData":{"title":"non-browning trait Archives | KQED Bay Area Bites","description":null,"ogTitle":null,"ogDescription":null,"ogImgId":null,"twTitle":null,"twDescription":null,"twImgId":null},"ttid":7354,"isLoading":false,"link":"/bayareabites/tag/non-browning-trait"},"bayareabites_10921":{"type":"terms","id":"bayareabites_10921","meta":{"index":"terms_1591234321","site":"bayareabites","id":"10921","found":true},"relationships":{},"included":{},"name":"the salt","slug":"the-salt","taxonomy":"tag","description":null,"featImg":null,"headData":{"title":"the salt Archives | KQED Bay Area Bites","description":null,"ogTitle":null,"ogDescription":null,"ogImgId":null,"twTitle":null,"twDescription":null,"twImgId":null},"ttid":5380,"isLoading":false,"link":"/bayareabites/tag/the-salt"},"bayareabites_8913":{"type":"terms","id":"bayareabites_8913","meta":{"index":"terms_1591234321","site":"bayareabites","id":"8913","found":true},"relationships":{},"included":{},"name":"usda","slug":"usda","taxonomy":"tag","description":null,"featImg":null,"headData":{"title":"usda Archives | KQED Bay Area Bites","description":null,"ogTitle":null,"ogDescription":null,"ogImgId":null,"twTitle":null,"twDescription":null,"twImgId":null},"ttid":3366,"isLoading":false,"link":"/bayareabites/tag/usda"},"bayareabites_1875":{"type":"terms","id":"bayareabites_1875","meta":{"index":"terms_1591234321","site":"bayareabites","id":"1875","found":true},"relationships":{},"included":{},"name":"local food businesses","slug":"local-food-businesses","taxonomy":"category","description":null,"featImg":null,"headData":{"title":"local food businesses Archives | KQED Bay Area Bites","description":null,"ogTitle":null,"ogDescription":null,"ogImgId":null,"twTitle":null,"twDescription":null,"twImgId":null},"ttid":1453,"isLoading":false,"link":"/bayareabites/category/local-food-businesses"},"bayareabites_129":{"type":"terms","id":"bayareabites_129","meta":{"index":"terms_1591234321","site":"bayareabites","id":"129","found":true},"relationships":{},"included":{},"name":"agriculture","slug":"agriculture","taxonomy":"tag","description":null,"featImg":null,"headData":{"title":"agriculture Archives | KQED Bay Area Bites","description":null,"ogTitle":null,"ogDescription":null,"ogImgId":null,"twTitle":null,"twDescription":null,"twImgId":null},"ttid":93,"isLoading":false,"link":"/bayareabites/tag/agriculture"},"bayareabites_12282":{"type":"terms","id":"bayareabites_12282","meta":{"index":"terms_1591234321","site":"bayareabites","id":"12282","found":true},"relationships":{},"included":{},"name":"dry farming","slug":"dry-farming","taxonomy":"tag","description":null,"featImg":null,"headData":{"title":"dry farming Archives | KQED Bay Area Bites","description":null,"ogTitle":null,"ogDescription":null,"ogImgId":null,"twTitle":null,"twDescription":null,"twImgId":null},"ttid":6744,"isLoading":false,"link":"/bayareabites/tag/dry-farming"},"bayareabites_8395":{"type":"terms","id":"bayareabites_8395","meta":{"index":"terms_1591234321","site":"bayareabites","id":"8395","found":true},"relationships":{},"included":{},"name":"Early Girl tomatoes","slug":"early-girl-tomatoes","taxonomy":"tag","description":null,"featImg":null,"headData":{"title":"Early Girl tomatoes Archives | KQED Bay Area Bites","description":null,"ogTitle":null,"ogDescription":null,"ogImgId":null,"twTitle":null,"twDescription":null,"twImgId":null},"ttid":2848,"isLoading":false,"link":"/bayareabites/tag/early-girl-tomatoes"},"bayareabites_12281":{"type":"terms","id":"bayareabites_12281","meta":{"index":"terms_1591234321","site":"bayareabites","id":"12281","found":true},"relationships":{},"included":{},"name":"happy boy farms","slug":"happy-boy-farms","taxonomy":"tag","description":null,"featImg":null,"headData":{"title":"happy boy farms Archives | KQED Bay Area Bites","description":null,"ogTitle":null,"ogDescription":null,"ogImgId":null,"twTitle":null,"twDescription":null,"twImgId":null},"ttid":6743,"isLoading":false,"link":"/bayareabites/tag/happy-boy-farms"},"bayareabites_12283":{"type":"terms","id":"bayareabites_12283","meta":{"index":"terms_1591234321","site":"bayareabites","id":"12283","found":true},"relationships":{},"included":{},"name":"Quetzal Farm","slug":"quetzal-farm","taxonomy":"tag","description":null,"featImg":null,"headData":{"title":"Quetzal Farm Archives | KQED Bay Area Bites","description":null,"ogTitle":null,"ogDescription":null,"ogImgId":null,"twTitle":null,"twDescription":null,"twImgId":null},"ttid":6745,"isLoading":false,"link":"/bayareabites/tag/quetzal-farm"},"bayareabites_141":{"type":"terms","id":"bayareabites_141","meta":{"index":"terms_1591234321","site":"bayareabites","id":"141","found":true},"relationships":{},"included":{},"name":"santa cruz","slug":"santa-cruz","taxonomy":"tag","description":null,"featImg":null,"headData":{"title":"santa cruz Archives | KQED Bay Area Bites","description":null,"ogTitle":null,"ogDescription":null,"ogImgId":null,"twTitle":null,"twDescription":null,"twImgId":null},"ttid":106,"isLoading":false,"link":"/bayareabites/tag/santa-cruz"},"bayareabites_1344":{"type":"terms","id":"bayareabites_1344","meta":{"index":"terms_1591234321","site":"bayareabites","id":"1344","found":true},"relationships":{},"included":{},"name":"water","slug":"water","taxonomy":"tag","description":null,"featImg":null,"headData":{"title":"water Archives | KQED Bay Area Bites","description":null,"ogTitle":null,"ogDescription":null,"ogImgId":null,"twTitle":null,"twDescription":null,"twImgId":null},"ttid":1295,"isLoading":false,"link":"/bayareabites/tag/water"}},"userAgentReducer":{"userAgent":"Mozilla/5.0 AppleWebKit/537.36 (KHTML, like Gecko; compatible; ClaudeBot/1.0; +claudebot@anthropic.com)","isBot":true},"userPermissionsReducer":{"wpLoggedIn":false},"localStorageReducer":{},"browserHistoryReducer":[],"eventsReducer":{},"fssReducer":{},"tvDailyScheduleReducer":{},"tvWeeklyScheduleReducer":{},"tvPrimetimeScheduleReducer":{},"tvMonthlyScheduleReducer":{},"userAccountReducer":{"routeTo":"","showDeleteConfirmModal":false,"user":{"userId":"","isFound":false,"firstName":"","lastName":"","phoneNumber":"","email":"","articles":[]}},"youthMediaReducer":{},"checkPleaseReducer":{"filterData":{},"restaurantData":[]},"reframeReducer":{"attendee":null},"location":{"pathname":"/bayareabites/tag/fruit/","previousPathname":"/"}}