To Eat Authentically Irish This St. Patrick's Day, Go For The Butter
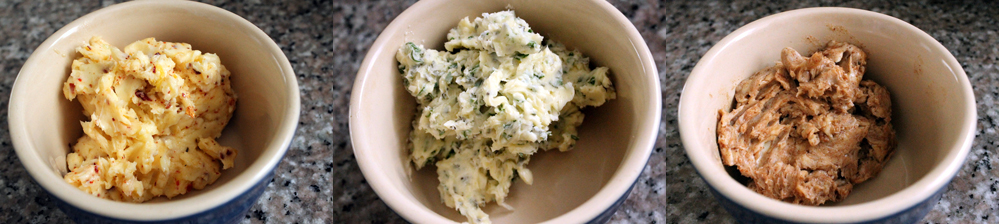
Homemade Cultured Compound Butter is a Festive Addition to the Thanksgiving Table
How The DIY Butter Trend Got Churning
Bar and Restaurant Themantics
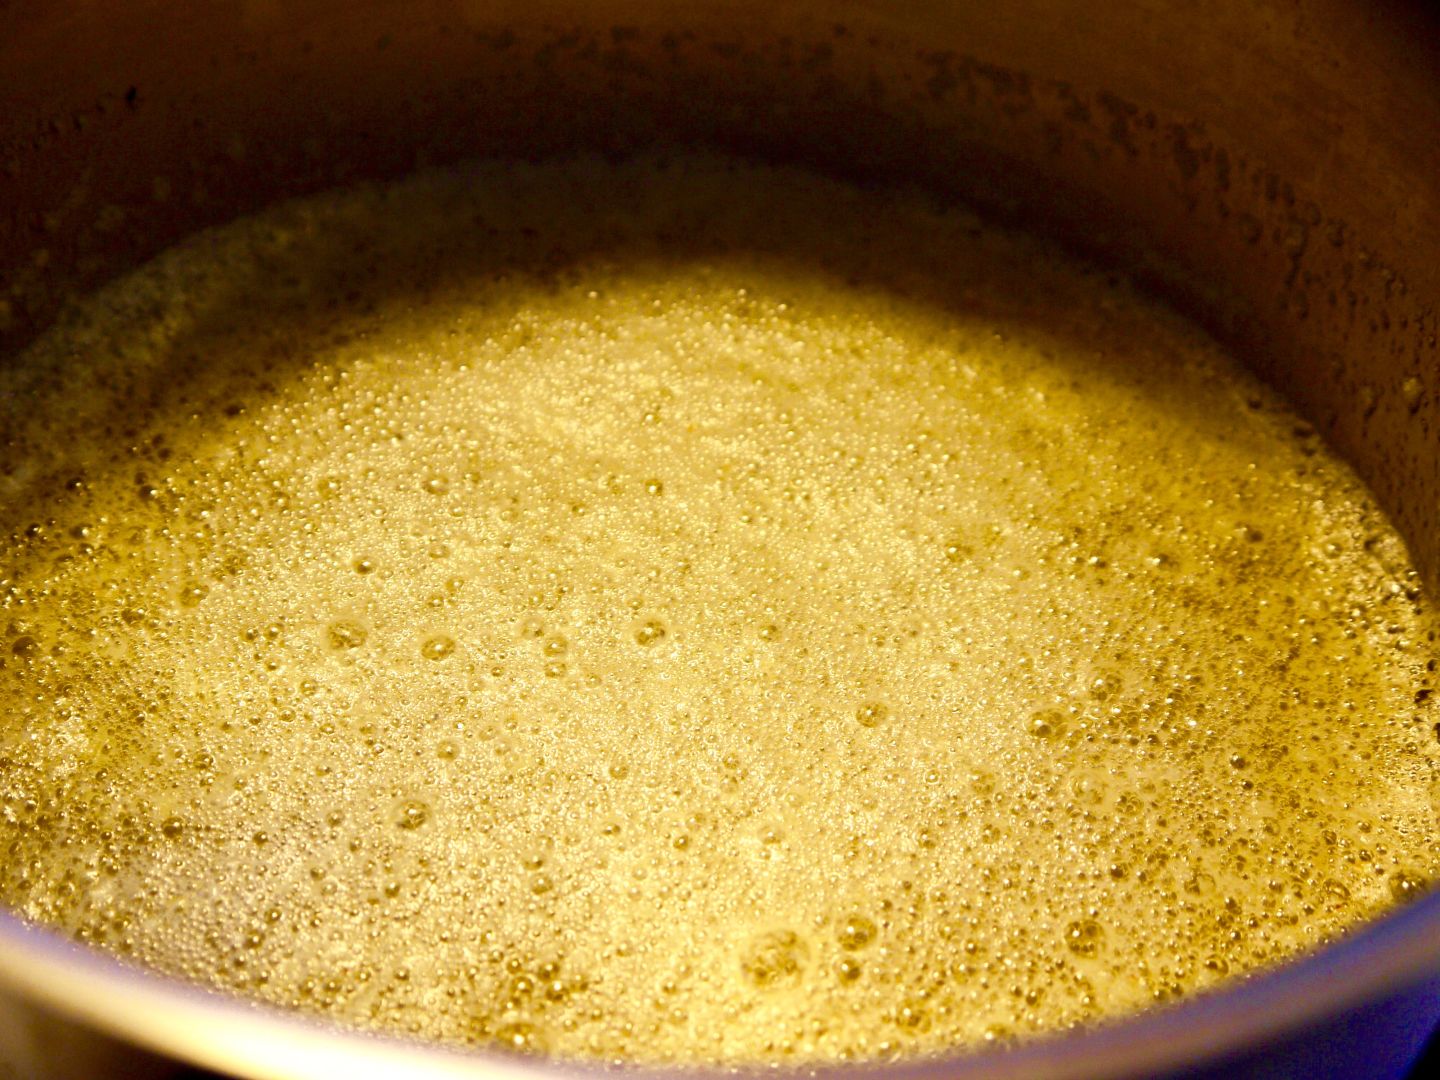
Taking Time in the Kitchen: Down to the Brown
How To Make Butter
Sponsored
window.__IS_SSR__=true
window.__INITIAL_STATE__={"attachmentsReducer":{"audio_0":{"type":"attachments","id":"audio_0","imgSizes":{"kqedFullSize":{"file":"https://ww2.kqed.org/news/wp-content/themes/KQED-unified/img/audio_bgs/background0.jpg"}}},"audio_1":{"type":"attachments","id":"audio_1","imgSizes":{"kqedFullSize":{"file":"https://ww2.kqed.org/news/wp-content/themes/KQED-unified/img/audio_bgs/background1.jpg"}}},"audio_2":{"type":"attachments","id":"audio_2","imgSizes":{"kqedFullSize":{"file":"https://ww2.kqed.org/news/wp-content/themes/KQED-unified/img/audio_bgs/background2.jpg"}}},"audio_3":{"type":"attachments","id":"audio_3","imgSizes":{"kqedFullSize":{"file":"https://ww2.kqed.org/news/wp-content/themes/KQED-unified/img/audio_bgs/background3.jpg"}}},"audio_4":{"type":"attachments","id":"audio_4","imgSizes":{"kqedFullSize":{"file":"https://ww2.kqed.org/news/wp-content/themes/KQED-unified/img/audio_bgs/background4.jpg"}}},"placeholder":{"type":"attachments","id":"placeholder","imgSizes":{"thumbnail":{"file":"https://ww2.kqed.org/wp-content/uploads/sites/10/2018/01/GettyImages-896326950-160x96.jpg","width":160,"height":96,"mimeType":"image/jpeg"},"medium":{"file":"https://ww2.kqed.org/wp-content/uploads/sites/10/2018/01/GettyImages-896326950-800x478.jpg","width":800,"height":478,"mimeType":"image/jpeg"},"large":{"file":"https://ww2.kqed.org/wp-content/uploads/sites/10/2018/01/GettyImages-896326950-1020x610.jpg","width":1020,"height":610,"mimeType":"image/jpeg"},"fd-lrg":{"file":"https://ww2.kqed.org/wp-content/uploads/sites/10/2018/01/GettyImages-896326950-1920x1148.jpg","width":1920,"height":1148,"mimeType":"image/jpeg"},"fd-med":{"file":"https://ww2.kqed.org/wp-content/uploads/sites/10/2018/01/GettyImages-896326950-1180x705.jpg","width":1180,"height":705,"mimeType":"image/jpeg"},"fd-sm":{"file":"https://ww2.kqed.org/wp-content/uploads/sites/10/2018/01/GettyImages-896326950-960x574.jpg","width":960,"height":574,"mimeType":"image/jpeg"},"post-thumbnail":{"file":"https://ww2.kqed.org/wp-content/uploads/sites/10/2018/01/GettyImages-896326950-672x372.jpg","width":672,"height":372,"mimeType":"image/jpeg"},"twentyfourteen-full-width":{"file":"https://ww2.kqed.org/wp-content/uploads/sites/10/2018/01/GettyImages-896326950-1038x576.jpg","width":1038,"height":576,"mimeType":"image/jpeg"},"xxsmall":{"file":"https://ww2.kqed.org/wp-content/uploads/sites/10/2018/01/GettyImages-896326950-240x143.jpg","width":240,"height":143,"mimeType":"image/jpeg"},"xsmall":{"file":"https://ww2.kqed.org/wp-content/uploads/sites/10/2018/01/GettyImages-896326950-375x224.jpg","width":375,"height":224,"mimeType":"image/jpeg"},"small":{"file":"https://ww2.kqed.org/wp-content/uploads/sites/10/2018/01/GettyImages-896326950-520x311.jpg","width":520,"height":311,"mimeType":"image/jpeg"},"xlarge":{"file":"https://ww2.kqed.org/wp-content/uploads/sites/10/2018/01/GettyImages-896326950-1180x705.jpg","width":1180,"height":705,"mimeType":"image/jpeg"},"full-width":{"file":"https://ww2.kqed.org/wp-content/uploads/sites/10/2018/01/GettyImages-896326950-1920x1148.jpg","width":1920,"height":1148,"mimeType":"image/jpeg"},"guest-author-32":{"file":"https://ww2.kqed.org/wp-content/uploads/sites/10/2018/01/GettyImages-896326950-32x32.jpg","width":32,"height":32,"mimeType":"image/jpeg"},"guest-author-50":{"file":"https://ww2.kqed.org/wp-content/uploads/sites/10/2018/01/GettyImages-896326950-50x50.jpg","width":50,"height":50,"mimeType":"image/jpeg"},"guest-author-64":{"file":"https://ww2.kqed.org/wp-content/uploads/sites/10/2018/01/GettyImages-896326950-64x64.jpg","width":64,"height":64,"mimeType":"image/jpeg"},"guest-author-96":{"file":"https://ww2.kqed.org/wp-content/uploads/sites/10/2018/01/GettyImages-896326950-96x96.jpg","width":96,"height":96,"mimeType":"image/jpeg"},"guest-author-128":{"file":"https://ww2.kqed.org/wp-content/uploads/sites/10/2018/01/GettyImages-896326950-128x128.jpg","width":128,"height":128,"mimeType":"image/jpeg"},"detail":{"file":"https://ww2.kqed.org/wp-content/uploads/sites/10/2018/01/GettyImages-896326950-150x150.jpg","width":150,"height":150,"mimeType":"image/jpeg"},"kqedFullSize":{"file":"https://ww2.kqed.org/wp-content/uploads/sites/10/2018/01/GettyImages-896326950-e1514998105161.jpg","width":1920,"height":1148}}},"bayareabites_103408":{"type":"attachments","id":"bayareabites_103408","meta":{"index":"attachments_1591205162","site":"bayareabites","id":"103408","found":true},"title":"The golden brown color of fresh ghee.","publishDate":1447116672,"status":"inherit","parent":103395,"modified":1447121159,"caption":"The golden brown color of fresh ghee.","credit":"Lila Volkas","description":"The golden brown color of fresh ghee.","imgSizes":{"thumbnail":{"file":"https://ww2.kqed.org/app/uploads/sites/24/2015/11/pic-3-400x300.jpg","width":400,"height":300,"mimeType":"image/jpeg"},"medium":{"file":"https://ww2.kqed.org/app/uploads/sites/24/2015/11/pic-3-800x600.jpg","width":800,"height":600,"mimeType":"image/jpeg"},"large":{"file":"https://ww2.kqed.org/app/uploads/sites/24/2015/11/pic-3-1440x1080.jpg","width":1440,"height":1080,"mimeType":"image/jpeg"},"fd-lrg":{"file":"https://ww2.kqed.org/app/uploads/sites/24/2015/11/pic-3-1920x1440.jpg","width":1920,"height":1440,"mimeType":"image/jpeg"},"fd-med":{"file":"https://ww2.kqed.org/app/uploads/sites/24/2015/11/pic-3-1180x885.jpg","width":1180,"height":885,"mimeType":"image/jpeg"},"fd-sm":{"file":"https://ww2.kqed.org/app/uploads/sites/24/2015/11/pic-3-960x720.jpg","width":960,"height":720,"mimeType":"image/jpeg"},"post-thumbnail":{"file":"https://ww2.kqed.org/app/uploads/sites/24/2015/11/pic-3-672x372.jpg","width":672,"height":372,"mimeType":"image/jpeg"},"twentyfourteen-full-width":{"file":"https://ww2.kqed.org/app/uploads/sites/24/2015/11/pic-3-1038x576.jpg","width":1038,"height":576,"mimeType":"image/jpeg"},"guest-author-32":{"file":"https://ww2.kqed.org/app/uploads/sites/24/2015/11/pic-3-32x32.jpg","width":32,"height":32,"mimeType":"image/jpeg"},"guest-author-64":{"file":"https://ww2.kqed.org/app/uploads/sites/24/2015/11/pic-3-64x64.jpg","width":64,"height":64,"mimeType":"image/jpeg"},"guest-author-96":{"file":"https://ww2.kqed.org/app/uploads/sites/24/2015/11/pic-3-96x96.jpg","width":96,"height":96,"mimeType":"image/jpeg"},"guest-author-128":{"file":"https://ww2.kqed.org/app/uploads/sites/24/2015/11/pic-3-128x128.jpg","width":128,"height":128,"mimeType":"image/jpeg"},"cat_post_thumb_sizecategory-posts-2":{"file":"https://ww2.kqed.org/app/uploads/sites/24/2015/11/pic-3-150x150.jpg","width":150,"height":150,"mimeType":"image/jpeg"},"detail":{"file":"https://ww2.kqed.org/app/uploads/sites/24/2015/11/pic-3-75x75.jpg","width":75,"height":75,"mimeType":"image/jpeg"},"kqedFullSize":{"file":"https://ww2.kqed.org/app/uploads/sites/24/2015/11/pic-3.jpg","width":4000,"height":3000}},"fetchFailed":false,"isLoading":false},"bayareabites_94060":{"type":"attachments","id":"bayareabites_94060","meta":{"index":"attachments_1591205162","site":"bayareabites","id":"94060","found":true},"title":"Butter labels from Irish creameries operating in the 1970s.","publishDate":1426621842,"status":"inherit","parent":94059,"modified":1426622112,"caption":"Butter labels from Irish creameries operating in the 1970s. Photo: Roland Paschhoff/Cork Butter Museum","credit":null,"description":"Butter labels from Irish creameries operating in the 1970s.","imgSizes":{"medium":{"file":"https://ww2.kqed.org/app/uploads/sites/24/2015/03/walllowres-1e39a90bfdb3e3fa2214fde62b88be441d4b1d74-800x599.jpg","width":800,"height":599,"mimeType":"image/jpeg"},"fd-lrg":{"file":"https://ww2.kqed.org/app/uploads/sites/24/2015/03/walllowres-1e39a90bfdb3e3fa2214fde62b88be441d4b1d74-1180x884.jpg","width":1180,"height":884,"mimeType":"image/jpeg"},"fd-med":{"file":"https://ww2.kqed.org/app/uploads/sites/24/2015/03/walllowres-1e39a90bfdb3e3fa2214fde62b88be441d4b1d74-768x576.jpg","width":768,"height":576,"mimeType":"image/jpeg"},"fd-sm":{"file":"https://ww2.kqed.org/app/uploads/sites/24/2015/03/walllowres-1e39a90bfdb3e3fa2214fde62b88be441d4b1d74-320x240.jpg","width":320,"height":240,"mimeType":"image/jpeg"},"post-thumbnail":{"file":"https://ww2.kqed.org/app/uploads/sites/24/2015/03/walllowres-1e39a90bfdb3e3fa2214fde62b88be441d4b1d74-672x372.jpg","width":672,"height":372,"mimeType":"image/jpeg"},"twentyfourteen-full-width":{"file":"https://ww2.kqed.org/app/uploads/sites/24/2015/03/walllowres-1e39a90bfdb3e3fa2214fde62b88be441d4b1d74-1038x576.jpg","width":1038,"height":576,"mimeType":"image/jpeg"},"guest-author-32":{"file":"https://ww2.kqed.org/app/uploads/sites/24/2015/03/walllowres-1e39a90bfdb3e3fa2214fde62b88be441d4b1d74-32x32.jpg","width":32,"height":32,"mimeType":"image/jpeg"},"guest-author-64":{"file":"https://ww2.kqed.org/app/uploads/sites/24/2015/03/walllowres-1e39a90bfdb3e3fa2214fde62b88be441d4b1d74-64x64.jpg","width":64,"height":64,"mimeType":"image/jpeg"},"guest-author-96":{"file":"https://ww2.kqed.org/app/uploads/sites/24/2015/03/walllowres-1e39a90bfdb3e3fa2214fde62b88be441d4b1d74-96x96.jpg","width":96,"height":96,"mimeType":"image/jpeg"},"guest-author-128":{"file":"https://ww2.kqed.org/app/uploads/sites/24/2015/03/walllowres-1e39a90bfdb3e3fa2214fde62b88be441d4b1d74-128x128.jpg","width":128,"height":128,"mimeType":"image/jpeg"},"cat_post_thumb_sizecategory-posts-2":{"file":"https://ww2.kqed.org/app/uploads/sites/24/2015/03/walllowres-1e39a90bfdb3e3fa2214fde62b88be441d4b1d74-50x50.jpg","width":50,"height":50,"mimeType":"image/jpeg"},"detail":{"file":"https://ww2.kqed.org/app/uploads/sites/24/2015/03/walllowres-1e39a90bfdb3e3fa2214fde62b88be441d4b1d74-75x75.jpg","width":75,"height":75,"mimeType":"image/jpeg"},"kqedFullSize":{"file":"https://ww2.kqed.org/app/uploads/sites/24/2015/03/walllowres-1e39a90bfdb3e3fa2214fde62b88be441d4b1d74.jpg","width":1197,"height":897}},"fetchFailed":false,"isLoading":false},"bayareabites_90348":{"type":"attachments","id":"bayareabites_90348","meta":{"index":"attachments_1591205162","site":"bayareabites","id":"90348","found":true},"title":"butter-medley","publishDate":1416874038,"status":"inherit","parent":90334,"modified":1416874038,"caption":"Three variations on compound butter that will all make great additions to the Thanksgiving table. Photos: Kate Williams","credit":null,"description":null,"imgSizes":{"kqedFullSize":{"file":"https://ww2.kqed.org/app/uploads/sites/24/2014/11/butter-medley.jpg","width":1000,"height":224}},"fetchFailed":false,"isLoading":false},"bayareabites_64659":{"type":"attachments","id":"bayareabites_64659","meta":{"index":"attachments_1591205162","site":"bayareabites","id":"64659","found":true},"title":"butter1000","publishDate":1373057674,"status":"inherit","parent":64654,"modified":1373057674,"caption":"Butter churning demos can be found at Claude Moore Colonial Farm, but DIYers are rediscovering the art, too. Photo Courtesy of Claude Moore Colonial Farm","credit":null,"description":null,"imgSizes":{"kqedFullSize":{"file":"https://ww2.kqed.org/app/uploads/sites/24/2013/07/butter1000.jpg","width":1000,"height":750}},"fetchFailed":false,"isLoading":false}},"audioPlayerReducer":{"postId":"stream_live"},"authorsReducer":{"byline_bayareabites_94059":{"type":"authors","id":"byline_bayareabites_94059","meta":{"override":true},"slug":"byline_bayareabites_94059","name":"Deena Prichep","isLoading":false},"byline_bayareabites_64654":{"type":"authors","id":"byline_bayareabites_64654","meta":{"override":true},"slug":"byline_bayareabites_64654","name":"Allison Aubrey","isLoading":false},"michael-procopio":{"type":"authors","id":"5017","meta":{"index":"authors_1591205172","id":"5017","found":true},"name":"Michael Procopio","firstName":"Michael","lastName":"Procopio","slug":"michael-procopio","email":"m_procopio@mac.com","display_author_email":false,"staff_mastheads":[],"title":null,"bio":"I am terribly fond of martinis, Edward Gorey, and sleeping with many pillows. \r\nYou are more than welcome to follow me on Twitter: \u003ca href=\"http://twitter.com/#!/procopster\">@procopster\u003c/a>","avatar":"https://secure.gravatar.com/avatar/2eb848aac69d701cf1e2c3e88199feb4?s=600&d=blank&r=g","twitter":"procopster","facebook":"foodforthethoughtless","instagram":null,"linkedin":null,"sites":[{"site":"bayareabites","roles":["contributor"]},{"site":"food","roles":["contributor"]}],"headData":{"title":"Michael Procopio | KQED","description":null,"ogImgSrc":"https://secure.gravatar.com/avatar/2eb848aac69d701cf1e2c3e88199feb4?s=600&d=blank&r=g","twImgSrc":"https://secure.gravatar.com/avatar/2eb848aac69d701cf1e2c3e88199feb4?s=600&d=blank&r=g"},"isLoading":false,"link":"/author/michael-procopio"},"thy-tran":{"type":"authors","id":"5018","meta":{"index":"authors_1591205172","id":"5018","found":true},"name":"Thy Tran","firstName":"Thy","lastName":"Tran","slug":"thy-tran","email":"thy@wanderingspoon.com","display_author_email":false,"staff_mastheads":[],"title":null,"bio":"Thy Tran writes literary nonfiction about food, the rituals of the kitchen, and the many ways eating and cooking both connect and separate communities around the world. She co-authored the award-winning guide, Kitchen Companion, and her work has appeared in numerous other books, including Asia in the San Francisco Bay Area: A Cultural Travel Guide and Cooking at Home with the Culinary Institute of America. Her writing has been featured in The Washington Post, Los Angeles Times, San Francisco Chronicle, Fine Cooking and Saveur. A recipient of a literary grant from the San Francisco Arts Commission, Thy is currently working on a collection of essays about how food changes in families across time and place.\r\n\r\nThough trained as a professional chef, she works on cookbooks by day, then creates literary chapbooks by night. An old letterpress and two cabinets of wood and lead type occupy a corner of her writing studio, for she is as committed to the art and craft of bookmaking as she is to the power of words themselves. In addition to writing, editing, teaching and printing, Thy remains active in local food justice and global food sovereignty movements. Visit her website, wanderingspoon.com, to learn more about her culinary adventures.","avatar":"https://secure.gravatar.com/avatar/5b7758ab85c07037c4ea4dae26be27bd?s=600&d=blank&r=g","twitter":null,"facebook":null,"instagram":null,"linkedin":null,"sites":[{"site":"bayareabites","roles":["contributor"]}],"headData":{"title":"Thy Tran | KQED","description":null,"ogImgSrc":"https://secure.gravatar.com/avatar/5b7758ab85c07037c4ea4dae26be27bd?s=600&d=blank&r=g","twImgSrc":"https://secure.gravatar.com/avatar/5b7758ab85c07037c4ea4dae26be27bd?s=600&d=blank&r=g"},"isLoading":false,"link":"/author/thy-tran"},"andrewsimmons":{"type":"authors","id":"5060","meta":{"index":"authors_1591205172","id":"5060","found":true},"name":"Andrew Simmons","firstName":"Andrew","lastName":"Simmons","slug":"andrewsimmons","email":"adlsimmons@gmail.com","display_author_email":false,"staff_mastheads":[],"title":null,"bio":"Andrew is from Louisville, Kentucky. He lives in San Francisco, plays music, works with kids, and writes for a variety of magazines and newspapers, including The Oakland Tribune, The Contra Costa County Times, Wine Enthusiast, The Onion, and Thrasher. Pro: hush puppies, green garlic, caramel ice cream, Japanese sweet potatoes, smelts, Larb Ped, beer, wine, cocktails, and assorted dumplings; con: milk, chips, and candy.","avatar":"https://secure.gravatar.com/avatar/42e85c65b8e2ff85837caa9418e48a7a?s=600&d=blank&r=g","twitter":null,"facebook":null,"instagram":null,"linkedin":null,"sites":[{"site":"bayareabites","roles":["contributor"]}],"headData":{"title":"Andrew Simmons | KQED","description":null,"ogImgSrc":"https://secure.gravatar.com/avatar/42e85c65b8e2ff85837caa9418e48a7a?s=600&d=blank&r=g","twImgSrc":"https://secure.gravatar.com/avatar/42e85c65b8e2ff85837caa9418e48a7a?s=600&d=blank&r=g"},"isLoading":false,"link":"/author/andrewsimmons"},"lilavolkas":{"type":"authors","id":"5404","meta":{"index":"authors_1591205172","id":"5404","found":true},"name":"Lila Volkas","firstName":"Lila","lastName":"Volkas","slug":"lilavolkas","email":"lilavolkas@gmail.com","display_author_email":false,"staff_mastheads":[],"title":null,"bio":"Lila Volkas is a Berkeley based Holistic Nutritionist, food writer and illustrator. She received her Nutritional Consulting Certification from Bauman College and offers clients individualized nutritional support. As an illustrator she creates hand drawn and digitally colored illustrations that whimsically capture the essence of her subjects and are easily digested by readers. Much of her inspiration comes from her undeniable love for vegetables, as well her knack for anthropomorphizing what's on her plate. Lila has had several pieces published in KQED’s Bay Area Bites as well as in Edible East Bay Magazine. For more of a taste of Lila's offering, check out her website \u003ca href=\"http://www.lilavolkas.com/\">lilavolkas.com\u003c/a>","avatar":"https://secure.gravatar.com/avatar/e520743544a0600729bc45ff3ab43206?s=600&d=blank&r=g","twitter":null,"facebook":null,"instagram":null,"linkedin":null,"sites":[{"site":"bayareabites","roles":["contributor"]},{"site":"food","roles":["contributor"]}],"headData":{"title":"Lila Volkas | KQED","description":null,"ogImgSrc":"https://secure.gravatar.com/avatar/e520743544a0600729bc45ff3ab43206?s=600&d=blank&r=g","twImgSrc":"https://secure.gravatar.com/avatar/e520743544a0600729bc45ff3ab43206?s=600&d=blank&r=g"},"isLoading":false,"link":"/author/lilavolkas"},"katewilliams":{"type":"authors","id":"5485","meta":{"index":"authors_1591205172","id":"5485","found":true},"name":"Kate Williams","firstName":"Kate","lastName":"Williams","slug":"katewilliams","email":"williaka@gmail.com","display_author_email":false,"staff_mastheads":[],"title":null,"bio":"Kate Williams grew up outside of Atlanta, where twenty-pound baskets of peaches were an end-of-summer tradition. After spending time in Boston developing recipes for America's Test Kitchen and pretending to be a New Englander, she moved to sunny Berkeley. Here she works as a personal chef and food writer, covering topics ranging from taco trucks to modernist cookbooks. In addition to KQED's Bay Area Bites, Kate's work appears on Serious Eats, Berkeleyside NOSH, The Oxford American, America's Test Kitchen cookbooks, and Food52.","avatar":"https://secure.gravatar.com/avatar/25623fe56e181fe8b6ee92fd0ea077de?s=600&d=blank&r=g","twitter":"KateHWilliams","facebook":null,"instagram":null,"linkedin":null,"sites":[{"site":"bayareabites","roles":["contributor"]},{"site":"food","roles":["contributor"]}],"headData":{"title":"Kate Williams | KQED","description":null,"ogImgSrc":"https://secure.gravatar.com/avatar/25623fe56e181fe8b6ee92fd0ea077de?s=600&d=blank&r=g","twImgSrc":"https://secure.gravatar.com/avatar/25623fe56e181fe8b6ee92fd0ea077de?s=600&d=blank&r=g"},"isLoading":false,"link":"/author/katewilliams"}},"breakingNewsReducer":{},"campaignFinanceReducer":{},"firebase":{"requesting":{},"requested":{},"timestamps":{},"data":{},"ordered":{},"auth":{"isLoaded":false,"isEmpty":true},"authError":null,"profile":{"isLoaded":false,"isEmpty":true},"listeners":{"byId":{},"allIds":[]},"isInitializing":false,"errors":[]},"navBarReducer":{"navBarId":"arts","fullView":true,"showPlayer":false},"navMenuReducer":{"menus":[{"key":"menu1","items":[{"name":"News","link":"/","type":"title"},{"name":"Politics","link":"/politics"},{"name":"Science","link":"/science"},{"name":"Education","link":"/educationnews"},{"name":"Housing","link":"/housing"},{"name":"Immigration","link":"/immigration"},{"name":"Criminal Justice","link":"/criminaljustice"},{"name":"Silicon Valley","link":"/siliconvalley"},{"name":"Forum","link":"/forum"},{"name":"The California Report","link":"/californiareport"}]},{"key":"menu2","items":[{"name":"Arts & Culture","link":"/arts","type":"title"},{"name":"Critics’ Picks","link":"/thedolist"},{"name":"Cultural Commentary","link":"/artscommentary"},{"name":"Food & Drink","link":"/food"},{"name":"Bay Area Hip-Hop","link":"/bayareahiphop"},{"name":"Rebel Girls","link":"/rebelgirls"},{"name":"Arts Video","link":"/artsvideos"}]},{"key":"menu3","items":[{"name":"Podcasts","link":"/podcasts","type":"title"},{"name":"Bay Curious","link":"/podcasts/baycurious"},{"name":"Rightnowish","link":"/podcasts/rightnowish"},{"name":"The Bay","link":"/podcasts/thebay"},{"name":"On Our Watch","link":"/podcasts/onourwatch"},{"name":"Mindshift","link":"/podcasts/mindshift"},{"name":"Consider This","link":"/podcasts/considerthis"},{"name":"Political Breakdown","link":"/podcasts/politicalbreakdown"}]},{"key":"menu4","items":[{"name":"Live Radio","link":"/radio","type":"title"},{"name":"TV","link":"/tv","type":"title"},{"name":"Events","link":"/events","type":"title"},{"name":"For Educators","link":"/education","type":"title"},{"name":"Support KQED","link":"/support","type":"title"},{"name":"About","link":"/about","type":"title"},{"name":"Help Center","link":"https://kqed-helpcenter.kqed.org/s","type":"title"}]}]},"pagesReducer":{},"postsReducer":{"stream_live":{"type":"live","id":"stream_live","audioUrl":"https://streams.kqed.org/kqedradio","title":"Live Stream","excerpt":"Live Stream information currently unavailable.","link":"/radio","featImg":"","label":{"name":"KQED Live","link":"/"}},"stream_kqedNewscast":{"type":"posts","id":"stream_kqedNewscast","audioUrl":"https://www.kqed.org/.stream/anon/radio/RDnews/newscast.mp3?_=1","title":"KQED Newscast","featImg":"","label":{"name":"88.5 FM","link":"/"}},"bayareabites_103395":{"type":"posts","id":"bayareabites_103395","meta":{"index":"posts_1591205157","site":"bayareabites","id":"103395","score":null,"sort":[1447858820000]},"guestAuthors":[],"slug":"diy-make-your-own-jar-of-ghee-or-liquid-gold","title":"DIY: Make Your Own Jar of Ghee, aka \"Liquid Gold\"","publishDate":1447858820,"format":"standard","headTitle":"Bay Area Bites | KQED Food","labelTerm":{"site":"bayareabites"},"content":"\u003cp>Ghee, or Indian clarified unsalted butter, is delicious and easy to make at home. Regular butter is transformed through a sacred cooking process that evaporates the water and separates the milk solids. Known as “liquid gold” in India, this pure fat has been used for centuries for medicinal and ceremonial purposes. And it's prized in the kitchen for its high smoking point, nutty flavor and digestibility.\u003c/p>\n\u003cfigure id=\"attachment_103398\" class=\"wp-caption alignright\" style=\"max-width: 400px\">\u003cimg src=\"http://ww2.kqed.org/bayareabites/wp-content/uploads/sites/24/2015/11/pic-6-400x426.jpg\" alt=\"A jar of liquid gold.\" width=\"400\" height=\"426\" class=\"size-thumbnail wp-image-103398\" srcset=\"https://ww2.kqed.org/app/uploads/sites/24/2015/11/pic-6-400x426.jpg 400w, https://ww2.kqed.org/app/uploads/sites/24/2015/11/pic-6-800x851.jpg 800w, https://ww2.kqed.org/app/uploads/sites/24/2015/11/pic-6-1440x1532.jpg 1440w, https://ww2.kqed.org/app/uploads/sites/24/2015/11/pic-6-1180x1256.jpg 1180w, https://ww2.kqed.org/app/uploads/sites/24/2015/11/pic-6-960x1022.jpg 960w\" sizes=\"(max-width: 400px) 100vw, 400px\">\u003cfigcaption class=\"wp-caption-text\">A finished jar ghee, or \"liquid gold.\" \u003ccite>(Lila Volkas)\u003c/cite>\u003c/figcaption>\u003c/figure>\n\u003cp>I recently spent the afternoon in the kitchen of \u003ca href=\"http://www.thespicewhisperer.com\" target=\"_blank\">Vinita Jacinto\u003c/a>, a chef and former instructor at the \u003ca href=\"http://www.chefs.edu/san-francisco/about-california-culinary-academy\" target=\"_blank\">California Culinary Academy\u003c/a>, to learn more about ghee. I first heard raves about ghee from my fellow yoga teacher friends. But when I saw the steep price tag of a jar at Whole Foods, my \u003ca href=\"http://ww2.kqed.org/bayareabites/2015/08/13/an-illustrated-guide-benefits-to-soaking-and-sprouting-legumes-grains-and-seeds/\" target=\"_blank\">DIY instincts\u003c/a> kicked in and I vowed to learn how to make it.\u003c/p>\n\u003cp>\u003cstrong>Ancestral roots\u003c/strong>\u003c/p>\n\u003cp>When I arrived at Jacinto’s home in El Cerrito, she welcomed me with a big hug and handed me a mug of her homemade chai tea. As we sipped our drinks, Jacinto recounted her childhood memories in Calcutta, India. \u003c/p>\n\u003cp>“Growing up, we saw the whole dairy cycle. Twice a day, the milkman came to our house and brought fresh milk. If I hugged the jar, it was still warm because he milked it 20 minutes before coming to my door. Right after the milk arrived, it was boiled; the cream that rose to the top was collected. That cream is churned to make fresh butter and that butter is then made into ghee. Every day we had fresh butter on the table and every week fresh ghee.”\u003c/p>\n\u003cfigure id=\"attachment_103399\" class=\"wp-caption alignright\" style=\"max-width: 400px\">\u003cimg src=\"http://ww2.kqed.org/bayareabites/wp-content/uploads/sites/24/2015/11/vinita-pic-400x400.jpg\" alt=\"Each time Jacinto dances through the sacred tradition of making ghee, she is reminded of her home far away and feels golden threads connecting to her family and roots.\" width=\"400\" height=\"400\" class=\"size-thumbnail wp-image-103399\" srcset=\"https://ww2.kqed.org/app/uploads/sites/24/2015/11/vinita-pic-400x400.jpg 400w, https://ww2.kqed.org/app/uploads/sites/24/2015/11/vinita-pic-32x32.jpg 32w, https://ww2.kqed.org/app/uploads/sites/24/2015/11/vinita-pic-64x64.jpg 64w, https://ww2.kqed.org/app/uploads/sites/24/2015/11/vinita-pic-96x96.jpg 96w, https://ww2.kqed.org/app/uploads/sites/24/2015/11/vinita-pic-128x128.jpg 128w, https://ww2.kqed.org/app/uploads/sites/24/2015/11/vinita-pic-150x150.jpg 150w, https://ww2.kqed.org/app/uploads/sites/24/2015/11/vinita-pic-75x75.jpg 75w, https://ww2.kqed.org/app/uploads/sites/24/2015/11/vinita-pic.jpg 720w\" sizes=\"(max-width: 400px) 100vw, 400px\">\u003cfigcaption class=\"wp-caption-text\">When Jacinto dances through the sacred tradition of making ghee, she's reminded of her native country and feels golden threads connecting to her family and roots. \u003ccite>(Lila Volkas)\u003c/cite>\u003c/figcaption>\u003c/figure>\n\u003cp>Jacinto explained that in India, cows are sacred beings, thus dairy foods are also treated with the utmost respect. In her household, there were designated pots that were used to only boil milk and make ghee. The usual multitasking in the kitchen was paused during the ghee making process. And to further honor the sacredness of the fat, the elder women of the family would traditionally chant \u003cem>\u003ca href=\"https://en.wikipedia.org/wiki/Mantra\" target=\"_blank\">mantras\u003c/a>\u003c/em> while cooking to infuse the liquid gold with blessings.\u003c/p>\n\u003cp>[ad fullwidth]\u003c/p>\n\u003cp>Ghee is not only used in the kitchen. Jacinto added that it served as fuel \"during festivals [in India] when you want to light the lamps.\" The golden fat has a very long shelf life, and she described the 30-year-old jar of ghee in her childhood home reserved solely for medicinal purposes. There's also the tradition of mothers handing down a jar to their daughters after marriage so that they'll be prepared to be a caretaker of their families.\u003c/p>\n\u003cp>\u003cstrong>The ritual in the kitchen\u003c/strong>\u003c/p>\n\u003cp>I followed Jacinto into the kitchen and she handed me a finished jar of ghee. I opened the lid and breathed in the scent of sweet caramel; no wonder it’s called liquid gold. We unwrapped two sticks of unsalted organic butter and placed them in a saucepan. \u003c/p>\n\u003cp>\"Traditionally, you begin the cooking process on low heat because you don’t want the butter to catch on the bottom on the pan,\" said Jacinto. \u003c/p>\n\u003cfigure id=\"attachment_103404\" class=\"wp-caption aligncenter\" style=\"max-width: 640px\">\u003cimg src=\"http://ww2.kqed.org/bayareabites/wp-content/uploads/sites/24/2015/11/step1ghee-1440x1080.jpg\" alt=\"Jacinto honors the ghee by allowing the process to be a meditative ritual. There are no other dishes cooking or activities going on at the same time, her full attention is on the butter.\" width=\"640\" height=\"480\" class=\"size-large wp-image-103404\" srcset=\"https://ww2.kqed.org/app/uploads/sites/24/2015/11/step1ghee-1440x1080.jpg 1440w, https://ww2.kqed.org/app/uploads/sites/24/2015/11/step1ghee-400x300.jpg 400w, https://ww2.kqed.org/app/uploads/sites/24/2015/11/step1ghee-800x600.jpg 800w, https://ww2.kqed.org/app/uploads/sites/24/2015/11/step1ghee-1180x885.jpg 1180w, https://ww2.kqed.org/app/uploads/sites/24/2015/11/step1ghee-960x720.jpg 960w\" sizes=\"(max-width: 640px) 100vw, 640px\">\u003cfigcaption class=\"wp-caption-text\">Jacinto honors the ghee by allowing the process to be a meditative ritual. No other dishes are cooking and other activities are paused; her full attention is on the butter. \u003ccite>(Lila Volkas)\u003c/cite>\u003c/figcaption>\u003c/figure>\n\u003cp>As we flowed into a meditative state while cooking, I heard a popping noise coming from the saucepan that sounded like popcorn. Jacinto told me that this is the sound of the water content of the butter evaporating away. She pointed out how the white foam looked like clumpy clouds and told me to keep watching the buttery sky.\u003c/p>\n\u003cp>After the sticks of butter were fully melted, Jacinto raised the heat to medium to speed up the evaporation process. She tilted the saucepan to get a glimpse of the bottom of the pan to make sure the butter wasn’t burning.\u003c/p>\n\u003cfigure id=\"attachment_103409\" class=\"wp-caption aligncenter\" style=\"max-width: 640px\">\u003cimg src=\"http://ww2.kqed.org/bayareabites/wp-content/uploads/sites/24/2015/11/pic-4-1440x1080.jpg\" alt=\"Jacinto tilts the pot to show me the caramelized milk solids that look like black speckles stuck to the bottom.\" width=\"640\" height=\"480\" class=\"size-large wp-image-103409\" srcset=\"https://ww2.kqed.org/app/uploads/sites/24/2015/11/pic-4-1440x1080.jpg 1440w, https://ww2.kqed.org/app/uploads/sites/24/2015/11/pic-4-400x300.jpg 400w, https://ww2.kqed.org/app/uploads/sites/24/2015/11/pic-4-800x600.jpg 800w, https://ww2.kqed.org/app/uploads/sites/24/2015/11/pic-4-1180x885.jpg 1180w, https://ww2.kqed.org/app/uploads/sites/24/2015/11/pic-4-960x720.jpg 960w\" sizes=\"(max-width: 640px) 100vw, 640px\">\u003cfigcaption class=\"wp-caption-text\">Jacinto tilted the pot to show me the caramelized milk solids that had collected at the bottom. \u003ccite>(Lila Volkas)\u003c/cite>\u003c/figcaption>\u003c/figure>\n\u003cp>The butter cooked for 10-15 minutes, and I noticed the sound coming from the pot had changed to a gurgle. The buttery sky had also changed to a single, uniform cloud of foam -- signs that the ghee was done. Jacinto told me that each family has their own color preference for ghee. The darker it is, the nuttier the flavor. We aimed for a medium golden brown.\u003c/p>\n\u003cfigure id=\"attachment_103410\" class=\"wp-caption alignright\" style=\"max-width: 400px\">\u003cimg src=\"http://ww2.kqed.org/bayareabites/wp-content/uploads/sites/24/2015/11/pic5-400x533.jpg\" alt=\"Jacinto plans to use the pot with ghee residue to make lentils for dinner. Its nutty flavor enhances stir-fried vegetables, scrambled eggs or even a simple piece of toast.\" width=\"400\" height=\"533\" class=\"size-thumbnail wp-image-103410\" srcset=\"https://ww2.kqed.org/app/uploads/sites/24/2015/11/pic5-400x533.jpg 400w, https://ww2.kqed.org/app/uploads/sites/24/2015/11/pic5-800x1067.jpg 800w, https://ww2.kqed.org/app/uploads/sites/24/2015/11/pic5-1440x1920.jpg 1440w, https://ww2.kqed.org/app/uploads/sites/24/2015/11/pic5-1180x1573.jpg 1180w, https://ww2.kqed.org/app/uploads/sites/24/2015/11/pic5-960x1280.jpg 960w\" sizes=\"(max-width: 400px) 100vw, 400px\">\u003cfigcaption class=\"wp-caption-text\">Jacinto planned to use this pot and its ghee residue to make lentils for dinner. Its nutty flavor enhances stir-fried vegetables, scrambled eggs or even a simple piece of toast. \u003ccite>(Lila Volkas)\u003c/cite>\u003c/figcaption>\u003c/figure>\n\u003cp>We let the liquid gold cool for 5 minutes and poured it into a clean glass jar for its final cooling and storage. You can also pour the liquid through a fine metal strainer to filter out the milk solids if you want your ghee to be “pure.” Many cooks also use a cheesecloth to strain ghee, but Jacinto told me that she avoids it because too much ghee will be absorbed into the material. \"This food is sacred, so it is important to me not to waste any of it,\" she said. \u003c/p>\n\u003cp>\u003c/p>\n\u003cp>I asked Jacinto about ghee's current popularity, evidenced by the ubiquitous presence of expensive jars sold in many health food stores. She told me that fat is making a general comeback after years of being deemed \"bad.\" And over the last decade, yoga's popularity ushered in more curiosity about Ayurveda, where \u003ca href=\"http://ww2.kqed.org/bayareabites/2015/06/09/ayurveda-a-journey-towards-balance-using-food-as-medicine/\" target=\"_blank\">ghee holds a vital role\u003c/a>. Jacinto hopes this increasing enthusiasm for yoga culture encourages people to make ghee at home so they can also enjoy the culinary and spiritual benefits of this magical fat.\u003c/p>\n\n","blocks":[],"excerpt":"Ghee, or Indian clarified butter, has been used for centuries for medicinal and ceremonial purposes -- and it's prized in the kitchen for its high smoking point, nutty flavor and easy digestibility.","status":"publish","parent":0,"modified":1448603980,"stats":{"hasAudio":false,"hasVideo":false,"hasChartOrMap":false,"iframeSrcs":[],"hasGoogleForm":false,"hasGallery":false,"hasHearkenModule":false,"hasPolis":false,"paragraphCount":17,"wordCount":986},"headData":{"title":"DIY: Make Your Own Jar of Ghee, aka \"Liquid Gold\" | KQED","description":"Ghee, or Indian clarified butter, has been used for centuries for medicinal and ceremonial purposes -- and it's prized in the kitchen for its high smoking point, nutty flavor and easy digestibility.","ogTitle":"","ogDescription":"","ogImgId":"","twTitle":"","twDescription":"","twImgId":"","schema":{"@context":"http://schema.org","@type":"Article","headline":"DIY: Make Your Own Jar of Ghee, aka \"Liquid Gold\"","datePublished":"2015-11-18T15:00:20.000Z","dateModified":"2015-11-27T05:59:40.000Z","image":"https://cdn.kqed.org/wp-content/uploads/2020/02/KQED-OG-Image@1x.png"}},"disqusIdentifier":"103395 http://ww2.kqed.org/bayareabites/?p=103395","disqusUrl":"https://ww2.kqed.org/bayareabites/2015/11/18/diy-make-your-own-jar-of-ghee-or-liquid-gold/","disqusTitle":"DIY: Make Your Own Jar of Ghee, aka \"Liquid Gold\"","path":"/bayareabites/103395/diy-make-your-own-jar-of-ghee-or-liquid-gold","audioTrackLength":null,"parsedContent":[{"type":"contentString","content":"\u003cdiv class=\"post-body\">\u003cp>\u003cp>Ghee, or Indian clarified unsalted butter, is delicious and easy to make at home. Regular butter is transformed through a sacred cooking process that evaporates the water and separates the milk solids. Known as “liquid gold” in India, this pure fat has been used for centuries for medicinal and ceremonial purposes. And it's prized in the kitchen for its high smoking point, nutty flavor and digestibility.\u003c/p>\n\u003cfigure id=\"attachment_103398\" class=\"wp-caption alignright\" style=\"max-width: 400px\">\u003cimg src=\"http://ww2.kqed.org/bayareabites/wp-content/uploads/sites/24/2015/11/pic-6-400x426.jpg\" alt=\"A jar of liquid gold.\" width=\"400\" height=\"426\" class=\"size-thumbnail wp-image-103398\" srcset=\"https://ww2.kqed.org/app/uploads/sites/24/2015/11/pic-6-400x426.jpg 400w, https://ww2.kqed.org/app/uploads/sites/24/2015/11/pic-6-800x851.jpg 800w, https://ww2.kqed.org/app/uploads/sites/24/2015/11/pic-6-1440x1532.jpg 1440w, https://ww2.kqed.org/app/uploads/sites/24/2015/11/pic-6-1180x1256.jpg 1180w, https://ww2.kqed.org/app/uploads/sites/24/2015/11/pic-6-960x1022.jpg 960w\" sizes=\"(max-width: 400px) 100vw, 400px\">\u003cfigcaption class=\"wp-caption-text\">A finished jar ghee, or \"liquid gold.\" \u003ccite>(Lila Volkas)\u003c/cite>\u003c/figcaption>\u003c/figure>\n\u003cp>I recently spent the afternoon in the kitchen of \u003ca href=\"http://www.thespicewhisperer.com\" target=\"_blank\">Vinita Jacinto\u003c/a>, a chef and former instructor at the \u003ca href=\"http://www.chefs.edu/san-francisco/about-california-culinary-academy\" target=\"_blank\">California Culinary Academy\u003c/a>, to learn more about ghee. I first heard raves about ghee from my fellow yoga teacher friends. But when I saw the steep price tag of a jar at Whole Foods, my \u003ca href=\"http://ww2.kqed.org/bayareabites/2015/08/13/an-illustrated-guide-benefits-to-soaking-and-sprouting-legumes-grains-and-seeds/\" target=\"_blank\">DIY instincts\u003c/a> kicked in and I vowed to learn how to make it.\u003c/p>\n\u003cp>\u003cstrong>Ancestral roots\u003c/strong>\u003c/p>\n\u003cp>When I arrived at Jacinto’s home in El Cerrito, she welcomed me with a big hug and handed me a mug of her homemade chai tea. As we sipped our drinks, Jacinto recounted her childhood memories in Calcutta, India. \u003c/p>\n\u003cp>“Growing up, we saw the whole dairy cycle. Twice a day, the milkman came to our house and brought fresh milk. If I hugged the jar, it was still warm because he milked it 20 minutes before coming to my door. Right after the milk arrived, it was boiled; the cream that rose to the top was collected. That cream is churned to make fresh butter and that butter is then made into ghee. Every day we had fresh butter on the table and every week fresh ghee.”\u003c/p>\n\u003cfigure id=\"attachment_103399\" class=\"wp-caption alignright\" style=\"max-width: 400px\">\u003cimg src=\"http://ww2.kqed.org/bayareabites/wp-content/uploads/sites/24/2015/11/vinita-pic-400x400.jpg\" alt=\"Each time Jacinto dances through the sacred tradition of making ghee, she is reminded of her home far away and feels golden threads connecting to her family and roots.\" width=\"400\" height=\"400\" class=\"size-thumbnail wp-image-103399\" srcset=\"https://ww2.kqed.org/app/uploads/sites/24/2015/11/vinita-pic-400x400.jpg 400w, https://ww2.kqed.org/app/uploads/sites/24/2015/11/vinita-pic-32x32.jpg 32w, https://ww2.kqed.org/app/uploads/sites/24/2015/11/vinita-pic-64x64.jpg 64w, https://ww2.kqed.org/app/uploads/sites/24/2015/11/vinita-pic-96x96.jpg 96w, https://ww2.kqed.org/app/uploads/sites/24/2015/11/vinita-pic-128x128.jpg 128w, https://ww2.kqed.org/app/uploads/sites/24/2015/11/vinita-pic-150x150.jpg 150w, https://ww2.kqed.org/app/uploads/sites/24/2015/11/vinita-pic-75x75.jpg 75w, https://ww2.kqed.org/app/uploads/sites/24/2015/11/vinita-pic.jpg 720w\" sizes=\"(max-width: 400px) 100vw, 400px\">\u003cfigcaption class=\"wp-caption-text\">When Jacinto dances through the sacred tradition of making ghee, she's reminded of her native country and feels golden threads connecting to her family and roots. \u003ccite>(Lila Volkas)\u003c/cite>\u003c/figcaption>\u003c/figure>\n\u003cp>Jacinto explained that in India, cows are sacred beings, thus dairy foods are also treated with the utmost respect. In her household, there were designated pots that were used to only boil milk and make ghee. The usual multitasking in the kitchen was paused during the ghee making process. And to further honor the sacredness of the fat, the elder women of the family would traditionally chant \u003cem>\u003ca href=\"https://en.wikipedia.org/wiki/Mantra\" target=\"_blank\">mantras\u003c/a>\u003c/em> while cooking to infuse the liquid gold with blessings.\u003c/p>\n\u003cp>\u003c/p>\u003c/div>","attributes":{"named":{},"numeric":[]}},{"type":"component","content":"","name":"ad","attributes":{"named":{"label":"fullwidth"},"numeric":["fullwidth"]}},{"type":"contentString","content":"\u003cdiv class=\"post-body\">\u003cp>\u003c/p>\n\u003cp>Ghee is not only used in the kitchen. Jacinto added that it served as fuel \"during festivals [in India] when you want to light the lamps.\" The golden fat has a very long shelf life, and she described the 30-year-old jar of ghee in her childhood home reserved solely for medicinal purposes. There's also the tradition of mothers handing down a jar to their daughters after marriage so that they'll be prepared to be a caretaker of their families.\u003c/p>\n\u003cp>\u003cstrong>The ritual in the kitchen\u003c/strong>\u003c/p>\n\u003cp>I followed Jacinto into the kitchen and she handed me a finished jar of ghee. I opened the lid and breathed in the scent of sweet caramel; no wonder it’s called liquid gold. We unwrapped two sticks of unsalted organic butter and placed them in a saucepan. \u003c/p>\n\u003cp>\"Traditionally, you begin the cooking process on low heat because you don’t want the butter to catch on the bottom on the pan,\" said Jacinto. \u003c/p>\n\u003cfigure id=\"attachment_103404\" class=\"wp-caption aligncenter\" style=\"max-width: 640px\">\u003cimg src=\"http://ww2.kqed.org/bayareabites/wp-content/uploads/sites/24/2015/11/step1ghee-1440x1080.jpg\" alt=\"Jacinto honors the ghee by allowing the process to be a meditative ritual. There are no other dishes cooking or activities going on at the same time, her full attention is on the butter.\" width=\"640\" height=\"480\" class=\"size-large wp-image-103404\" srcset=\"https://ww2.kqed.org/app/uploads/sites/24/2015/11/step1ghee-1440x1080.jpg 1440w, https://ww2.kqed.org/app/uploads/sites/24/2015/11/step1ghee-400x300.jpg 400w, https://ww2.kqed.org/app/uploads/sites/24/2015/11/step1ghee-800x600.jpg 800w, https://ww2.kqed.org/app/uploads/sites/24/2015/11/step1ghee-1180x885.jpg 1180w, https://ww2.kqed.org/app/uploads/sites/24/2015/11/step1ghee-960x720.jpg 960w\" sizes=\"(max-width: 640px) 100vw, 640px\">\u003cfigcaption class=\"wp-caption-text\">Jacinto honors the ghee by allowing the process to be a meditative ritual. No other dishes are cooking and other activities are paused; her full attention is on the butter. \u003ccite>(Lila Volkas)\u003c/cite>\u003c/figcaption>\u003c/figure>\n\u003cp>As we flowed into a meditative state while cooking, I heard a popping noise coming from the saucepan that sounded like popcorn. Jacinto told me that this is the sound of the water content of the butter evaporating away. She pointed out how the white foam looked like clumpy clouds and told me to keep watching the buttery sky.\u003c/p>\n\u003cp>After the sticks of butter were fully melted, Jacinto raised the heat to medium to speed up the evaporation process. She tilted the saucepan to get a glimpse of the bottom of the pan to make sure the butter wasn’t burning.\u003c/p>\n\u003cfigure id=\"attachment_103409\" class=\"wp-caption aligncenter\" style=\"max-width: 640px\">\u003cimg src=\"http://ww2.kqed.org/bayareabites/wp-content/uploads/sites/24/2015/11/pic-4-1440x1080.jpg\" alt=\"Jacinto tilts the pot to show me the caramelized milk solids that look like black speckles stuck to the bottom.\" width=\"640\" height=\"480\" class=\"size-large wp-image-103409\" srcset=\"https://ww2.kqed.org/app/uploads/sites/24/2015/11/pic-4-1440x1080.jpg 1440w, https://ww2.kqed.org/app/uploads/sites/24/2015/11/pic-4-400x300.jpg 400w, https://ww2.kqed.org/app/uploads/sites/24/2015/11/pic-4-800x600.jpg 800w, https://ww2.kqed.org/app/uploads/sites/24/2015/11/pic-4-1180x885.jpg 1180w, https://ww2.kqed.org/app/uploads/sites/24/2015/11/pic-4-960x720.jpg 960w\" sizes=\"(max-width: 640px) 100vw, 640px\">\u003cfigcaption class=\"wp-caption-text\">Jacinto tilted the pot to show me the caramelized milk solids that had collected at the bottom. \u003ccite>(Lila Volkas)\u003c/cite>\u003c/figcaption>\u003c/figure>\n\u003cp>The butter cooked for 10-15 minutes, and I noticed the sound coming from the pot had changed to a gurgle. The buttery sky had also changed to a single, uniform cloud of foam -- signs that the ghee was done. Jacinto told me that each family has their own color preference for ghee. The darker it is, the nuttier the flavor. We aimed for a medium golden brown.\u003c/p>\n\u003cfigure id=\"attachment_103410\" class=\"wp-caption alignright\" style=\"max-width: 400px\">\u003cimg src=\"http://ww2.kqed.org/bayareabites/wp-content/uploads/sites/24/2015/11/pic5-400x533.jpg\" alt=\"Jacinto plans to use the pot with ghee residue to make lentils for dinner. Its nutty flavor enhances stir-fried vegetables, scrambled eggs or even a simple piece of toast.\" width=\"400\" height=\"533\" class=\"size-thumbnail wp-image-103410\" srcset=\"https://ww2.kqed.org/app/uploads/sites/24/2015/11/pic5-400x533.jpg 400w, https://ww2.kqed.org/app/uploads/sites/24/2015/11/pic5-800x1067.jpg 800w, https://ww2.kqed.org/app/uploads/sites/24/2015/11/pic5-1440x1920.jpg 1440w, https://ww2.kqed.org/app/uploads/sites/24/2015/11/pic5-1180x1573.jpg 1180w, https://ww2.kqed.org/app/uploads/sites/24/2015/11/pic5-960x1280.jpg 960w\" sizes=\"(max-width: 400px) 100vw, 400px\">\u003cfigcaption class=\"wp-caption-text\">Jacinto planned to use this pot and its ghee residue to make lentils for dinner. Its nutty flavor enhances stir-fried vegetables, scrambled eggs or even a simple piece of toast. \u003ccite>(Lila Volkas)\u003c/cite>\u003c/figcaption>\u003c/figure>\n\u003cp>We let the liquid gold cool for 5 minutes and poured it into a clean glass jar for its final cooling and storage. You can also pour the liquid through a fine metal strainer to filter out the milk solids if you want your ghee to be “pure.” Many cooks also use a cheesecloth to strain ghee, but Jacinto told me that she avoids it because too much ghee will be absorbed into the material. \"This food is sacred, so it is important to me not to waste any of it,\" she said. \u003c/p>\n\u003cp>\u003c/p>\n\u003cp>I asked Jacinto about ghee's current popularity, evidenced by the ubiquitous presence of expensive jars sold in many health food stores. She told me that fat is making a general comeback after years of being deemed \"bad.\" And over the last decade, yoga's popularity ushered in more curiosity about Ayurveda, where \u003ca href=\"http://ww2.kqed.org/bayareabites/2015/06/09/ayurveda-a-journey-towards-balance-using-food-as-medicine/\" target=\"_blank\">ghee holds a vital role\u003c/a>. Jacinto hopes this increasing enthusiasm for yoga culture encourages people to make ghee at home so they can also enjoy the culinary and spiritual benefits of this magical fat.\u003c/p>\n\n\u003c/div>\u003c/p>","attributes":{"named":{},"numeric":[]}}],"link":"/bayareabites/103395/diy-make-your-own-jar-of-ghee-or-liquid-gold","authors":["5404"],"categories":["bayareabites_12493","bayareabites_1245","bayareabites_12869","bayareabites_12"],"tags":["bayareabites_1288","bayareabites_15082","bayareabites_15081","bayareabites_8435","bayareabites_15083"],"featImg":"bayareabites_103408","label":"bayareabites"},"bayareabites_94059":{"type":"posts","id":"bayareabites_94059","meta":{"index":"posts_1591205157","site":"bayareabites","id":"94059","score":null,"sort":[1426622429000]},"guestAuthors":[],"slug":"to-eat-authentically-irish-this-st-patricks-day-go-for-the-butter","title":"To Eat Authentically Irish This St. Patrick's Day, Go For The Butter","publishDate":1426622429,"format":"aside","headTitle":"Bay Area Bites | KQED Food","labelTerm":{"site":"bayareabites"},"content":"\u003cfigure id=\"attachment_94060\" class=\"wp-caption aligncenter\" style=\"max-width: 1197px\">\u003ca href=\"http://ww2.kqed.org/bayareabites/wp-content/uploads/sites/24/2015/03/walllowres-1e39a90bfdb3e3fa2214fde62b88be441d4b1d74.jpg\">\u003cimg class=\"size-full wp-image-94060\" src=\"http://ww2.kqed.org/bayareabites/wp-content/uploads/sites/24/2015/03/walllowres-1e39a90bfdb3e3fa2214fde62b88be441d4b1d74.jpg\" alt=\"Butter labels from Irish creameries operating in the 1970s. Photo: Roland Paschhoff/Cork Butter Museum\" width=\"1197\" height=\"897\" srcset=\"https://ww2.kqed.org/app/uploads/sites/24/2015/03/walllowres-1e39a90bfdb3e3fa2214fde62b88be441d4b1d74.jpg 1197w, https://ww2.kqed.org/app/uploads/sites/24/2015/03/walllowres-1e39a90bfdb3e3fa2214fde62b88be441d4b1d74-800x599.jpg 800w, https://ww2.kqed.org/app/uploads/sites/24/2015/03/walllowres-1e39a90bfdb3e3fa2214fde62b88be441d4b1d74-1180x884.jpg 1180w, https://ww2.kqed.org/app/uploads/sites/24/2015/03/walllowres-1e39a90bfdb3e3fa2214fde62b88be441d4b1d74-768x576.jpg 768w, https://ww2.kqed.org/app/uploads/sites/24/2015/03/walllowres-1e39a90bfdb3e3fa2214fde62b88be441d4b1d74-320x240.jpg 320w\" sizes=\"(max-width: 1197px) 100vw, 1197px\">\u003c/a>\u003cfigcaption class=\"wp-caption-text\">Butter labels from Irish creameries operating in the 1970s. Photo: Roland Paschhoff/Cork Butter Museum\u003c/figcaption>\u003c/figure>\n\u003cp>By Deena Prichep, \u003ca href=\"http://www.npr.org/blogs/thesalt/2015/03/17/393565373/to-eat-authentically-irish-this-st-patrick-s-day-go-for-the-butter\" target=\"_blank\" rel=\"noopener\">The Salt at NPR Food\u003c/a> (3/17/15)\u003c/p>\n\u003cp>As scholarly buzzkills have long told us, \u003ca href=\"http://www.smithsonianmag.com/arts-culture/is-corned-beef-really-irish-2839144/?no-ist\">corned beef isn't really Irish\u003c/a>. So what to do if you want a taste of the Emerald Isle on St. Patrick's Day? Instead of green, maybe look for yellow — a pat of Irish butter. Although most Americans are familiar with images of Ireland's rolling green hills, few realize that those hills are the secret to a deliciously buttery empire.\u003c/p>\n\u003cp>\"It goes back to the Emerald Isle,\" explains \u003ca href=\"https://twitter.com/ifj_pat\">Pat O'Keeffe\u003c/a>, deputy editor of \u003ca href=\"http://www.farmersjournal.ie/\">Irish Farmers Journal\u003c/a>. \"The green land is our competitive advantage. Those rolling green hills are great for growing grass. You need frequent and regular rainfall, and we've got plenty of that.\"\u003c/p>\n\u003cp>The actual Irish cows themselves aren't that different from their American counterparts — in both countries, over 90 percent of milkers are Holstein-Friesians, those iconic black-and-whites. What it comes down to is what the cows are eating.\u003c/p>\n\u003cp>Irish cows graze on those temperate hills from March to October, and are only milked during those months. (A small number — O'Keeffe estimates 10 percent — are milked year-round for drinking, or fluid, milk, but butter's the real business.) Grass-fed milk produces a rich butter, yellow with natural beta carotene. The polyunsaturated fats in fresh grass also make for pats that are softer than those from hay or grain — all the better for spreading across your scone. Like most European dairy, Irish cream also has a higher butterfat content, creating soft butter with a richer mouthfeel. And the end result?\u003c/p>\n\u003cfigure id=\"attachment_94061\" class=\"wp-caption aligncenter\" style=\"max-width: 1920px\">\u003ca href=\"http://ww2.kqed.org/bayareabites/wp-content/uploads/sites/24/2015/03/96849468_edit_custom-ee85200a375e93a387fdf1379927d79bba5071c4-e1426622183884.jpg\">\u003cimg class=\"size-full wp-image-94061\" src=\"http://ww2.kqed.org/bayareabites/wp-content/uploads/sites/24/2015/03/96849468_edit_custom-ee85200a375e93a387fdf1379927d79bba5071c4-e1426622183884.jpg\" alt=\"Holstein-Friesian dairy cows make their way towards pasture in County Cavan, Ireland. Irish cows graze on the country's rolling green hills from March to October, and most are only milked during those months. Photo: Tom Stoddart/Getty Images\" width=\"1920\" height=\"1279\" srcset=\"https://ww2.kqed.org/app/uploads/sites/24/2015/03/96849468_edit_custom-ee85200a375e93a387fdf1379927d79bba5071c4-e1426622183884.jpg 1920w, https://ww2.kqed.org/app/uploads/sites/24/2015/03/96849468_edit_custom-ee85200a375e93a387fdf1379927d79bba5071c4-e1426622183884-400x266.jpg 400w, https://ww2.kqed.org/app/uploads/sites/24/2015/03/96849468_edit_custom-ee85200a375e93a387fdf1379927d79bba5071c4-e1426622183884-800x533.jpg 800w, https://ww2.kqed.org/app/uploads/sites/24/2015/03/96849468_edit_custom-ee85200a375e93a387fdf1379927d79bba5071c4-e1426622183884-1440x959.jpg 1440w, https://ww2.kqed.org/app/uploads/sites/24/2015/03/96849468_edit_custom-ee85200a375e93a387fdf1379927d79bba5071c4-e1426622183884-1180x786.jpg 1180w, https://ww2.kqed.org/app/uploads/sites/24/2015/03/96849468_edit_custom-ee85200a375e93a387fdf1379927d79bba5071c4-e1426622183884-768x512.jpg 768w, https://ww2.kqed.org/app/uploads/sites/24/2015/03/96849468_edit_custom-ee85200a375e93a387fdf1379927d79bba5071c4-e1426622183884-320x213.jpg 320w\" sizes=\"(max-width: 1920px) 100vw, 1920px\">\u003c/a>\u003cfigcaption class=\"wp-caption-text\">Holstein-Friesian dairy cows make their way towards pasture in County Cavan, Ireland. Irish cows graze on the country's rolling green hills from March to October, and most are only milked during those months. Photo: Tom Stoddart/Getty Images\u003c/figcaption>\u003c/figure>\n\u003cp>\"I have to be careful for an American audience,\" Pat O'Keeffe hedges for a diplomatic moment, \"but we'd say it's [like the difference between] chalk and cheese.\"\u003c/p>\n\u003cp>[ad fullwidth]\u003c/p>\n\u003cp>And those feelings of nostalgia (and unabashed superiority) about Irish butter can run deep, even after leaving Ireland. When Dublin-born Lisa Jacobs' family emigrated to the United States, her parents continued to seek out Irish butter. And when she dropped out of law school to start making cheese in the similarly green-and-rainy Pacific Northwest, her father not-so-gently suggested that \u003ca href=\"http://www.jacobscreamery.com/\">Jacobs Creamery\u003c/a> make him some good, Irish-style butter. Jacobs even smuggled some grass and wildflower seed to cultivate the cows' fields, seeing if she could capture some of that Irish \u003cem>terroir\u003c/em> in her hand-churned product.\u003c/p>\n\u003cp>But far before this modern evangelism, Irish butter had its fans. Ancient stashes of butter dating back \u003ca href=\"http://www.bbc.com/news/uk-northern-ireland-27143838\">1,000 years\u003c/a> — and up to \u003ca href=\"http://www.nbcnews.com/id/32630695/ns/technology_and_science-science/t/-year-old-butter-discovered-ireland/\">3,000 years\u003c/a> — are routinely dug out of the Irish peat bogs. Scholars speculate that the butter was either a high-value offering, buried ritualistically, or else a foodstuff stored in the bog as a primitive refrigeration technique. (Either way, the phenomenon is given the irresistible term \"bog butter.\") Although this millennia-old butter isn't quite ready for toast, butter \u003cem>is\u003c/em> a long-lived product. Which means it can be shipped — and it was.\u003c/p>\n\u003cfigure id=\"attachment_94062\" class=\"wp-caption aligncenter\" style=\"max-width: 1920px\">\u003ca href=\"http://ww2.kqed.org/bayareabites/wp-content/uploads/sites/24/2015/03/ci-12_custom-bb5b80835c39673fa46e6cd7b5017d50c64bfa22-e1426622272507.jpg\">\u003cimg class=\"size-full wp-image-94062\" src=\"http://ww2.kqed.org/bayareabites/wp-content/uploads/sites/24/2015/03/ci-12_custom-bb5b80835c39673fa46e6cd7b5017d50c64bfa22-e1426622272507.jpg\" alt=\"Butter samples from the first quarter of the 20th Century in Ireland. Photo: Cork Butter Museum\" width=\"1920\" height=\"1152\" srcset=\"https://ww2.kqed.org/app/uploads/sites/24/2015/03/ci-12_custom-bb5b80835c39673fa46e6cd7b5017d50c64bfa22-e1426622272507.jpg 1920w, https://ww2.kqed.org/app/uploads/sites/24/2015/03/ci-12_custom-bb5b80835c39673fa46e6cd7b5017d50c64bfa22-e1426622272507-400x240.jpg 400w, https://ww2.kqed.org/app/uploads/sites/24/2015/03/ci-12_custom-bb5b80835c39673fa46e6cd7b5017d50c64bfa22-e1426622272507-800x480.jpg 800w, https://ww2.kqed.org/app/uploads/sites/24/2015/03/ci-12_custom-bb5b80835c39673fa46e6cd7b5017d50c64bfa22-e1426622272507-1440x864.jpg 1440w, https://ww2.kqed.org/app/uploads/sites/24/2015/03/ci-12_custom-bb5b80835c39673fa46e6cd7b5017d50c64bfa22-e1426622272507-1180x708.jpg 1180w, https://ww2.kqed.org/app/uploads/sites/24/2015/03/ci-12_custom-bb5b80835c39673fa46e6cd7b5017d50c64bfa22-e1426622272507-768x461.jpg 768w, https://ww2.kqed.org/app/uploads/sites/24/2015/03/ci-12_custom-bb5b80835c39673fa46e6cd7b5017d50c64bfa22-e1426622272507-320x192.jpg 320w\" sizes=\"(max-width: 1920px) 100vw, 1920px\">\u003c/a>\u003cfigcaption class=\"wp-caption-text\">Butter samples from the first quarter of the 20th Century in Ireland. Photo: Cork Butter Museum\u003c/figcaption>\u003c/figure>\n\u003cp>\"Cork butter was the first global food brand,\" explains Peter Foynes, director of the \u003ca href=\"http://www.corkbutter.museum/\">Cork Butter Museum\u003c/a> (and yes, there is a butter museum).\u003c/p>\n\u003cp>The Cork Butter Exchange was established in the late 18th century, and in its day it was the largest butter market in the world. Irish butter was tied to British expansion, as buckets made their way onto ships loaded for the sugar routes, or crossed the Atlantic to feed troops fighting to quell the American Revolution. Hundreds of thousands of casks left Ireland every year, heading everywhere from Australia to Brazil, France to the West Indies. Miles of \"butter roads\" helped even remote rural farmers bring their butter into the global marketplace.\u003c/p>\n\u003cp>But after this peak — Foynes puts it in the 1870s — Irish butter production began to trail off, due to a number of factors. Colonies had steadily been establishing their own agriculture, rendering Irish exports less important. But the biggest blow came in 1879, with the mechanical separator.\u003c/p>\n\u003cfigure id=\"attachment_94063\" class=\"wp-caption aligncenter\" style=\"max-width: 700px\">\u003ca href=\"http://ww2.kqed.org/bayareabites/wp-content/uploads/sites/24/2015/03/ci-30_custom-9efe421ba02886463e333f782c7e1d1ed2152e23-e1426622323144.jpg\">\u003cimg class=\"size-full wp-image-94063\" src=\"http://ww2.kqed.org/bayareabites/wp-content/uploads/sites/24/2015/03/ci-30_custom-9efe421ba02886463e333f782c7e1d1ed2152e23-e1426622323144.jpg\" alt=\"Butter is inspected inside a creamery in Dublin, Ireland, during the first quarter of the 20th century. Photo: Cork Butter Museum\" width=\"700\" srcset=\"https://ww2.kqed.org/app/uploads/sites/24/2015/03/ci-30_custom-9efe421ba02886463e333f782c7e1d1ed2152e23-e1426622323144.jpg 1920w, https://ww2.kqed.org/app/uploads/sites/24/2015/03/ci-30_custom-9efe421ba02886463e333f782c7e1d1ed2152e23-e1426622323144-400x468.jpg 400w, https://ww2.kqed.org/app/uploads/sites/24/2015/03/ci-30_custom-9efe421ba02886463e333f782c7e1d1ed2152e23-e1426622323144-800x935.jpg 800w, https://ww2.kqed.org/app/uploads/sites/24/2015/03/ci-30_custom-9efe421ba02886463e333f782c7e1d1ed2152e23-e1426622323144-1440x1684.jpg 1440w, https://ww2.kqed.org/app/uploads/sites/24/2015/03/ci-30_custom-9efe421ba02886463e333f782c7e1d1ed2152e23-e1426622323144-1180x1380.jpg 1180w, https://ww2.kqed.org/app/uploads/sites/24/2015/03/ci-30_custom-9efe421ba02886463e333f782c7e1d1ed2152e23-e1426622323144-768x898.jpg 768w, https://ww2.kqed.org/app/uploads/sites/24/2015/03/ci-30_custom-9efe421ba02886463e333f782c7e1d1ed2152e23-e1426622323144-320x374.jpg 320w\" sizes=\"(max-width: 1920px) 100vw, 1920px\">\u003c/a>\u003cfigcaption class=\"wp-caption-text\">Butter is inspected inside a creamery in Dublin, Ireland, during the first quarter of the 20th century. Photo: Cork Butter Museum\u003c/figcaption>\u003c/figure>\n\u003cp>Even as farmers mechanized the butter-churning process, they had long been hampered by separating — patiently waiting for the to-be-churned cream to rise to the top (a process that takes 24 to 36 hours, depending upon the temperature). With the centrifuge-like mechanical separator, that wait time is eliminated. Unfortunately, Irish farmers were late adopters; by the time they mechanized, the industry was 20 years behind. By the early 20th century, the Cork Butter Market had closed.\u003c/p>\n\u003cp>But luckily for lovers of good Irish butter, its grass-fed richness has made a comeback. Farms banded together to form the \u003ca href=\"http://kerrygoldusa.com/heritage/irish-dairy-board/\">Irish Dairy Board\u003c/a> in 1961, which developed the popular Kerrygold Irish butter. (The company says it's now the No. 4 butter in the U.S.) And the country's EU membership in the following decades brought with it milk subsidies, laying the bedrock for increased dairy production (and even overproduction, leading to established quotas). Later fears of saturated fats hit the Irish butter industry, as they did all dairy, but \u003ca href=\"http://www.npr.org/blogs/thesalt/2014/02/12/275376259/the-full-fat-paradox-whole-milk-may-keep-us-lean\">recent data\u003c/a> seems to be moving consumers beyond those margarine moments, and back to the full, sunny swipe of butter.\u003c/p>\n\u003cp>\"Some of the science — or alleged science — has changed,\" notes O'Keeffe. But like a good Irishman, he was never swayed. \"It was always a good product. Butter today is still as good as it was.\"\u003c/p>\n\u003cp>And with the 30-year-old EU dairy quotas set to expire on April 1, this product could be on the brink of a new buttery era.\u003c/p>\n\u003cp>\u003c/p>\n\u003cp>\u003cem>Copyright 2015 \u003ca href=\"http://www.npr.org/\" target=\"_blank\" rel=\"noopener\">NPR\u003c/a>.\u003c/em>\u003c/p>\n\n","blocks":[],"excerpt":"From 3,000-year-old peat bogs to 19th-century Brazil to modern foodies, the love of Irish butter has spread far. The secret to Ireland's deliciously rich, creamy butter is in its rolling green hills.","status":"publish","parent":0,"modified":1554250586,"stats":{"hasAudio":false,"hasVideo":false,"hasChartOrMap":false,"iframeSrcs":[],"hasGoogleForm":false,"hasGallery":false,"hasHearkenModule":false,"hasPolis":false,"paragraphCount":18,"wordCount":1026},"headData":{"title":"To Eat Authentically Irish This St. Patrick's Day, Go For The Butter | KQED","description":"From 3,000-year-old peat bogs to 19th-century Brazil to modern foodies, the love of Irish butter has spread far. The secret to Ireland's deliciously rich, creamy butter is in its rolling green hills.","ogTitle":"","ogDescription":"","ogImgId":"","twTitle":"","twDescription":"","twImgId":"","schema":{"@context":"http://schema.org","@type":"Article","headline":"To Eat Authentically Irish This St. Patrick's Day, Go For The Butter","datePublished":"2015-03-17T20:00:29.000Z","dateModified":"2019-04-03T00:16:26.000Z","image":"https://cdn.kqed.org/wp-content/uploads/2020/02/KQED-OG-Image@1x.png"}},"disqusIdentifier":"94059 http://blogs.kqed.org/bayareabites/?p=94059","disqusUrl":"https://ww2.kqed.org/bayareabites/2015/03/17/to-eat-authentically-irish-this-st-patricks-day-go-for-the-butter/","disqusTitle":"To Eat Authentically Irish This St. Patrick's Day, Go For The Butter","nprByline":"Deena Prichep","nprStoryId":"393565373","nprApiLink":"http://api.npr.org/query?id=393565373&apiKey=MDAxOTAwOTE4MDEyMTkxMDAzNjczZDljZA004","nprHtmlLink":"http://www.npr.org/blogs/thesalt/2015/03/17/393565373/to-eat-authentically-irish-this-st-patrick-s-day-go-for-the-butter?ft=nprml&f=393565373","nprRetrievedStory":"1","nprPubDate":"Tue, 17 Mar 2015 15:12:00 -0400","nprStoryDate":"Tue, 17 Mar 2015 13:47:00 -0400","nprLastModifiedDate":"Tue, 17 Mar 2015 15:12:58 -0400","path":"/bayareabites/94059/to-eat-authentically-irish-this-st-patricks-day-go-for-the-butter","audioTrackLength":null,"parsedContent":[{"type":"contentString","content":"\u003cdiv class=\"post-body\">\u003cp>\u003cfigure id=\"attachment_94060\" class=\"wp-caption aligncenter\" style=\"max-width: 1197px\">\u003ca href=\"http://ww2.kqed.org/bayareabites/wp-content/uploads/sites/24/2015/03/walllowres-1e39a90bfdb3e3fa2214fde62b88be441d4b1d74.jpg\">\u003cimg class=\"size-full wp-image-94060\" src=\"http://ww2.kqed.org/bayareabites/wp-content/uploads/sites/24/2015/03/walllowres-1e39a90bfdb3e3fa2214fde62b88be441d4b1d74.jpg\" alt=\"Butter labels from Irish creameries operating in the 1970s. Photo: Roland Paschhoff/Cork Butter Museum\" width=\"1197\" height=\"897\" srcset=\"https://ww2.kqed.org/app/uploads/sites/24/2015/03/walllowres-1e39a90bfdb3e3fa2214fde62b88be441d4b1d74.jpg 1197w, https://ww2.kqed.org/app/uploads/sites/24/2015/03/walllowres-1e39a90bfdb3e3fa2214fde62b88be441d4b1d74-800x599.jpg 800w, https://ww2.kqed.org/app/uploads/sites/24/2015/03/walllowres-1e39a90bfdb3e3fa2214fde62b88be441d4b1d74-1180x884.jpg 1180w, https://ww2.kqed.org/app/uploads/sites/24/2015/03/walllowres-1e39a90bfdb3e3fa2214fde62b88be441d4b1d74-768x576.jpg 768w, https://ww2.kqed.org/app/uploads/sites/24/2015/03/walllowres-1e39a90bfdb3e3fa2214fde62b88be441d4b1d74-320x240.jpg 320w\" sizes=\"(max-width: 1197px) 100vw, 1197px\">\u003c/a>\u003cfigcaption class=\"wp-caption-text\">Butter labels from Irish creameries operating in the 1970s. Photo: Roland Paschhoff/Cork Butter Museum\u003c/figcaption>\u003c/figure>\n\u003cp>By Deena Prichep, \u003ca href=\"http://www.npr.org/blogs/thesalt/2015/03/17/393565373/to-eat-authentically-irish-this-st-patrick-s-day-go-for-the-butter\" target=\"_blank\" rel=\"noopener\">The Salt at NPR Food\u003c/a> (3/17/15)\u003c/p>\n\u003cp>As scholarly buzzkills have long told us, \u003ca href=\"http://www.smithsonianmag.com/arts-culture/is-corned-beef-really-irish-2839144/?no-ist\">corned beef isn't really Irish\u003c/a>. So what to do if you want a taste of the Emerald Isle on St. Patrick's Day? Instead of green, maybe look for yellow — a pat of Irish butter. Although most Americans are familiar with images of Ireland's rolling green hills, few realize that those hills are the secret to a deliciously buttery empire.\u003c/p>\n\u003cp>\"It goes back to the Emerald Isle,\" explains \u003ca href=\"https://twitter.com/ifj_pat\">Pat O'Keeffe\u003c/a>, deputy editor of \u003ca href=\"http://www.farmersjournal.ie/\">Irish Farmers Journal\u003c/a>. \"The green land is our competitive advantage. Those rolling green hills are great for growing grass. You need frequent and regular rainfall, and we've got plenty of that.\"\u003c/p>\n\u003cp>The actual Irish cows themselves aren't that different from their American counterparts — in both countries, over 90 percent of milkers are Holstein-Friesians, those iconic black-and-whites. What it comes down to is what the cows are eating.\u003c/p>\n\u003cp>Irish cows graze on those temperate hills from March to October, and are only milked during those months. (A small number — O'Keeffe estimates 10 percent — are milked year-round for drinking, or fluid, milk, but butter's the real business.) Grass-fed milk produces a rich butter, yellow with natural beta carotene. The polyunsaturated fats in fresh grass also make for pats that are softer than those from hay or grain — all the better for spreading across your scone. Like most European dairy, Irish cream also has a higher butterfat content, creating soft butter with a richer mouthfeel. And the end result?\u003c/p>\n\u003cfigure id=\"attachment_94061\" class=\"wp-caption aligncenter\" style=\"max-width: 1920px\">\u003ca href=\"http://ww2.kqed.org/bayareabites/wp-content/uploads/sites/24/2015/03/96849468_edit_custom-ee85200a375e93a387fdf1379927d79bba5071c4-e1426622183884.jpg\">\u003cimg class=\"size-full wp-image-94061\" src=\"http://ww2.kqed.org/bayareabites/wp-content/uploads/sites/24/2015/03/96849468_edit_custom-ee85200a375e93a387fdf1379927d79bba5071c4-e1426622183884.jpg\" alt=\"Holstein-Friesian dairy cows make their way towards pasture in County Cavan, Ireland. Irish cows graze on the country's rolling green hills from March to October, and most are only milked during those months. Photo: Tom Stoddart/Getty Images\" width=\"1920\" height=\"1279\" srcset=\"https://ww2.kqed.org/app/uploads/sites/24/2015/03/96849468_edit_custom-ee85200a375e93a387fdf1379927d79bba5071c4-e1426622183884.jpg 1920w, https://ww2.kqed.org/app/uploads/sites/24/2015/03/96849468_edit_custom-ee85200a375e93a387fdf1379927d79bba5071c4-e1426622183884-400x266.jpg 400w, https://ww2.kqed.org/app/uploads/sites/24/2015/03/96849468_edit_custom-ee85200a375e93a387fdf1379927d79bba5071c4-e1426622183884-800x533.jpg 800w, https://ww2.kqed.org/app/uploads/sites/24/2015/03/96849468_edit_custom-ee85200a375e93a387fdf1379927d79bba5071c4-e1426622183884-1440x959.jpg 1440w, https://ww2.kqed.org/app/uploads/sites/24/2015/03/96849468_edit_custom-ee85200a375e93a387fdf1379927d79bba5071c4-e1426622183884-1180x786.jpg 1180w, https://ww2.kqed.org/app/uploads/sites/24/2015/03/96849468_edit_custom-ee85200a375e93a387fdf1379927d79bba5071c4-e1426622183884-768x512.jpg 768w, https://ww2.kqed.org/app/uploads/sites/24/2015/03/96849468_edit_custom-ee85200a375e93a387fdf1379927d79bba5071c4-e1426622183884-320x213.jpg 320w\" sizes=\"(max-width: 1920px) 100vw, 1920px\">\u003c/a>\u003cfigcaption class=\"wp-caption-text\">Holstein-Friesian dairy cows make their way towards pasture in County Cavan, Ireland. Irish cows graze on the country's rolling green hills from March to October, and most are only milked during those months. Photo: Tom Stoddart/Getty Images\u003c/figcaption>\u003c/figure>\n\u003cp>\"I have to be careful for an American audience,\" Pat O'Keeffe hedges for a diplomatic moment, \"but we'd say it's [like the difference between] chalk and cheese.\"\u003c/p>\n\u003cp>\u003c/p>\u003c/div>","attributes":{"named":{},"numeric":[]}},{"type":"component","content":"","name":"ad","attributes":{"named":{"label":"fullwidth"},"numeric":["fullwidth"]}},{"type":"contentString","content":"\u003cdiv class=\"post-body\">\u003cp>\u003c/p>\n\u003cp>And those feelings of nostalgia (and unabashed superiority) about Irish butter can run deep, even after leaving Ireland. When Dublin-born Lisa Jacobs' family emigrated to the United States, her parents continued to seek out Irish butter. And when she dropped out of law school to start making cheese in the similarly green-and-rainy Pacific Northwest, her father not-so-gently suggested that \u003ca href=\"http://www.jacobscreamery.com/\">Jacobs Creamery\u003c/a> make him some good, Irish-style butter. Jacobs even smuggled some grass and wildflower seed to cultivate the cows' fields, seeing if she could capture some of that Irish \u003cem>terroir\u003c/em> in her hand-churned product.\u003c/p>\n\u003cp>But far before this modern evangelism, Irish butter had its fans. Ancient stashes of butter dating back \u003ca href=\"http://www.bbc.com/news/uk-northern-ireland-27143838\">1,000 years\u003c/a> — and up to \u003ca href=\"http://www.nbcnews.com/id/32630695/ns/technology_and_science-science/t/-year-old-butter-discovered-ireland/\">3,000 years\u003c/a> — are routinely dug out of the Irish peat bogs. Scholars speculate that the butter was either a high-value offering, buried ritualistically, or else a foodstuff stored in the bog as a primitive refrigeration technique. (Either way, the phenomenon is given the irresistible term \"bog butter.\") Although this millennia-old butter isn't quite ready for toast, butter \u003cem>is\u003c/em> a long-lived product. Which means it can be shipped — and it was.\u003c/p>\n\u003cfigure id=\"attachment_94062\" class=\"wp-caption aligncenter\" style=\"max-width: 1920px\">\u003ca href=\"http://ww2.kqed.org/bayareabites/wp-content/uploads/sites/24/2015/03/ci-12_custom-bb5b80835c39673fa46e6cd7b5017d50c64bfa22-e1426622272507.jpg\">\u003cimg class=\"size-full wp-image-94062\" src=\"http://ww2.kqed.org/bayareabites/wp-content/uploads/sites/24/2015/03/ci-12_custom-bb5b80835c39673fa46e6cd7b5017d50c64bfa22-e1426622272507.jpg\" alt=\"Butter samples from the first quarter of the 20th Century in Ireland. Photo: Cork Butter Museum\" width=\"1920\" height=\"1152\" srcset=\"https://ww2.kqed.org/app/uploads/sites/24/2015/03/ci-12_custom-bb5b80835c39673fa46e6cd7b5017d50c64bfa22-e1426622272507.jpg 1920w, https://ww2.kqed.org/app/uploads/sites/24/2015/03/ci-12_custom-bb5b80835c39673fa46e6cd7b5017d50c64bfa22-e1426622272507-400x240.jpg 400w, https://ww2.kqed.org/app/uploads/sites/24/2015/03/ci-12_custom-bb5b80835c39673fa46e6cd7b5017d50c64bfa22-e1426622272507-800x480.jpg 800w, https://ww2.kqed.org/app/uploads/sites/24/2015/03/ci-12_custom-bb5b80835c39673fa46e6cd7b5017d50c64bfa22-e1426622272507-1440x864.jpg 1440w, https://ww2.kqed.org/app/uploads/sites/24/2015/03/ci-12_custom-bb5b80835c39673fa46e6cd7b5017d50c64bfa22-e1426622272507-1180x708.jpg 1180w, https://ww2.kqed.org/app/uploads/sites/24/2015/03/ci-12_custom-bb5b80835c39673fa46e6cd7b5017d50c64bfa22-e1426622272507-768x461.jpg 768w, https://ww2.kqed.org/app/uploads/sites/24/2015/03/ci-12_custom-bb5b80835c39673fa46e6cd7b5017d50c64bfa22-e1426622272507-320x192.jpg 320w\" sizes=\"(max-width: 1920px) 100vw, 1920px\">\u003c/a>\u003cfigcaption class=\"wp-caption-text\">Butter samples from the first quarter of the 20th Century in Ireland. Photo: Cork Butter Museum\u003c/figcaption>\u003c/figure>\n\u003cp>\"Cork butter was the first global food brand,\" explains Peter Foynes, director of the \u003ca href=\"http://www.corkbutter.museum/\">Cork Butter Museum\u003c/a> (and yes, there is a butter museum).\u003c/p>\n\u003cp>The Cork Butter Exchange was established in the late 18th century, and in its day it was the largest butter market in the world. Irish butter was tied to British expansion, as buckets made their way onto ships loaded for the sugar routes, or crossed the Atlantic to feed troops fighting to quell the American Revolution. Hundreds of thousands of casks left Ireland every year, heading everywhere from Australia to Brazil, France to the West Indies. Miles of \"butter roads\" helped even remote rural farmers bring their butter into the global marketplace.\u003c/p>\n\u003cp>But after this peak — Foynes puts it in the 1870s — Irish butter production began to trail off, due to a number of factors. Colonies had steadily been establishing their own agriculture, rendering Irish exports less important. But the biggest blow came in 1879, with the mechanical separator.\u003c/p>\n\u003cfigure id=\"attachment_94063\" class=\"wp-caption aligncenter\" style=\"max-width: 700px\">\u003ca href=\"http://ww2.kqed.org/bayareabites/wp-content/uploads/sites/24/2015/03/ci-30_custom-9efe421ba02886463e333f782c7e1d1ed2152e23-e1426622323144.jpg\">\u003cimg class=\"size-full wp-image-94063\" src=\"http://ww2.kqed.org/bayareabites/wp-content/uploads/sites/24/2015/03/ci-30_custom-9efe421ba02886463e333f782c7e1d1ed2152e23-e1426622323144.jpg\" alt=\"Butter is inspected inside a creamery in Dublin, Ireland, during the first quarter of the 20th century. Photo: Cork Butter Museum\" width=\"700\" srcset=\"https://ww2.kqed.org/app/uploads/sites/24/2015/03/ci-30_custom-9efe421ba02886463e333f782c7e1d1ed2152e23-e1426622323144.jpg 1920w, https://ww2.kqed.org/app/uploads/sites/24/2015/03/ci-30_custom-9efe421ba02886463e333f782c7e1d1ed2152e23-e1426622323144-400x468.jpg 400w, https://ww2.kqed.org/app/uploads/sites/24/2015/03/ci-30_custom-9efe421ba02886463e333f782c7e1d1ed2152e23-e1426622323144-800x935.jpg 800w, https://ww2.kqed.org/app/uploads/sites/24/2015/03/ci-30_custom-9efe421ba02886463e333f782c7e1d1ed2152e23-e1426622323144-1440x1684.jpg 1440w, https://ww2.kqed.org/app/uploads/sites/24/2015/03/ci-30_custom-9efe421ba02886463e333f782c7e1d1ed2152e23-e1426622323144-1180x1380.jpg 1180w, https://ww2.kqed.org/app/uploads/sites/24/2015/03/ci-30_custom-9efe421ba02886463e333f782c7e1d1ed2152e23-e1426622323144-768x898.jpg 768w, https://ww2.kqed.org/app/uploads/sites/24/2015/03/ci-30_custom-9efe421ba02886463e333f782c7e1d1ed2152e23-e1426622323144-320x374.jpg 320w\" sizes=\"(max-width: 1920px) 100vw, 1920px\">\u003c/a>\u003cfigcaption class=\"wp-caption-text\">Butter is inspected inside a creamery in Dublin, Ireland, during the first quarter of the 20th century. Photo: Cork Butter Museum\u003c/figcaption>\u003c/figure>\n\u003cp>Even as farmers mechanized the butter-churning process, they had long been hampered by separating — patiently waiting for the to-be-churned cream to rise to the top (a process that takes 24 to 36 hours, depending upon the temperature). With the centrifuge-like mechanical separator, that wait time is eliminated. Unfortunately, Irish farmers were late adopters; by the time they mechanized, the industry was 20 years behind. By the early 20th century, the Cork Butter Market had closed.\u003c/p>\n\u003cp>But luckily for lovers of good Irish butter, its grass-fed richness has made a comeback. Farms banded together to form the \u003ca href=\"http://kerrygoldusa.com/heritage/irish-dairy-board/\">Irish Dairy Board\u003c/a> in 1961, which developed the popular Kerrygold Irish butter. (The company says it's now the No. 4 butter in the U.S.) And the country's EU membership in the following decades brought with it milk subsidies, laying the bedrock for increased dairy production (and even overproduction, leading to established quotas). Later fears of saturated fats hit the Irish butter industry, as they did all dairy, but \u003ca href=\"http://www.npr.org/blogs/thesalt/2014/02/12/275376259/the-full-fat-paradox-whole-milk-may-keep-us-lean\">recent data\u003c/a> seems to be moving consumers beyond those margarine moments, and back to the full, sunny swipe of butter.\u003c/p>\n\u003cp>\"Some of the science — or alleged science — has changed,\" notes O'Keeffe. But like a good Irishman, he was never swayed. \"It was always a good product. Butter today is still as good as it was.\"\u003c/p>\n\u003cp>And with the 30-year-old EU dairy quotas set to expire on April 1, this product could be on the brink of a new buttery era.\u003c/p>\n\u003cp>\u003c/p>\n\u003cp>\u003cem>Copyright 2015 \u003ca href=\"http://www.npr.org/\" target=\"_blank\" rel=\"noopener\">NPR\u003c/a>.\u003c/em>\u003c/p>\n\n\u003c/div>\u003c/p>","attributes":{"named":{},"numeric":[]}}],"link":"/bayareabites/94059/to-eat-authentically-irish-this-st-patricks-day-go-for-the-butter","authors":["byline_bayareabites_94059"],"categories":["bayareabites_2090","bayareabites_1763","bayareabites_10916"],"tags":["bayareabites_1288","bayareabites_16272","bayareabites_123"],"featImg":"bayareabites_94060","label":"bayareabites"},"bayareabites_90334":{"type":"posts","id":"bayareabites_90334","meta":{"index":"posts_1591205157","site":"bayareabites","id":"90334","score":null,"sort":[1416879654000]},"guestAuthors":[],"slug":"homemade-cultured-compound-butter-is-a-festive-addition-to-the-thanksgiving-table","title":"Homemade Cultured Compound Butter is a Festive Addition to the Thanksgiving Table","publishDate":1416879654,"format":"aside","headTitle":"Thanksgiving Recipes | Bay Area Bites | KQED Food","labelTerm":{"term":15012,"site":"bayareabites"},"content":"\u003cfigure id=\"attachment_90348\" class=\"wp-caption aligncenter\" style=\"max-width: 1000px\">\u003ca href=\"http://ww2.kqed.org/bayareabites/wp-content/uploads/sites/24/2014/11/butter-medley.jpg\">\u003cimg class=\"size-full wp-image-90348\" src=\"http://ww2.kqed.org/bayareabites/wp-content/uploads/sites/24/2014/11/butter-medley.jpg\" alt=\"Three variations of compound butter that will make great additions to the Thanksgiving table. Photos: Kate Williams\" width=\"1000\" height=\"224\">\u003c/a>\u003cfigcaption class=\"wp-caption-text\">Three variations of compound butter that will make great additions to the Thanksgiving table. Photos: Kate Williams\u003c/figcaption>\u003c/figure>\n\u003cp>Homemade butter is shockingly easy to make, but the uncultured spread is only as good as the cream you're using. By culturing the cream before churning, you can add enormous depth of flavor to even the least fancy bottles of cream. It adds only a couple of extra days to the planning time and absolutely no extra work.\u003c/p>\n\u003cp>[contextly_sidebar id=\"4JXRTBxVUiWid9z3qMF8uwsT7wyGmDmx\"]\u003c/p>\n\u003cp>What is a little extra work is to take your butter up another notch by adding in chopped herbs and spices — even homemade pumpkin pie spice — for a festive addition to the Thanksgiving table. But this final step takes only a few minutes, and it is easy to add just about anything you’d like to the freshly churned butter.\u003c/p>\n\u003cp>Now I know I just said that you can use un-fancy cream to make homemade butter, but I still like to start with a good, robust cream. The only caveat to keep in mind when choosing the cream is that you want to pick a product that has been “pasteurized,” not “ultra-pasteurized.” Pasteurized dairy has only been heated up to 161 degrees, whereas ultra-pasteurized dairy gets blasted with 280 degrees of heat. Those extra degrees can make a huge difference when trying to culture the cream, so it’s worth it to look for the pasteurized label.\u003c/p>\n\u003cfigure id=\"attachment_90337\" class=\"wp-caption aligncenter\" style=\"max-width: 500px\">\u003ca href=\"http://ww2.kqed.org/bayareabites/wp-content/uploads/sites/24/2014/11/butter-ingredients.jpg\">\u003cimg class=\"size-full wp-image-90337\" src=\"http://ww2.kqed.org/bayareabites/wp-content/uploads/sites/24/2014/11/butter-ingredients.jpg\" alt=\"All you need to make cultured butter is cream, yogurt, and a bit of time. Photo: Kate Williams\" width=\"500\">\u003c/a>\u003cfigcaption class=\"wp-caption-text\">All you need to make cultured butter is cream, yogurt, and a bit of time. Photo: Kate Williams\u003c/figcaption>\u003c/figure>\n\u003cp>Combine one quart of cream with about 1/3 cup of plain yogurt. Make sure you’re buying yogurt with live cultures (and nothing else) added. It’s these cultures that will give your butter its pleasant tang. Put the cream-yogurt mixture in a large glass canning jar and cover the top with a clean dish towel. Secure with a rubber band and place the jar in a warm-ish place for 1 to 2 days. Since the temperatures are (finally) dropping, you may need to let the cream sit for an extra 12 hours or so.\u003c/p>\n\u003cp>[ad fullwidth]\u003c/p>\n\u003cp>You’ll know the cream is ready to churn once it has thickened and takes on a tangy flavor. Depending on the cream and the yogurt you’ve used, the cream may be as thick as sour cream, or it may be runnier, like European-style yogurt. Either way, you’re looking for a subtle cultured tang. At that point, cover the jar with a lid and transfer it to the fridge for a few hours to chill. You can leave it in the fridge overnight if you’d like.\u003c/p>\n\u003cp>Once the cream is cold, transfer it to the bowl of a stand mixer fitted with a whisk attachment. (It is possible to make butter with a whisk or a hand mixer, but it will be far more work and you will likely splatter buttermilk all over your counter.) Drape a kitchen towel over the mixer to cover the space above the mixer bowl. Turn the mixer on high and let it run.\u003c/p>\n\u003cp>The mixer will take the cream through soft peaks:\u003c/p>\n\u003cfigure id=\"attachment_90342\" class=\"wp-caption aligncenter\" style=\"max-width: 1000px\">\u003ca href=\"http://ww2.kqed.org/bayareabites/wp-content/uploads/sites/24/2014/11/soft-peaks-on-whisk.jpg\">\u003cimg class=\"size-full wp-image-90342\" src=\"http://ww2.kqed.org/bayareabites/wp-content/uploads/sites/24/2014/11/soft-peaks-on-whisk.jpg\" alt=\"Cultured cream whipped to soft peaks. Photo: Kate Williams\" width=\"1000\" height=\"659\">\u003c/a>\u003cfigcaption class=\"wp-caption-text\">Cultured cream whipped to soft peaks. Photo: Kate Williams\u003c/figcaption>\u003c/figure>\n\u003cp>And stiff peaks:\u003c/p>\n\u003cfigure id=\"attachment_90344\" class=\"wp-caption aligncenter\" style=\"max-width: 1000px\">\u003ca href=\"http://ww2.kqed.org/bayareabites/wp-content/uploads/sites/24/2014/11/stiff-peaks-on-whisk.jpg\">\u003cimg class=\"size-full wp-image-90344\" src=\"http://ww2.kqed.org/bayareabites/wp-content/uploads/sites/24/2014/11/stiff-peaks-on-whisk.jpg\" alt=\"Cultured cream whipped to stiff peaks. Photo: Kate Williams\" width=\"1000\" height=\"667\">\u003c/a>\u003cfigcaption class=\"wp-caption-text\">Cultured cream whipped to stiff peaks. Photo: Kate Williams\u003c/figcaption>\u003c/figure>\n\u003cp>Before the butterfat separates from the buttermilk. You’ll know the cream has separated when you hear the buttermilk splatter against the bowl and the towel starts to get wet. Turn the mixer off and take a look at the contents of the bowl. You should clearly see yellow butter clumped on the whisk and white buttermilk in the bowl, like this:\u003c/p>\n\u003cfigure id=\"attachment_90341\" class=\"wp-caption aligncenter\" style=\"max-width: 1000px\">\u003ca href=\"http://ww2.kqed.org/bayareabites/wp-content/uploads/sites/24/2014/11/separated-butter-in-bowl.jpg\">\u003cimg class=\"size-full wp-image-90341\" src=\"http://ww2.kqed.org/bayareabites/wp-content/uploads/sites/24/2014/11/separated-butter-in-bowl.jpg\" alt=\"Cultured cream fully separated into butter and buttermilk. Photo: Kate Williams\" width=\"1000\" height=\"689\">\u003c/a>\u003cfigcaption class=\"wp-caption-text\">Cultured cream fully separated into butter and buttermilk. Photo: Kate Williams\u003c/figcaption>\u003c/figure>\n\u003cp>If the cream isn’t fully separated, let it run (re-cover the mixer with the towel) for another 30 seconds or so. Next, strain out the butter by pouring the butter and buttermilk through a fine mesh strainer lined with a clean kitchen towel or triple layer of cheesecloth. Place the strainer over a bowl to collect the buttermilk. It is delicious, and you should keep it for baking or drinking straight up. Once most of the visible buttermilk has drained off, gather the edges of the kitchen towel together and squeeze the butter to drain off more buttermilk.\u003c/p>\n\u003cfigure id=\"attachment_90345\" class=\"wp-caption aligncenter\" style=\"max-width: 1000px\">\u003ca href=\"http://ww2.kqed.org/bayareabites/wp-content/uploads/sites/24/2014/11/straining-butter-1.jpg\">\u003cimg class=\"size-full wp-image-90345\" src=\"http://ww2.kqed.org/bayareabites/wp-content/uploads/sites/24/2014/11/straining-butter-1.jpg\" alt=\"Let the butter drain through a clean dish towel first. Photo: Kate Williams\" width=\"1000\" height=\"667\">\u003c/a>\u003cfigcaption class=\"wp-caption-text\">Let the butter drain through a clean dish towel first. Photo: Kate Williams\u003c/figcaption>\u003c/figure>\n\u003cfigure id=\"attachment_90343\" class=\"wp-caption aligncenter\" style=\"max-width: 1000px\">\u003ca href=\"http://ww2.kqed.org/bayareabites/wp-content/uploads/sites/24/2014/11/squeezed-butter.jpg\">\u003cimg class=\"size-full wp-image-90343\" src=\"http://ww2.kqed.org/bayareabites/wp-content/uploads/sites/24/2014/11/squeezed-butter.jpg\" alt=\"Next, gather the edges of the towel, twist, and squeeze on the butter to release more buttermilk. Photo: Kate Williams\" width=\"1000\" height=\"643\">\u003c/a>\u003cfigcaption class=\"wp-caption-text\">Next, gather the edges of the towel, twist, and squeeze on the butter to release more buttermilk. Photo: Kate Williams\u003c/figcaption>\u003c/figure>\n\u003cp>The butter may now look completely dry, but there’s still another step to take to remove hidden buttermilk: washing. Transfer the butter to a large bowl and cover it with about a half a cup of super cold ice water. Reach into the bowl and gently knead and fold the butter. You’ll see the water turn cloudy — that’s the buttermilk. Pour off the cloudy water and repeat the washing process until the water stays clear. Continue to knead the butter (without water) to expel any drops of water remaining.\u003c/p>\n\u003cfigure id=\"attachment_90346\" class=\"wp-caption aligncenter\" style=\"max-width: 1000px\">\u003ca href=\"http://ww2.kqed.org/bayareabites/wp-content/uploads/sites/24/2014/11/washing-butter.jpg\">\u003cimg class=\"size-full wp-image-90346\" src=\"http://ww2.kqed.org/bayareabites/wp-content/uploads/sites/24/2014/11/washing-butter.jpg\" alt=\"Knead the butter in cold water to expel even more buttermilk. Photo: Kate Williams\" width=\"1000\" height=\"648\">\u003c/a>\u003cfigcaption class=\"wp-caption-text\">Knead the butter in cold water to expel even more buttermilk. Photo: Kate Williams\u003c/figcaption>\u003c/figure>\n\u003cp>Now you’ve got butter! You can keep it totally plain, add a little salt, or go crazy with different flavorings. Flavored butter is also known as “compound” butter.\u003c/p>\n\u003cp>I’ve provided three variations on compound butter that will all make great additions to the Thanksgiving table. Each is scaled to be made with 4 tablespoons of butter, or 2 ounces if you’re using a scale to measure. You can make all three with this batch of butter, and still have some plain leftover for everyday use.\u003c/p>\n\u003cp>Chili-honey butter adds surprising heat to sautéed vegetables.\u003c/p>\n\u003cfigure id=\"attachment_90339\" class=\"wp-caption aligncenter\" style=\"max-width: 1000px\">\u003ca href=\"http://ww2.kqed.org/bayareabites/wp-content/uploads/sites/24/2014/11/honey-chili-final.jpg\">\u003cimg class=\"size-full wp-image-90339\" src=\"http://ww2.kqed.org/bayareabites/wp-content/uploads/sites/24/2014/11/honey-chili-final.jpg\" alt=\"Homemade cultured butter with honey and chiles. Photo: Kate Williams\" width=\"1000\" height=\"690\">\u003c/a>\u003cfigcaption class=\"wp-caption-text\">Homemade cultured butter with honey and chiles. Photo: Kate Williams\u003c/figcaption>\u003c/figure>\n\u003cp>Maple-spice butter will satisfy all of the pumpkin pie spice lovers at the table.\u003c/p>\n\u003cfigure id=\"attachment_90340\" class=\"wp-caption aligncenter\" style=\"max-width: 1000px\">\u003ca href=\"http://ww2.kqed.org/bayareabites/wp-content/uploads/sites/24/2014/11/maple-spice-final.jpg\">\u003cimg class=\"size-full wp-image-90340\" src=\"http://ww2.kqed.org/bayareabites/wp-content/uploads/sites/24/2014/11/maple-spice-final.jpg\" alt=\"Maple-spice butter. Photo: Kate Williams\" width=\"1000\" height=\"672\">\u003c/a>\u003cfigcaption class=\"wp-caption-text\">Maple-spice butter. Photo: Kate Williams\u003c/figcaption>\u003c/figure>\n\u003cp>Savory garlic-herb butter is as fantastic smeared on a dinner roll as it is stuffed underneath turkey skin.\u003c/p>\n\u003cfigure id=\"attachment_90338\" class=\"wp-caption aligncenter\" style=\"max-width: 1000px\">\u003ca href=\"http://ww2.kqed.org/bayareabites/wp-content/uploads/sites/24/2014/11/herb-garlic-final-2.jpg\">\u003cimg class=\"size-full wp-image-90338\" src=\"http://ww2.kqed.org/bayareabites/wp-content/uploads/sites/24/2014/11/herb-garlic-final-2.jpg\" alt=\"Garlic-herb butter. Photo: Kate Williams\" width=\"1000\" height=\"725\">\u003c/a>\u003cfigcaption class=\"wp-caption-text\">Garlic-herb butter. Photo: Kate Williams\u003c/figcaption>\u003c/figure>\n\u003ch3>Recipe: Cultured Compound Butter\u003c/h3>\n\u003cp>\u003cem>Makes 10-12 ounces of butter and 2 cups of buttermilk\u003c/em>\u003c/p>\n\u003cp>\u003cstrong>Note:\u003c/strong> Each add-in is scaled for 2 ounces (4 tablespoon) of butter. If you would like to make more of any flavor, increase the amount of butter used appropriately.\u003c/p>\n\u003cp>\u003cstrong>Ingredients:\u003c/strong>\u003cbr>\n\u003cstrong>Butter\u003c/strong>\u003c/p>\n\u003cul>\n\u003cli>1 quart pasteurized heavy whipping cream (not ultra-pasteurized)\u003c/li>\n\u003cli>1/3 cup plain yogurt with active cultures\u003c/li>\n\u003cli>3/4 teaspoon flaky sea salt, optional (if not making compound butter)\u003c/li>\n\u003c/ul>\n\u003cp>\u003cstrong>Add-ins\u003c/strong>\u003cbr>\n\u003cstrong>Chili-Honey\u003c/strong>\u003c/p>\n\u003cul>(for 2 ounces of butter)\n\u003cli>1 teaspoon honey\u003c/li>\n\u003cli>1/2 teaspoon crushed red pepper flakes\u003c/li>\n\u003cli>1/2 teaspoon lemon zest\u003c/li>\n\u003cli>1/2 teaspoon kosher salt\u003c/li>\n\u003c/ul>\n\u003cp>\u003cstrong>Maple-Spice\u003c/strong>\u003c/p>\n\u003cul>\n\u003cli style=\"list-style-type: none\">\n\u003cul>(for 2 ounces of butter)\n\u003cli>1 teaspoon maple syrup\u003c/li>\n\u003cli>1/2 teaspoon kosher salt\u003c/li>\n\u003cli>1/2 teaspoon cinnamon\u003c/li>\n\u003cli>1/4 teaspoon ground ginger\u003c/li>\n\u003cli>1/8 teaspoon ground nutmeg\u003c/li>\n\u003c/ul>\n\u003c/li>\n\u003c/ul>\n\u003cp>1/8 teaspoon ground cloves\u003cbr>\n1/8 teaspoon allspice\u003c/p>\n\u003cp>\u003cstrong>Garlic-Herb\u003c/strong>\u003c/p>\n\u003cul>(for 2 ounces of butter)\n\u003cli>1 clove garlic, minced\u003c/li>\n\u003cli>1 teaspoon chopped fresh parsley\u003c/li>\n\u003cli>1 teaspoon chopped fresh sage\u003c/li>\n\u003cli>1 teaspoon chopped fresh rosemary\u003c/li>\n\u003cli>1/2 teaspoon kosher salt\u003c/li>\n\u003c/ul>\n\u003cp>[ad floatright]\u003c/p>\n\u003cp>\u003cstrong>Instructions:\u003c/strong>\u003c/p>\n\u003col>\n\u003cli>Combine the cream and yogurt in large glass jar and stir to combine. Cover the jar with a clean kitchen towel and place jar in a warm area until the cream has thickened and become tangy, 24 to 48 hours.\u003c/li>\n\u003cli>Once the cream has thickened, remove the kitchen towel, cover container with lid, and refrigerate overnight.\u003c/li>\n\u003cli>To make the butter: Pour the chilled cultured cream into the bowl of a stand mixer fitted with whisk attachment. Drape a kitchen towel over the mixer to prevent splatter. Whip the cream on high until it separates into buttermilk and clumps of small, yellow beads of butter. This will take anywhere from 2 to 5 minutes.\u003c/li>\n\u003cli>Strain the butter through a clean kitchen towel-lined strainer. Gather the edges of the towel and twist to squeeze out more buttermilk from the butter. Transfer the butter to a clean large bowl and reserve the buttermilk for another use.\u003c/li>\n\u003cli>Prepare about 4 cups of ice water in a large measuring cup. Pour about 1/2 cup of ice water over the butter. With the butter resting in the water, gently fold and knead butter to expel remaining buttermilk. Discard the milky liquid and repeat washing and kneading process until the water is clear. This should take 4 to 6 washes.\u003c/li>\n\u003cli>After the final wash, discard any remaining water and continue to knead and fold the butter to squeeze out any remaining liquid. Discard any liquid remaining in the bowl.\u003c/li>\n\u003cli>To flavor the butter, measure out 2 ounces (4 tablespoons of butter) into a medium bowl. Choose your desired add-ins, and add them to the bowl with the butter. Use a fork to thoroughly whisk add-ins into the butter. Place in a small airtight container and refrigerate.\u003c/li>\n\u003cli>If you’d like to make plain salted butter, add flaky sea salt to washed butter. Season with additional salt to taste. Place in a small airtight container or roll into a log shape and wrap in parchment paper. Refrigerate for up to 1 month.\u003c/li>\n\u003c/ol>\n\n","blocks":[],"excerpt":"Homemade butter is shockingly easy to make, but the uncultured spread is only as good as the cream you're using. By culturing the cream before churning, you can add enormous depth of flavor to even the least fancy bottles of cream. Kate Williams will show you how.","status":"publish","parent":0,"modified":1571963091,"stats":{"hasAudio":false,"hasVideo":false,"hasChartOrMap":false,"iframeSrcs":[],"hasGoogleForm":false,"hasGallery":false,"hasHearkenModule":false,"hasPolis":false,"paragraphCount":27,"wordCount":1559},"headData":{"title":"Homemade Cultured Compound Butter is a Festive Addition to the Thanksgiving Table | KQED","description":"Homemade butter is shockingly easy to make, but the uncultured spread is only as good as the cream you're using. By culturing the cream before churning, you can add enormous depth of flavor to even the least fancy bottles of cream. Kate Williams will show you how.","ogTitle":"","ogDescription":"","ogImgId":"","twTitle":"","twDescription":"","twImgId":"","schema":{"@context":"http://schema.org","@type":"Article","headline":"Homemade Cultured Compound Butter is a Festive Addition to the Thanksgiving Table","datePublished":"2014-11-25T01:40:54.000Z","dateModified":"2019-10-25T00:24:51.000Z","image":"https://cdn.kqed.org/wp-content/uploads/2020/02/KQED-OG-Image@1x.png"}},"disqusIdentifier":"90334 http://blogs.kqed.org/bayareabites/?p=90334","disqusUrl":"https://ww2.kqed.org/bayareabites/2014/11/24/homemade-cultured-compound-butter-is-a-festive-addition-to-the-thanksgiving-table/","disqusTitle":"Homemade Cultured Compound Butter is a Festive Addition to the Thanksgiving Table","path":"/bayareabites/90334/homemade-cultured-compound-butter-is-a-festive-addition-to-the-thanksgiving-table","audioTrackLength":null,"parsedContent":[{"type":"contentString","content":"\u003cdiv class=\"post-body\">\u003cp>\u003cfigure id=\"attachment_90348\" class=\"wp-caption aligncenter\" style=\"max-width: 1000px\">\u003ca href=\"http://ww2.kqed.org/bayareabites/wp-content/uploads/sites/24/2014/11/butter-medley.jpg\">\u003cimg class=\"size-full wp-image-90348\" src=\"http://ww2.kqed.org/bayareabites/wp-content/uploads/sites/24/2014/11/butter-medley.jpg\" alt=\"Three variations of compound butter that will make great additions to the Thanksgiving table. Photos: Kate Williams\" width=\"1000\" height=\"224\">\u003c/a>\u003cfigcaption class=\"wp-caption-text\">Three variations of compound butter that will make great additions to the Thanksgiving table. Photos: Kate Williams\u003c/figcaption>\u003c/figure>\n\u003cp>Homemade butter is shockingly easy to make, but the uncultured spread is only as good as the cream you're using. By culturing the cream before churning, you can add enormous depth of flavor to even the least fancy bottles of cream. It adds only a couple of extra days to the planning time and absolutely no extra work.\u003c/p>\n\u003cp>\u003c/p>\u003cp>\u003c/p>\u003cp>\u003c/p>\n\u003cp>What is a little extra work is to take your butter up another notch by adding in chopped herbs and spices — even homemade pumpkin pie spice — for a festive addition to the Thanksgiving table. But this final step takes only a few minutes, and it is easy to add just about anything you’d like to the freshly churned butter.\u003c/p>\n\u003cp>Now I know I just said that you can use un-fancy cream to make homemade butter, but I still like to start with a good, robust cream. The only caveat to keep in mind when choosing the cream is that you want to pick a product that has been “pasteurized,” not “ultra-pasteurized.” Pasteurized dairy has only been heated up to 161 degrees, whereas ultra-pasteurized dairy gets blasted with 280 degrees of heat. Those extra degrees can make a huge difference when trying to culture the cream, so it’s worth it to look for the pasteurized label.\u003c/p>\n\u003cfigure id=\"attachment_90337\" class=\"wp-caption aligncenter\" style=\"max-width: 500px\">\u003ca href=\"http://ww2.kqed.org/bayareabites/wp-content/uploads/sites/24/2014/11/butter-ingredients.jpg\">\u003cimg class=\"size-full wp-image-90337\" src=\"http://ww2.kqed.org/bayareabites/wp-content/uploads/sites/24/2014/11/butter-ingredients.jpg\" alt=\"All you need to make cultured butter is cream, yogurt, and a bit of time. Photo: Kate Williams\" width=\"500\">\u003c/a>\u003cfigcaption class=\"wp-caption-text\">All you need to make cultured butter is cream, yogurt, and a bit of time. Photo: Kate Williams\u003c/figcaption>\u003c/figure>\n\u003cp>Combine one quart of cream with about 1/3 cup of plain yogurt. Make sure you’re buying yogurt with live cultures (and nothing else) added. It’s these cultures that will give your butter its pleasant tang. Put the cream-yogurt mixture in a large glass canning jar and cover the top with a clean dish towel. Secure with a rubber band and place the jar in a warm-ish place for 1 to 2 days. Since the temperatures are (finally) dropping, you may need to let the cream sit for an extra 12 hours or so.\u003c/p>\n\u003cp>\u003c/p>\u003c/div>","attributes":{"named":{},"numeric":[]}},{"type":"component","content":"","name":"ad","attributes":{"named":{"label":"fullwidth"},"numeric":["fullwidth"]}},{"type":"contentString","content":"\u003cdiv class=\"post-body\">\u003cp>\u003c/p>\n\u003cp>You’ll know the cream is ready to churn once it has thickened and takes on a tangy flavor. Depending on the cream and the yogurt you’ve used, the cream may be as thick as sour cream, or it may be runnier, like European-style yogurt. Either way, you’re looking for a subtle cultured tang. At that point, cover the jar with a lid and transfer it to the fridge for a few hours to chill. You can leave it in the fridge overnight if you’d like.\u003c/p>\n\u003cp>Once the cream is cold, transfer it to the bowl of a stand mixer fitted with a whisk attachment. (It is possible to make butter with a whisk or a hand mixer, but it will be far more work and you will likely splatter buttermilk all over your counter.) Drape a kitchen towel over the mixer to cover the space above the mixer bowl. Turn the mixer on high and let it run.\u003c/p>\n\u003cp>The mixer will take the cream through soft peaks:\u003c/p>\n\u003cfigure id=\"attachment_90342\" class=\"wp-caption aligncenter\" style=\"max-width: 1000px\">\u003ca href=\"http://ww2.kqed.org/bayareabites/wp-content/uploads/sites/24/2014/11/soft-peaks-on-whisk.jpg\">\u003cimg class=\"size-full wp-image-90342\" src=\"http://ww2.kqed.org/bayareabites/wp-content/uploads/sites/24/2014/11/soft-peaks-on-whisk.jpg\" alt=\"Cultured cream whipped to soft peaks. Photo: Kate Williams\" width=\"1000\" height=\"659\">\u003c/a>\u003cfigcaption class=\"wp-caption-text\">Cultured cream whipped to soft peaks. Photo: Kate Williams\u003c/figcaption>\u003c/figure>\n\u003cp>And stiff peaks:\u003c/p>\n\u003cfigure id=\"attachment_90344\" class=\"wp-caption aligncenter\" style=\"max-width: 1000px\">\u003ca href=\"http://ww2.kqed.org/bayareabites/wp-content/uploads/sites/24/2014/11/stiff-peaks-on-whisk.jpg\">\u003cimg class=\"size-full wp-image-90344\" src=\"http://ww2.kqed.org/bayareabites/wp-content/uploads/sites/24/2014/11/stiff-peaks-on-whisk.jpg\" alt=\"Cultured cream whipped to stiff peaks. Photo: Kate Williams\" width=\"1000\" height=\"667\">\u003c/a>\u003cfigcaption class=\"wp-caption-text\">Cultured cream whipped to stiff peaks. Photo: Kate Williams\u003c/figcaption>\u003c/figure>\n\u003cp>Before the butterfat separates from the buttermilk. You’ll know the cream has separated when you hear the buttermilk splatter against the bowl and the towel starts to get wet. Turn the mixer off and take a look at the contents of the bowl. You should clearly see yellow butter clumped on the whisk and white buttermilk in the bowl, like this:\u003c/p>\n\u003cfigure id=\"attachment_90341\" class=\"wp-caption aligncenter\" style=\"max-width: 1000px\">\u003ca href=\"http://ww2.kqed.org/bayareabites/wp-content/uploads/sites/24/2014/11/separated-butter-in-bowl.jpg\">\u003cimg class=\"size-full wp-image-90341\" src=\"http://ww2.kqed.org/bayareabites/wp-content/uploads/sites/24/2014/11/separated-butter-in-bowl.jpg\" alt=\"Cultured cream fully separated into butter and buttermilk. Photo: Kate Williams\" width=\"1000\" height=\"689\">\u003c/a>\u003cfigcaption class=\"wp-caption-text\">Cultured cream fully separated into butter and buttermilk. Photo: Kate Williams\u003c/figcaption>\u003c/figure>\n\u003cp>If the cream isn’t fully separated, let it run (re-cover the mixer with the towel) for another 30 seconds or so. Next, strain out the butter by pouring the butter and buttermilk through a fine mesh strainer lined with a clean kitchen towel or triple layer of cheesecloth. Place the strainer over a bowl to collect the buttermilk. It is delicious, and you should keep it for baking or drinking straight up. Once most of the visible buttermilk has drained off, gather the edges of the kitchen towel together and squeeze the butter to drain off more buttermilk.\u003c/p>\n\u003cfigure id=\"attachment_90345\" class=\"wp-caption aligncenter\" style=\"max-width: 1000px\">\u003ca href=\"http://ww2.kqed.org/bayareabites/wp-content/uploads/sites/24/2014/11/straining-butter-1.jpg\">\u003cimg class=\"size-full wp-image-90345\" src=\"http://ww2.kqed.org/bayareabites/wp-content/uploads/sites/24/2014/11/straining-butter-1.jpg\" alt=\"Let the butter drain through a clean dish towel first. Photo: Kate Williams\" width=\"1000\" height=\"667\">\u003c/a>\u003cfigcaption class=\"wp-caption-text\">Let the butter drain through a clean dish towel first. Photo: Kate Williams\u003c/figcaption>\u003c/figure>\n\u003cfigure id=\"attachment_90343\" class=\"wp-caption aligncenter\" style=\"max-width: 1000px\">\u003ca href=\"http://ww2.kqed.org/bayareabites/wp-content/uploads/sites/24/2014/11/squeezed-butter.jpg\">\u003cimg class=\"size-full wp-image-90343\" src=\"http://ww2.kqed.org/bayareabites/wp-content/uploads/sites/24/2014/11/squeezed-butter.jpg\" alt=\"Next, gather the edges of the towel, twist, and squeeze on the butter to release more buttermilk. Photo: Kate Williams\" width=\"1000\" height=\"643\">\u003c/a>\u003cfigcaption class=\"wp-caption-text\">Next, gather the edges of the towel, twist, and squeeze on the butter to release more buttermilk. Photo: Kate Williams\u003c/figcaption>\u003c/figure>\n\u003cp>The butter may now look completely dry, but there’s still another step to take to remove hidden buttermilk: washing. Transfer the butter to a large bowl and cover it with about a half a cup of super cold ice water. Reach into the bowl and gently knead and fold the butter. You’ll see the water turn cloudy — that’s the buttermilk. Pour off the cloudy water and repeat the washing process until the water stays clear. Continue to knead the butter (without water) to expel any drops of water remaining.\u003c/p>\n\u003cfigure id=\"attachment_90346\" class=\"wp-caption aligncenter\" style=\"max-width: 1000px\">\u003ca href=\"http://ww2.kqed.org/bayareabites/wp-content/uploads/sites/24/2014/11/washing-butter.jpg\">\u003cimg class=\"size-full wp-image-90346\" src=\"http://ww2.kqed.org/bayareabites/wp-content/uploads/sites/24/2014/11/washing-butter.jpg\" alt=\"Knead the butter in cold water to expel even more buttermilk. Photo: Kate Williams\" width=\"1000\" height=\"648\">\u003c/a>\u003cfigcaption class=\"wp-caption-text\">Knead the butter in cold water to expel even more buttermilk. Photo: Kate Williams\u003c/figcaption>\u003c/figure>\n\u003cp>Now you’ve got butter! You can keep it totally plain, add a little salt, or go crazy with different flavorings. Flavored butter is also known as “compound” butter.\u003c/p>\n\u003cp>I’ve provided three variations on compound butter that will all make great additions to the Thanksgiving table. Each is scaled to be made with 4 tablespoons of butter, or 2 ounces if you’re using a scale to measure. You can make all three with this batch of butter, and still have some plain leftover for everyday use.\u003c/p>\n\u003cp>Chili-honey butter adds surprising heat to sautéed vegetables.\u003c/p>\n\u003cfigure id=\"attachment_90339\" class=\"wp-caption aligncenter\" style=\"max-width: 1000px\">\u003ca href=\"http://ww2.kqed.org/bayareabites/wp-content/uploads/sites/24/2014/11/honey-chili-final.jpg\">\u003cimg class=\"size-full wp-image-90339\" src=\"http://ww2.kqed.org/bayareabites/wp-content/uploads/sites/24/2014/11/honey-chili-final.jpg\" alt=\"Homemade cultured butter with honey and chiles. Photo: Kate Williams\" width=\"1000\" height=\"690\">\u003c/a>\u003cfigcaption class=\"wp-caption-text\">Homemade cultured butter with honey and chiles. Photo: Kate Williams\u003c/figcaption>\u003c/figure>\n\u003cp>Maple-spice butter will satisfy all of the pumpkin pie spice lovers at the table.\u003c/p>\n\u003cfigure id=\"attachment_90340\" class=\"wp-caption aligncenter\" style=\"max-width: 1000px\">\u003ca href=\"http://ww2.kqed.org/bayareabites/wp-content/uploads/sites/24/2014/11/maple-spice-final.jpg\">\u003cimg class=\"size-full wp-image-90340\" src=\"http://ww2.kqed.org/bayareabites/wp-content/uploads/sites/24/2014/11/maple-spice-final.jpg\" alt=\"Maple-spice butter. Photo: Kate Williams\" width=\"1000\" height=\"672\">\u003c/a>\u003cfigcaption class=\"wp-caption-text\">Maple-spice butter. Photo: Kate Williams\u003c/figcaption>\u003c/figure>\n\u003cp>Savory garlic-herb butter is as fantastic smeared on a dinner roll as it is stuffed underneath turkey skin.\u003c/p>\n\u003cfigure id=\"attachment_90338\" class=\"wp-caption aligncenter\" style=\"max-width: 1000px\">\u003ca href=\"http://ww2.kqed.org/bayareabites/wp-content/uploads/sites/24/2014/11/herb-garlic-final-2.jpg\">\u003cimg class=\"size-full wp-image-90338\" src=\"http://ww2.kqed.org/bayareabites/wp-content/uploads/sites/24/2014/11/herb-garlic-final-2.jpg\" alt=\"Garlic-herb butter. Photo: Kate Williams\" width=\"1000\" height=\"725\">\u003c/a>\u003cfigcaption class=\"wp-caption-text\">Garlic-herb butter. Photo: Kate Williams\u003c/figcaption>\u003c/figure>\n\u003ch3>Recipe: Cultured Compound Butter\u003c/h3>\n\u003cp>\u003cem>Makes 10-12 ounces of butter and 2 cups of buttermilk\u003c/em>\u003c/p>\n\u003cp>\u003cstrong>Note:\u003c/strong> Each add-in is scaled for 2 ounces (4 tablespoon) of butter. If you would like to make more of any flavor, increase the amount of butter used appropriately.\u003c/p>\n\u003cp>\u003cstrong>Ingredients:\u003c/strong>\u003cbr>\n\u003cstrong>Butter\u003c/strong>\u003c/p>\n\u003cul>\n\u003cli>1 quart pasteurized heavy whipping cream (not ultra-pasteurized)\u003c/li>\n\u003cli>1/3 cup plain yogurt with active cultures\u003c/li>\n\u003cli>3/4 teaspoon flaky sea salt, optional (if not making compound butter)\u003c/li>\n\u003c/ul>\n\u003cp>\u003cstrong>Add-ins\u003c/strong>\u003cbr>\n\u003cstrong>Chili-Honey\u003c/strong>\u003c/p>\n\u003cul>(for 2 ounces of butter)\n\u003cli>1 teaspoon honey\u003c/li>\n\u003cli>1/2 teaspoon crushed red pepper flakes\u003c/li>\n\u003cli>1/2 teaspoon lemon zest\u003c/li>\n\u003cli>1/2 teaspoon kosher salt\u003c/li>\n\u003c/ul>\n\u003cp>\u003cstrong>Maple-Spice\u003c/strong>\u003c/p>\n\u003cul>\n\u003cli style=\"list-style-type: none\">\n\u003cul>(for 2 ounces of butter)\n\u003cli>1 teaspoon maple syrup\u003c/li>\n\u003cli>1/2 teaspoon kosher salt\u003c/li>\n\u003cli>1/2 teaspoon cinnamon\u003c/li>\n\u003cli>1/4 teaspoon ground ginger\u003c/li>\n\u003cli>1/8 teaspoon ground nutmeg\u003c/li>\n\u003c/ul>\n\u003c/li>\n\u003c/ul>\n\u003cp>1/8 teaspoon ground cloves\u003cbr>\n1/8 teaspoon allspice\u003c/p>\n\u003cp>\u003cstrong>Garlic-Herb\u003c/strong>\u003c/p>\n\u003cul>(for 2 ounces of butter)\n\u003cli>1 clove garlic, minced\u003c/li>\n\u003cli>1 teaspoon chopped fresh parsley\u003c/li>\n\u003cli>1 teaspoon chopped fresh sage\u003c/li>\n\u003cli>1 teaspoon chopped fresh rosemary\u003c/li>\n\u003cli>1/2 teaspoon kosher salt\u003c/li>\n\u003c/ul>\n\u003cp>\u003c/p>\u003c/div>","attributes":{"named":{},"numeric":[]}},{"type":"component","content":"","name":"ad","attributes":{"named":{"label":"floatright"},"numeric":["floatright"]}},{"type":"contentString","content":"\u003cdiv class=\"post-body\">\u003cp>\u003c/p>\n\u003cp>\u003cstrong>Instructions:\u003c/strong>\u003c/p>\n\u003col>\n\u003cli>Combine the cream and yogurt in large glass jar and stir to combine. Cover the jar with a clean kitchen towel and place jar in a warm area until the cream has thickened and become tangy, 24 to 48 hours.\u003c/li>\n\u003cli>Once the cream has thickened, remove the kitchen towel, cover container with lid, and refrigerate overnight.\u003c/li>\n\u003cli>To make the butter: Pour the chilled cultured cream into the bowl of a stand mixer fitted with whisk attachment. Drape a kitchen towel over the mixer to prevent splatter. Whip the cream on high until it separates into buttermilk and clumps of small, yellow beads of butter. This will take anywhere from 2 to 5 minutes.\u003c/li>\n\u003cli>Strain the butter through a clean kitchen towel-lined strainer. Gather the edges of the towel and twist to squeeze out more buttermilk from the butter. Transfer the butter to a clean large bowl and reserve the buttermilk for another use.\u003c/li>\n\u003cli>Prepare about 4 cups of ice water in a large measuring cup. Pour about 1/2 cup of ice water over the butter. With the butter resting in the water, gently fold and knead butter to expel remaining buttermilk. Discard the milky liquid and repeat washing and kneading process until the water is clear. This should take 4 to 6 washes.\u003c/li>\n\u003cli>After the final wash, discard any remaining water and continue to knead and fold the butter to squeeze out any remaining liquid. Discard any liquid remaining in the bowl.\u003c/li>\n\u003cli>To flavor the butter, measure out 2 ounces (4 tablespoons of butter) into a medium bowl. Choose your desired add-ins, and add them to the bowl with the butter. Use a fork to thoroughly whisk add-ins into the butter. Place in a small airtight container and refrigerate.\u003c/li>\n\u003cli>If you’d like to make plain salted butter, add flaky sea salt to washed butter. Season with additional salt to taste. Place in a small airtight container or roll into a log shape and wrap in parchment paper. Refrigerate for up to 1 month.\u003c/li>\n\u003c/ol>\n\n\u003c/div>\u003c/p>","attributes":{"named":{},"numeric":[]}}],"link":"/bayareabites/90334/homemade-cultured-compound-butter-is-a-festive-addition-to-the-thanksgiving-table","authors":["5485"],"series":["bayareabites_15012"],"categories":["bayareabites_752","bayareabites_2638","bayareabites_12550","bayareabites_1763","bayareabites_12"],"tags":["bayareabites_1288","bayareabites_13949","bayareabites_530","bayareabites_2962"],"featImg":"bayareabites_90348","label":"bayareabites_15012"},"bayareabites_64654":{"type":"posts","id":"bayareabites_64654","meta":{"index":"posts_1591205157","site":"bayareabites","id":"64654","score":null,"sort":[1373060196000]},"guestAuthors":[],"slug":"how-the-diy-butter-trend-got-churning","title":"How The DIY Butter Trend Got Churning","publishDate":1373060196,"format":"aside","headTitle":"Bay Area Bites | KQED Food","labelTerm":{"site":"bayareabites"},"content":"\u003cfigure id=\"attachment_64659\" class=\"wp-caption aligncenter\" style=\"max-width: 1000px\">\u003ca href=\"http://ww2.kqed.org/bayareabites/wp-content/uploads/sites/24/2013/07/butter1000.jpg\">\u003cimg src=\"http://ww2.kqed.org/bayareabites/wp-content/uploads/sites/24/2013/07/butter1000.jpg\" alt=\"Butter churning demos can be found at Claude Moore Colonial Farm, but DIYers are rediscovering the art, too. Photo Courtesy of Claude Moore Colonial Farm\" width=\"1000\" height=\"750\" class=\"size-full wp-image-64659\">\u003c/a>\u003cfigcaption class=\"wp-caption-text\">Butter churning demos can be found at Claude Moore Colonial Farm, but DIYers are rediscovering the art, too. Photo Courtesy of Claude Moore Colonial Farm\u003c/figcaption>\u003c/figure>\n\u003cp>\u003cstrong>Listen to the Story\u003c/strong> on \u003ca href=\"http://www.npr.org/blogs/thesalt/2013/07/04/198425906/how-the-diy-butter-trend-got-churning\">All Things Considered\u003c/a> [audio src=\"http://pd.npr.org/anon.npr-mp3/npr/atc/2013/07/20130704_atc_04.mp3\"] \u003c/p>\n\u003cp>Post by Allison Aubrey, \u003ca href=\"http://www.npr.org/blogs/thesalt/2013/07/04/198425906/how-the-diy-butter-trend-got-churning\">The Salt at NPR Food\u003c/a>(7/4/13)\u003c/p>\n\u003cp>Artisanal food fever is raging, and the latest sign is the rise in sales of old-fashioned butter churns.\u003c/p>\n\u003cp>Purveyor Glenda Lehman Ervin of \u003ca href=\"https://www.lehmans.com/default.aspx\">Lehman's \u003c/a>sells old-timey kitchen gadgets online and at her family's store in Kidron, Ohio. She says the clientele is quite diverse. \"There are lots of people interested,\" she says.\u003c/p>\n\u003cp>It's not just homesteaders, hipsters and do-it-yourself-minded foodies getting in on the hands-on pursuit.\u003c/p>\n\u003cp>[ad fullwidth]\u003c/p>\n\u003cp>This hobby has now spread to 40-something suburbanites, as I learned a few weeks back when I received an email invite to a butter-churning party.\u003c/p>\n\u003cp>Bring the kids, and bring your own cream (BYOC), the note said. The host, my friend Jerry Casagrande, promised pingpong too, perhaps in anticipation that the churning might get old quick.\u003c/p>\n\u003cp>Now, if you listen to my story, you'll appreciate that the technical feat of turning cream into butter is not much of a feat — if you follow the directions.\u003c/p>\n\u003cp>One of the most important make-or-break steps is the 15 to 20 minutes of continuous, vigorous churning, which entails cranking a handle. This can be a real workout for the arms — if you actually stick with the task. \"It gets tiring,\" said Casagrande, the butter-churn owner. \"That's why it's good to have a butter-churning party.\"\u003c/p>\n\u003cfigure id=\"attachment_64660\" class=\"wp-caption alignleft\" style=\"max-width: 250px\">\u003ca href=\"http://ww2.kqed.org/bayareabites/wp-content/uploads/sites/24/2013/07/butterchurning.jpg\">\u003cimg src=\"http://ww2.kqed.org/bayareabites/wp-content/uploads/sites/24/2013/07/butterchurning.jpg\" alt=\"Riley Casagrande churns butter with her dad Jerry Casagrande. Photo: Allison Aubrey/NPR\" width=\"250\" class=\"size-full wp-image-64660\">\u003c/a>\u003cfigcaption class=\"wp-caption-text\">Riley Casagrande churns butter with her dad Jerry Casagrande. Photo: Allison Aubrey/NPR\u003c/figcaption>\u003c/figure>\n\u003cp>Now, I was skeptical that the churn, which basically looks like a gallon-sized glass jar with a crank on top, would hold the crowd's attention.\u003c/p>\n\u003cp>But it turned out that we gathered around the churn as if it was a campfire.\u003c/p>\n\u003cp>And as a few of the kids at the party started beating a toy drum to the rhythm of the churning, the whole scene felt part ceremony, part circus.\u003c/p>\n\u003cp>\"Sounds like fun,\" \u003ca href=\"http://www.considerthefork.com/?p=3\">Bee Wilson\u003c/a>, British food writer and author of the food-gadget history book \u003cem>Consider the Fo\u003c/em>rk, said when I told her about the party.\u003c/p>\n\u003cp>She had some smart ideas about why simple crafts like butter-churning have become trendy again.\u003c/p>\n\u003cp>\"I think it's kind of a response to the computer age,\" Wilson says. And it is part of a larger, do-it-yourself food movement that includes everything from \u003ca href=\"http://www.npr.org/blogs/thesalt/2013/06/29/196334312/SAVING-THE-SEASON\">canning\u003c/a>, to making homemade bitters or DIY \u003ca href=\"http://www.jsonline.com/features/food/making-wholemilk-ricotta-cheese-easier-than-expected-b48mkjk-190885501.html\">ricotta\u003c/a>.\u003c/p>\n\u003cp>\"We're just spending so much of our lives living in a sort-of virtual capacity, staring at things, that's it very therapeutic to do things again,\" Wilson said.\u003c/p>\n\u003cp>And these hands-on projects can help us get our hands off our tiny, electronic devices.\u003c/p>\n\u003cp>Now, of course, foodies don't need to go so low-tech to get freshly churned butter. Specialty shops and home-delivery dairies offer lots of options.\u003c/p>\n\u003cp>Or, hey, you can also whip up some butter using a stand-mixer \u003ca href=\"http://www.guardian.co.uk/lifeandstyle/2010/feb/24/how-to-make-butter\">recipe\u003c/a> in a jiffy.\u003c/p>\n\u003cp>So, after an evening of butter-churning, were there any converts among the group? Well, Riley Casagrande, Jerry's daughter, seemed to sum it up best.\u003c/p>\n\u003cp>\"It's kinda fun, like, as something special,\" Riley said. \"But if you had to do it all the time, it wouldn't be very fun.\"\u003c/p>\n\u003cp>Seems it was the novelty that made it entertaining.\u003c/p>\n\u003cp>\u003c/p>\n\u003cp>\u003cem>Copyright 2013 \u003ca href=\"http://www.npr.org/\">NPR\u003c/a>.\u003c/em> \u003c/p>\n\n","blocks":[],"excerpt":"It's not just homesteaders, hipsters and foodies getting into the hands-on pursuit. The butter-churning craze is part of a larger, do-it-yourself food movement that includes everything from canning, to making homemade bitters, a food writer says.","status":"publish","parent":0,"modified":1373060196,"stats":{"hasAudio":true,"hasVideo":false,"hasChartOrMap":false,"iframeSrcs":[],"hasGoogleForm":false,"hasGallery":false,"hasHearkenModule":false,"hasPolis":false,"paragraphCount":25,"wordCount":608},"headData":{"title":"How The DIY Butter Trend Got Churning | KQED","description":"It's not just homesteaders, hipsters and foodies getting into the hands-on pursuit. The butter-churning craze is part of a larger, do-it-yourself food movement that includes everything from canning, to making homemade bitters, a food writer says.","ogTitle":"","ogDescription":"","ogImgId":"","twTitle":"","twDescription":"","twImgId":"","schema":{"@context":"http://schema.org","@type":"Article","headline":"How The DIY Butter Trend Got Churning","datePublished":"2013-07-05T21:36:36.000Z","dateModified":"2013-07-05T21:36:36.000Z","image":"https://cdn.kqed.org/wp-content/uploads/2020/02/KQED-OG-Image@1x.png"}},"disqusIdentifier":"64654 http://blogs.kqed.org/bayareabites/?p=64654","disqusUrl":"https://ww2.kqed.org/bayareabites/2013/07/05/how-the-diy-butter-trend-got-churning/","disqusTitle":"How The DIY Butter Trend Got Churning","nprByline":"Allison Aubrey","nprStoryId":"198425906","nprApiLink":"http://api.npr.org/query?id=198425906&apiKey=MDAxOTAwOTE4MDEyMTkxMDAzNjczZDljZA004","nprHtmlLink":"http://www.npr.org/blogs/thesalt/2013/07/04/198425906/how-the-diy-butter-trend-got-churning?ft=3&f=198425906","nprRetrievedStory":"1","nprPubDate":"Thu, 04 Jul 2013 21:58:00 -0400","nprStoryDate":"Thu, 04 Jul 2013 15:00:00 -0400","nprLastModifiedDate":"Fri, 05 Jul 2013 00:55:39 -0400","nprAudio":"http://pd.npr.org/anon.npr-mp3/npr/atc/2013/07/20130704_atc_04.mp3?orgId=1&topicId=1053&ft=3&f=198425906","nprAudioM3u":"http://api.npr.org/m3u/1198781775-1ea279.m3u?orgId=1&topicId=1053&ft=3&f=198425906","path":"/bayareabites/64654/how-the-diy-butter-trend-got-churning","audioUrl":"http://pd.npr.org/anon.npr-mp3/npr/atc/2013/07/20130704_atc_04.mp3?orgId=1&topicId=1053&ft=3&f=198425906","audioDuration":null,"audioTrackLength":null,"parsedContent":[{"type":"contentString","content":"\u003cdiv class=\"post-body\">\u003cp>\u003cfigure id=\"attachment_64659\" class=\"wp-caption aligncenter\" style=\"max-width: 1000px\">\u003ca href=\"http://ww2.kqed.org/bayareabites/wp-content/uploads/sites/24/2013/07/butter1000.jpg\">\u003cimg src=\"http://ww2.kqed.org/bayareabites/wp-content/uploads/sites/24/2013/07/butter1000.jpg\" alt=\"Butter churning demos can be found at Claude Moore Colonial Farm, but DIYers are rediscovering the art, too. Photo Courtesy of Claude Moore Colonial Farm\" width=\"1000\" height=\"750\" class=\"size-full wp-image-64659\">\u003c/a>\u003cfigcaption class=\"wp-caption-text\">Butter churning demos can be found at Claude Moore Colonial Farm, but DIYers are rediscovering the art, too. Photo Courtesy of Claude Moore Colonial Farm\u003c/figcaption>\u003c/figure>\n\u003cp>\u003cstrong>Listen to the Story\u003c/strong> on \u003ca href=\"http://www.npr.org/blogs/thesalt/2013/07/04/198425906/how-the-diy-butter-trend-got-churning\">All Things Considered\u003c/a> \u003c/p>\u003c/div>","attributes":{"named":{},"numeric":[]}},{"type":"component","content":"","name":"audio","attributes":{"named":{"src":"http://pd.npr.org/anon.npr-mp3/npr/atc/2013/07/20130704_atc_04.mp3","label":""},"numeric":[]}},{"type":"contentString","content":"\u003cdiv class=\"post-body\">\u003cp> \u003c/p>\n\u003cp>Post by Allison Aubrey, \u003ca href=\"http://www.npr.org/blogs/thesalt/2013/07/04/198425906/how-the-diy-butter-trend-got-churning\">The Salt at NPR Food\u003c/a>(7/4/13)\u003c/p>\n\u003cp>Artisanal food fever is raging, and the latest sign is the rise in sales of old-fashioned butter churns.\u003c/p>\n\u003cp>Purveyor Glenda Lehman Ervin of \u003ca href=\"https://www.lehmans.com/default.aspx\">Lehman's \u003c/a>sells old-timey kitchen gadgets online and at her family's store in Kidron, Ohio. She says the clientele is quite diverse. \"There are lots of people interested,\" she says.\u003c/p>\n\u003cp>It's not just homesteaders, hipsters and do-it-yourself-minded foodies getting in on the hands-on pursuit.\u003c/p>\n\u003cp>\u003c/p>\u003c/div>","attributes":{"named":{},"numeric":[]}},{"type":"component","content":"","name":"ad","attributes":{"named":{"label":"fullwidth"},"numeric":["fullwidth"]}},{"type":"contentString","content":"\u003cdiv class=\"post-body\">\u003cp>\u003c/p>\n\u003cp>This hobby has now spread to 40-something suburbanites, as I learned a few weeks back when I received an email invite to a butter-churning party.\u003c/p>\n\u003cp>Bring the kids, and bring your own cream (BYOC), the note said. The host, my friend Jerry Casagrande, promised pingpong too, perhaps in anticipation that the churning might get old quick.\u003c/p>\n\u003cp>Now, if you listen to my story, you'll appreciate that the technical feat of turning cream into butter is not much of a feat — if you follow the directions.\u003c/p>\n\u003cp>One of the most important make-or-break steps is the 15 to 20 minutes of continuous, vigorous churning, which entails cranking a handle. This can be a real workout for the arms — if you actually stick with the task. \"It gets tiring,\" said Casagrande, the butter-churn owner. \"That's why it's good to have a butter-churning party.\"\u003c/p>\n\u003cfigure id=\"attachment_64660\" class=\"wp-caption alignleft\" style=\"max-width: 250px\">\u003ca href=\"http://ww2.kqed.org/bayareabites/wp-content/uploads/sites/24/2013/07/butterchurning.jpg\">\u003cimg src=\"http://ww2.kqed.org/bayareabites/wp-content/uploads/sites/24/2013/07/butterchurning.jpg\" alt=\"Riley Casagrande churns butter with her dad Jerry Casagrande. Photo: Allison Aubrey/NPR\" width=\"250\" class=\"size-full wp-image-64660\">\u003c/a>\u003cfigcaption class=\"wp-caption-text\">Riley Casagrande churns butter with her dad Jerry Casagrande. Photo: Allison Aubrey/NPR\u003c/figcaption>\u003c/figure>\n\u003cp>Now, I was skeptical that the churn, which basically looks like a gallon-sized glass jar with a crank on top, would hold the crowd's attention.\u003c/p>\n\u003cp>But it turned out that we gathered around the churn as if it was a campfire.\u003c/p>\n\u003cp>And as a few of the kids at the party started beating a toy drum to the rhythm of the churning, the whole scene felt part ceremony, part circus.\u003c/p>\n\u003cp>\"Sounds like fun,\" \u003ca href=\"http://www.considerthefork.com/?p=3\">Bee Wilson\u003c/a>, British food writer and author of the food-gadget history book \u003cem>Consider the Fo\u003c/em>rk, said when I told her about the party.\u003c/p>\n\u003cp>She had some smart ideas about why simple crafts like butter-churning have become trendy again.\u003c/p>\n\u003cp>\"I think it's kind of a response to the computer age,\" Wilson says. And it is part of a larger, do-it-yourself food movement that includes everything from \u003ca href=\"http://www.npr.org/blogs/thesalt/2013/06/29/196334312/SAVING-THE-SEASON\">canning\u003c/a>, to making homemade bitters or DIY \u003ca href=\"http://www.jsonline.com/features/food/making-wholemilk-ricotta-cheese-easier-than-expected-b48mkjk-190885501.html\">ricotta\u003c/a>.\u003c/p>\n\u003cp>\"We're just spending so much of our lives living in a sort-of virtual capacity, staring at things, that's it very therapeutic to do things again,\" Wilson said.\u003c/p>\n\u003cp>And these hands-on projects can help us get our hands off our tiny, electronic devices.\u003c/p>\n\u003cp>Now, of course, foodies don't need to go so low-tech to get freshly churned butter. Specialty shops and home-delivery dairies offer lots of options.\u003c/p>\n\u003cp>Or, hey, you can also whip up some butter using a stand-mixer \u003ca href=\"http://www.guardian.co.uk/lifeandstyle/2010/feb/24/how-to-make-butter\">recipe\u003c/a> in a jiffy.\u003c/p>\n\u003cp>So, after an evening of butter-churning, were there any converts among the group? Well, Riley Casagrande, Jerry's daughter, seemed to sum it up best.\u003c/p>\n\u003cp>\"It's kinda fun, like, as something special,\" Riley said. \"But if you had to do it all the time, it wouldn't be very fun.\"\u003c/p>\n\u003cp>Seems it was the novelty that made it entertaining.\u003c/p>\n\u003cp>\u003c/p>\n\u003cp>\u003cem>Copyright 2013 \u003ca href=\"http://www.npr.org/\">NPR\u003c/a>.\u003c/em> \u003c/p>\n\n\u003c/div>\u003c/p>","attributes":{"named":{},"numeric":[]}}],"link":"/bayareabites/64654/how-the-diy-butter-trend-got-churning","authors":["byline_bayareabites_64654"],"categories":["bayareabites_2638","bayareabites_10916","bayareabites_34"],"tags":["bayareabites_1288","bayareabites_11943","bayareabites_11942","bayareabites_987","bayareabites_1893","bayareabites_10921"],"featImg":"bayareabites_64659","label":"bayareabites"},"bayareabites_11324":{"type":"posts","id":"bayareabites_11324","meta":{"index":"posts_1591205157","site":"bayareabites","id":"11324","score":null,"sort":[1268752652000]},"guestAuthors":[],"slug":"bar-and-restaurant-themantics","title":"Bar and Restaurant Themantics","publishDate":1268752652,"format":"aside","headTitle":"Bay Area Bites | KQED Food","labelTerm":{"site":"bayareabites"},"content":"\u003cp>\u003cimg src=\"http://ww2.kqed.org/bayareabites/wp-content/uploads/sites/24/2010/03/andrew-rasta.jpg\" alt=\"andrew simmons at rasta\" title=\"andrew simmons at rasta\" width=\"300\" height=\"225\" class=\"alignleft size-full wp-image-11341\">Restaurants and bars with themes have always rubbed me the wrong way. I think of the first and only time I walked into \u003ca href=\"http://www.smoothasbutter.com/\">Butter\u003c/a>. It must have been 2003. While I was as well-versed in irony as any literary theory buff with a fresh diploma, the brown-bagged forties, snack stand carved out of the side of a trailer, and steaming tater tots seemed a bit much. I'm not a stickler for good taste, but I was instantly annoyed by a bar dedicated to aping the coarsest trappings of poor white culture for the amusement of privileged San Franciscans carousing through SoMa. I've seen it before around these parts: even politically radical non-profit workers who would rather poke out an eye than offend a person of color think nothing of throwing \"white trash\"-themed birthday parties for themselves. Plus, tater tots are actually really good -- without irony, just ketchup.\u003c/p>\n\u003cp>Still, I've splashed around the \u003ca href=\"http://www.fairmont.com/sanfrancisco/GuestServices/Restaurants/TheTongaRoomHurricaneBar.htm\">Tonga Room\u003c/a>, stomped into the \u003ca href=\"http://www.bigfootlodge.com/\">Bigfoot Lounge\u003c/a>, and knocked back a whiskey at \u003ca href=\"http://www.bourbonandbranch.com/\">Bourbon and Branch\u003c/a>, that classy throw-back to San Francisco's speakeasy-riddled past -- appealing themed joints, all of them. The other day, I was talking themed bars with some buddies, one of whom manages a newish decidedly un-themed establishment in Russian Hill, on Polk, just above the Tenderloin. The topic was Manhattan bars, where drink costs soar to airport prices -- $6 for a bottle of beer, $10 for a well drink. We joked that someone should start a really, really expensive bar in San Francisco called $$$. There would be a $50 cover charge, and no music, karaoke, free food, pool, or pub quiz to account for the steep entrance fee. The drinks would not be made with fancy infused \u003ca href=\"http://www.alcademics.com/2010/02/ilegal-infusions-the-word-gets-out.html\">potentially illegal spirits\u003c/a> or feature small artisanal producers. They would be perfectly plain and perhaps a little weak. Still, if you could afford to buy your way in, you could hang out with others who could as well, which might be reward enough. It'd be pure elitism, distilled -- as appropriate a theme as any.\u003c/p>\n\u003cp>My trip to Japan late last March gave me a new perspective on themed drinking establishments. I wasn't there long enough to deliver an exhaustive report -- I'm sure some late-night Travel Channel special has already tried. There was so much I did not see, particularly in Tokyo, where I only spent a few jet-lagged days. My home-base for most of the visit was Kyoto, Japan's old Imperial capitol. Still, after a week of bouncing around that city's bars and informal late-night eateries, my head was throbbing -- and not from too much single malt. Along Kiyamachi St., very close to the Kamo River, tiny izakayas and watering holes burrow into unassuming commercial storefronts and stubby office buildings. You walk up a few flights of stairs -- as if going to see a disreputable dentist -- and knock on doors that open on to strange, insular, fastidiously detailed worlds. They reminded me of levels in \u003ca href=\"http://www.videogamesblogger.com/wp-content/uploads/2006/10/super-mario-bros-2-nes-potion.jpg\">Super Mario Brothers\u003c/a>: through one portal, a swanky, pocket-sized cool jazz club draped in blue curtains appeared, through another, fittingly, a red-and-white toadstool-themed \u003ca href=\"http://ww2.kqed.org/bayareabites/2009/11/24/morel-of-a-story/\">\"mushroom\" bar\u003c/a> no bigger than an apartment kitchen -- both in the same building, occupying suites on the same floor. \u003c/p>\n\u003cp>One night, I visited two establishments thoroughly preoccupied with Jamaica's most prominent (and cliched) cultural and artistic exports -- Bob Marley, an easy way with marijuana, Rastafarianism, ripe for the watering down, and the flag's black, yellow, and green color scheme. Despite being a huge reggae fan, in the United States, I wouldn't have had the slightest interest. Nonetheless, Rasta and Rub-A-Dub were a lot of fun. The first is a dark cave on the 4th or 5th floor of an office building. Muzak renditions of Rockers classics seep from hidden speakers. A weed leaf mosaic rises up out of the tiled floor. A shrine to Mr. Marley occupies the middle of the back wall, bathed in chartreuse light, overlooking the scene. When I was there, the crowd was typically diverse: bartenders with desperate attempts at dreadlocks, a few business guys enjoying an extended happy hour, a party of ladies on the heels of a shopping trip, and a couple hanging out along the side wall, with the lanky American gentleman trying not to look as absurd as the retina-burning blue \"island\" cocktails in his glass. Significantly older, Rub-A-Dub is located in a frond-filled basement. According to legend, the owner, a Japanese man, married a Jamaican woman, and opened the bar to continuously remind her of her homeland. In truth, theme aside, Rasta would be considered a pretty good restaurant in San Francisco, offering roast fish heads and Japanese riffs on jerked chicken and seafood. I didn't eat at Rub-A-Dub (too many fish heads at Rasta), but I did have a few drinks under bunches of bananas hanging from the ceiling. \u003c/p>\n\u003cp>I returned from Japan in April -- just ten days after I'd arrived -- but I started thinking about themes all over again last week, when I read an S.F. Weekly \u003ca href=\"http://blogs.sfweekly.com/foodie/2010/03/hog_rocks_introduces_the_ham_b.php\">blog post\u003c/a> about Hogs & Rocks. Set to open in May or June, this joint endeavor of \u003ca href=\"http://www.sfmaverick.com/\">Maverick\u003c/a> chef Scott Youkilis and Eric Rubin of \u003ca href=\"http://www.tresagaves.com/\">Tres Agaves\u003c/a> will serve 45 different kinds of ham, along with pickles, salads, and oysters (the rocks, of course). Unlike, say Rasta, Hogs & Rocks will do food and drink first, letting aesthetics follow suit. If the bar sprang up in Japan, the floor cushions would be swine-pink and sewn up to look like plump hind legs. There'd be small chairs shaped like oyster shells. Albums by Badfinger (lead singer, the late Peter Ham) would boom on the stereo. Images of piggy pop culture's most prominent representatives -- Wilbur, Porky, Pooh's \u003ca href=\"http://janezlifeandtimes.files.wordpress.com/2009/04/pooh_n_piglet_jig.jpg\">nervous little friend\u003c/a>, and a rogue's gallery of notorious male chauvinists -- would line the walls. The atmosphere would be unsubtly rendered, but genuine, irony-free -- seriously silly, with excellent food. That's one distinction I can draw between themed bars and restaurants here and there: seemingly goofy joints in Japan actually tend to have good food, whereas in the United States, even in San Francisco, corny trappings (from tiki bars to Chuck E. Cheese) all but guarantee an indifferent kitchen.\u003c/p>\n\u003cp>[ad fullwidth]\u003c/p>\n\u003cp>[ad floatright]\u003c/p>\n\u003cp>In Kyoto, the most unassuming bar I visited was in many ways the most revealing. To launch a long night of drinking, my girlfriend and I wandered into Color, an elegant, stylish lounge decked out in handsome modern furniture and classy vintage appliances. This was a nice place to drink. It reminded us of countless bars we'd patronized in the States. We discerned no theme, which, obviously, didn't surprise us. We'd seen plenty of regular bars around. This one just felt cozier than most. Then, we grabbed a card on the way out and read the finer print. The bar did in fact have a theme. It identified as \"New York-style,\" which explained why it struck us as so familiar -- right down to the $10 cocktails.\u003c/p>\n\n","blocks":[],"excerpt":"My trip to Japan late last March gave me a new perspective on themed drinking establishments. I wasn't there long enough to deliver an exhaustive report -- I'm sure some late-night Travel Channel special has already tried.","status":"publish","parent":0,"modified":1268760321,"stats":{"hasAudio":false,"hasVideo":false,"hasChartOrMap":false,"iframeSrcs":[],"hasGoogleForm":false,"hasGallery":false,"hasHearkenModule":false,"hasPolis":false,"paragraphCount":8,"wordCount":1200},"headData":{"title":"Bar and Restaurant Themantics | KQED","description":"My trip to Japan late last March gave me a new perspective on themed drinking establishments. I wasn't there long enough to deliver an exhaustive report -- I'm sure some late-night Travel Channel special has already tried.","ogTitle":"","ogDescription":"","ogImgId":"","twTitle":"","twDescription":"","twImgId":"","schema":{"@context":"http://schema.org","@type":"Article","headline":"Bar and Restaurant Themantics","datePublished":"2010-03-16T15:17:32.000Z","dateModified":"2010-03-16T17:25:21.000Z","image":"https://cdn.kqed.org/wp-content/uploads/2020/02/KQED-OG-Image@1x.png"}},"disqusIdentifier":"11324 http://blogs.kqed.org/bayareabites/?p=11324","disqusUrl":"https://ww2.kqed.org/bayareabites/2010/03/16/bar-and-restaurant-themantics/","disqusTitle":"Bar and Restaurant Themantics","path":"/bayareabites/11324/bar-and-restaurant-themantics","audioTrackLength":null,"parsedContent":[{"type":"contentString","content":"\u003cdiv class=\"post-body\">\u003cp>\u003cp>\u003cimg src=\"http://ww2.kqed.org/bayareabites/wp-content/uploads/sites/24/2010/03/andrew-rasta.jpg\" alt=\"andrew simmons at rasta\" title=\"andrew simmons at rasta\" width=\"300\" height=\"225\" class=\"alignleft size-full wp-image-11341\">Restaurants and bars with themes have always rubbed me the wrong way. I think of the first and only time I walked into \u003ca href=\"http://www.smoothasbutter.com/\">Butter\u003c/a>. It must have been 2003. While I was as well-versed in irony as any literary theory buff with a fresh diploma, the brown-bagged forties, snack stand carved out of the side of a trailer, and steaming tater tots seemed a bit much. I'm not a stickler for good taste, but I was instantly annoyed by a bar dedicated to aping the coarsest trappings of poor white culture for the amusement of privileged San Franciscans carousing through SoMa. I've seen it before around these parts: even politically radical non-profit workers who would rather poke out an eye than offend a person of color think nothing of throwing \"white trash\"-themed birthday parties for themselves. Plus, tater tots are actually really good -- without irony, just ketchup.\u003c/p>\n\u003cp>Still, I've splashed around the \u003ca href=\"http://www.fairmont.com/sanfrancisco/GuestServices/Restaurants/TheTongaRoomHurricaneBar.htm\">Tonga Room\u003c/a>, stomped into the \u003ca href=\"http://www.bigfootlodge.com/\">Bigfoot Lounge\u003c/a>, and knocked back a whiskey at \u003ca href=\"http://www.bourbonandbranch.com/\">Bourbon and Branch\u003c/a>, that classy throw-back to San Francisco's speakeasy-riddled past -- appealing themed joints, all of them. The other day, I was talking themed bars with some buddies, one of whom manages a newish decidedly un-themed establishment in Russian Hill, on Polk, just above the Tenderloin. The topic was Manhattan bars, where drink costs soar to airport prices -- $6 for a bottle of beer, $10 for a well drink. We joked that someone should start a really, really expensive bar in San Francisco called $$$. There would be a $50 cover charge, and no music, karaoke, free food, pool, or pub quiz to account for the steep entrance fee. The drinks would not be made with fancy infused \u003ca href=\"http://www.alcademics.com/2010/02/ilegal-infusions-the-word-gets-out.html\">potentially illegal spirits\u003c/a> or feature small artisanal producers. They would be perfectly plain and perhaps a little weak. Still, if you could afford to buy your way in, you could hang out with others who could as well, which might be reward enough. It'd be pure elitism, distilled -- as appropriate a theme as any.\u003c/p>\n\u003cp>My trip to Japan late last March gave me a new perspective on themed drinking establishments. I wasn't there long enough to deliver an exhaustive report -- I'm sure some late-night Travel Channel special has already tried. There was so much I did not see, particularly in Tokyo, where I only spent a few jet-lagged days. My home-base for most of the visit was Kyoto, Japan's old Imperial capitol. Still, after a week of bouncing around that city's bars and informal late-night eateries, my head was throbbing -- and not from too much single malt. Along Kiyamachi St., very close to the Kamo River, tiny izakayas and watering holes burrow into unassuming commercial storefronts and stubby office buildings. You walk up a few flights of stairs -- as if going to see a disreputable dentist -- and knock on doors that open on to strange, insular, fastidiously detailed worlds. They reminded me of levels in \u003ca href=\"http://www.videogamesblogger.com/wp-content/uploads/2006/10/super-mario-bros-2-nes-potion.jpg\">Super Mario Brothers\u003c/a>: through one portal, a swanky, pocket-sized cool jazz club draped in blue curtains appeared, through another, fittingly, a red-and-white toadstool-themed \u003ca href=\"http://ww2.kqed.org/bayareabites/2009/11/24/morel-of-a-story/\">\"mushroom\" bar\u003c/a> no bigger than an apartment kitchen -- both in the same building, occupying suites on the same floor. \u003c/p>\n\u003cp>One night, I visited two establishments thoroughly preoccupied with Jamaica's most prominent (and cliched) cultural and artistic exports -- Bob Marley, an easy way with marijuana, Rastafarianism, ripe for the watering down, and the flag's black, yellow, and green color scheme. Despite being a huge reggae fan, in the United States, I wouldn't have had the slightest interest. Nonetheless, Rasta and Rub-A-Dub were a lot of fun. The first is a dark cave on the 4th or 5th floor of an office building. Muzak renditions of Rockers classics seep from hidden speakers. A weed leaf mosaic rises up out of the tiled floor. A shrine to Mr. Marley occupies the middle of the back wall, bathed in chartreuse light, overlooking the scene. When I was there, the crowd was typically diverse: bartenders with desperate attempts at dreadlocks, a few business guys enjoying an extended happy hour, a party of ladies on the heels of a shopping trip, and a couple hanging out along the side wall, with the lanky American gentleman trying not to look as absurd as the retina-burning blue \"island\" cocktails in his glass. Significantly older, Rub-A-Dub is located in a frond-filled basement. According to legend, the owner, a Japanese man, married a Jamaican woman, and opened the bar to continuously remind her of her homeland. In truth, theme aside, Rasta would be considered a pretty good restaurant in San Francisco, offering roast fish heads and Japanese riffs on jerked chicken and seafood. I didn't eat at Rub-A-Dub (too many fish heads at Rasta), but I did have a few drinks under bunches of bananas hanging from the ceiling. \u003c/p>\n\u003cp>I returned from Japan in April -- just ten days after I'd arrived -- but I started thinking about themes all over again last week, when I read an S.F. Weekly \u003ca href=\"http://blogs.sfweekly.com/foodie/2010/03/hog_rocks_introduces_the_ham_b.php\">blog post\u003c/a> about Hogs & Rocks. Set to open in May or June, this joint endeavor of \u003ca href=\"http://www.sfmaverick.com/\">Maverick\u003c/a> chef Scott Youkilis and Eric Rubin of \u003ca href=\"http://www.tresagaves.com/\">Tres Agaves\u003c/a> will serve 45 different kinds of ham, along with pickles, salads, and oysters (the rocks, of course). Unlike, say Rasta, Hogs & Rocks will do food and drink first, letting aesthetics follow suit. If the bar sprang up in Japan, the floor cushions would be swine-pink and sewn up to look like plump hind legs. There'd be small chairs shaped like oyster shells. Albums by Badfinger (lead singer, the late Peter Ham) would boom on the stereo. Images of piggy pop culture's most prominent representatives -- Wilbur, Porky, Pooh's \u003ca href=\"http://janezlifeandtimes.files.wordpress.com/2009/04/pooh_n_piglet_jig.jpg\">nervous little friend\u003c/a>, and a rogue's gallery of notorious male chauvinists -- would line the walls. The atmosphere would be unsubtly rendered, but genuine, irony-free -- seriously silly, with excellent food. That's one distinction I can draw between themed bars and restaurants here and there: seemingly goofy joints in Japan actually tend to have good food, whereas in the United States, even in San Francisco, corny trappings (from tiki bars to Chuck E. Cheese) all but guarantee an indifferent kitchen.\u003c/p>\n\u003cp>\u003c/p>\u003c/div>","attributes":{"named":{},"numeric":[]}},{"type":"component","content":"","name":"ad","attributes":{"named":{"label":"fullwidth"},"numeric":["fullwidth"]}},{"type":"contentString","content":"\u003cdiv class=\"post-body\">\u003cp>\u003c/p>\n\u003cp>\u003c/p>\u003c/div>","attributes":{"named":{},"numeric":[]}},{"type":"component","content":"","name":"ad","attributes":{"named":{"label":"floatright"},"numeric":["floatright"]}},{"type":"contentString","content":"\u003cdiv class=\"post-body\">\u003cp>\u003c/p>\n\u003cp>In Kyoto, the most unassuming bar I visited was in many ways the most revealing. To launch a long night of drinking, my girlfriend and I wandered into Color, an elegant, stylish lounge decked out in handsome modern furniture and classy vintage appliances. This was a nice place to drink. It reminded us of countless bars we'd patronized in the States. We discerned no theme, which, obviously, didn't surprise us. We'd seen plenty of regular bars around. This one just felt cozier than most. Then, we grabbed a card on the way out and read the finer print. The bar did in fact have a theme. It identified as \"New York-style,\" which explained why it struck us as so familiar -- right down to the $10 cocktails.\u003c/p>\n\n\u003c/div>\u003c/p>","attributes":{"named":{},"numeric":[]}}],"link":"/bayareabites/11324/bar-and-restaurant-themantics","authors":["5060"],"categories":["bayareabites_109","bayareabites_1807","bayareabites_90","bayareabites_61"],"tags":["bayareabites_772","bayareabites_3590","bayareabites_1288","bayareabites_989","bayareabites_3588","bayareabites_3589","bayareabites_3591"],"label":"bayareabites"},"bayareabites_6783":{"type":"posts","id":"bayareabites_6783","meta":{"index":"posts_1591205157","site":"bayareabites","id":"6783","score":null,"sort":[1252957824000]},"guestAuthors":[],"slug":"taking-time-in-the-kitchen-down-to-the-brown","title":"Taking Time in the Kitchen: Down to the Brown","publishDate":1252957824,"format":"aside","headTitle":"Bay Area Bites | KQED Food","labelTerm":{"site":"bayareabites"},"content":"\u003cp>\u003cimg src=\"http://ww2.kqed.org/bayareabites/wp-content/uploads/sites/24/2009/09/brown_butter.jpg\" alt=\"brown butter\" title=\"brown butter\" width=\"500\" height=\"253\" class=\"alignnone size-full wp-image-6785\">\u003c/p>\n\u003cp>Everyday cooking means taking lots of shortcuts. For the most flavor with the shortest amount of time in the kitchen, especially when you've splurged or gone out of your way to buy good ingredients, it's a delicate balance between paying attention to the details and just trying to get dinner on the table.\u003c/p>\n\u003cp>We've all done it -- cooked tomatoes with their peels and seeds, served pureed soup unstrained, fried the potatoes just once, not twice. It's healthier, right?\u003c/p>\n\u003cp>As a cook, I embrace shortcuts. But as a cooking teacher, I always try to explain to my classes why, over the centuries and millennia, certain techniques have developed. Sometimes it's cultural. Usually, though, there's a very real change in texture or flavor, nutrition or shelf-life.\u003c/p>\n\u003cp>Two simple techniques increasingly omitted from recipes now are salting eggplant and browning butter. Neither are absolutely necessary. Both, however, are worth doing every once in a while to remind yourself just what amazing flavors you can create in the kitchen.\u003c/p>\n\u003cp>[ad fullwidth]\u003c/p>\n\u003cp>\u003cstrong>BROWNED BUTTER\u003c/strong>\u003c/p>\n\u003cp>\u003cimg src=\"http://ww2.kqed.org/bayareabites/wp-content/uploads/sites/24/2009/09/brown_butter3.jpg\" alt=\"brown butter\" title=\"brown butter\" width=\"500\" height=\"332\" class=\"alignnone size-full wp-image-6789\">\u003c/p>\n\u003cp>Simmering whole butter until all its water bubbles off and its protein solids separate accomplishes several key improvements. It allows the butter to sit at (tropical) room temperature much longer without turning rancid. It significantly increases the butter's smoke point to allow high-heat cooking. And it transforms the milks sweet flavor, adding deep, nutty, caramel tones. Indians call it \u003cem>ghee\u003c/em>, while the French call it \u003cem>beurre noisette\u003c/em>, or hazelnut butter for its rich color and flavor.\u003c/p>\n\u003cp>You need just five or ten minutes to make browned butter. Melt good-quality, unsalted butter in a small, heavy pan over medium heat. (A lighter colored pan will allow you to judge more easily the color of the butter as it cooks.) Continue cooking it through the foamy bubbling stage, while all the water evaporates off. Reduce the heat if you want to give yourself some extra buffer time, especially if this is your first time browning butter. As the bubbles subside, swirl the pan occasionally and keep an extra close eye on the butter. The protein solids will sink to the bottom. When they turn light brown, transfer the hot butter immediately to a heat-proof bowl. Be sure not to scorch the butter, as blackened protein will taste sharply acrid, not pleasantly nutty. It will darken a little more as it cools. \u003c/p>\n\u003cp>For frying or long storage, be sure to separate the milk solids: skim off any remaining foam and spoon or pour off the oil while still liquid, leaving behind the darkened protein at the bottom of the bowl.\u003c/p>\n\u003cp>Browned butter can be used while still melted to saute or to garnish. It's excellent for vegetables like asparagus, broccoli, and green beans. If you're trying to use less butter, deepening its flavor will accentuate the effect from smaller amounts. For a super simple yet elegant entree, sear chicken breast, pork chops, or fish fillets in browned butter and then serve with fresh lemon wedges.\u003c/p>\n\u003cp>Let browned butter solidify and substitute it in baked recipes for extra delicate cookies and cakes. (Remember that less water means less gluten development in flour, so be sure to allow for some trial and error as you figure out the fulcrum point between flavor and structure.) Use it in rice pilaf to serve with full-flavored stews and roasts. Or simply offer it at the table in your regular butter dish and spread it on crusty bread or flaky biscuits for a flavor epiphany.\u003c/p>\n\u003cp>\u003cstrong>SALTING EGGPLANT\u003c/strong>\u003c/p>\n\u003cp>\u003cimg src=\"http://ww2.kqed.org/bayareabites/wp-content/uploads/sites/24/2009/09/brown_eggplant.jpg\" alt=\"brown eggplant\" title=\"brown eggplant\" width=\"500\" height=\"332\" class=\"alignnone size-full wp-image-6784\">\u003c/p>\n\u003cp>With ever smaller, younger and fresher vegetables making their way to our markets in the past decades, old rules have lost much of their imperative. Peeling, trimming, salting -- these were techniques required when vegetables were allowed to mature completely on the plant, transported long distances without the benefit of refrigeration, and served within days not weeks of harvest. Tender carrots no longer require peeling. Young celery stalks can be cooked with leaves. And most eggplants now, especially the narrow Asian varieties, are fine going straight from the cutting board the pan.\u003c/p>\n\u003cp>Occasionally, though, salting eggplant is critical and will remind you just why this vegetable has been embraced in classic dishes around the world. It's a hassle, but the extra step draws out bitter juices in older vegetables, whether those missed in the back corner of your garden or forgotten in the bottom of your refrigerator. More importantly, salting alters the cell structure of the vegetable's flesh, creating that famous silken texture while preventing excess absorption of oil.\u003c/p>\n\u003cp>To salt eggplant, halve, dice or slice it as needed. Sprinkle generous with kosher salt and set aside in a bowl or colander. To encourage the purging of juices, weight the eggplant. (The most effective way is to fill a zip bag with water and plop it on top of the pieces. The age-old method is a flat plate topped with a rock.) Leave the eggplant for 30 to 60 minutes. When you return and peek into the bowl, you'll see a surprising amount of dark brown liquid at the bottom. Rinse the eggplant quickly in cool water, drain well and then dry it by wringing in a clean cloth or patting with paper towels. \u003c/p>\n\u003cp>Salting eggplant will noticeably improve recipes that call for stuffing eggplant halves or rolling thin slices around a filling. It's also a good technique for dishes where keeping its shape is important, such as stews, curries, ratatouille, or parmigiana. If you're deep-frying eggplant, salting is essential for preventing greasiness.\u003c/p>\n\u003cp>And what if you're making baba ganoush or using tiny, little adolescent eggplants? Nope, no one will care or notice if you skip the salting. \u003c/p>\n\u003cp>\u003c/p>\n\u003cp>Cooking is an investment of time and money, energy and love. Like all decisions, judging the costs requires knowing the benefits. And then choosing wisely. \u003c/p>\n\n","blocks":[],"excerpt":"Two simple techniques increasingly omitted from recipes now are salting eggplant and browning butter. Neither are absolutely necessary. Both, however, are worth doing every once in a while to remind yourself just what amazing flavors you can create in the kitchen.\r\n","status":"publish","parent":0,"modified":1252957824,"stats":{"hasAudio":false,"hasVideo":false,"hasChartOrMap":false,"iframeSrcs":[],"hasGoogleForm":false,"hasGallery":false,"hasHearkenModule":false,"hasPolis":false,"paragraphCount":22,"wordCount":981},"headData":{"title":"Taking Time in the Kitchen: Down to the Brown | KQED","description":"Two simple techniques increasingly omitted from recipes now are salting eggplant and browning butter. Neither are absolutely necessary. Both, however, are worth doing every once in a while to remind yourself just what amazing flavors you can create in the kitchen.\r\n","ogTitle":"","ogDescription":"","ogImgId":"","twTitle":"","twDescription":"","twImgId":"","schema":{"@context":"http://schema.org","@type":"Article","headline":"Taking Time in the Kitchen: Down to the Brown","datePublished":"2009-09-14T19:50:24.000Z","dateModified":"2009-09-14T19:50:24.000Z","image":"https://cdn.kqed.org/wp-content/uploads/2020/02/KQED-OG-Image@1x.png"}},"disqusIdentifier":"6783 http://blogs.kqed.org/bayareabites/?p=6783","disqusUrl":"https://ww2.kqed.org/bayareabites/2009/09/14/taking-time-in-the-kitchen-down-to-the-brown/","disqusTitle":"Taking Time in the Kitchen: Down to the Brown","path":"/bayareabites/6783/taking-time-in-the-kitchen-down-to-the-brown","audioTrackLength":null,"parsedContent":[{"type":"contentString","content":"\u003cdiv class=\"post-body\">\u003cp>\u003cp>\u003cimg src=\"http://ww2.kqed.org/bayareabites/wp-content/uploads/sites/24/2009/09/brown_butter.jpg\" alt=\"brown butter\" title=\"brown butter\" width=\"500\" height=\"253\" class=\"alignnone size-full wp-image-6785\">\u003c/p>\n\u003cp>Everyday cooking means taking lots of shortcuts. For the most flavor with the shortest amount of time in the kitchen, especially when you've splurged or gone out of your way to buy good ingredients, it's a delicate balance between paying attention to the details and just trying to get dinner on the table.\u003c/p>\n\u003cp>We've all done it -- cooked tomatoes with their peels and seeds, served pureed soup unstrained, fried the potatoes just once, not twice. It's healthier, right?\u003c/p>\n\u003cp>As a cook, I embrace shortcuts. But as a cooking teacher, I always try to explain to my classes why, over the centuries and millennia, certain techniques have developed. Sometimes it's cultural. Usually, though, there's a very real change in texture or flavor, nutrition or shelf-life.\u003c/p>\n\u003cp>Two simple techniques increasingly omitted from recipes now are salting eggplant and browning butter. Neither are absolutely necessary. Both, however, are worth doing every once in a while to remind yourself just what amazing flavors you can create in the kitchen.\u003c/p>\n\u003cp>\u003c/p>\u003c/div>","attributes":{"named":{},"numeric":[]}},{"type":"component","content":"","name":"ad","attributes":{"named":{"label":"fullwidth"},"numeric":["fullwidth"]}},{"type":"contentString","content":"\u003cdiv class=\"post-body\">\u003cp>\u003c/p>\n\u003cp>\u003cstrong>BROWNED BUTTER\u003c/strong>\u003c/p>\n\u003cp>\u003cimg src=\"http://ww2.kqed.org/bayareabites/wp-content/uploads/sites/24/2009/09/brown_butter3.jpg\" alt=\"brown butter\" title=\"brown butter\" width=\"500\" height=\"332\" class=\"alignnone size-full wp-image-6789\">\u003c/p>\n\u003cp>Simmering whole butter until all its water bubbles off and its protein solids separate accomplishes several key improvements. It allows the butter to sit at (tropical) room temperature much longer without turning rancid. It significantly increases the butter's smoke point to allow high-heat cooking. And it transforms the milks sweet flavor, adding deep, nutty, caramel tones. Indians call it \u003cem>ghee\u003c/em>, while the French call it \u003cem>beurre noisette\u003c/em>, or hazelnut butter for its rich color and flavor.\u003c/p>\n\u003cp>You need just five or ten minutes to make browned butter. Melt good-quality, unsalted butter in a small, heavy pan over medium heat. (A lighter colored pan will allow you to judge more easily the color of the butter as it cooks.) Continue cooking it through the foamy bubbling stage, while all the water evaporates off. Reduce the heat if you want to give yourself some extra buffer time, especially if this is your first time browning butter. As the bubbles subside, swirl the pan occasionally and keep an extra close eye on the butter. The protein solids will sink to the bottom. When they turn light brown, transfer the hot butter immediately to a heat-proof bowl. Be sure not to scorch the butter, as blackened protein will taste sharply acrid, not pleasantly nutty. It will darken a little more as it cools. \u003c/p>\n\u003cp>For frying or long storage, be sure to separate the milk solids: skim off any remaining foam and spoon or pour off the oil while still liquid, leaving behind the darkened protein at the bottom of the bowl.\u003c/p>\n\u003cp>Browned butter can be used while still melted to saute or to garnish. It's excellent for vegetables like asparagus, broccoli, and green beans. If you're trying to use less butter, deepening its flavor will accentuate the effect from smaller amounts. For a super simple yet elegant entree, sear chicken breast, pork chops, or fish fillets in browned butter and then serve with fresh lemon wedges.\u003c/p>\n\u003cp>Let browned butter solidify and substitute it in baked recipes for extra delicate cookies and cakes. (Remember that less water means less gluten development in flour, so be sure to allow for some trial and error as you figure out the fulcrum point between flavor and structure.) Use it in rice pilaf to serve with full-flavored stews and roasts. Or simply offer it at the table in your regular butter dish and spread it on crusty bread or flaky biscuits for a flavor epiphany.\u003c/p>\n\u003cp>\u003cstrong>SALTING EGGPLANT\u003c/strong>\u003c/p>\n\u003cp>\u003cimg src=\"http://ww2.kqed.org/bayareabites/wp-content/uploads/sites/24/2009/09/brown_eggplant.jpg\" alt=\"brown eggplant\" title=\"brown eggplant\" width=\"500\" height=\"332\" class=\"alignnone size-full wp-image-6784\">\u003c/p>\n\u003cp>With ever smaller, younger and fresher vegetables making their way to our markets in the past decades, old rules have lost much of their imperative. Peeling, trimming, salting -- these were techniques required when vegetables were allowed to mature completely on the plant, transported long distances without the benefit of refrigeration, and served within days not weeks of harvest. Tender carrots no longer require peeling. Young celery stalks can be cooked with leaves. And most eggplants now, especially the narrow Asian varieties, are fine going straight from the cutting board the pan.\u003c/p>\n\u003cp>Occasionally, though, salting eggplant is critical and will remind you just why this vegetable has been embraced in classic dishes around the world. It's a hassle, but the extra step draws out bitter juices in older vegetables, whether those missed in the back corner of your garden or forgotten in the bottom of your refrigerator. More importantly, salting alters the cell structure of the vegetable's flesh, creating that famous silken texture while preventing excess absorption of oil.\u003c/p>\n\u003cp>To salt eggplant, halve, dice or slice it as needed. Sprinkle generous with kosher salt and set aside in a bowl or colander. To encourage the purging of juices, weight the eggplant. (The most effective way is to fill a zip bag with water and plop it on top of the pieces. The age-old method is a flat plate topped with a rock.) Leave the eggplant for 30 to 60 minutes. When you return and peek into the bowl, you'll see a surprising amount of dark brown liquid at the bottom. Rinse the eggplant quickly in cool water, drain well and then dry it by wringing in a clean cloth or patting with paper towels. \u003c/p>\n\u003cp>Salting eggplant will noticeably improve recipes that call for stuffing eggplant halves or rolling thin slices around a filling. It's also a good technique for dishes where keeping its shape is important, such as stews, curries, ratatouille, or parmigiana. If you're deep-frying eggplant, salting is essential for preventing greasiness.\u003c/p>\n\u003cp>And what if you're making baba ganoush or using tiny, little adolescent eggplants? Nope, no one will care or notice if you skip the salting. \u003c/p>\n\u003cp>\u003c/p>\n\u003cp>Cooking is an investment of time and money, energy and love. Like all decisions, judging the costs requires knowing the benefits. And then choosing wisely. \u003c/p>\n\n\u003c/div>\u003c/p>","attributes":{"named":{},"numeric":[]}}],"link":"/bayareabites/6783/taking-time-in-the-kitchen-down-to-the-brown","authors":["5018"],"categories":["bayareabites_2695","bayareabites_12"],"tags":["bayareabites_1288","bayareabites_569","bayareabites_2292","bayareabites_2694","bayareabites_199"],"label":"bayareabites"},"bayareabites_1334":{"type":"posts","id":"bayareabites_1334","meta":{"index":"posts_1591205157","site":"bayareabites","id":"1334","score":null,"sort":[1218222042000]},"guestAuthors":[],"slug":"how-to-make-butter","title":"How To Make Butter","publishDate":1218222042,"format":"aside","headTitle":"Bay Area Bites | KQED Food","labelTerm":{"site":"bayareabites"},"content":"\u003cp>\u003cimg src=\"http://ww2.kqed.org/bayareabites/wp-content/uploads/sites/24/2008/08/butter-trio.jpg\" alt=\"butter trio\" align=\"left\">A couple of summers ago, I called to check in on a friend of mine in New Jersey, who was taking a more-or-less enforced summer off of work. He'd spent his time traveling to Greece with his family, organizing his life, playing with his kids, but the novelty of so much free time was wearing thin. His boredom was as clear as he sighed over the phone when I asked him what he'd been up to.\u003c/p>\n\u003cp>\"Oh...nothing. Just making butter today...\"\u003c/p>\n\u003cp>Making butter? I pictured him sitting on an Amish stool churning away in the shade of his porch. And since I've always thought of butter-making as the sole province of women, I pictured him in a dairy maid's bonnet that matched both his eyes and his rugby shirt. I was a bit jealous of both his crushing amount of free time and the fact that he had thought of making butter before I did. I asked him where he picked up the churn.\u003c/p>\n\u003cp>\"I don't have a churn, Michael. I'm doing it in my Kitchen Aid.\"\u003c/p>\n\u003cp>There went my fantasy. Use of a stand mixer was cheating in my book. Especially on the East Coast, where my urban, California sensibilities allowed me to imagine butter churns by the truckload were to be had yard-saling on any given weekend.\u003c/p>\n\u003cp>[ad fullwidth]\u003c/p>\n\u003cp>My fantasy deflated, I cast the thought of butter-making out of my head. Until last week, when I picked up my dog-eared copy of \u003ca href=\"http://www.amazon.com/exec/obidos/ASIN/0802136516/kqedorg-20\">Much Depends on Dinner\u003c/a> by \u003ca href=\"http://www.margaretvisser.com/\">Margaret Visser\u003c/a>. Her chapter “Butter– and Something ‘Just as Good’” made me think entirely too much about the stuff. I wanted to know how to make it on my own, so I did a little research. And I do mean little.\u003c/p>\n\u003cp>It’s alarmingly easy to do, as you’ll soon see. For an excellent and very informative post on butter and butter-making, visit \u003ca href=\"http://www.cookingforengineers.com/article/113/Making-Butter\">Cooking for Engineers\u003c/a> -- a site filled with all the cooking Geekdom to which I aspire.\u003c/p>\n\u003cp>\u003cstrong>Butter\u003c/strong>\u003c/p>\n\u003cp>\u003cstrong>Makes: \u003c/strong>1 cup\u003c/p>\n\u003cp>\u003cstrong>Ingredients:\u003c/strong>\u003c/p>\n\u003cp>2 cups heavy whipping cream (at a temperature between 60 and 68°F)\u003cbr>\nA pinch of salt (optional)\u003cbr>\nFinely diced herbs (also optional)\u003c/p>\n\u003cp>\u003cstrong>Preparation:\u003c/strong>\u003c/p>\n\u003cp>1. Place cream in the clean, cool bowl of your stand mixer, assuming you have one. Mix on medium speed.\u003c/p>\n\u003cp>\u003cimg src=\"http://ww2.kqed.org/bayareabites/wp-content/uploads/sites/24/2008/08/butter-whiskcream.jpg\" alt=\"whisk cream\">\u003c/p>\n\u003cp>2. Basically, you begin by making whipped cream. Once the cream has reached stiff-peak stage, slow the mixing down a little. The cream will now start to clump in the bowl.\u003c/p>\n\u003cp>\u003cimg src=\"http://ww2.kqed.org/bayareabites/wp-content/uploads/sites/24/2008/08/butter-overwhip.jpg\" alt=\"butter happens when you keep whipping after the cream turns into whipped cream\">\u003c/p>\n\u003cp>3. What you have in the bowl will quickly turn from creamy white to, not surprisingly given the subject matter of this post, buttery yellow.\u003c/p>\n\u003cp>\u003cimg src=\"http://ww2.kqed.org/bayareabites/wp-content/uploads/sites/24/2008/08/butter-turns.jpg\" alt=\"butter turns\">\u003c/p>\n\u003cp>4. After a short while, the buttermilk will begin to separate from the butter solids.\u003c/p>\n\u003cp>\u003cimg src=\"http://ww2.kqed.org/bayareabites/wp-content/uploads/sites/24/2008/08/butter-leaky.jpg\" alt=\"buttermilk separates from butter solids\">\u003c/p>\n\u003cp>5. Pour off the buttermilk. You may save it as the appropriate beverage for a late night, heart-to-heart conversation about women with your teen-aged son around your antique farm house table, cook with it, or throw it away. The choice is yours.\u003c/p>\n\u003cp>6. At this point, it’s a good idea to rinse the remaining buttermilk from the solid bits, since the buttermilk will cause your butter to turn rancid much sooner than one would like. Pour cold water over the butter, then squeeze and knead. Repeat until water runs clear.\u003c/p>\n\u003cp>\u003cimg src=\"http://ww2.kqed.org/bayareabites/wp-content/uploads/sites/24/2008/08/butter-press.jpg\" alt=\" squeeze and knead butter\">\u003c/p>\n\u003cp>7. Congratulations, you now have your butter.\u003c/p>\n\u003cp>\u003cimg src=\"http://ww2.kqed.org/bayareabites/wp-content/uploads/sites/24/2008/08/butter-done.jpg\" alt=\"butter done\">\u003c/p>\n\u003cp>8. You may now add a little salt, if that is your preference. Or fold in some fresh herbs. Whatever the hell you want, really-- it’s your butter.\u003c/p>\n\u003cp>\u003cimg src=\"http://ww2.kqed.org/bayareabites/wp-content/uploads/sites/24/2008/08/butter-chives.jpg\" alt=\"butter with chives\">\u003c/p>\n\u003cp>\u003c/p>\n\u003cp>Makes approximately one cup of useable butter excellent for lashing on one’s toast or experimenting à la \u003ca href=\"http://en.wikipedia.org/wiki/Maria_Schneider_(actress)\">Maria Schneider\u003c/a>. Have a jolly time with it.\u003c/p>\n\n","blocks":[],"excerpt":"Making butter? I pictured him sitting on an Amish stool churning away in the shade of his porch. And since I've always thought of butter-making as the sole province of women, I pictured him in a dairy maid's bonnet that matched both his eyes and his rugby shirt. I was a bit jealous of both his crushing amount of free time and the fact that he had thought of making butter before I did. I asked him where he picked up the churn.\r\n\"I don't have a churn, Michael. I'm doing it in my Kitchen Aid.\"\r\n","status":"publish","parent":0,"modified":1373058212,"stats":{"hasAudio":false,"hasVideo":false,"hasChartOrMap":false,"iframeSrcs":[],"hasGoogleForm":false,"hasGallery":false,"hasHearkenModule":false,"hasPolis":false,"paragraphCount":30,"wordCount":631},"headData":{"title":"How To Make Butter | KQED","description":"Making butter? I pictured him sitting on an Amish stool churning away in the shade of his porch. And since I've always thought of butter-making as the sole province of women, I pictured him in a dairy maid's bonnet that matched both his eyes and his rugby shirt. I was a bit jealous of both his crushing amount of free time and the fact that he had thought of making butter before I did. I asked him where he picked up the churn.\r\n"I don't have a churn, Michael. I'm doing it in my Kitchen Aid."\r\n","ogTitle":"","ogDescription":"","ogImgId":"","twTitle":"","twDescription":"","twImgId":"","schema":{"@context":"http://schema.org","@type":"Article","headline":"How To Make Butter","datePublished":"2008-08-08T19:00:42.000Z","dateModified":"2013-07-05T21:03:32.000Z","image":"https://cdn.kqed.org/wp-content/uploads/2020/02/KQED-OG-Image@1x.png"}},"disqusIdentifier":"1334 http://blogs.kqed.org/bayareabites/2008/08/08/how-to-make-butter/","disqusUrl":"https://ww2.kqed.org/bayareabites/2008/08/08/how-to-make-butter/","disqusTitle":"How To Make Butter","path":"/bayareabites/1334/how-to-make-butter","audioTrackLength":null,"parsedContent":[{"type":"contentString","content":"\u003cdiv class=\"post-body\">\u003cp>\u003cp>\u003cimg src=\"http://ww2.kqed.org/bayareabites/wp-content/uploads/sites/24/2008/08/butter-trio.jpg\" alt=\"butter trio\" align=\"left\">A couple of summers ago, I called to check in on a friend of mine in New Jersey, who was taking a more-or-less enforced summer off of work. He'd spent his time traveling to Greece with his family, organizing his life, playing with his kids, but the novelty of so much free time was wearing thin. His boredom was as clear as he sighed over the phone when I asked him what he'd been up to.\u003c/p>\n\u003cp>\"Oh...nothing. Just making butter today...\"\u003c/p>\n\u003cp>Making butter? I pictured him sitting on an Amish stool churning away in the shade of his porch. And since I've always thought of butter-making as the sole province of women, I pictured him in a dairy maid's bonnet that matched both his eyes and his rugby shirt. I was a bit jealous of both his crushing amount of free time and the fact that he had thought of making butter before I did. I asked him where he picked up the churn.\u003c/p>\n\u003cp>\"I don't have a churn, Michael. I'm doing it in my Kitchen Aid.\"\u003c/p>\n\u003cp>There went my fantasy. Use of a stand mixer was cheating in my book. Especially on the East Coast, where my urban, California sensibilities allowed me to imagine butter churns by the truckload were to be had yard-saling on any given weekend.\u003c/p>\n\u003cp>\u003c/p>\u003c/div>","attributes":{"named":{},"numeric":[]}},{"type":"component","content":"","name":"ad","attributes":{"named":{"label":"fullwidth"},"numeric":["fullwidth"]}},{"type":"contentString","content":"\u003cdiv class=\"post-body\">\u003cp>\u003c/p>\n\u003cp>My fantasy deflated, I cast the thought of butter-making out of my head. Until last week, when I picked up my dog-eared copy of \u003ca href=\"http://www.amazon.com/exec/obidos/ASIN/0802136516/kqedorg-20\">Much Depends on Dinner\u003c/a> by \u003ca href=\"http://www.margaretvisser.com/\">Margaret Visser\u003c/a>. Her chapter “Butter– and Something ‘Just as Good’” made me think entirely too much about the stuff. I wanted to know how to make it on my own, so I did a little research. And I do mean little.\u003c/p>\n\u003cp>It’s alarmingly easy to do, as you’ll soon see. For an excellent and very informative post on butter and butter-making, visit \u003ca href=\"http://www.cookingforengineers.com/article/113/Making-Butter\">Cooking for Engineers\u003c/a> -- a site filled with all the cooking Geekdom to which I aspire.\u003c/p>\n\u003cp>\u003cstrong>Butter\u003c/strong>\u003c/p>\n\u003cp>\u003cstrong>Makes: \u003c/strong>1 cup\u003c/p>\n\u003cp>\u003cstrong>Ingredients:\u003c/strong>\u003c/p>\n\u003cp>2 cups heavy whipping cream (at a temperature between 60 and 68°F)\u003cbr>\nA pinch of salt (optional)\u003cbr>\nFinely diced herbs (also optional)\u003c/p>\n\u003cp>\u003cstrong>Preparation:\u003c/strong>\u003c/p>\n\u003cp>1. Place cream in the clean, cool bowl of your stand mixer, assuming you have one. Mix on medium speed.\u003c/p>\n\u003cp>\u003cimg src=\"http://ww2.kqed.org/bayareabites/wp-content/uploads/sites/24/2008/08/butter-whiskcream.jpg\" alt=\"whisk cream\">\u003c/p>\n\u003cp>2. Basically, you begin by making whipped cream. Once the cream has reached stiff-peak stage, slow the mixing down a little. The cream will now start to clump in the bowl.\u003c/p>\n\u003cp>\u003cimg src=\"http://ww2.kqed.org/bayareabites/wp-content/uploads/sites/24/2008/08/butter-overwhip.jpg\" alt=\"butter happens when you keep whipping after the cream turns into whipped cream\">\u003c/p>\n\u003cp>3. What you have in the bowl will quickly turn from creamy white to, not surprisingly given the subject matter of this post, buttery yellow.\u003c/p>\n\u003cp>\u003cimg src=\"http://ww2.kqed.org/bayareabites/wp-content/uploads/sites/24/2008/08/butter-turns.jpg\" alt=\"butter turns\">\u003c/p>\n\u003cp>4. After a short while, the buttermilk will begin to separate from the butter solids.\u003c/p>\n\u003cp>\u003cimg src=\"http://ww2.kqed.org/bayareabites/wp-content/uploads/sites/24/2008/08/butter-leaky.jpg\" alt=\"buttermilk separates from butter solids\">\u003c/p>\n\u003cp>5. Pour off the buttermilk. You may save it as the appropriate beverage for a late night, heart-to-heart conversation about women with your teen-aged son around your antique farm house table, cook with it, or throw it away. The choice is yours.\u003c/p>\n\u003cp>6. At this point, it’s a good idea to rinse the remaining buttermilk from the solid bits, since the buttermilk will cause your butter to turn rancid much sooner than one would like. Pour cold water over the butter, then squeeze and knead. Repeat until water runs clear.\u003c/p>\n\u003cp>\u003cimg src=\"http://ww2.kqed.org/bayareabites/wp-content/uploads/sites/24/2008/08/butter-press.jpg\" alt=\" squeeze and knead butter\">\u003c/p>\n\u003cp>7. Congratulations, you now have your butter.\u003c/p>\n\u003cp>\u003cimg src=\"http://ww2.kqed.org/bayareabites/wp-content/uploads/sites/24/2008/08/butter-done.jpg\" alt=\"butter done\">\u003c/p>\n\u003cp>8. You may now add a little salt, if that is your preference. Or fold in some fresh herbs. Whatever the hell you want, really-- it’s your butter.\u003c/p>\n\u003cp>\u003cimg src=\"http://ww2.kqed.org/bayareabites/wp-content/uploads/sites/24/2008/08/butter-chives.jpg\" alt=\"butter with chives\">\u003c/p>\n\u003cp>\u003c/p>\n\u003cp>Makes approximately one cup of useable butter excellent for lashing on one’s toast or experimenting à la \u003ca href=\"http://en.wikipedia.org/wiki/Maria_Schneider_(actress)\">Maria Schneider\u003c/a>. Have a jolly time with it.\u003c/p>\n\n\u003c/div>\u003c/p>","attributes":{"named":{},"numeric":[]}}],"link":"/bayareabites/1334/how-to-make-butter","authors":["5017"],"categories":["bayareabites_2638","bayareabites_12"],"tags":["bayareabites_1288","bayareabites_11943","bayareabites_11942","bayareabites_987"],"label":"bayareabites"}},"programsReducer":{"possible":{"id":"possible","title":"Possible","info":"Possible is hosted by entrepreneur Reid Hoffman and writer Aria Finger. Together in Possible, Hoffman and Finger lead enlightening discussions about building a brighter collective future. The show features interviews with visionary guests like Trevor Noah, Sam Altman and Janette Sadik-Khan. Possible paints an optimistic portrait of the world we can create through science, policy, business, art and our shared humanity. It asks: What if everything goes right for once? How can we get there? Each episode also includes a short fiction story generated by advanced AI GPT-4, serving as a thought-provoking springboard to speculate how humanity could leverage technology for good.","airtime":"SUN 2pm","imageSrc":"https://cdn.kqed.org/wp-content/uploads/2024/04/Possible-Podcast-Tile-360x360-1.jpg","officialWebsiteLink":"https://www.possible.fm/","meta":{"site":"news","source":"Possible"},"link":"/radio/program/possible","subscribe":{"apple":"https://podcasts.apple.com/us/podcast/possible/id1677184070","spotify":"https://open.spotify.com/show/730YpdUSNlMyPQwNnyjp4k"}},"1a":{"id":"1a","title":"1A","info":"1A is home to the national conversation. 1A brings on great guests and frames the best debate in ways that make you think, share and engage.","airtime":"MON-THU 11pm-12am","imageSrc":"https://ww2.kqed.org/radio/wp-content/uploads/sites/50/2018/04/1a.jpg","officialWebsiteLink":"https://the1a.org/","meta":{"site":"news","source":"npr"},"link":"/radio/program/1a","subscribe":{"npr":"https://rpb3r.app.goo.gl/RBrW","apple":"https://itunes.apple.com/WebObjects/MZStore.woa/wa/viewPodcast?s=143441&mt=2&id=1188724250&at=11l79Y&ct=nprdirectory","tuneIn":"https://tunein.com/radio/1A-p947376/","rss":"https://feeds.npr.org/510316/podcast.xml"}},"all-things-considered":{"id":"all-things-considered","title":"All Things Considered","info":"Every weekday, \u003cem>All Things Considered\u003c/em> hosts Robert Siegel, Audie Cornish, Ari Shapiro, and Kelly McEvers present the program's trademark mix of news, interviews, commentaries, reviews, and offbeat features. Michel Martin hosts on the weekends.","airtime":"MON-FRI 1pm-2pm, 4:30pm-6:30pm\u003cbr />SAT-SUN 5pm-6pm","imageSrc":"https://cdn.kqed.org/wp-content/uploads/2024/04/All-Things-Considered-Podcast-Tile-360x360-1.jpg","officialWebsiteLink":"https://www.npr.org/programs/all-things-considered/","meta":{"site":"news","source":"npr"},"link":"/radio/program/all-things-considered"},"american-suburb-podcast":{"id":"american-suburb-podcast","title":"American Suburb: The Podcast","tagline":"The flip side of gentrification, told through one town","info":"Gentrification is changing cities across America, forcing people from neighborhoods they have long called home. Call them the displaced. Now those priced out of the Bay Area are looking for a better life in an unlikely place. American Suburb follows this migration to one California town along the Delta, 45 miles from San Francisco. But is this once sleepy suburb ready for them?","imageSrc":"https://cdn.kqed.org/wp-content/uploads/2024/04/American-Suburb-Podcast-Tile-703x703-1.jpg","officialWebsiteLink":"/news/series/american-suburb-podcast","meta":{"site":"news","source":"kqed","order":"13"},"link":"/news/series/american-suburb-podcast/","subscribe":{"npr":"https://rpb3r.app.goo.gl/RBrW","apple":"https://itunes.apple.com/WebObjects/MZStore.woa/wa/viewPodcast?mt=2&id=1287748328","tuneIn":"https://tunein.com/radio/American-Suburb-p1086805/","rss":"https://ww2.kqed.org/news/series/american-suburb-podcast/feed/podcast","google":"https://podcasts.google.com/feed/aHR0cHM6Ly9mZWVkcy5tZWdhcGhvbmUuZm0vS1FJTkMzMDExODgxNjA5"}},"baycurious":{"id":"baycurious","title":"Bay Curious","tagline":"Exploring the Bay Area, one question at a time","info":"KQED’s new podcast, Bay Curious, gets to the bottom of the mysteries — both profound and peculiar — that give the Bay Area its unique identity. And we’ll do it with your help! You ask the questions. You decide what Bay Curious investigates. And you join us on the journey to find the answers.","imageSrc":"https://cdn.kqed.org/wp-content/uploads/2024/04/Bay-Curious-Podcast-Tile-703x703-1.jpg","imageAlt":"\"KQED Bay Curious","officialWebsiteLink":"/news/series/baycurious","meta":{"site":"news","source":"kqed","order":"4"},"link":"/podcasts/baycurious","subscribe":{"apple":"https://podcasts.apple.com/us/podcast/bay-curious/id1172473406","npr":"https://www.npr.org/podcasts/500557090/bay-curious","rss":"https://ww2.kqed.org/news/category/bay-curious-podcast/feed/podcast","google":"https://podcasts.google.com/feed/aHR0cHM6Ly93dzIua3FlZC5vcmcvbmV3cy9jYXRlZ29yeS9iYXktY3VyaW91cy1wb2RjYXN0L2ZlZWQvcG9kY2FzdA","stitcher":"https://www.stitcher.com/podcast/kqed/bay-curious","spotify":"https://open.spotify.com/show/6O76IdmhixfijmhTZLIJ8k"}},"bbc-world-service":{"id":"bbc-world-service","title":"BBC World Service","info":"The day's top stories from BBC News compiled twice daily in the week, once at weekends.","airtime":"MON-FRI 9pm-10pm, TUE-FRI 1am-2am","imageSrc":"https://cdn.kqed.org/wp-content/uploads/2024/04/BBC-World-Service-Podcast-Tile-360x360-1.jpg","officialWebsiteLink":"https://www.bbc.co.uk/sounds/play/live:bbc_world_service","meta":{"site":"news","source":"BBC World Service"},"link":"/radio/program/bbc-world-service","subscribe":{"apple":"https://itunes.apple.com/us/podcast/global-news-podcast/id135067274?mt=2","tuneIn":"https://tunein.com/radio/BBC-World-Service-p455581/","rss":"https://podcasts.files.bbci.co.uk/p02nq0gn.rss"}},"code-switch-life-kit":{"id":"code-switch-life-kit","title":"Code Switch / Life Kit","info":"\u003cem>Code Switch\u003c/em>, which listeners will hear in the first part of the hour, has fearless and much-needed conversations about race. Hosted by journalists of color, the show tackles the subject of race head-on, exploring how it impacts every part of society — from politics and pop culture to history, sports and more.\u003cbr />\u003cbr />\u003cem>Life Kit\u003c/em>, which will be in the second part of the hour, guides you through spaces and feelings no one prepares you for — from finances to mental health, from workplace microaggressions to imposter syndrome, from relationships to parenting. The show features experts with real world experience and shares their knowledge. Because everyone needs a little help being human.\u003cbr />\u003cbr />\u003ca href=\"https://www.npr.org/podcasts/510312/codeswitch\">\u003cem>Code Switch\u003c/em> offical site and podcast\u003c/a>\u003cbr />\u003ca href=\"https://www.npr.org/lifekit\">\u003cem>Life Kit\u003c/em> offical site and podcast\u003c/a>\u003cbr />","airtime":"SUN 9pm-10pm","imageSrc":"https://cdn.kqed.org/wp-content/uploads/2024/04/Code-Switch-Life-Kit-Podcast-Tile-360x360-1.jpg","meta":{"site":"radio","source":"npr"},"link":"/radio/program/code-switch-life-kit","subscribe":{"apple":"https://podcasts.apple.com/podcast/1112190608?mt=2&at=11l79Y&ct=nprdirectory","google":"https://podcasts.google.com/feed/aHR0cHM6Ly93d3cubnByLm9yZy9yc3MvcG9kY2FzdC5waHA_aWQ9NTEwMzEy","spotify":"https://open.spotify.com/show/3bExJ9JQpkwNhoHvaIIuyV","rss":"https://feeds.npr.org/510312/podcast.xml"}},"commonwealth-club":{"id":"commonwealth-club","title":"Commonwealth Club of California Podcast","info":"The Commonwealth Club of California is the nation's oldest and largest public affairs forum. As a non-partisan forum, The Club brings to the public airwaves diverse viewpoints on important topics. The Club's weekly radio broadcast - the oldest in the U.S., dating back to 1924 - is carried across the nation on public radio stations and is now podcasting. Our website archive features audio of our recent programs, as well as selected speeches from our long and distinguished history. This podcast feed is usually updated twice a week and is always un-edited.","airtime":"THU 10pm, FRI 1am","imageSrc":"https://cdn.kqed.org/wp-content/uploads/2024/04/Commonwealth-Club-Podcast-Tile-360x360-1.jpg","officialWebsiteLink":"https://www.commonwealthclub.org/podcasts","meta":{"site":"news","source":"Commonwealth Club of California"},"link":"/radio/program/commonwealth-club","subscribe":{"apple":"https://itunes.apple.com/us/podcast/commonwealth-club-of-california-podcast/id976334034?mt=2","google":"https://podcasts.google.com/feed/aHR0cDovL3d3dy5jb21tb253ZWFsdGhjbHViLm9yZy9hdWRpby9wb2RjYXN0L3dlZWtseS54bWw","tuneIn":"https://tunein.com/radio/Commonwealth-Club-of-California-p1060/"}},"considerthis":{"id":"considerthis","title":"Consider This","tagline":"Make sense of the day","info":"Make sense of the day. Every weekday afternoon, Consider This helps you consider the major stories of the day in less than 15 minutes, featuring the reporting and storytelling resources of NPR. Plus, KQED’s Bianca Taylor brings you the local KQED news you need to know.","imageSrc":"https://cdn.kqed.org/wp-content/uploads/2024/04/Consider-This-Podcast-Tile-703x703-1.jpg","imageAlt":"Consider This from NPR and KQED","officialWebsiteLink":"/podcasts/considerthis","meta":{"site":"news","source":"kqed","order":"7"},"link":"/podcasts/considerthis","subscribe":{"apple":"https://podcasts.apple.com/podcast/id1503226625?mt=2&at=11l79Y&ct=nprdirectory","npr":"https://rpb3r.app.goo.gl/coronavirusdaily","google":"https://podcasts.google.com/feed/aHR0cHM6Ly9mZWVkcy5ucHIub3JnLzUxMDM1NS9wb2RjYXN0LnhtbA","spotify":"https://open.spotify.com/show/3Z6JdCS2d0eFEpXHKI6WqH"}},"forum":{"id":"forum","title":"Forum","tagline":"The conversation starts here","info":"KQED’s live call-in program discussing local, state, national and international issues, as well as in-depth interviews.","airtime":"MON-FRI 9am-11am, 10pm-11pm","imageSrc":"https://cdn.kqed.org/wp-content/uploads/2024/04/Forum-Podcast-Tile-703x703-1.jpg","imageAlt":"KQED Forum with Mina Kim and Alexis Madrigal","officialWebsiteLink":"/forum","meta":{"site":"news","source":"kqed","order":"8"},"link":"/forum","subscribe":{"apple":"https://podcasts.apple.com/us/podcast/kqeds-forum/id73329719","google":"https://podcasts.google.com/feed/aHR0cHM6Ly9mZWVkcy5tZWdhcGhvbmUuZm0vS1FJTkM5NTU3MzgxNjMz","npr":"https://www.npr.org/podcasts/432307980/forum","stitcher":"https://www.stitcher.com/podcast/kqedfm-kqeds-forum-podcast","rss":"https://feeds.megaphone.fm/KQINC9557381633"}},"freakonomics-radio":{"id":"freakonomics-radio","title":"Freakonomics Radio","info":"Freakonomics Radio is a one-hour award-winning podcast and public-radio project hosted by Stephen Dubner, with co-author Steve Levitt as a regular guest. It is produced in partnership with WNYC.","imageSrc":"https://ww2.kqed.org/news/wp-content/uploads/sites/10/2018/05/freakonomicsRadio.png","officialWebsiteLink":"http://freakonomics.com/","airtime":"SUN 1am-2am, SAT 3pm-4pm","meta":{"site":"radio","source":"WNYC"},"link":"/radio/program/freakonomics-radio","subscribe":{"npr":"https://rpb3r.app.goo.gl/4s8b","apple":"https://itunes.apple.com/us/podcast/freakonomics-radio/id354668519","tuneIn":"https://tunein.com/podcasts/WNYC-Podcasts/Freakonomics-Radio-p272293/","rss":"https://feeds.feedburner.com/freakonomicsradio"}},"fresh-air":{"id":"fresh-air","title":"Fresh Air","info":"Hosted by Terry Gross, \u003cem>Fresh Air from WHYY\u003c/em> is the Peabody Award-winning weekday magazine of contemporary arts and issues. One of public radio's most popular programs, Fresh Air features intimate conversations with today's biggest luminaries.","airtime":"MON-FRI 7pm-8pm","imageSrc":"https://cdn.kqed.org/wp-content/uploads/2024/04/Fresh-Air-Podcast-Tile-360x360-1.jpg","officialWebsiteLink":"https://www.npr.org/programs/fresh-air/","meta":{"site":"radio","source":"npr"},"link":"/radio/program/fresh-air","subscribe":{"npr":"https://rpb3r.app.goo.gl/4s8b","apple":"https://itunes.apple.com/WebObjects/MZStore.woa/wa/viewPodcast?s=143441&mt=2&id=214089682&at=11l79Y&ct=nprdirectory","tuneIn":"https://tunein.com/radio/Fresh-Air-p17/","rss":"https://feeds.npr.org/381444908/podcast.xml"}},"here-and-now":{"id":"here-and-now","title":"Here & Now","info":"A live production of NPR and WBUR Boston, in collaboration with stations across the country, Here & Now reflects the fluid world of news as it's happening in the middle of the day, with timely, in-depth news, interviews and conversation. Hosted by Robin Young, Jeremy Hobson and Tonya Mosley.","airtime":"MON-THU 11am-12pm","imageSrc":"https://cdn.kqed.org/wp-content/uploads/2024/04/Here-And-Now-Podcast-Tile-360x360-1.jpg","officialWebsiteLink":"http://www.wbur.org/hereandnow","meta":{"site":"news","source":"npr"},"link":"/radio/program/here-and-now","subsdcribe":{"apple":"https://itunes.apple.com/WebObjects/MZStore.woa/wa/viewPodcast?mt=2&id=426698661","tuneIn":"https://tunein.com/radio/Here--Now-p211/","rss":"https://feeds.npr.org/510051/podcast.xml"}},"how-i-built-this":{"id":"how-i-built-this","title":"How I Built This with Guy Raz","info":"Guy Raz dives into the stories behind some of the world's best known companies. How I Built This weaves a narrative journey about innovators, entrepreneurs and idealists—and the movements they built.","imageSrc":"https://ww2.kqed.org/news/wp-content/uploads/sites/10/2018/05/howIBuiltThis.png","officialWebsiteLink":"https://www.npr.org/podcasts/510313/how-i-built-this","airtime":"SUN 7:30pm-8pm","meta":{"site":"news","source":"npr"},"link":"/radio/program/how-i-built-this","subscribe":{"npr":"https://rpb3r.app.goo.gl/3zxy","apple":"https://itunes.apple.com/us/podcast/how-i-built-this-with-guy-raz/id1150510297?mt=2","tuneIn":"https://tunein.com/podcasts/Arts--Culture-Podcasts/How-I-Built-This-p910896/","rss":"https://feeds.npr.org/510313/podcast.xml"}},"inside-europe":{"id":"inside-europe","title":"Inside Europe","info":"Inside Europe, a one-hour weekly news magazine hosted by Helen Seeney and Keith Walker, explores the topical issues shaping the continent. No other part of the globe has experienced such dynamic political and social change in recent years.","airtime":"SAT 3am-4am","imageSrc":"https://cdn.kqed.org/wp-content/uploads/2024/04/Inside-Europe-Podcast-Tile-300x300-1.jpg","meta":{"site":"news","source":"Deutsche Welle"},"link":"/radio/program/inside-europe","subscribe":{"apple":"https://itunes.apple.com/us/podcast/inside-europe/id80106806?mt=2","tuneIn":"https://tunein.com/radio/Inside-Europe-p731/","rss":"https://partner.dw.com/xml/podcast_inside-europe"}},"latino-usa":{"id":"latino-usa","title":"Latino USA","airtime":"MON 1am-2am, SUN 6pm-7pm","info":"Latino USA, the radio journal of news and culture, is the only national, English-language radio program produced from a Latino perspective.","imageSrc":"https://ww2.kqed.org/radio/wp-content/uploads/sites/50/2018/04/latinoUsa.jpg","officialWebsiteLink":"http://latinousa.org/","meta":{"site":"news","source":"npr"},"link":"/radio/program/latino-usa","subscribe":{"npr":"https://rpb3r.app.goo.gl/xtTd","apple":"https://itunes.apple.com/WebObjects/MZStore.woa/wa/viewPodcast?s=143441&mt=2&id=79681317&at=11l79Y&ct=nprdirectory","tuneIn":"https://tunein.com/radio/Latino-USA-p621/","rss":"https://feeds.npr.org/510016/podcast.xml"}},"live-from-here-highlights":{"id":"live-from-here-highlights","title":"Live from Here Highlights","info":"Chris Thile steps to the mic as the host of Live from Here (formerly A Prairie Home Companion), a live public radio variety show. Download Chris’s Song of the Week plus other highlights from the broadcast. Produced by American Public Media.","airtime":"SAT 6pm-8pm, SUN 11am-1pm","imageSrc":"https://cdn.kqed.org/wp-content/uploads/2024/04/Live-From-Here-Podcast-Tile-360x360-1.jpg","officialWebsiteLink":"https://www.livefromhere.org/","meta":{"site":"arts","source":"american public media"},"link":"/radio/program/live-from-here-highlights","subscribe":{"apple":"https://itunes.apple.com/us/podcast/id1167173941","tuneIn":"https://tunein.com/radio/Live-from-Here-Highlights-p921744/","rss":"https://feeds.publicradio.org/public_feeds/a-prairie-home-companion-highlights/rss/rss"}},"marketplace":{"id":"marketplace","title":"Marketplace","info":"Our flagship program, helmed by Kai Ryssdal, examines what the day in money delivered, through stories, conversations, newsworthy numbers and more. Updated Monday through Friday at about 3:30 p.m. PT.","airtime":"MON-FRI 4pm-4:30pm, MON-WED 6:30pm-7pm","imageSrc":"https://cdn.kqed.org/wp-content/uploads/2024/04/Marketplace-Podcast-Tile-360x360-1.jpg","officialWebsiteLink":"https://www.marketplace.org/","meta":{"site":"news","source":"American Public Media"},"link":"/radio/program/marketplace","subscribe":{"apple":"https://itunes.apple.com/WebObjects/MZStore.woa/wa/viewPodcast?s=143441&mt=2&id=201853034&at=11l79Y&ct=nprdirectory","tuneIn":"https://tunein.com/radio/APM-Marketplace-p88/","rss":"https://feeds.publicradio.org/public_feeds/marketplace-pm/rss/rss"}},"mindshift":{"id":"mindshift","title":"MindShift","tagline":"A podcast about the future of learning and how we raise our kids","info":"The MindShift podcast explores the innovations in education that are shaping how kids learn. Hosts Ki Sung and Katrina Schwartz introduce listeners to educators, researchers, parents and students who are developing effective ways to improve how kids learn. We cover topics like how fed-up administrators are developing surprising tactics to deal with classroom disruptions; how listening to podcasts are helping kids develop reading skills; the consequences of overparenting; and why interdisciplinary learning can engage students on all ends of the traditional achievement spectrum. This podcast is part of the MindShift education site, a division of KQED News. KQED is an NPR/PBS member station based in San Francisco. You can also visit the MindShift website for episodes and supplemental blog posts or tweet us \u003ca href=\"https://twitter.com/MindShiftKQED\">@MindShiftKQED\u003c/a> or visit us at \u003ca href=\"/mindshift\">MindShift.KQED.org\u003c/a>","imageSrc":"https://cdn.kqed.org/wp-content/uploads/2024/04/Mindshift-Podcast-Tile-703x703-1.jpg","imageAlt":"KQED MindShift: How We Will Learn","officialWebsiteLink":"/mindshift/","meta":{"site":"news","source":"kqed","order":"2"},"link":"/podcasts/mindshift","subscribe":{"apple":"https://podcasts.apple.com/us/podcast/mindshift-podcast/id1078765985","google":"https://podcasts.google.com/feed/aHR0cHM6Ly9mZWVkcy5tZWdhcGhvbmUuZm0vS1FJTkM1NzY0NjAwNDI5","npr":"https://www.npr.org/podcasts/464615685/mind-shift-podcast","stitcher":"https://www.stitcher.com/podcast/kqed/stories-teachers-share","spotify":"https://open.spotify.com/show/0MxSpNYZKNprFLCl7eEtyx"}},"morning-edition":{"id":"morning-edition","title":"Morning Edition","info":"\u003cem>Morning Edition\u003c/em> takes listeners around the country and the world with multi-faceted stories and commentaries every weekday. Hosts Steve Inskeep, David Greene and Rachel Martin bring you the latest breaking news and features to prepare you for the day.","airtime":"MON-FRI 3am-9am","imageSrc":"https://cdn.kqed.org/wp-content/uploads/2024/04/Morning-Edition-Podcast-Tile-360x360-1.jpg","officialWebsiteLink":"https://www.npr.org/programs/morning-edition/","meta":{"site":"news","source":"npr"},"link":"/radio/program/morning-edition"},"onourwatch":{"id":"onourwatch","title":"On Our Watch","tagline":"Police secrets, unsealed","info":"For decades, the process for how police police themselves has been inconsistent – if not opaque. In some states, like California, these proceedings were completely hidden. After a new police transparency law unsealed scores of internal affairs files, our reporters set out to examine these cases and the shadow world of police discipline. On Our Watch brings listeners into the rooms where officers are questioned and witnesses are interrogated to find out who this system is really protecting. Is it the officers, or the public they've sworn to serve?","imageSrc":"https://cdn.kqed.org/wp-content/uploads/2024/04/On-Our-Watch-Podcast-Tile-703x703-1.jpg","imageAlt":"On Our Watch from NPR and KQED","officialWebsiteLink":"/podcasts/onourwatch","meta":{"site":"news","source":"kqed","order":"1"},"link":"/podcasts/onourwatch","subscribe":{"apple":"https://podcasts.apple.com/podcast/id1567098962","google":"https://podcasts.google.com/feed/aHR0cHM6Ly9mZWVkcy5ucHIub3JnLzUxMDM2MC9wb2RjYXN0LnhtbD9zYz1nb29nbGVwb2RjYXN0cw","npr":"https://rpb3r.app.goo.gl/onourwatch","spotify":"https://open.spotify.com/show/0OLWoyizopu6tY1XiuX70x","tuneIn":"https://tunein.com/radio/On-Our-Watch-p1436229/","stitcher":"https://www.stitcher.com/show/on-our-watch","rss":"https://feeds.npr.org/510360/podcast.xml"}},"on-the-media":{"id":"on-the-media","title":"On The Media","info":"Our weekly podcast explores how the media 'sausage' is made, casts an incisive eye on fluctuations in the marketplace of ideas, and examines threats to the freedom of information and expression in America and abroad. For one hour a week, the show tries to lift the veil from the process of \"making media,\" especially news media, because it's through that lens that we see the world and the world sees us","airtime":"SUN 2pm-3pm, MON 12am-1am","imageSrc":"https://ww2.kqed.org/radio/wp-content/uploads/sites/50/2018/04/onTheMedia.png","officialWebsiteLink":"https://www.wnycstudios.org/shows/otm","meta":{"site":"news","source":"wnyc"},"link":"/radio/program/on-the-media","subscribe":{"apple":"https://itunes.apple.com/us/podcast/on-the-media/id73330715?mt=2","tuneIn":"https://tunein.com/radio/On-the-Media-p69/","rss":"http://feeds.wnyc.org/onthemedia"}},"our-body-politic":{"id":"our-body-politic","title":"Our Body Politic","info":"Presented by KQED, KCRW and KPCC, and created and hosted by award-winning journalist Farai Chideya, Our Body Politic is unapologetically centered on reporting on not just how women of color experience the major political events of today, but how they’re impacting those very issues.","airtime":"SAT 6pm-7pm, SUN 1am-2am","imageSrc":"https://cdn.kqed.org/wp-content/uploads/2024/04/Our-Body-Politic-Podcast-Tile-360x360-1.jpg","officialWebsiteLink":"https://our-body-politic.simplecast.com/","meta":{"site":"news","source":"kcrw"},"link":"/radio/program/our-body-politic","subscribe":{"apple":"https://podcasts.apple.com/us/podcast/our-body-politic/id1533069868","google":"https://podcasts.google.com/feed/aHR0cHM6Ly9mZWVkcy5zaW1wbGVjYXN0LmNvbS9feGFQaHMxcw","spotify":"https://open.spotify.com/show/4ApAiLT1kV153TttWAmqmc","rss":"https://feeds.simplecast.com/_xaPhs1s","tuneIn":"https://tunein.com/podcasts/News--Politics-Podcasts/Our-Body-Politic-p1369211/"}},"pbs-newshour":{"id":"pbs-newshour","title":"PBS NewsHour","info":"Analysis, background reports and updates from the PBS NewsHour putting today's news in context.","airtime":"MON-FRI 3pm-4pm","imageSrc":"https://cdn.kqed.org/wp-content/uploads/2024/04/PBS-News-Hour-Podcast-Tile-360x360-1.jpg","officialWebsiteLink":"https://www.pbs.org/newshour/","meta":{"site":"news","source":"pbs"},"link":"/radio/program/pbs-newshour","subscribe":{"apple":"https://itunes.apple.com/us/podcast/pbs-newshour-full-show/id394432287?mt=2","tuneIn":"https://tunein.com/radio/PBS-NewsHour---Full-Show-p425698/","rss":"https://www.pbs.org/newshour/feeds/rss/podcasts/show"}},"perspectives":{"id":"perspectives","title":"Perspectives","tagline":"KQED's series of of daily listener commentaries since 1991","info":"KQED's series of of daily listener commentaries since 1991.","imageSrc":"https://cdn.kqed.org/wp-content/uploads/2024/04/Perspectives-Podcast-Tile-703x703-1.jpg","officialWebsiteLink":"/perspectives/","meta":{"site":"radio","source":"kqed","order":"15"},"link":"/perspectives","subscribe":{"apple":"https://podcasts.apple.com/us/podcast/id73801135","npr":"https://www.npr.org/podcasts/432309616/perspectives","rss":"https://ww2.kqed.org/perspectives/category/perspectives/feed/","google":"https://podcasts.google.com/feed/aHR0cHM6Ly93dzIua3FlZC5vcmcvcGVyc3BlY3RpdmVzL2NhdGVnb3J5L3BlcnNwZWN0aXZlcy9mZWVkLw"}},"planet-money":{"id":"planet-money","title":"Planet Money","info":"The economy explained. Imagine you could call up a friend and say, Meet me at the bar and tell me what's going on with the economy. Now imagine that's actually a fun evening.","airtime":"SUN 3pm-4pm","imageSrc":"https://ww2.kqed.org/radio/wp-content/uploads/sites/50/2018/04/planetmoney.jpg","officialWebsiteLink":"https://www.npr.org/sections/money/","meta":{"site":"news","source":"npr"},"link":"/radio/program/planet-money","subscribe":{"npr":"https://rpb3r.app.goo.gl/M4f5","apple":"https://itunes.apple.com/us/podcast/planet-money/id290783428?mt=2","tuneIn":"https://tunein.com/podcasts/Business--Economics-Podcasts/Planet-Money-p164680/","rss":"https://feeds.npr.org/510289/podcast.xml"}},"politicalbreakdown":{"id":"politicalbreakdown","title":"Political Breakdown","tagline":"Politics from a personal perspective","info":"Political Breakdown is a new series that explores the political intersection of California and the nation. Each week hosts Scott Shafer and Marisa Lagos are joined with a new special guest to unpack politics -- with personality — and offer an insider’s glimpse at how politics happens.","airtime":"THU 6:30pm-7pm","imageSrc":"https://cdn.kqed.org/wp-content/uploads/2024/04/Political-Breakdown-2024-Podcast-Tile-703x703-1.jpg","imageAlt":"KQED Political Breakdown","officialWebsiteLink":"/podcasts/politicalbreakdown","meta":{"site":"radio","source":"kqed","order":"11"},"link":"/podcasts/politicalbreakdown","subscribe":{"apple":"https://podcasts.apple.com/us/podcast/political-breakdown/id1327641087","google":"https://podcasts.google.com/feed/aHR0cHM6Ly9mZWVkcy5tZWdhcGhvbmUuZm0vS1FJTkM5Nzk2MzI2MTEx","npr":"https://www.npr.org/podcasts/572155894/political-breakdown","stitcher":"https://www.stitcher.com/podcast/kqed/political-breakdown","spotify":"https://open.spotify.com/show/07RVyIjIdk2WDuVehvBMoN","rss":"https://ww2.kqed.org/news/tag/political-breakdown/feed/podcast"}},"pri-the-world":{"id":"pri-the-world","title":"PRI's The World: Latest Edition","info":"Each weekday, host Marco Werman and his team of producers bring you the world's most interesting stories in an hour of radio that reminds us just how small our planet really is.","airtime":"MON-FRI 2pm-3pm","imageSrc":"https://cdn.kqed.org/wp-content/uploads/2024/04/The-World-Podcast-Tile-360x360-1.jpg","officialWebsiteLink":"https://www.pri.org/programs/the-world","meta":{"site":"news","source":"PRI"},"link":"/radio/program/pri-the-world","subscribe":{"apple":"https://itunes.apple.com/us/podcast/pris-the-world-latest-edition/id278196007?mt=2","tuneIn":"https://tunein.com/podcasts/News--Politics-Podcasts/PRIs-The-World-p24/","rss":"http://feeds.feedburner.com/pri/theworld"}},"radiolab":{"id":"radiolab","title":"Radiolab","info":"A two-time Peabody Award-winner, Radiolab is an investigation told through sounds and stories, and centered around one big idea. In the Radiolab world, information sounds like music and science and culture collide. Hosted by Jad Abumrad and Robert Krulwich, the show is designed for listeners who demand skepticism, but appreciate wonder. WNYC Studios is the producer of other leading podcasts including Freakonomics Radio, Death, Sex & Money, On the Media and many more.","airtime":"SUN 12am-1am, SAT 2pm-3pm","imageSrc":"https://ww2.kqed.org/radio/wp-content/uploads/sites/50/2018/04/radiolab1400.png","officialWebsiteLink":"https://www.wnycstudios.org/shows/radiolab/","meta":{"site":"science","source":"WNYC"},"link":"/radio/program/radiolab","subscribe":{"apple":"https://itunes.apple.com/us/podcast/radiolab/id152249110?mt=2","tuneIn":"https://tunein.com/radio/RadioLab-p68032/","rss":"https://feeds.wnyc.org/radiolab"}},"reveal":{"id":"reveal","title":"Reveal","info":"Created by The Center for Investigative Reporting and PRX, Reveal is public radios first one-hour weekly radio show and podcast dedicated to investigative reporting. Credible, fact based and without a partisan agenda, Reveal combines the power and artistry of driveway moment storytelling with data-rich reporting on critically important issues. The result is stories that inform and inspire, arming our listeners with information to right injustices, hold the powerful accountable and improve lives.Reveal is hosted by Al Letson and showcases the award-winning work of CIR and newsrooms large and small across the nation. In a radio and podcast market crowded with choices, Reveal focuses on important and often surprising stories that illuminate the world for our listeners.","airtime":"SAT 4pm-5pm","imageSrc":"https://ww2.kqed.org/radio/wp-content/uploads/sites/50/2018/04/reveal300px.png","officialWebsiteLink":"https://www.revealnews.org/episodes/","meta":{"site":"news","source":"npr"},"link":"/radio/program/reveal","subscribe":{"apple":"https://itunes.apple.com/us/podcast/reveal/id886009669","tuneIn":"https://tunein.com/radio/Reveal-p679597/","rss":"http://feeds.revealradio.org/revealpodcast"}},"says-you":{"id":"says-you","title":"Says You!","info":"Public radio's game show of bluff and bluster, words and whimsy. The warmest, wittiest cocktail party - it's spirited and civil, brainy and boisterous, peppered with musical interludes. Fast paced and playful, it's the most fun you can have with language without getting your mouth washed out with soap. Our motto: It's not important to know the answers, it's important to like the answers!","airtime":"SUN 4pm-5pm","imageSrc":"https://cdn.kqed.org/wp-content/uploads/2024/04/Says-You-Podcast-Tile-360x360-1.jpg","officialWebsiteLink":"http://www.saysyouradio.com/","meta":{"site":"comedy","source":"Pipit and Finch"},"link":"/radio/program/says-you","subscribe":{"apple":"https://itunes.apple.com/us/podcast/says-you!/id1050199826","tuneIn":"https://tunein.com/radio/Says-You-p480/","rss":"https://saysyou.libsyn.com/rss"}},"science-friday":{"id":"science-friday","title":"Science Friday","info":"Science Friday is a weekly science talk show, broadcast live over public radio stations nationwide. Each week, the show focuses on science topics that are in the news and tries to bring an educated, balanced discussion to bear on the scientific issues at hand. Panels of expert guests join host Ira Flatow, a veteran science journalist, to discuss science and to take questions from listeners during the call-in portion of the program.","airtime":"FRI 11am-1pm","imageSrc":"https://cdn.kqed.org/wp-content/uploads/2024/04/Science-Friday-Podcast-Tile-360x360-1.jpg","officialWebsiteLink":"https://www.wnycstudios.org/shows/science-friday","meta":{"site":"news","source":"npr"},"link":"/radio/program/science-friday","subscribe":{"apple":"https://itunes.apple.com/WebObjects/MZStore.woa/wa/viewPodcast?s=143441&mt=2&id=73329284&at=11l79Y&ct=nprdirectory","tuneIn":"https://tunein.com/radio/Science-Friday-p394/","rss":"http://feeds.wnyc.org/science-friday"}},"science-podcast":{"id":"science-podcast","title":"KQED Science News","tagline":"From the lab, to your ears","info":"KQED Science explores science and environment news, trends, and events from the Bay Area and beyond.","imageSrc":"https://cdn.kqed.org/wp-content/uploads/2024/04/Science-News-Podcast-Tile-703x703-1.jpg","officialWebsiteLink":"https://ww2.kqed.org/science/category/science-podcast/","meta":{"site":"science","source":"kqed","order":"17"},"link":"/science/category/science-podcast","subscribe":{"apple":"https://podcasts.apple.com/us/podcast/kqed-science-news/id214663465","google":"https://podcasts.google.com/feed/aHR0cDovL2Jsb2dzLmtxZWQub3JnL3NjaWVuY2UvZmVlZC8","stitcher":"https://www.stitcher.com/podcast/kqed-science-news","rss":"https://ww2.kqed.org/science/category/science-podcast/feed/podcast"}},"selected-shorts":{"id":"selected-shorts","title":"Selected Shorts","info":"Spellbinding short stories by established and emerging writers take on a new life when they are performed by stars of the stage and screen.","airtime":"SAT 8pm-9pm","imageSrc":"https://cdn.kqed.org/wp-content/uploads/2024/04/Selected-Shorts-Podcast-Tile-360x360-1.jpg","officialWebsiteLink":"https://www.pri.org/programs/selected-shorts","meta":{"site":"arts","source":"pri"},"link":"/radio/program/selected-shorts","subscribe":{"apple":"https://itunes.apple.com/WebObjects/MZStore.woa/wa/viewPodcast?s=143441&mt=2&id=253191824&at=11l79Y&ct=nprdirectory","tuneIn":"https://tunein.com/radio/Selected-Shorts-p31792/","rss":"https://feeds.megaphone.fm/selectedshorts"}},"snap-judgment":{"id":"snap-judgment","title":"Snap Judgment","info":"Snap Judgment (Storytelling, with a BEAT) mixes real stories with killer beats to produce cinematic, dramatic, kick-ass radio. Snap’s raw, musical brand of storytelling dares listeners to see the world through the eyes of another. WNYC studios is the producer of leading podcasts including Radiolab, Freakonomics Radio, Note To Self, Here’s The Thing With Alec Baldwin, and more.","airtime":"SAT 1pm-2pm, 9pm-10pm","imageSrc":"https://ww2.kqed.org/radio/wp-content/uploads/sites/50/2018/04/snapJudgement.jpg","officialWebsiteLink":"https://snapjudgment.org","meta":{"site":"arts","source":"WNYC"},"link":"/radio/program/snap-judgment","subscribe":{"apple":"https://itunes.apple.com/WebObjects/MZStore.woa/wa/viewPodcast?s=143441&mt=2&id=283657561&at=11l79Y&ct=nprdirectory","tuneIn":"https://tunein.com/radio/Snap-Judgment-p243817/","rss":"https://feeds.feedburner.com/snapjudgment-wnyc"}},"soldout":{"id":"soldout","title":"SOLD OUT: Rethinking Housing in America","tagline":"A new future for housing","info":"Sold Out: Rethinking Housing in America","imageSrc":"https://cdn.kqed.org/wp-content/uploads/2024/04/Sold-Out-Podcast-Tile-703x703-1.jpg","imageAlt":"KQED Sold Out: Rethinking Housing in America","officialWebsiteLink":"/podcasts/soldout","meta":{"site":"news","source":"kqed","order":3},"link":"/podcasts/soldout","subscribe":{"npr":"https://www.npr.org/podcasts/911586047/s-o-l-d-o-u-t-a-new-future-for-housing","apple":"https://podcasts.apple.com/us/podcast/introducing-sold-out-rethinking-housing-in-america/id1531354937","rss":"https://feeds.megaphone.fm/soldout","spotify":"https://open.spotify.com/show/38dTBSk2ISFoPiyYNoKn1X","stitcher":"https://www.stitcher.com/podcast/kqed/sold-out-rethinking-housing-in-america","tunein":"https://tunein.com/radio/SOLD-OUT-Rethinking-Housing-in-America-p1365871/","google":"https://podcasts.google.com/feed/aHR0cHM6Ly9mZWVkcy5tZWdhcGhvbmUuZm0vc29sZG91dA"}},"ted-radio-hour":{"id":"ted-radio-hour","title":"TED Radio Hour","info":"The TED Radio Hour is a journey through fascinating ideas, astonishing inventions, fresh approaches to old problems, and new ways to think and create.","airtime":"SUN 3pm-4pm, SAT 10pm-11pm","imageSrc":"https://ww2.kqed.org/radio/wp-content/uploads/sites/50/2018/04/tedRadioHour.jpg","officialWebsiteLink":"https://www.npr.org/programs/ted-radio-hour/?showDate=2018-06-22","meta":{"site":"news","source":"npr"},"link":"/radio/program/ted-radio-hour","subscribe":{"npr":"https://rpb3r.app.goo.gl/8vsS","apple":"https://itunes.apple.com/WebObjects/MZStore.woa/wa/viewPodcast?s=143441&mt=2&id=523121474&at=11l79Y&ct=nprdirectory","tuneIn":"https://tunein.com/radio/TED-Radio-Hour-p418021/","rss":"https://feeds.npr.org/510298/podcast.xml"}},"tech-nation":{"id":"tech-nation","title":"Tech Nation Radio Podcast","info":"Tech Nation is a weekly public radio program, hosted by Dr. Moira Gunn. Founded in 1993, it has grown from a simple interview show to a multi-faceted production, featuring conversations with noted technology and science leaders, and a weekly science and technology-related commentary.","airtime":"FRI 10pm","imageSrc":"https://cdn.kqed.org/wp-content/uploads/2024/04/Tech-Nation-Radio-Podcast-Tile-360x360-1.jpg","officialWebsiteLink":"http://technation.podomatic.com/","meta":{"site":"science","source":"Tech Nation Media"},"link":"/radio/program/tech-nation","subscribe":{"rss":"https://technation.podomatic.com/rss2.xml"}},"thebay":{"id":"thebay","title":"The Bay","tagline":"Local news to keep you rooted","info":"Host Devin Katayama walks you through the biggest story of the day with reporters and newsmakers.","imageSrc":"https://cdn.kqed.org/wp-content/uploads/2024/04/The-Bay-Podcast-Tile-703x703-1.jpg","imageAlt":"\"KQED The Bay","officialWebsiteLink":"/podcasts/thebay","meta":{"site":"radio","source":"kqed","order":"6"},"link":"/podcasts/thebay","subscribe":{"apple":"https://podcasts.apple.com/us/podcast/the-bay/id1350043452","google":"https://podcasts.google.com/feed/aHR0cHM6Ly9mZWVkcy5tZWdhcGhvbmUuZm0vS1FJTkM4MjU5Nzg2MzI3","npr":"https://www.npr.org/podcasts/586725995/the-bay","stitcher":"https://www.stitcher.com/podcast/kqed/the-bay","spotify":"https://open.spotify.com/show/4BIKBKIujizLHlIlBNaAqQ","rss":"https://feeds.megaphone.fm/KQINC8259786327"}},"californiareport":{"id":"californiareport","title":"The California Report","tagline":"California, day by day","info":"KQED’s statewide radio news program providing daily coverage of issues, trends and public policy decisions.","imageSrc":"https://cdn.kqed.org/wp-content/uploads/2024/04/The-California-Report-Podcast-Tile-703x703-1.jpg","imageAlt":"KQED The California Report","officialWebsiteLink":"/californiareport","meta":{"site":"news","source":"kqed","order":"9"},"link":"/californiareport","subscribe":{"apple":"https://podcasts.apple.com/us/podcast/kqeds-the-california-report/id79681292","google":"https://podcasts.google.com/feed/aHR0cHM6Ly9mZWVkcy5tZWdhcGhvbmUuZm0vS1FJTkM1MDAyODE4NTgz","npr":"https://www.npr.org/podcasts/432285393/the-california-report","stitcher":"https://www.stitcher.com/podcast/kqedfm-kqeds-the-california-report-podcast-8838","rss":"https://ww2.kqed.org/news/tag/tcram/feed/podcast"}},"californiareportmagazine":{"id":"californiareportmagazine","title":"The California Report Magazine","tagline":"Your state, your stories","info":"Every week, The California Report Magazine takes you on a road trip for the ears: to visit the places and meet the people who make California unique. The in-depth storytelling podcast from the California Report.","airtime":"FRI 4:30pm-5pm, 6:30pm-7pm, 11pm-11:30pm","imageSrc":"https://cdn.kqed.org/wp-content/uploads/2024/04/The-California-Report-Magazine-Podcast-Tile-703x703-1.jpg","officialWebsiteLink":"/californiareportmagazine","meta":{"site":"news","source":"kqed","order":"10"},"link":"/californiareportmagazine","subscribe":{"apple":"https://podcasts.apple.com/us/podcast/the-california-report-magazine/id1314750545","google":"https://podcasts.google.com/feed/aHR0cHM6Ly9mZWVkcy5tZWdhcGhvbmUuZm0vS1FJTkM3NjkwNjk1OTAz","npr":"https://www.npr.org/podcasts/564733126/the-california-report-magazine","stitcher":"https://www.stitcher.com/podcast/kqed/the-california-report-magazine","rss":"https://ww2.kqed.org/news/tag/tcrmag/feed/podcast"}},"theleap":{"id":"theleap","title":"The Leap","tagline":"What if you closed your eyes, and jumped?","info":"Stories about people making dramatic, risky changes, told by award-winning public radio reporter Judy Campbell.","imageSrc":"https://cdn.kqed.org/wp-content/uploads/2024/04/The-Leap-Podcast-Tile-703x703-1.jpg","imageAlt":"KQED The Leap","officialWebsiteLink":"/podcasts/theleap","meta":{"site":"news","source":"kqed","order":"14"},"link":"/podcasts/theleap","subscribe":{"apple":"https://podcasts.apple.com/us/podcast/the-leap/id1046668171","google":"https://podcasts.google.com/feed/aHR0cHM6Ly9mZWVkcy5tZWdhcGhvbmUuZm0vS1FJTkM0NTcwODQ2MjY2","npr":"https://www.npr.org/podcasts/447248267/the-leap","stitcher":"https://www.stitcher.com/podcast/kqed/the-leap","spotify":"https://open.spotify.com/show/3sSlVHHzU0ytLwuGs1SD1U","rss":"https://ww2.kqed.org/news/programs/the-leap/feed/podcast"}},"masters-of-scale":{"id":"masters-of-scale","title":"Masters of Scale","info":"Masters of Scale is an original podcast in which LinkedIn co-founder and Greylock Partner Reid Hoffman sets out to describe and prove theories that explain how great entrepreneurs take their companies from zero to a gazillion in ingenious fashion.","airtime":"Every other Wednesday June 12 through October 16 at 8pm (repeats Thursdays at 2am)","imageSrc":"https://cdn.kqed.org/wp-content/uploads/2024/04/Masters-of-Scale-Podcast-Tile-360x360-1.jpg","officialWebsiteLink":"https://mastersofscale.com/","meta":{"site":"radio","source":"WaitWhat"},"link":"/radio/program/masters-of-scale","subscribe":{"apple":"http://mastersofscale.app.link/","rss":"https://rss.art19.com/masters-of-scale"}},"the-moth-radio-hour":{"id":"the-moth-radio-hour","title":"The Moth Radio Hour","info":"Since its launch in 1997, The Moth has presented thousands of true stories, told live and without notes, to standing-room-only crowds worldwide. Moth storytellers stand alone, under a spotlight, with only a microphone and a roomful of strangers. The storyteller and the audience embark on a high-wire act of shared experience which is both terrifying and exhilarating. Since 2008, The Moth podcast has featured many of our favorite stories told live on Moth stages around the country. For information on all of our programs and live events, visit themoth.org.","airtime":"SAT 8pm-9pm and SUN 11am-12pm","imageSrc":"https://ww2.kqed.org/radio/wp-content/uploads/sites/50/2018/04/theMoth.jpg","officialWebsiteLink":"https://themoth.org/","meta":{"site":"arts","source":"prx"},"link":"/radio/program/the-moth-radio-hour","subscribe":{"apple":"https://itunes.apple.com/us/podcast/the-moth-podcast/id275699983?mt=2","tuneIn":"https://tunein.com/radio/The-Moth-p273888/","rss":"http://feeds.themoth.org/themothpodcast"}},"the-new-yorker-radio-hour":{"id":"the-new-yorker-radio-hour","title":"The New Yorker Radio Hour","info":"The New Yorker Radio Hour is a weekly program presented by the magazine's editor, David Remnick, and produced by WNYC Studios and The New Yorker. Each episode features a diverse mix of interviews, profiles, storytelling, and an occasional burst of humor inspired by the magazine, and shaped by its writers, artists, and editors. This isn't a radio version of a magazine, but something all its own, reflecting the rich possibilities of audio storytelling and conversation. Theme music for the show was composed and performed by Merrill Garbus of tUnE-YArDs.","airtime":"SAT 10am-11am","imageSrc":"https://cdn.kqed.org/wp-content/uploads/2024/04/The-New-Yorker-Podcast-Tile-360x360-1.jpg","officialWebsiteLink":"https://www.wnycstudios.org/shows/tnyradiohour","meta":{"site":"arts","source":"WNYC"},"link":"/radio/program/the-new-yorker-radio-hour","subscribe":{"apple":"https://itunes.apple.com/us/podcast/id1050430296","tuneIn":"https://tunein.com/podcasts/WNYC-Podcasts/New-Yorker-Radio-Hour-p803804/","rss":"https://feeds.feedburner.com/newyorkerradiohour"}},"the-takeaway":{"id":"the-takeaway","title":"The Takeaway","info":"The Takeaway is produced in partnership with its national audience. It delivers perspective and analysis to help us better understand the day’s news. Be a part of the American conversation on-air and online.","airtime":"MON-THU 12pm-1pm","imageSrc":"https://cdn.kqed.org/wp-content/uploads/2024/04/The-Takeaway-Podcast-Tile-360x360-1.jpg","officialWebsiteLink":"https://www.wnycstudios.org/shows/takeaway","meta":{"site":"news","source":"WNYC"},"link":"/radio/program/the-takeaway","subscribe":{"apple":"https://itunes.apple.com/us/podcast/the-takeaway/id363143310?mt=2","tuneIn":"http://tunein.com/radio/The-Takeaway-p150731/","rss":"https://feeds.feedburner.com/takeawaypodcast"}},"this-american-life":{"id":"this-american-life","title":"This American Life","info":"This American Life is a weekly public radio show, heard by 2.2 million people on more than 500 stations. Another 2.5 million people download the weekly podcast. It is hosted by Ira Glass, produced in collaboration with Chicago Public Media, delivered to stations by PRX The Public Radio Exchange, and has won all of the major broadcasting awards.","airtime":"SAT 12pm-1pm, 7pm-8pm","imageSrc":"https://ww2.kqed.org/radio/wp-content/uploads/sites/50/2018/04/thisAmericanLife.png","officialWebsiteLink":"https://www.thisamericanlife.org/","meta":{"site":"news","source":"wbez"},"link":"/radio/program/this-american-life","subscribe":{"apple":"https://itunes.apple.com/WebObjects/MZStore.woa/wa/viewPodcast?s=143441&mt=2&id=201671138&at=11l79Y&ct=nprdirectory","rss":"https://www.thisamericanlife.org/podcast/rss.xml"}},"truthbetold":{"id":"truthbetold","title":"Truth Be Told","tagline":"Advice by and for people of color","info":"We’re the friend you call after a long day, the one who gets it. Through wisdom from some of the greatest thinkers of our time, host Tonya Mosley explores what it means to grow and thrive as a Black person in America, while discovering new ways of being that serve as a portal to more love, more healing, and more joy.","airtime":"","imageSrc":"https://cdn.kqed.org/wp-content/uploads/2024/04/Truth-Be-Told-Podcast-Tile-360x360-1.jpg","imageAlt":"KQED Truth Be Told with Tonya Mosley","officialWebsiteLink":"https://www.kqed.ord/podcasts/truthbetold","meta":{"site":"news","source":"npr","order":"12"},"link":"/podcasts/truthbetold","subscribe":{"apple":"https://podcasts.apple.com/us/podcast/truth-be-told/id1462216572","google":"https://podcasts.google.com/feed/aHR0cHM6Ly93dzIua3FlZC5vcmcvbmV3cy9jYXRlZ29yeS90cnV0aC1iZS10b2xkLXBvZGNhc3QvZmVlZA","npr":"https://www.npr.org/podcasts/719210818/truth-be-told","stitcher":"https://www.stitcher.com/s?fid=398170&refid=stpr","spotify":"https://open.spotify.com/show/587DhwTBxke6uvfwDfaV5N"}},"wait-wait-dont-tell-me":{"id":"wait-wait-dont-tell-me","title":"Wait Wait... Don't Tell Me!","info":"Peter Sagal and Bill Kurtis host the weekly NPR News quiz show alongside some of the best and brightest news and entertainment personalities.","airtime":"SUN 10am-11am, SAT 11am-12pm, SAT 6pm-7pm","imageSrc":"https://cdn.kqed.org/wp-content/uploads/2024/04/Wait-Wait-Podcast-Tile-300x300-1.jpg","officialWebsiteLink":"https://www.npr.org/programs/wait-wait-dont-tell-me/","meta":{"site":"news","source":"npr"},"link":"/radio/program/wait-wait-dont-tell-me","subscribe":{"npr":"https://rpb3r.app.goo.gl/Xogv","apple":"https://itunes.apple.com/WebObjects/MZStore.woa/wa/viewPodcast?s=143441&mt=2&id=121493804&at=11l79Y&ct=nprdirectory","tuneIn":"https://tunein.com/radio/Wait-Wait-Dont-Tell-Me-p46/","rss":"https://feeds.npr.org/344098539/podcast.xml"}},"washington-week":{"id":"washington-week","title":"Washington Week","info":"For 50 years, Washington Week has been the most intelligent and up to date conversation about the most important news stories of the week. Washington Week is the longest-running news and public affairs program on PBS and features journalists -- not pundits -- lending insight and perspective to the week's important news stories.","airtime":"SAT 1:30am-2am","imageSrc":"https://ww2.kqed.org/radio/wp-content/uploads/sites/50/2018/04/washington-week.jpg","officialWebsiteLink":"http://www.pbs.org/weta/washingtonweek/","meta":{"site":"news","source":"pbs"},"link":"/radio/program/washington-week","subscribe":{"apple":"https://itunes.apple.com/us/podcast/washington-week-audio-pbs/id83324702?mt=2","tuneIn":"https://tunein.com/podcasts/Current-Affairs/Washington-Week-p693/","rss":"http://feeds.pbs.org/pbs/weta/washingtonweek-audio"}},"weekend-edition-saturday":{"id":"weekend-edition-saturday","title":"Weekend Edition Saturday","info":"Weekend Edition Saturday wraps up the week's news and offers a mix of analysis and features on a wide range of topics, including arts, sports, entertainment, and human interest stories. The two-hour program is hosted by NPR's Peabody Award-winning Scott Simon.","airtime":"SAT 5am-10am","imageSrc":"https://cdn.kqed.org/wp-content/uploads/2024/04/Weekend-Edition-Podcast-Tile-360x360-1.jpg","officialWebsiteLink":"https://www.npr.org/programs/weekend-edition-saturday/","meta":{"site":"news","source":"npr"},"link":"/radio/program/weekend-edition-saturday"},"weekend-edition-sunday":{"id":"weekend-edition-sunday","title":"Weekend Edition Sunday","info":"Weekend Edition Sunday features interviews with newsmakers, artists, scientists, politicians, musicians, writers, theologians and historians. The program has covered news events from Nelson Mandela's 1990 release from a South African prison to the capture of Saddam Hussein.","airtime":"SUN 5am-10am","imageSrc":"https://cdn.kqed.org/wp-content/uploads/2024/04/Weekend-Edition-Podcast-Tile-360x360-1.jpg","officialWebsiteLink":"https://www.npr.org/programs/weekend-edition-sunday/","meta":{"site":"news","source":"npr"},"link":"/radio/program/weekend-edition-sunday"},"world-affairs":{"id":"world-affairs","title":"World Affairs","info":"The world as we knew it is undergoing a rapid transformation…so what's next? Welcome to WorldAffairs, your guide to a changing world. We give you the context you need to navigate across borders and ideologies. Through sound-rich stories and in-depth interviews, we break down what it means to be a global citizen on a hot, crowded planet. Our hosts, Ray Suarez, Teresa Cotsirilos and Philip Yun help you make sense of an uncertain world, one story at a time.","airtime":"MON 10pm, TUE 1am, SAT 3am","imageSrc":"https://cdn.kqed.org/wp-content/uploads/2024/04/World-Affairs-Podcast-Tile-360x360-1.jpg ","officialWebsiteLink":"https://www.worldaffairs.org/","meta":{"site":"news","source":"World Affairs"},"link":"/radio/program/world-affairs","subscribe":{"apple":"https://itunes.apple.com/us/podcast/world-affairs/id101215657?mt=2","tuneIn":"https://tunein.com/radio/WorldAffairs-p1665/","rss":"https://worldaffairs.libsyn.com/rss"}},"on-shifting-ground":{"id":"on-shifting-ground","title":"On Shifting Ground with Ray Suarez","info":"Geopolitical turmoil. A warming planet. Authoritarians on the rise. We live in a chaotic world that’s rapidly shifting around us. “On Shifting Ground with Ray Suarez” explores international fault lines and how they impact us all. Each week, NPR veteran Ray Suarez hosts conversations with journalists, leaders and policy experts to help us read between the headlines – and give us hope for human resilience.","airtime":"MON 10pm, TUE 1am, SAT 3am","imageSrc":"https://ww2.kqed.org/app/uploads/2022/12/onshiftingground-600x600-1.png","officialWebsiteLink":"https://worldaffairs.org/radio-podcast/","meta":{"site":"news","source":"On Shifting Ground"},"link":"/radio/program/on-shifting-ground","subscribe":{"apple":"https://podcasts.apple.com/ie/podcast/on-shifting-ground/id101215657","rss":"https://feeds.libsyn.com/36668/rss"}},"hidden-brain":{"id":"hidden-brain","title":"Hidden Brain","info":"Shankar Vedantam uses science and storytelling to reveal the unconscious patterns that drive human behavior, shape our choices and direct our relationships.","imageSrc":"https://ww2.kqed.org/radio/wp-content/uploads/sites/50/2018/05/hiddenbrain.jpg","officialWebsiteLink":"https://www.npr.org/series/423302056/hidden-brain","airtime":"SUN 7pm-8pm","meta":{"site":"news","source":"NPR"},"link":"/radio/program/hidden-brain","subscribe":{"apple":"https://itunes.apple.com/us/podcast/hidden-brain/id1028908750?mt=2","tuneIn":"https://tunein.com/podcasts/Science-Podcasts/Hidden-Brain-p787503/","rss":"https://feeds.npr.org/510308/podcast.xml"}},"city-arts":{"id":"city-arts","title":"City Arts & Lectures","info":"A one-hour radio program to hear celebrated writers, artists and thinkers address contemporary ideas and values, often discussing the creative process. Please note: tapes or transcripts are not available","imageSrc":"https://ww2.kqed.org/radio/wp-content/uploads/sites/50/2018/05/cityartsandlecture-300x300.jpg","officialWebsiteLink":"https://www.cityarts.net/","airtime":"SUN 1pm-2pm, TUE 10pm, WED 1am","meta":{"site":"news","source":"City Arts & Lectures"},"link":"https://www.cityarts.net","subscribe":{"tuneIn":"https://tunein.com/radio/City-Arts-and-Lectures-p692/","rss":"https://www.cityarts.net/feed/"}},"white-lies":{"id":"white-lies","title":"White Lies","info":"In 1965, Rev. James Reeb was murdered in Selma, Alabama. Three men were tried and acquitted, but no one was ever held to account. Fifty years later, two journalists from Alabama return to the city where it happened, expose the lies that kept the murder from being solved and uncover a story about guilt and memory that says as much about America today as it does about the past.","imageSrc":"https://cdn.kqed.org/wp-content/uploads/2024/04/White-Lies-Podcast-Tile-360x360-1.jpg","officialWebsiteLink":"https://www.npr.org/podcasts/510343/white-lies","meta":{"site":"news","source":"npr"},"link":"/radio/program/white-lies","subscribe":{"npr":"https://rpb3r.app.goo.gl/whitelies","apple":"https://podcasts.apple.com/podcast/id1462650519?mt=2&at=11l79Y&ct=nprdirectory","google":"https://podcasts.google.com/feed/aHR0cHM6Ly9mZWVkcy5ucHIub3JnLzUxMDM0My9wb2RjYXN0LnhtbA","spotify":"https://open.spotify.com/show/12yZ2j8vxqhc0QZyRES3ft?si=LfWYEK6URA63hueKVxRLAw","rss":"https://feeds.npr.org/510343/podcast.xml"}},"rightnowish":{"id":"rightnowish","title":"Rightnowish","tagline":"Art is where you find it","info":"Rightnowish digs into life in the Bay Area right now… ish. Journalist Pendarvis Harshaw takes us to galleries painted on the sides of liquor stores in West Oakland. We'll dance in warehouses in the Bayview, make smoothies with kids in South Berkeley, and listen to classical music in a 1984 Cutlass Supreme in Richmond. Every week, Pen talks to movers and shakers about how the Bay Area shapes what they create, and how they shape the place we call home.","imageSrc":"https://cdn.kqed.org/wp-content/uploads/2024/04/Rightnowish-Podcast-Tile-500x500-1.jpg","imageAlt":"KQED Rightnowish with Pendarvis Harshaw","officialWebsiteLink":"/podcasts/rightnowish","meta":{"site":"arts","source":"kqed","order":"5"},"link":"/podcasts/rightnowish","subscribe":{"npr":"https://www.npr.org/podcasts/721590300/rightnowish","rss":"https://ww2.kqed.org/arts/programs/rightnowish/feed/podcast","apple":"https://podcasts.apple.com/us/podcast/rightnowish/id1482187648","stitcher":"https://www.stitcher.com/podcast/kqed/rightnowish","google":"https://podcasts.google.com/feed/aHR0cHM6Ly9mZWVkcy5tZWdhcGhvbmUuZm0vS1FJTkMxMjU5MTY3NDc4","spotify":"https://open.spotify.com/show/7kEJuafTzTVan7B78ttz1I"}},"jerrybrown":{"id":"jerrybrown","title":"The Political Mind of Jerry Brown","tagline":"Lessons from a lifetime in politics","info":"The Political Mind of Jerry Brown brings listeners the wisdom of the former Governor, Mayor, and presidential candidate. Scott Shafer interviewed Brown for more than 40 hours, covering the former governor's life and half-century in the political game – and Brown has some lessons he'd like to share. ","imageSrc":"https://cdn.kqed.org/wp-content/uploads/2024/04/The-Political-Mind-of-Jerry-Brown-Podcast-Tile-703x703-1.jpg","imageAlt":"KQED The Political Mind of Jerry Brown","officialWebsiteLink":"/podcasts/jerrybrown","meta":{"site":"news","source":"kqed","order":"16"},"link":"/podcasts/jerrybrown","subscribe":{"npr":"https://www.npr.org/podcasts/790253322/the-political-mind-of-jerry-brown","apple":"https://itunes.apple.com/us/podcast/id1492194549","rss":"https://ww2.kqed.org/news/series/jerrybrown/feed/podcast/","tuneIn":"http://tun.in/pjGcK","stitcher":"https://www.stitcher.com/podcast/kqed/the-political-mind-of-jerry-brown","spotify":"https://open.spotify.com/show/54C1dmuyFyKMFttY6X2j6r?si=K8SgRCoISNK6ZbjpXrX5-w","google":"https://podcasts.google.com/feed/aHR0cHM6Ly93dzIua3FlZC5vcmcvbmV3cy9zZXJpZXMvamVycnlicm93bi9mZWVkL3BvZGNhc3Qv"}},"the-splendid-table":{"id":"the-splendid-table","title":"The Splendid Table","info":"\u003cem>The Splendid Table\u003c/em> hosts our nation's conversations about cooking, sustainability and food culture.","imageSrc":"https://cdn.kqed.org/wp-content/uploads/2024/04/The-Splendid-Table-Podcast-Tile-360x360-1.jpg","officialWebsiteLink":"https://www.splendidtable.org/","airtime":"SUN 10-11 pm","meta":{"site":"radio","source":"npr"},"link":"/radio/program/the-splendid-table"}},"racesReducer":{"5921":{"id":"5921","type":"apRace","location":"State of California","raceName":"U.S. House of Representatives, District 7","raceDescription":"Top candidate wins seat.","raceType":"top2","totalVotes":158422,"precinctsReportPercentage":98.97,"eevp":99,"tabulationStatus":"Tabulation Paused","dateUpdated":"March 22, 2024","timeUpdated":"4:48 PM","source":"AP","candidates":[{"candidateName":"Doris Matsui","candidateIncumbent":true,"candidateParty":"D","voteCount":89456,"isWinner":true},{"candidateName":"Tom Silva","candidateIncumbent":false,"candidateParty":"R","voteCount":48920,"isWinner":true},{"candidateName":"David Mandel","candidateIncumbent":false,"candidateParty":"D","voteCount":20046,"isWinner":false}],"winnerDateTime":"2024-03-09T01:00:38.194Z"},"5922":{"id":"5922","type":"apRace","location":"State of California","raceName":"U.S. House of Representatives, District 8","raceDescription":"Top candidate wins seat.","raceType":"top2","totalVotes":0,"uncontested":true,"precinctsReportPercentage":0,"eevp":0,"tabulationStatus":"Tabulation Paused","dateUpdated":"March 22, 2024","timeUpdated":"4:20 PM","source":"AP","candidates":[{"candidateName":"Rudy Recile","candidateIncumbent":false,"candidateParty":"R","voteCount":0,"isWinner":true},{"candidateName":"John Garamendi","candidateIncumbent":true,"candidateParty":"D","voteCount":0,"isWinner":true}],"winnerDateTime":"2024-03-06T04:00:30.000Z"},"5924":{"id":"5924","type":"apRace","location":"State of California","raceName":"U.S. House of Representatives, District 10","raceDescription":"Top candidate wins seat.","raceType":"top2","totalVotes":185034,"precinctsReportPercentage":99.07,"eevp":99,"tabulationStatus":"Tabulation Paused","dateUpdated":"March 22, 2024","timeUpdated":"4:48 PM","source":"AP","candidates":[{"candidateName":"Mark DeSaulnier","candidateIncumbent":true,"candidateParty":"D","voteCount":121265,"isWinner":true},{"candidateName":"Katherine Piccinini","candidateIncumbent":false,"candidateParty":"R","voteCount":34883,"isWinner":true},{"candidateName":"Nolan Chen","candidateIncumbent":false,"candidateParty":"R","voteCount":19459,"isWinner":false},{"candidateName":"Joe Sweeney","candidateIncumbent":false,"candidateParty":"NPP","voteCount":7606,"isWinner":false},{"candidateName":"Mohamed Elsherbini","candidateIncumbent":false,"candidateParty":"NPP","voteCount":1821,"isWinner":false}],"winnerDateTime":"2024-03-09T01:02:32.415Z"},"5926":{"id":"5926","type":"apRace","location":"State of California","raceName":"U.S. House of Representatives, District 12","raceDescription":"Top candidate wins seat.","raceType":"top2","totalVotes":153801,"precinctsReportPercentage":98.88,"eevp":99,"tabulationStatus":"Tabulation Paused","dateUpdated":"March 20, 2024","timeUpdated":"4:41 PM","source":"AP","candidates":[{"candidateName":"Lateefah Simon","candidateIncumbent":false,"candidateParty":"D","voteCount":85905,"isWinner":true},{"candidateName":"Jennifer Tran","candidateIncumbent":false,"candidateParty":"D","voteCount":22964,"isWinner":true},{"candidateName":"Tony Daysog","candidateIncumbent":false,"candidateParty":"D","voteCount":17197,"isWinner":false},{"candidateName":"Stephen Slauson","candidateIncumbent":false,"candidateParty":"R","voteCount":9699,"isWinner":false},{"candidateName":"Glenn Kaplan","candidateIncumbent":false,"candidateParty":"D","voteCount":6785,"isWinner":false},{"candidateName":"Eric Wilson","candidateIncumbent":false,"candidateParty":"D","voteCount":4243,"isWinner":false},{"candidateName":"Abdur Sikder","candidateIncumbent":false,"candidateParty":"D","voteCount":2847,"isWinner":false},{"candidateName":"Ned Nuerge","candidateIncumbent":false,"candidateParty":"R","voteCount":2532,"isWinner":false},{"candidateName":"Andre Todd","candidateIncumbent":false,"candidateParty":"D","voteCount":1629,"isWinner":false}],"winnerDateTime":"2024-03-16T00:22:36.062Z"},"5928":{"id":"5928","type":"apRace","location":"State of California","raceName":"U.S. House of Representatives, District 14","raceDescription":"Top candidate wins seat.","raceType":"top2","totalVotes":125831,"precinctsReportPercentage":99.14,"eevp":99,"tabulationStatus":"Tabulation Paused","dateUpdated":"March 20, 2024","timeUpdated":"4:41 PM","source":"AP","candidates":[{"candidateName":"Eric Swalwell","candidateIncumbent":true,"candidateParty":"D","voteCount":83989,"isWinner":true},{"candidateName":"Vin Kruttiventi","candidateIncumbent":false,"candidateParty":"R","voteCount":22106,"isWinner":true},{"candidateName":"Alison Hayden","candidateIncumbent":false,"candidateParty":"R","voteCount":11928,"isWinner":false},{"candidateName":"Luis Reynoso","candidateIncumbent":false,"candidateParty":"R","voteCount":7808,"isWinner":false}],"winnerDateTime":"2024-03-12T00:51:36.366Z"},"5930":{"id":"5930","type":"apRace","location":"State of California","raceName":"U.S. House of Representatives, District 16","raceDescription":"Top candidate wins seat.","raceType":"top2","totalVotes":182135,"precinctsReportPercentage":98.91,"eevp":99,"tabulationStatus":"Tabulation Paused","dateUpdated":"April 3, 2024","timeUpdated":"3:04 PM","source":"AP","candidates":[{"candidateName":"Sam Liccardo","candidateIncumbent":false,"candidateParty":"D","voteCount":38489,"isWinner":true},{"candidateName":"Evan Low","candidateIncumbent":false,"candidateParty":"D","voteCount":30249,"isWinner":false},{"candidateName":"Joe Simitian","candidateIncumbent":false,"candidateParty":"D","voteCount":30249,"isWinner":false},{"candidateName":"Peter Ohtaki","candidateIncumbent":false,"candidateParty":"R","voteCount":23275,"isWinner":false},{"candidateName":"Peter Dixon","candidateIncumbent":false,"candidateParty":"D","voteCount":14673,"isWinner":false},{"candidateName":"Rishi Kumar","candidateIncumbent":false,"candidateParty":"D","voteCount":12377,"isWinner":false},{"candidateName":"Karl Ryan","candidateIncumbent":false,"candidateParty":"R","voteCount":11557,"isWinner":false},{"candidateName":"Julie Lythcott-Haims","candidateIncumbent":false,"candidateParty":"D","voteCount":11383,"isWinner":false},{"candidateName":"Ahmed Mostafa","candidateIncumbent":false,"candidateParty":"D","voteCount":5811,"isWinner":false},{"candidateName":"Greg Tanaka","candidateIncumbent":false,"candidateParty":"D","voteCount":2421,"isWinner":false},{"candidateName":"Joby Bernstein","candidateIncumbent":false,"candidateParty":"D","voteCount":1651,"isWinner":false}],"winnerDateTime":"2024-03-12T00:32:05.002Z"},"5931":{"id":"5931","type":"apRace","location":"State of California","raceName":"U.S. House of Representatives, District 17","raceDescription":"Top candidate wins seat.","raceType":"top2","totalVotes":117534,"precinctsReportPercentage":98.92,"eevp":99,"tabulationStatus":"Tabulation Paused","dateUpdated":"March 22, 2024","timeUpdated":"4:20 PM","source":"AP","candidates":[{"candidateName":"Ro Khanna","candidateIncumbent":true,"candidateParty":"D","voteCount":73941,"isWinner":true},{"candidateName":"Anita Chen","candidateIncumbent":false,"candidateParty":"R","voteCount":31539,"isWinner":true},{"candidateName":"Ritesh Tandon","candidateIncumbent":false,"candidateParty":"D","voteCount":5728,"isWinner":false},{"candidateName":"Mario Ramirez","candidateIncumbent":false,"candidateParty":"D","voteCount":4491,"isWinner":false},{"candidateName":"Joe Dehn","candidateIncumbent":false,"candidateParty":"Lib","voteCount":1835,"isWinner":false}],"winnerDateTime":"2024-03-08T01:50:53.956Z"},"5932":{"id":"5932","type":"apRace","location":"State of California","raceName":"U.S. House of Representatives, District 18","raceDescription":"Top candidate wins seat.","raceType":"top2","totalVotes":96302,"precinctsReportPercentage":98.93,"eevp":98.83,"tabulationStatus":"Tabulation Paused","dateUpdated":"March 25, 2024","timeUpdated":"5:47 AM","source":"AP","candidates":[{"candidateName":"Zoe Lofgren","candidateIncumbent":true,"candidateParty":"D","voteCount":49323,"isWinner":true},{"candidateName":"Peter Hernandez","candidateIncumbent":false,"candidateParty":"R","voteCount":31622,"isWinner":true},{"candidateName":"Charlene Nijmeh","candidateIncumbent":false,"candidateParty":"D","voteCount":10614,"isWinner":false},{"candidateName":"Lawrence Milan","candidateIncumbent":false,"candidateParty":"D","voteCount":2712,"isWinner":false},{"candidateName":"Luele Kifle","candidateIncumbent":false,"candidateParty":"D","voteCount":2031,"isWinner":false}],"winnerDateTime":"2024-03-12T00:26:02.706Z"},"5963":{"id":"5963","type":"apRace","location":"State of California","raceName":"State House, District 2","raceDescription":"Top candidate wins seat.","raceType":"top2","totalVotes":139085,"precinctsReportPercentage":98.62,"eevp":98.6,"tabulationStatus":"Tabulation Paused","dateUpdated":"March 22, 2024","timeUpdated":"4:20 PM","source":"AP","candidates":[{"candidateName":"Michael Greer","candidateIncumbent":false,"candidateParty":"R","voteCount":38079,"isWinner":true},{"candidateName":"Chris Rogers","candidateIncumbent":false,"candidateParty":"D","voteCount":27126,"isWinner":true},{"candidateName":"Rusty Hicks","candidateIncumbent":false,"candidateParty":"D","voteCount":25615,"isWinner":false},{"candidateName":"Ariel Kelley","candidateIncumbent":false,"candidateParty":"D","voteCount":19483,"isWinner":false},{"candidateName":"Frankie Myers","candidateIncumbent":false,"candidateParty":"D","voteCount":17694,"isWinner":false},{"candidateName":"Ted Williams","candidateIncumbent":false,"candidateParty":"D","voteCount":9550,"isWinner":false},{"candidateName":"Cynthia Click","candidateIncumbent":false,"candidateParty":"D","voteCount":1538,"isWinner":false}],"winnerDateTime":"2024-03-22T21:38:36.711Z"},"5972":{"id":"5972","type":"apRace","location":"State of California","raceName":"State House, District 11","raceDescription":"Top candidate wins seat.","raceType":"top2","totalVotes":99775,"precinctsReportPercentage":99,"eevp":99,"tabulationStatus":"Tabulation Paused","dateUpdated":"March 22, 2024","timeUpdated":"4:48 PM","source":"AP","candidates":[{"candidateName":"Lori Wilson","candidateIncumbent":true,"candidateParty":"D","voteCount":50085,"isWinner":true},{"candidateName":"Dave Ennis","candidateIncumbent":false,"candidateParty":"R","voteCount":26074,"isWinner":true},{"candidateName":"Wanda Wallis","candidateIncumbent":false,"candidateParty":"R","voteCount":14638,"isWinner":false},{"candidateName":"Jeffrey Flack","candidateIncumbent":false,"candidateParty":"D","voteCount":8978,"isWinner":false}],"winnerDateTime":"2024-03-08T02:01:24.524Z"},"5973":{"id":"5973","type":"apRace","location":"State of California","raceName":"State House, District 12","raceDescription":"Top candidate wins seat.","raceType":"top2","totalVotes":143532,"precinctsReportPercentage":99.19,"eevp":99,"tabulationStatus":"Tabulation Paused","dateUpdated":"March 22, 2024","timeUpdated":"4:38 PM","source":"AP","candidates":[{"candidateName":"Damon Connolly","candidateIncumbent":true,"candidateParty":"D","voteCount":111275,"isWinner":true},{"candidateName":"Andy Podshadley","candidateIncumbent":false,"candidateParty":"R","voteCount":17240,"isWinner":true},{"candidateName":"Eryn Cervantes","candidateIncumbent":false,"candidateParty":"R","voteCount":15017,"isWinner":false}],"winnerDateTime":"2024-03-21T00:25:32.262Z"},"5975":{"id":"5975","type":"apRace","location":"State of California","raceName":"State House, District 14","raceDescription":"Top candidate wins seat.","raceType":"top2","totalVotes":106997,"precinctsReportPercentage":99.06,"eevp":99,"tabulationStatus":"Tabulation Paused","dateUpdated":"March 22, 2024","timeUpdated":"4:48 PM","source":"AP","candidates":[{"candidateName":"Buffy Wicks","candidateIncumbent":true,"candidateParty":"D","voteCount":78678,"isWinner":true},{"candidateName":"Margot Smith","candidateIncumbent":false,"candidateParty":"D","voteCount":18251,"isWinner":true},{"candidateName":"Utkarsh Jain","candidateIncumbent":false,"candidateParty":"R","voteCount":10068,"isWinner":false}],"winnerDateTime":"2024-03-15T01:30:34.539Z"},"5976":{"id":"5976","type":"apRace","location":"State of California","raceName":"State House, District 15","raceDescription":"Top candidate wins seat.","raceType":"top2","totalVotes":97144,"precinctsReportPercentage":98.98,"eevp":99,"tabulationStatus":"Tabulation Paused","dateUpdated":"March 22, 2024","timeUpdated":"4:48 PM","source":"AP","candidates":[{"candidateName":"Sonia Ledo","candidateIncumbent":false,"candidateParty":"R","voteCount":30946,"isWinner":true},{"candidateName":"Anamarie Farias","candidateIncumbent":false,"candidateParty":"D","voteCount":29512,"isWinner":true},{"candidateName":"Monica Wilson","candidateIncumbent":false,"candidateParty":"D","voteCount":24775,"isWinner":false},{"candidateName":"Karen Mitchoff","candidateIncumbent":false,"candidateParty":"D","voteCount":11911,"isWinner":false}],"winnerDateTime":"2024-03-14T00:19:38.858Z"},"5977":{"id":"5977","type":"apRace","location":"State of California","raceName":"State House, District 16","raceDescription":"Top candidate wins seat.","raceType":"top2","totalVotes":0,"uncontested":true,"precinctsReportPercentage":0,"eevp":0,"tabulationStatus":"Tabulation Paused","dateUpdated":"March 22, 2024","timeUpdated":"4:20 PM","source":"AP","candidates":[{"candidateName":"Joseph Rubay","candidateIncumbent":false,"candidateParty":"R","voteCount":0,"isWinner":true},{"candidateName":"Rebecca Bauer-Kahan","candidateIncumbent":true,"candidateParty":"D","voteCount":0,"isWinner":true}],"winnerDateTime":"2024-03-06T04:00:30.000Z"},"5978":{"id":"5978","type":"apRace","location":"State of California","raceName":"State House, District 17","raceDescription":"Top candidate wins seat.","raceType":"top2","totalVotes":111003,"precinctsReportPercentage":98.99,"eevp":99,"tabulationStatus":"Tabulation Paused","dateUpdated":"March 22, 2024","timeUpdated":"8:25 AM","source":"AP","candidates":[{"candidateName":"Matt Haney","candidateIncumbent":true,"candidateParty":"D","voteCount":90915,"isWinner":true},{"candidateName":"Manuel Noris-Barrera","candidateIncumbent":false,"candidateParty":"R","voteCount":13843,"isWinner":true},{"candidateName":"Otto Duke","candidateIncumbent":false,"candidateParty":"D","voteCount":6245,"isWinner":false}],"winnerDateTime":"2024-03-12T00:36:19.697Z"},"5979":{"id":"5979","type":"apRace","location":"State of California","raceName":"State House, District 18","raceDescription":"Top candidate wins seat.","raceType":"top2","totalVotes":86008,"precinctsReportPercentage":99.1,"eevp":99,"tabulationStatus":"Tabulation Paused","dateUpdated":"March 20, 2024","timeUpdated":"4:41 PM","source":"AP","candidates":[{"candidateName":"Mia Bonta","candidateIncumbent":true,"candidateParty":"D","voteCount":73040,"isWinner":true},{"candidateName":"Andre Sandford","candidateIncumbent":false,"candidateParty":"AIP","voteCount":4575,"isWinner":false},{"candidateName":"Mindy Pechenuk","candidateIncumbent":false,"candidateParty":"R","voteCount":4389,"isWinner":false},{"candidateName":"Cheyenne Kenney","candidateIncumbent":false,"candidateParty":"R","voteCount":4004,"isWinner":false}],"winnerDateTime":"2024-03-06T08:03:23.729Z"},"5980":{"id":"5980","type":"apRace","location":"State of California","raceName":"State House, District 19","raceDescription":"Top candidate wins seat.","raceType":"top2","totalVotes":113959,"precinctsReportPercentage":98.8,"eevp":99,"tabulationStatus":"Tabulation Paused","dateUpdated":"March 22, 2024","timeUpdated":"4:20 PM","source":"AP","candidates":[{"candidateName":"Catherine Stefani","candidateIncumbent":false,"candidateParty":"D","voteCount":64960,"isWinner":true},{"candidateName":"David Lee","candidateIncumbent":false,"candidateParty":"D","voteCount":33035,"isWinner":true},{"candidateName":"Nadia Flamenco","candidateIncumbent":false,"candidateParty":"R","voteCount":8335,"isWinner":false},{"candidateName":"Arjun Sodhani","candidateIncumbent":false,"candidateParty":"R","voteCount":7629,"isWinner":false}],"winnerDateTime":"2024-03-11T23:50:23.109Z"},"5981":{"id":"5981","type":"apRace","location":"State of California","raceName":"State House, District 20","raceDescription":"Top candidate wins seat.","raceType":"top2","totalVotes":0,"uncontested":true,"precinctsReportPercentage":0,"eevp":0,"tabulationStatus":"Tabulation Paused","dateUpdated":"March 20, 2024","timeUpdated":"4:36 PM","source":"AP","candidates":[{"candidateName":"Liz Ortega","candidateIncumbent":true,"candidateParty":"D","voteCount":0,"isWinner":true}],"winnerDateTime":"2024-03-06T04:00:30.000Z"},"5982":{"id":"5982","type":"apRace","location":"State of California","raceName":"State House, District 21","raceDescription":"Top candidate wins seat.","raceType":"top2","totalVotes":0,"uncontested":true,"precinctsReportPercentage":0,"eevp":0,"tabulationStatus":"Tabulation Paused","dateUpdated":"March 22, 2024","timeUpdated":"4:20 PM","source":"AP","candidates":[{"candidateName":"Mark Gilham","candidateIncumbent":false,"candidateParty":"R","voteCount":0,"isWinner":true},{"candidateName":"Diane Papan","candidateIncumbent":true,"candidateParty":"D","voteCount":0,"isWinner":true}],"winnerDateTime":"2024-03-06T04:00:30.000Z"},"5984":{"id":"5984","type":"apRace","location":"State of California","raceName":"State House, District 23","raceDescription":"Top candidate wins seat.","raceType":"top2","totalVotes":116963,"precinctsReportPercentage":98.91,"eevp":99,"tabulationStatus":"Tabulation Paused","dateUpdated":"March 22, 2024","timeUpdated":"4:20 PM","source":"AP","candidates":[{"candidateName":"Marc Berman","candidateIncumbent":true,"candidateParty":"D","voteCount":67106,"isWinner":true},{"candidateName":"Lydia Kou","candidateIncumbent":false,"candidateParty":"D","voteCount":23699,"isWinner":true},{"candidateName":"Gus Mattammal","candidateIncumbent":false,"candidateParty":"R","voteCount":13277,"isWinner":false},{"candidateName":"Allan Marson","candidateIncumbent":false,"candidateParty":"R","voteCount":12881,"isWinner":false}],"winnerDateTime":"2024-03-12T01:13:06.280Z"},"5987":{"id":"5987","type":"apRace","location":"State of California","raceName":"State House, District 26","raceDescription":"Top candidate wins seat.","raceType":"top2","totalVotes":72753,"precinctsReportPercentage":99.19,"eevp":99,"tabulationStatus":"Tabulation Paused","dateUpdated":"March 22, 2024","timeUpdated":"4:20 PM","source":"AP","candidates":[{"candidateName":"Patrick Ahrens","candidateIncumbent":false,"candidateParty":"D","voteCount":25036,"isWinner":true},{"candidateName":"Tara Sreekrishnan","candidateIncumbent":false,"candidateParty":"D","voteCount":19600,"isWinner":true},{"candidateName":"Sophie Song","candidateIncumbent":false,"candidateParty":"R","voteCount":15954,"isWinner":false},{"candidateName":"Omar Din","candidateIncumbent":false,"candidateParty":"D","voteCount":8772,"isWinner":false},{"candidateName":"Bob Goodwyn","candidateIncumbent":false,"candidateParty":"Lib","voteCount":2170,"isWinner":false},{"candidateName":"Ashish Garg","candidateIncumbent":false,"candidateParty":"NPP","voteCount":1221,"isWinner":false}],"winnerDateTime":"2024-03-13T21:06:29.070Z"},"5989":{"id":"5989","type":"apRace","location":"State of California","raceName":"State House, District 28","raceDescription":"Top candidate wins seat.","raceType":"top2","totalVotes":0,"uncontested":true,"precinctsReportPercentage":0,"eevp":0,"tabulationStatus":"Tabulation Paused","dateUpdated":"March 22, 2024","timeUpdated":"5:10 PM","source":"AP","candidates":[{"candidateName":"Gail Pellerin","candidateIncumbent":true,"candidateParty":"D","voteCount":0,"isWinner":true},{"candidateName":"Liz Lawler","candidateIncumbent":false,"candidateParty":"R","voteCount":0,"isWinner":true}],"winnerDateTime":"2024-03-06T04:00:30.000Z"},"6010":{"id":"6010","type":"apRace","location":"State of California","raceName":"State House, District 49","raceDescription":"Top candidate wins seat.","raceType":"top2","totalVotes":0,"uncontested":true,"precinctsReportPercentage":0,"eevp":0,"tabulationStatus":"Tabulation Paused","dateUpdated":"March 22, 2024","timeUpdated":"4:36 PM","source":"AP","candidates":[{"candidateName":"Mike Fong","candidateIncumbent":true,"candidateParty":"D","voteCount":0,"isWinner":true},{"candidateName":"Long Liu","candidateIncumbent":false,"candidateParty":"R","voteCount":0,"isWinner":true}],"winnerDateTime":"2024-03-06T04:00:30.000Z"},"6018":{"id":"6018","type":"apRace","location":"State of California","raceName":"U.S. House of Representatives, District 2","raceDescription":"Top candidate wins seat.","raceType":"top2","totalVotes":229348,"precinctsReportPercentage":99.05,"eevp":99,"tabulationStatus":"Tabulation Paused","dateUpdated":"March 22, 2024","timeUpdated":"4:38 PM","source":"AP","candidates":[{"candidateName":"Jared Huffman","candidateIncumbent":true,"candidateParty":"D","voteCount":169005,"isWinner":true},{"candidateName":"Chris Coulombe","candidateIncumbent":false,"candidateParty":"R","voteCount":37372,"isWinner":true},{"candidateName":"Tief Gibbs","candidateIncumbent":false,"candidateParty":"R","voteCount":18437,"isWinner":false},{"candidateName":"Jolian Kangas","candidateIncumbent":false,"candidateParty":"NPP","voteCount":3166,"isWinner":false},{"candidateName":"Jason Brisendine","candidateIncumbent":false,"candidateParty":"NPP","voteCount":1368,"isWinner":false}],"winnerDateTime":"2024-03-12T00:46:10.103Z"},"6020":{"id":"6020","type":"apRace","location":"State of California","raceName":"U.S. House of Representatives, District 4","raceDescription":"Top candidate wins seat.","raceType":"top2","totalVotes":187640,"precinctsReportPercentage":96.32,"eevp":96.36,"tabulationStatus":"Tabulation Paused","dateUpdated":"March 22, 2024","timeUpdated":"4:20 PM","source":"AP","candidates":[{"candidateName":"Mike Thompson","candidateIncumbent":true,"candidateParty":"D","voteCount":118147,"isWinner":true},{"candidateName":"John Munn","candidateIncumbent":false,"candidateParty":"R","voteCount":56232,"isWinner":true},{"candidateName":"Andrew Engdahl","candidateIncumbent":false,"candidateParty":"D","voteCount":11202,"isWinner":false},{"candidateName":"Niket Patwardhan","candidateIncumbent":false,"candidateParty":"NPP","voteCount":2059,"isWinner":false}],"winnerDateTime":"2024-03-07T00:30:57.980Z"},"6025":{"id":"6025","type":"apRace","location":"State of California","raceName":"U.S. House of Representatives, District 9","raceDescription":"Top candidate wins seat.","raceType":"top2","totalVotes":121271,"precinctsReportPercentage":99.17,"eevp":99,"tabulationStatus":"Tabulation Paused","dateUpdated":"March 22, 2024","timeUpdated":"5:10 PM","source":"AP","candidates":[{"candidateName":"Josh Harder","candidateIncumbent":true,"candidateParty":"D","voteCount":60396,"isWinner":true},{"candidateName":"Kevin Lincoln","candidateIncumbent":false,"candidateParty":"R","voteCount":36346,"isWinner":true},{"candidateName":"John McBride","candidateIncumbent":false,"candidateParty":"R","voteCount":15525,"isWinner":false},{"candidateName":"Khalid Jafri","candidateIncumbent":false,"candidateParty":"R","voteCount":9004,"isWinner":false}],"winnerDateTime":"2024-03-12T00:49:44.113Z"},"6031":{"id":"6031","type":"apRace","location":"State of California","raceName":"U.S. House of Representatives, District 15","raceDescription":"Top candidate wins seat.","raceType":"top2","totalVotes":0,"uncontested":true,"precinctsReportPercentage":0,"eevp":0,"tabulationStatus":"Tabulation Paused","dateUpdated":"March 22, 2024","timeUpdated":"4:20 PM","source":"AP","candidates":[{"candidateName":"Anna Kramer","candidateIncumbent":false,"candidateParty":"R","voteCount":0,"isWinner":true},{"candidateName":"Kevin Mullin","candidateIncumbent":true,"candidateParty":"D","voteCount":0,"isWinner":true}],"winnerDateTime":"2024-03-06T04:00:30.000Z"},"6035":{"id":"6035","type":"apRace","location":"State of California","raceName":"U.S. House of Representatives, District 19","raceDescription":"Top candidate wins seat.","raceType":"top2","totalVotes":203670,"precinctsReportPercentage":99.11,"eevp":99,"tabulationStatus":"Tabulation Paused","dateUpdated":"March 25, 2024","timeUpdated":"5:47 AM","source":"AP","candidates":[{"candidateName":"Jimmy Panetta","candidateIncumbent":true,"candidateParty":"D","voteCount":132540,"isWinner":true},{"candidateName":"Jason Anderson","candidateIncumbent":false,"candidateParty":"R","voteCount":58120,"isWinner":true},{"candidateName":"Sean Dougherty","candidateIncumbent":false,"candidateParty":"Grn","voteCount":13010,"isWinner":false}],"winnerDateTime":"2024-03-07T00:23:46.779Z"},"6066":{"id":"6066","type":"apRace","location":"State of California","raceName":"State House, District 3","raceDescription":"Top candidate wins seat.","raceType":"top2","totalVotes":0,"uncontested":true,"precinctsReportPercentage":0,"eevp":0,"tabulationStatus":"Tabulation Paused","dateUpdated":"March 22, 2024","timeUpdated":"5:10 PM","source":"AP","candidates":[{"candidateName":"Jamie Gallagher","candidateIncumbent":true,"candidateParty":"R","voteCount":0,"isWinner":true},{"candidateName":"Aaron Draper","candidateIncumbent":false,"candidateParty":"D","voteCount":0,"isWinner":true}],"winnerDateTime":"2024-03-06T04:00:30.000Z"},"6067":{"id":"6067","type":"apRace","location":"State of California","raceName":"State House, District 4","raceDescription":"Top candidate wins seat.","raceType":"top2","totalVotes":0,"uncontested":true,"precinctsReportPercentage":0,"eevp":0,"tabulationStatus":"Tabulation Paused","dateUpdated":"March 22, 2024","timeUpdated":"4:20 PM","source":"AP","candidates":[{"candidateName":"Cecilia Aguiar-Curry","candidateIncumbent":true,"candidateParty":"D","voteCount":0,"isWinner":true}],"winnerDateTime":"2024-03-06T04:00:30.000Z"},"6087":{"id":"6087","type":"apRace","location":"State of California","raceName":"State House, District 24","raceDescription":"Top candidate wins seat.","raceType":"top2","totalVotes":66643,"precinctsReportPercentage":99.19,"eevp":99,"tabulationStatus":"Tabulation Paused","dateUpdated":"March 22, 2024","timeUpdated":"4:20 PM","source":"AP","candidates":[{"candidateName":"Alex Lee","candidateIncumbent":true,"candidateParty":"D","voteCount":45544,"isWinner":true},{"candidateName":"Bob Brunton","candidateIncumbent":false,"candidateParty":"R","voteCount":14951,"isWinner":true},{"candidateName":"Marti Souza","candidateIncumbent":false,"candidateParty":"R","voteCount":6148,"isWinner":false}],"winnerDateTime":"2024-03-14T23:23:49.770Z"},"6088":{"id":"6088","type":"apRace","location":"State of California","raceName":"State House, District 25","raceDescription":"Top candidate wins seat.","raceType":"top2","totalVotes":69560,"precinctsReportPercentage":99.31,"eevp":99,"tabulationStatus":"Tabulation Paused","dateUpdated":"March 22, 2024","timeUpdated":"4:20 PM","source":"AP","candidates":[{"candidateName":"Ash Kalra","candidateIncumbent":true,"candidateParty":"D","voteCount":35821,"isWinner":true},{"candidateName":"Ted Stroll","candidateIncumbent":false,"candidateParty":"R","voteCount":18255,"isWinner":true},{"candidateName":"Lan Ngo","candidateIncumbent":false,"candidateParty":"D","voteCount":15484,"isWinner":false}],"winnerDateTime":"2024-03-14T02:40:57.200Z"},"6092":{"id":"6092","type":"apRace","location":"State of California","raceName":"State House, District 29","raceDescription":"Top candidate wins seat.","raceType":"top2","totalVotes":0,"uncontested":true,"precinctsReportPercentage":0,"eevp":0,"tabulationStatus":"Tabulation Paused","dateUpdated":"March 25, 2024","timeUpdated":"5:47 AM","source":"AP","candidates":[{"candidateName":"Robert Rivas","candidateIncumbent":true,"candidateParty":"D","voteCount":0,"isWinner":true},{"candidateName":"J.W. Paine","candidateIncumbent":false,"candidateParty":"R","voteCount":0,"isWinner":true}],"winnerDateTime":"2024-03-06T04:00:30.000Z"},"6223":{"id":"6223","type":"apRace","location":"State of California","raceName":"U.S. House of Representatives, District 46","raceDescription":"Top candidate wins seat.","raceType":"top2","totalVotes":0,"uncontested":true,"precinctsReportPercentage":0,"eevp":0,"tabulationStatus":"Tabulation Paused","dateUpdated":"March 22, 2024","timeUpdated":"5:16 PM","source":"AP","candidates":[{"candidateName":"Lou Correa","candidateIncumbent":true,"candidateParty":"D","voteCount":0,"isWinner":true},{"candidateName":"David Pan","candidateIncumbent":false,"candidateParty":"R","voteCount":0,"isWinner":true}],"winnerDateTime":"2024-03-06T04:00:30.000Z"},"6530":{"id":"6530","type":"apRace","location":"State of California","raceName":"State Senate, District 3","raceDescription":"Top candidate wins seat.","raceType":"top2","totalVotes":222193,"precinctsReportPercentage":98.99,"eevp":99,"tabulationStatus":"Tabulation Paused","dateUpdated":"March 22, 2024","timeUpdated":"4:48 PM","source":"AP","candidates":[{"candidateName":"Thom Bogue","candidateIncumbent":false,"candidateParty":"R","voteCount":61776,"isWinner":true},{"candidateName":"Christopher Cabaldon","candidateIncumbent":false,"candidateParty":"D","voteCount":59041,"isWinner":true},{"candidateName":"Rozzana Verder-Aliga","candidateIncumbent":false,"candidateParty":"D","voteCount":45546,"isWinner":false},{"candidateName":"Jackie Elward","candidateIncumbent":false,"candidateParty":"D","voteCount":41127,"isWinner":false},{"candidateName":"Jimih Jones","candidateIncumbent":false,"candidateParty":"R","voteCount":14703,"isWinner":false}],"winnerDateTime":"2024-03-15T01:24:31.539Z"},"6531":{"id":"6531","type":"apRace","location":"State of California","raceName":"State Senate, District 5","raceDescription":"Top candidate wins seat.","raceType":"top2","totalVotes":171623,"precinctsReportPercentage":99.09,"eevp":99,"tabulationStatus":"Tabulation Paused","dateUpdated":"March 22, 2024","timeUpdated":"5:10 PM","source":"AP","candidates":[{"candidateName":"Jim Shoemaker","candidateIncumbent":false,"candidateParty":"R","voteCount":74935,"isWinner":true},{"candidateName":"Jerry McNerney","candidateIncumbent":false,"candidateParty":"D","voteCount":57040,"isWinner":true},{"candidateName":"Carlos Villapudua","candidateIncumbent":false,"candidateParty":"D","voteCount":39648,"isWinner":false}],"winnerDateTime":"2024-03-13T20:07:46.382Z"},"6532":{"id":"6532","type":"apRace","location":"State of California","raceName":"State Senate, District 7","raceDescription":"Top candidate wins seat.","raceType":"top2","totalVotes":192446,"precinctsReportPercentage":98.72,"eevp":98.78,"tabulationStatus":"Tabulation Paused","dateUpdated":"March 22, 2024","timeUpdated":"4:48 PM","source":"AP","candidates":[{"candidateName":"Jesse Arreguín","candidateIncumbent":false,"candidateParty":"D","voteCount":61837,"isWinner":true},{"candidateName":"Jovanka Beckles","candidateIncumbent":false,"candidateParty":"D","voteCount":34025,"isWinner":true},{"candidateName":"Dan Kalb","candidateIncumbent":false,"candidateParty":"D","voteCount":28842,"isWinner":false},{"candidateName":"Kathryn Lybarger","candidateIncumbent":false,"candidateParty":"D","voteCount":28041,"isWinner":false},{"candidateName":"Sandre Swanson","candidateIncumbent":false,"candidateParty":"D","voteCount":22862,"isWinner":false},{"candidateName":"Jeanne Solnordal","candidateIncumbent":false,"candidateParty":"R","voteCount":16839,"isWinner":false}],"winnerDateTime":"2024-03-16T00:58:11.533Z"},"6533":{"id":"6533","type":"apRace","location":"State of California","raceName":"State Senate, District 9","raceDescription":"Top candidate wins seat.","raceType":"top2","totalVotes":0,"uncontested":true,"precinctsReportPercentage":0,"eevp":0,"tabulationStatus":"Tabulation Paused","dateUpdated":"March 22, 2024","timeUpdated":"4:20 PM","source":"AP","candidates":[{"candidateName":"Tim Grayson","candidateIncumbent":false,"candidateParty":"D","voteCount":0,"isWinner":true},{"candidateName":"Marisol Rubio","candidateIncumbent":false,"candidateParty":"D","voteCount":0,"isWinner":true}],"winnerDateTime":"2024-03-06T04:00:30.000Z"},"6534":{"id":"6534","type":"apRace","location":"State of California","raceName":"State Senate, District 11","raceDescription":"Top candidate wins seat.","raceType":"top2","totalVotes":228260,"precinctsReportPercentage":99.09,"eevp":99,"tabulationStatus":"Tabulation Paused","dateUpdated":"March 22, 2024","timeUpdated":"4:20 PM","source":"AP","candidates":[{"candidateName":"Scott Wiener","candidateIncumbent":true,"candidateParty":"D","voteCount":166592,"isWinner":true},{"candidateName":"Yvette Corkrean","candidateIncumbent":false,"candidateParty":"R","voteCount":34438,"isWinner":true},{"candidateName":"Cynthia Cravens","candidateIncumbent":false,"candidateParty":"D","voteCount":18513,"isWinner":false},{"candidateName":"Jing Xiong","candidateIncumbent":false,"candidateParty":"NPP","voteCount":8717,"isWinner":false}],"winnerDateTime":"2024-03-12T02:01:51.597Z"},"6535":{"id":"6535","type":"apRace","location":"State of California","raceName":"State Senate, District 13","raceDescription":"Top candidate wins seat.","raceType":"top2","totalVotes":227191,"precinctsReportPercentage":98.88,"eevp":99,"tabulationStatus":"Tabulation Paused","dateUpdated":"March 22, 2024","timeUpdated":"4:20 PM","source":"AP","candidates":[{"candidateName":"Josh Becker","candidateIncumbent":true,"candidateParty":"D","voteCount":167127,"isWinner":true},{"candidateName":"Alexander Glew","candidateIncumbent":false,"candidateParty":"R","voteCount":42788,"isWinner":true},{"candidateName":"Christina Laskowski","candidateIncumbent":false,"candidateParty":"R","voteCount":17276,"isWinner":false}],"winnerDateTime":"2024-03-12T01:56:24.964Z"},"6536":{"id":"6536","type":"apRace","location":"State of California","raceName":"State Senate, District 15","raceDescription":"Top candidate wins seat.","raceType":"top2","totalVotes":180231,"precinctsReportPercentage":98.81,"eevp":98.95,"tabulationStatus":"Tabulation Paused","dateUpdated":"March 22, 2024","timeUpdated":"4:20 PM","source":"AP","candidates":[{"candidateName":"Dave Cortese","candidateIncumbent":true,"candidateParty":"D","voteCount":124440,"isWinner":true},{"candidateName":"Robert Howell","candidateIncumbent":false,"candidateParty":"R","voteCount":34173,"isWinner":true},{"candidateName":"Tony Loaiza","candidateIncumbent":false,"candidateParty":"R","voteCount":21618,"isWinner":false}],"winnerDateTime":"2024-03-13T01:15:45.365Z"},"6548":{"id":"6548","type":"apRace","location":"State of California","raceName":"State Senate, District 39","raceDescription":"Top candidate wins seat.","raceType":"top2","totalVotes":0,"uncontested":true,"precinctsReportPercentage":0,"eevp":0,"tabulationStatus":"Tabulation Paused","dateUpdated":"March 20, 2024","timeUpdated":"4:55 PM","source":"AP","candidates":[{"candidateName":"Akilah Weber","candidateIncumbent":false,"candidateParty":"D","voteCount":0,"isWinner":true},{"candidateName":"Bob Divine","candidateIncumbent":false,"candidateParty":"R","voteCount":0,"isWinner":true}],"winnerDateTime":"2024-03-06T04:00:30.000Z"},"6611":{"id":"6611","type":"apRace","location":"State of California","raceName":"U.S. House of Representatives, District 11","raceDescription":"Top candidate wins seat.","raceType":"top2","totalVotes":188732,"precinctsReportPercentage":98.89,"eevp":99,"tabulationStatus":"Tabulation Paused","dateUpdated":"March 22, 2024","timeUpdated":"8:25 AM","source":"AP","candidates":[{"candidateName":"Nancy Pelosi","candidateIncumbent":true,"candidateParty":"D","voteCount":138285,"isWinner":true},{"candidateName":"Bruce Lou","candidateIncumbent":false,"candidateParty":"R","voteCount":16285,"isWinner":true},{"candidateName":"Marjorie Mikels","candidateIncumbent":false,"candidateParty":"D","voteCount":9363,"isWinner":false},{"candidateName":"Bianca Von Krieg","candidateIncumbent":false,"candidateParty":"D","voteCount":7634,"isWinner":false},{"candidateName":"Jason Zeng","candidateIncumbent":false,"candidateParty":"R","voteCount":6607,"isWinner":false},{"candidateName":"Jason Boyce","candidateIncumbent":false,"candidateParty":"D","voteCount":4325,"isWinner":false},{"candidateName":"Larry Nichelson","candidateIncumbent":false,"candidateParty":"R","voteCount":3482,"isWinner":false},{"candidateName":"Eve Del Castello","candidateIncumbent":false,"candidateParty":"R","voteCount":2751,"isWinner":false}],"winnerDateTime":"2024-03-12T00:31:55.445Z"},"8589":{"id":"8589","type":"apRace","location":"State of California","raceName":"U.S. Senate, Class I","raceDescription":"Top candidate wins seat.","raceType":"top2","totalVotes":7276537,"precinctsReportPercentage":99,"eevp":99,"tabulationStatus":"Tabulation Paused","dateUpdated":"March 25, 2024","timeUpdated":"5:47 AM","source":"AP","candidates":[{"candidateName":"Adam Schiff","candidateIncumbent":false,"candidateParty":"D","voteCount":2299507,"isWinner":true},{"candidateName":"Steve Garvey","candidateIncumbent":false,"candidateParty":"R","voteCount":2292414,"isWinner":true},{"candidateName":"Katie Porter","candidateIncumbent":false,"candidateParty":"D","voteCount":1115606,"isWinner":false},{"candidateName":"Barbara Lee","candidateIncumbent":false,"candidateParty":"D","voteCount":714408,"isWinner":false},{"candidateName":"Eric Early","candidateIncumbent":false,"candidateParty":"R","voteCount":240723,"isWinner":false},{"candidateName":"James Bradley","candidateIncumbent":false,"candidateParty":"R","voteCount":98180,"isWinner":false},{"candidateName":"Christina Pascucci","candidateIncumbent":false,"candidateParty":"D","voteCount":61755,"isWinner":false},{"candidateName":"Sharleta Bassett","candidateIncumbent":false,"candidateParty":"R","voteCount":54422,"isWinner":false},{"candidateName":"Sarah Liew","candidateIncumbent":false,"candidateParty":"R","voteCount":38483,"isWinner":false},{"candidateName":"Laura Garza ","candidateIncumbent":false,"candidateParty":"NPP","voteCount":34320,"isWinner":false},{"candidateName":"Jonathan Reiss","candidateIncumbent":false,"candidateParty":"R","voteCount":34283,"isWinner":false},{"candidateName":"Sepi Gilani","candidateIncumbent":false,"candidateParty":"D","voteCount":34056,"isWinner":false},{"candidateName":"Gail Lightfoot","candidateIncumbent":false,"candidateParty":"Lib","voteCount":33046,"isWinner":false},{"candidateName":"Denice Gary-Pandol","candidateIncumbent":false,"candidateParty":"R","voteCount":25494,"isWinner":false},{"candidateName":"James Macauley","candidateIncumbent":false,"candidateParty":"R","voteCount":23168,"isWinner":false},{"candidateName":"Harmesh Kumar","candidateIncumbent":false,"candidateParty":"D","voteCount":21522,"isWinner":false},{"candidateName":"David Peterson","candidateIncumbent":false,"candidateParty":"D","voteCount":21076,"isWinner":false},{"candidateName":"Douglas Pierce","candidateIncumbent":false,"candidateParty":"D","voteCount":19371,"isWinner":false},{"candidateName":"Major Singh","candidateIncumbent":false,"candidateParty":"NPP","voteCount":16965,"isWinner":false},{"candidateName":"John Rose","candidateIncumbent":false,"candidateParty":"D","voteCount":14577,"isWinner":false},{"candidateName":"Perry Pound","candidateIncumbent":false,"candidateParty":"D","voteCount":14134,"isWinner":false},{"candidateName":"Raji Rab","candidateIncumbent":false,"candidateParty":"D","voteCount":13558,"isWinner":false},{"candidateName":"Mark Ruzon","candidateIncumbent":false,"candidateParty":"NPP","voteCount":13429,"isWinner":false},{"candidateName":"Forrest Jones","candidateIncumbent":false,"candidateParty":"AIP","voteCount":13027,"isWinner":false},{"candidateName":"Stefan Simchowitz","candidateIncumbent":false,"candidateParty":"R","voteCount":12717,"isWinner":false},{"candidateName":"Martin Veprauskas","candidateIncumbent":false,"candidateParty":"R","voteCount":9714,"isWinner":false},{"candidateName":"Don Grundmann","candidateIncumbent":false,"candidateParty":"NPP","voteCount":6582,"isWinner":false}],"winnerDateTime":"2024-03-06T05:01:46.589Z"},"8686":{"id":"8686","type":"apRace","location":"State of California","raceName":"President,","raceDescription":"Top candidate wins seat.","raceType":"top1","totalVotes":3589127,"precinctsReportPercentage":99,"eevp":99,"tabulationStatus":"Tabulation Paused","dateUpdated":"March 25, 2024","timeUpdated":"5:48 AM","source":"AP","candidates":[{"candidateName":"Joe Biden","candidateIncumbent":true,"candidateParty":"D","voteCount":3200188,"isWinner":true},{"candidateName":"Marianne Williamson","candidateIncumbent":false,"candidateParty":"D","voteCount":145690,"isWinner":false},{"candidateName":"Dean Phillips","candidateIncumbent":false,"candidateParty":"D","voteCount":99981,"isWinner":false},{"candidateName":"Armando Perez-Serrato","candidateIncumbent":false,"candidateParty":"D","voteCount":42925,"isWinner":false},{"candidateName":"Gabriel Cornejo","candidateIncumbent":false,"candidateParty":"D","voteCount":41261,"isWinner":false},{"candidateName":"President Boddie","candidateIncumbent":false,"candidateParty":"D","voteCount":25373,"isWinner":false},{"candidateName":"Stephen Lyons","candidateIncumbent":false,"candidateParty":"D","voteCount":21008,"isWinner":false},{"candidateName":"Eban Cambridge","candidateIncumbent":false,"candidateParty":"D","voteCount":12701,"isWinner":false}],"winnerDateTime":"2024-03-06T04:12:27.559Z"},"8688":{"id":"8688","type":"apRace","location":"State of California","raceName":"President,","raceDescription":"Top candidate wins seat.","raceType":"top1","totalVotes":2466569,"precinctsReportPercentage":99,"eevp":99,"tabulationStatus":"Tabulation Paused","dateUpdated":"March 25, 2024","timeUpdated":"5:47 AM","source":"AP","candidates":[{"candidateName":"Donald Trump","candidateIncumbent":false,"candidateParty":"R","voteCount":1953947,"isWinner":true},{"candidateName":"Nikki Haley","candidateIncumbent":false,"candidateParty":"R","voteCount":430792,"isWinner":false},{"candidateName":"Ron DeSantis","candidateIncumbent":false,"candidateParty":"R","voteCount":35581,"isWinner":false},{"candidateName":"Chris Christie","candidateIncumbent":false,"candidateParty":"R","voteCount":20164,"isWinner":false},{"candidateName":"Vivek Ramaswamy","candidateIncumbent":false,"candidateParty":"R","voteCount":11069,"isWinner":false},{"candidateName":"Rachel Swift","candidateIncumbent":false,"candidateParty":"R","voteCount":4231,"isWinner":false},{"candidateName":"David Stuckenberg","candidateIncumbent":false,"candidateParty":"R","voteCount":3895,"isWinner":false},{"candidateName":"Ryan Binkley","candidateIncumbent":false,"candidateParty":"R","voteCount":3563,"isWinner":false},{"candidateName":"Asa Hutchinson","candidateIncumbent":false,"candidateParty":"R","voteCount":3327,"isWinner":false}],"winnerDateTime":"2024-03-06T04:13:19.766Z"},"81993":{"id":"81993","type":"apRace","location":"State of California","raceName":"U.S. Senate, Class I Unexpired Term","raceDescription":"Top candidate wins seat.","raceType":"top2","totalVotes":7358837,"precinctsReportPercentage":99,"eevp":99,"tabulationStatus":"Tabulation Paused","dateUpdated":"March 25, 2024","timeUpdated":"5:47 AM","source":"AP","candidates":[{"candidateName":"Steve Garvey","candidateIncumbent":false,"candidateParty":"R","voteCount":2444940,"isWinner":true},{"candidateName":"Adam Schiff","candidateIncumbent":false,"candidateParty":"D","voteCount":2155146,"isWinner":true},{"candidateName":"Katie Porter","candidateIncumbent":false,"candidateParty":"D","voteCount":1269194,"isWinner":false},{"candidateName":"Barbara Lee","candidateIncumbent":false,"candidateParty":"D","voteCount":863278,"isWinner":false},{"candidateName":"Eric Early","candidateIncumbent":false,"candidateParty":"R","voteCount":448788,"isWinner":false},{"candidateName":"Christina Pascucci","candidateIncumbent":false,"candidateParty":"D","voteCount":109421,"isWinner":false},{"candidateName":"Sepi Gilani","candidateIncumbent":false,"candidateParty":"D","voteCount":68070,"isWinner":false}],"winnerDateTime":"2024-03-06T04:31:08.186Z"},"82014":{"id":"82014","type":"apRace","location":"State of California","raceName":"Proposition, 1 - Behavioral Health Services Program","raceDescription":"Top candidate wins seat.","raceType":"top1","totalVotes":7221972,"precinctsReportPercentage":99,"eevp":99,"tabulationStatus":"Tabulation Paused","dateUpdated":"March 25, 2024","timeUpdated":"5:47 AM","source":"AP","candidates":[{"candidateName":"Yes","candidateIncumbent":false,"candidateParty":null,"voteCount":3624998,"isWinner":true},{"candidateName":"No","candidateIncumbent":false,"candidateParty":null,"voteCount":3596974,"isWinner":false}],"winnerDateTime":"2024-03-21T00:11:06.265Z"},"timeLoaded":"April 25, 2024 9:03 PM","nationalRacesLoaded":true,"localRacesLoaded":true,"overrides":[{"id":"5921","raceName":"U.S. House of Representatives, District 7","raceDescription":"Top two candidates advance to general election.","raceReadTheStory":""},{"id":"5922","raceName":"U.S. House of Representatives, District 8","raceDescription":"Top two candidates advance to general election.","raceReadTheStory":""},{"id":"5924","raceName":"U.S. House of Representatives, District 10","raceDescription":"Top two candidates advance to general election.","raceReadTheStory":""},{"id":"5926","raceName":"U.S. House of Representatives, District 12","raceDescription":"Top two candidates advance to general election.","raceReadTheStory":"https://www.kqed.org/elections/results/alameda/congress-12th-district"},{"id":"5928","raceName":"U.S. House of Representatives, District 14","raceDescription":"Top two candidates advance to general election.","raceReadTheStory":""},{"id":"5930","raceName":"U.S. House of Representatives, District 16","raceDescription":"Top two candidates advance to general election.","raceReadTheStory":"https://www.kqed.org/elections/results/california/congress-16th-district"},{"id":"5931","raceName":"U.S. House of Representatives, District 17","raceDescription":"Top two candidates advance to general election.","raceReadTheStory":""},{"id":"5932","raceName":"U.S. House of Representatives, District 18","raceDescription":"Top two candidates advance to general election.","raceReadTheStory":""},{"id":"5963","raceName":"State Assembly, District 2","raceDescription":"Top two candidates advance to general election.","raceReadTheStory":""},{"id":"5972","raceName":"State Assembly, District 11","raceDescription":"Top two candidates advance to general election.","raceReadTheStory":""},{"id":"5973","raceName":"State Assembly, District 12","raceDescription":"Top two candidates advance to general election.","raceReadTheStory":""},{"id":"5975","raceName":"State Assembly, District 14","raceDescription":"Top two candidates advance to general election.","raceReadTheStory":""},{"id":"5976","raceName":"State Assembly, District 15","raceDescription":"Top two candidates advance to general election.","raceReadTheStory":"https://www.kqed.org/elections/results/contracosta/state-assembly"},{"id":"5977","raceName":"State Assembly, District 16","raceDescription":"Top two candidates advance to general election.","raceReadTheStory":""},{"id":"5978","raceName":"State Assembly, District 17","raceDescription":"Top two candidates advance to general election.","raceReadTheStory":""},{"id":"5979","raceName":"State Assembly, District 18","raceDescription":"Top two candidates advance to general election.","raceReadTheStory":""},{"id":"5980","raceName":"State Assembly, District 19","raceDescription":"Top two candidates advance to general election.","raceReadTheStory":""},{"id":"5981","raceName":"State Assembly, District 20","raceDescription":"Top two candidates advance to general election.","raceReadTheStory":""},{"id":"5982","raceName":"State Assembly, District 21","raceDescription":"Top two candidates advance to general election.","raceReadTheStory":""},{"id":"5984","raceName":"State Assembly, District 23","raceDescription":"Top two candidates advance to general election.","raceReadTheStory":"https://www.kqed.org/elections/results/california/state-assembly-23rd-district"},{"id":"5987","raceName":"State Assembly, District 26","raceDescription":"Top two candidates advance to general election.","raceReadTheStory":"https://www.kqed.org/elections/results/santaclara/state-assembly-26th-district"},{"id":"5989","raceName":"State Assembly, District 28","raceDescription":"Top two candidates advance to general election.","raceReadTheStory":""},{"id":"6010","raceName":"State Assembly, District 4","raceDescription":"Top two candidates advance to general election.","raceReadTheStory":""},{"id":"6018","raceName":"U.S. House of Representatives, District 2","raceDescription":"Top two candidates advance to general election.","raceReadTheStory":""},{"id":"6020","raceName":"U.S. House of Representatives, District 4","raceDescription":"Top two candidates advance to general election.","raceReadTheStory":""},{"id":"6025","raceName":"U.S. House of Representatives, District 9","raceDescription":"Top two candidates advance to general election.","raceReadTheStory":""},{"id":"6031","raceName":"U.S. House of Representatives, District 15","raceDescription":"Top two candidates advance to general election.","raceReadTheStory":""},{"id":"6035","raceName":"U.S. House of Representatives, District 19","raceDescription":"Top two candidates advance to general election.","raceReadTheStory":""},{"id":"6067","raceName":"State Assembly, District 4","raceDescription":"Top two candidates advance to general election.","raceReadTheStory":""},{"id":"6087","raceName":"State Assembly, District 24","raceDescription":"Top two candidates advance to general election.","raceReadTheStory":""},{"id":"6088","raceName":"State Assembly, District 25","raceDescription":"Top two candidates advance to general election.","raceReadTheStory":""},{"id":"6092","raceName":"State Assembly, District 29","raceDescription":"Top two candidates advance to general election.","raceReadTheStory":""},{"id":"6223","raceName":"U.S. House of Representatives, District 4","raceDescription":"Top two candidates advance to general election.","raceReadTheStory":""},{"id":"6530","raceName":"State Senate, District 3","raceDescription":"Top two candidates advance to general election.","raceReadTheStory":"https://www.kqed.org/elections/results/california/state-senate-3rd-district"},{"id":"6531","raceName":"State Senate, District 5","raceDescription":"Top two candidates advance to general election.","raceReadTheStory":""},{"id":"6532","raceName":"State Senate, District 7","raceDescription":"Top two candidates advance to general election.","raceReadTheStory":"https://www.kqed.org/elections/results/california/state-senate-7th-district"},{"id":"6533","raceName":"State Senate, District 9","raceDescription":"Top two candidates advance to general election.","raceReadTheStory":""},{"id":"6534","raceName":"State Senate, District 11","raceDescription":"Top two candidates advance to general election.","raceReadTheStory":""},{"id":"6535","raceName":"State Senate, District 13","raceDescription":"Top two candidates advance to general election.","raceReadTheStory":""},{"id":"6536","raceName":"State Senate, District 15","raceDescription":"Top two candidates advance to general election.","raceReadTheStory":""},{"id":"6611","raceName":"U.S. House of Representatives, District 11","raceDescription":"Top two candidates advance to general election.","raceReadTheStory":""},{"id":"8589","raceName":"U.S. Senate (Full Term)","raceDescription":"Top two candidates advance to general election.","raceReadTheStory":"https://www.kqed.org/elections/results/california/senator"},{"id":"8686","raceName":"California Democratic Presidential Primary","raceDescription":"Candidates are competing for 496 delegates.","raceReadTheStory":"https://www.kqed.org/elections/results/president/democrat"},{"id":"8688","raceName":"California Republican Presidential Primary","raceDescription":"Candidates are competing for 169 delegates.","raceReadTheStory":"https://kqed.org/elections/results/president/republican"},{"id":"81993","raceName":"U.S. Senate (Partial/Unexpired Term)","raceDescription":"Top two candidates advance to general election."},{"id":"82014","raceName":"Proposition 1","raceDescription":"Bond and mental health reforms. Passes with majority vote.","raceReadTheStory":"https://www.kqed.org/elections/results/california/proposition-1"}],"AlamedaJudge5":{"id":"AlamedaJudge5","type":"localRace","location":"Alameda","raceName":"Superior Court Judge, Office 5","raceDescription":"Top candidate wins seat.","raceReadTheStory":"","raceType":"top1","timeUpdated":"7:02 PM","dateUpdated":"April 1, 2024","totalVotes":200601,"candidates":[{"candidateName":"Terry Wiley","candidateIncumbent":true,"candidateParty":"","voteCount":200601}]},"AlamedaJudge12":{"id":"AlamedaJudge12","type":"localRace","location":"Alameda","raceName":"Superior Court Judge, Office 12","raceDescription":"Top candidate wins seat.","raceReadTheStory":"","raceType":"top1","timeUpdated":"7:02 PM","dateUpdated":"April 1, 2024","totalVotes":240853,"candidates":[{"candidateName":"Mark Fickes","candidateIncumbent":false,"candidateParty":"","voteCount":133009},{"candidateName":"Michael P. Johnson","candidateIncumbent":false,"candidateParty":"","voteCount":107844}]},"AlamedaBoard2":{"id":"AlamedaBoard2","type":"localRace","location":"Alameda","raceName":"Board of Education, Trustee Area 2","raceDescription":"Top candidate wins seat.","raceReadTheStory":"","raceType":"top1","timeUpdated":"7:02 PM","dateUpdated":"April 1, 2024","totalVotes":33580,"candidates":[{"candidateName":"John Lewis","candidateIncumbent":false,"candidateParty":"","voteCount":6943},{"candidateName":"Angela Normand","candidateIncumbent":true,"candidateParty":"","voteCount":26637}]},"AlamedaBoard5":{"id":"AlamedaBoard5","type":"localRace","location":"Alameda","raceName":"Board of Education, Trustee Area 5","raceDescription":"Top candidate wins seat.","raceReadTheStory":"","raceType":"top1","timeUpdated":"7:02 PM","dateUpdated":"April 1, 2024","totalVotes":26072,"candidates":[{"candidateName":"Guadalupe \"Lupe\" Angulo","candidateIncumbent":false,"candidateParty":"","voteCount":7521},{"candidateName":"Janevette Cole","candidateIncumbent":true,"candidateParty":"","voteCount":13338},{"candidateName":"Joe Orlando Ramos","candidateIncumbent":false,"candidateParty":"","voteCount":5213}]},"AlamedaBoard6":{"id":"AlamedaBoard6","type":"localRace","location":"Alameda","raceName":"Board of Education, Trustee Area 6","raceDescription":"Top candidate wins seat.","raceReadTheStory":"","raceType":"top1","timeUpdated":"7:02 PM","dateUpdated":"April 1, 2024","totalVotes":30864,"candidates":[{"candidateName":"John Guerrero","candidateIncumbent":false,"candidateParty":"","voteCount":9989},{"candidateName":"Eileen McDonald","candidateIncumbent":true,"candidateParty":"","voteCount":20875}]},"AlamedaSup1":{"id":"AlamedaSup1","type":"localRace","location":"Alameda","raceName":"Board of Supervisors, District 1","raceDescription":"Candidate with majority vote wins seat. If no candidate reaches majority, top two candidates advance to runoff in general election.","raceReadTheStory":"","raceType":"top1","timeUpdated":"7:02 PM","dateUpdated":"April 1, 2024","totalVotes":41038,"candidates":[{"candidateName":"David Haubert","candidateIncumbent":true,"candidateParty":"","voteCount":41038}]},"AlamedaSup2":{"id":"AlamedaSup2","type":"localRace","location":"Alameda","raceName":"Board of Supervisors, District 2","raceDescription":"Candidate with majority vote wins seat. If no candidate reaches majority, top two candidates advance to runoff in general election.","raceReadTheStory":"","raceType":"top2","timeUpdated":"7:02 PM","dateUpdated":"April 1, 2024","totalVotes":31034,"candidates":[{"candidateName":"Elisa Márquez","candidateIncumbent":true,"candidateParty":"","voteCount":31034}]},"AlamedaSup4":{"id":"AlamedaSup4","type":"localRace","location":"Alameda","raceName":"Board of Supervisors, District 4","raceDescription":"Candidate with majority vote wins seat. If no candidate reaches majority, top two candidates advance to runoff in general election.","raceReadTheStory":"https://www.kqed.org/elections/results/alameda/supervisor-4th-district","raceType":"top2","timeUpdated":"7:02 PM","dateUpdated":"April 1, 2024","totalVotes":57007,"candidates":[{"candidateName":"Jennifer Esteen","candidateIncumbent":false,"candidateParty":"","voteCount":22400},{"candidateName":"Nate Miley","candidateIncumbent":true,"candidateParty":"","voteCount":34607}]},"AlamedaSup5":{"id":"AlamedaSup5","type":"localRace","location":"Alameda","raceName":"Board of Supervisors, District 5","raceDescription":"Candidate with majority vote wins seat. If no candidate reaches majority, top two candidates advance to runoff in general election.","raceReadTheStory":"https://www.kqed.org/elections/results/alameda/supervisor-5th-district","raceType":"top2","timeUpdated":"7:02 PM","dateUpdated":"April 1, 2024","totalVotes":81059,"candidates":[{"candidateName":"Ben Bartlett","candidateIncumbent":false,"candidateParty":"","voteCount":13518},{"candidateName":"Nikki Fortunato Bas","candidateIncumbent":false,"candidateParty":"","voteCount":27597},{"candidateName":"John J. Bauters","candidateIncumbent":false,"candidateParty":"","voteCount":16783},{"candidateName":"Ken Berrick","candidateIncumbent":false,"candidateParty":"","voteCount":7520},{"candidateName":"Omar Farmer","candidateIncumbent":false,"candidateParty":"","voteCount":1240},{"candidateName":"Gregory Hodge","candidateIncumbent":false,"candidateParty":"","voteCount":3419},{"candidateName":"Chris Moore","candidateIncumbent":false,"candidateParty":"","voteCount":7428},{"candidateName":"Gerald Pechenuk","candidateIncumbent":false,"candidateParty":"","voteCount":305},{"candidateName":"Lorrel Plimier","candidateIncumbent":false,"candidateParty":"","voteCount":3249}]},"AlamedaBoard7":{"id":"AlamedaBoard7","type":"localRace","location":"Alameda","raceName":"Flood Control & Water Conservation District Director, Zone 7, Full Term","raceDescription":"Top three candidates win seat.","raceReadTheStory":"","raceType":"top3","timeUpdated":"7:02 PM","dateUpdated":"April 1, 2024","totalVotes":134340,"candidates":[{"candidateName":"Alan Burnham","candidateIncumbent":false,"candidateParty":"","voteCount":15723},{"candidateName":"Sandy Figuers","candidateIncumbent":false,"candidateParty":"","voteCount":22454},{"candidateName":"Laurene K. Green","candidateIncumbent":false,"candidateParty":"","voteCount":30343},{"candidateName":"Kathy Narum","candidateIncumbent":true,"candidateParty":"","voteCount":23833},{"candidateName":"Seema Badar","candidateIncumbent":false,"candidateParty":"","voteCount":7468},{"candidateName":"Catherine Brown","candidateIncumbent":false,"candidateParty":"","voteCount":34519}]},"AlamedaAuditor":{"id":"AlamedaAuditor","type":"localRace","location":"Alameda","raceName":"Oakland Auditor","raceDescription":"Top candidate wins seat.","raceReadTheStory":"","raceType":"top1","timeUpdated":"7:02 PM","dateUpdated":"April 1, 2024","totalVotes":59227,"candidates":[{"candidateName":"Michael Houston","candidateIncumbent":true,"candidateParty":"","voteCount":59227}]},"AlamedaMeasureA":{"id":"AlamedaMeasureA","type":"localRace","location":"Alameda","raceName":"Measure A","raceDescription":"Alameda County. Civil service. Passes with majority vote.","raceReadTheStory":"","raceType":"yesNo","timeUpdated":"7:02 PM","dateUpdated":"April 1, 2024","totalVotes":282335,"candidates":[{"candidateName":"Yes","candidateIncumbent":false,"candidateParty":"","voteCount":167903},{"candidateName":"No","candidateIncumbent":false,"candidateParty":"","voteCount":114432}]},"AlamedaMeasureB":{"id":"AlamedaMeasureB","type":"localRace","location":"Alameda","raceName":"Measure B","raceDescription":"Alameda County. Recall rules. Passes with majority vote.","raceReadTheStory":"https://www.kqed.org/elections/results/alameda/measure-b","raceType":"yesNo","timeUpdated":"7:02 PM","dateUpdated":"April 1, 2024","totalVotes":282683,"candidates":[{"candidateName":"Yes","candidateIncumbent":false,"candidateParty":"","voteCount":182200},{"candidateName":"No","candidateIncumbent":false,"candidateParty":"","voteCount":100483}]},"AlamedaMeasureD":{"id":"AlamedaMeasureD","type":"localRace","location":"Alameda","raceName":"Measure D","raceDescription":"Oakland. Appropriations limit. Passes with majority vote.","raceReadTheStory":"","raceType":"yesNo","timeUpdated":"7:02 PM","dateUpdated":"April 1, 2024","totalVotes":79797,"candidates":[{"candidateName":"Yes","candidateIncumbent":false,"candidateParty":"","voteCount":59852},{"candidateName":"No","candidateIncumbent":false,"candidateParty":"","voteCount":19945}]},"AlamedaMeasureE":{"id":"AlamedaMeasureE","type":"localRace","location":"Alameda","raceName":"Measure E","raceDescription":"Alameda Unified School District. Parcel tax. Passes with 2/3 vote.","raceReadTheStory":"","raceType":"yesNo","timeUpdated":"7:02 PM","dateUpdated":"April 1, 2024","totalVotes":22692,"candidates":[{"candidateName":"Yes","candidateIncumbent":false,"candidateParty":"","voteCount":17280},{"candidateName":"No","candidateIncumbent":false,"candidateParty":"","voteCount":5412}]},"AlamedaMeasureF":{"id":"AlamedaMeasureF","type":"localRace","location":"Alameda","raceName":"Measure F","raceDescription":"Piedmont. Parcel tax. Passes with 2/3 vote.","raceReadTheStory":"","raceType":"yesNo","timeUpdated":"7:02 PM","dateUpdated":"April 1, 2024","totalVotes":4855,"candidates":[{"candidateName":"Yes","candidateIncumbent":false,"candidateParty":"","voteCount":3673},{"candidateName":"No","candidateIncumbent":false,"candidateParty":"","voteCount":1182}]},"AlamedaMeasureG":{"id":"AlamedaMeasureG","type":"localRace","location":"Alameda","raceName":"Measure G","raceDescription":"Albany Unified School District. Parcel tax. Passes with 2/3 vote. ","raceReadTheStory":"","raceType":"yesNo","timeUpdated":"7:02 PM","dateUpdated":"April 1, 2024","totalVotes":5898,"candidates":[{"candidateName":"Yes","candidateIncumbent":false,"candidateParty":"","voteCount":4651},{"candidateName":"No","candidateIncumbent":false,"candidateParty":"","voteCount":1247}]},"AlamedaMeasureH":{"id":"AlamedaMeasureH","type":"localRace","location":"Alameda","raceName":"Measure H","raceDescription":"Berkeley Unified School District. Parcel tax. Passes with 2/3 vote.","raceReadTheStory":"","raceType":"yesNo","timeUpdated":"7:02 PM","dateUpdated":"April 1, 2024","totalVotes":33331,"candidates":[{"candidateName":"Yes","candidateIncumbent":false,"candidateParty":"","voteCount":29418},{"candidateName":"No","candidateIncumbent":false,"candidateParty":"","voteCount":3913}]},"AlamedaMeasureI":{"id":"AlamedaMeasureI","type":"localRace","location":"Alameda","raceName":"Measure I","raceDescription":"Hayward Unified School District. School bond. Passes with 55% vote.","raceReadTheStory":"","raceType":"yesNo","timeUpdated":"7:02 PM","dateUpdated":"April 1, 2024","totalVotes":21929,"candidates":[{"candidateName":"Yes","candidateIncumbent":false,"candidateParty":"","voteCount":14151},{"candidateName":"No","candidateIncumbent":false,"candidateParty":"","voteCount":7778}]},"AlamedaMeasureJ":{"id":"AlamedaMeasureJ","type":"localRace","location":"Alameda","raceName":"Measure J","raceDescription":"San Leandro Unified School District. School bond. Passes with 55% vote.","raceReadTheStory":"","raceType":"yesNo","timeUpdated":"7:02 PM","dateUpdated":"April 1, 2024","totalVotes":12338,"candidates":[{"candidateName":"Yes","candidateIncumbent":false,"candidateParty":"","voteCount":7784},{"candidateName":"No","candidateIncumbent":false,"candidateParty":"","voteCount":4554}]},"CCD2":{"id":"CCD2","type":"localRace","location":"Contra Costa","raceName":"Board of Supervisors, District 2","raceDescription":"Candidate with majority vote wins seat. If no candidate reaches majority, top two candidates advance to runoff in general election.","raceReadTheStory":"","raceType":"yesNo","timeUpdated":"6:45 PM","dateUpdated":"March 28, 2024","totalVotes":45776,"candidates":[{"candidateName":"Candace Andersen","candidateIncumbent":true,"candidateParty":"","voteCount":45776}]},"CCD3":{"id":"CCD3","type":"localRace","location":"Contra Costa","raceName":"Board of Supervisors, District 3","raceDescription":"Candidate with majority vote wins seat. If no candidate reaches majority, top two candidates advance to runoff in general election.","raceReadTheStory":"","raceType":"top1","timeUpdated":"6:45 PM","dateUpdated":"March 28, 2024","totalVotes":25120,"candidates":[{"candidateName":"Diane Burgis","candidateIncumbent":true,"candidateParty":"","voteCount":25120}]},"CCD5":{"id":"CCD5","type":"localRace","location":"Contra Costa","raceName":"Board of Supervisors, District 5","raceDescription":"Candidate with majority vote wins seat. If no candidate reaches majority, top two candidates advance to runoff in general election.","raceReadTheStory":"https://www.kqed.org/elections/results/contracosta/supervisor-5th-district","raceType":"top2","timeUpdated":"6:45 PM","dateUpdated":"March 28, 2024","totalVotes":37045,"candidates":[{"candidateName":"Mike Barbanica","candidateIncumbent":false,"candidateParty":"","voteCount":14338},{"candidateName":"Jelani Killings","candidateIncumbent":false,"candidateParty":"","voteCount":5683},{"candidateName":"Shanelle Scales-Preston","candidateIncumbent":false,"candidateParty":"","voteCount":12993},{"candidateName":"Iztaccuauhtli Hector Gonzalez","candidateIncumbent":false,"candidateParty":"","voteCount":4031}]},"CCMeasureA":{"id":"CCMeasureA","type":"localRace","location":"Contra Costa","raceName":"Measure A","raceDescription":"Martinez. Appoint City Clerk. Passes with a majority vote.","raceReadTheStory":"","raceType":"yesNo","timeUpdated":"6:45 PM","dateUpdated":"March 28, 2024","totalVotes":11513,"candidates":[{"candidateName":"Yes","candidateIncumbent":false,"candidateParty":"","voteCount":7554},{"candidateName":"No","candidateIncumbent":false,"candidateParty":"","voteCount":3959}]},"CCMeasureB":{"id":"CCMeasureB","type":"localRace","location":"Contra Costa","raceName":"Measure B","raceDescription":"Antioch Unified School District. School bond. Passes with 55% vote.","raceReadTheStory":"","raceType":"yesNo","timeUpdated":"6:45 PM","dateUpdated":"March 28, 2024","totalVotes":17971,"candidates":[{"candidateName":"Yes","candidateIncumbent":false,"candidateParty":"","voteCount":10397},{"candidateName":"No","candidateIncumbent":false,"candidateParty":"","voteCount":7574}]},"CCMeasureC":{"id":"CCMeasureC","type":"localRace","location":"Contra Costa","raceName":"Measure C","raceDescription":"Martinez Unified School District. Parcel tax. Passes with 2/3 vote.","raceReadTheStory":"","raceType":"yesNo","timeUpdated":"6:45 PM","dateUpdated":"March 28, 2024","totalVotes":9230,"candidates":[{"candidateName":"Yes","candidateIncumbent":false,"candidateParty":"","voteCount":6917},{"candidateName":"No","candidateIncumbent":false,"candidateParty":"","voteCount":2313}]},"CCMeasureD":{"id":"CCMeasureD","type":"localRace","location":"Contra Costa","raceName":"Measure D","raceDescription":"Moraga School District. School bond. Passes with 55% vote.","raceReadTheStory":"","raceType":"yesNo","timeUpdated":"6:45 PM","dateUpdated":"March 28, 2024","totalVotes":6007,"candidates":[{"candidateName":"Yes","candidateIncumbent":false,"candidateParty":"","voteCount":4052},{"candidateName":"No","candidateIncumbent":false,"candidateParty":"","voteCount":1955}]},"MarinD2":{"id":"MarinD2","type":"localRace","location":"Marin","raceName":"Board of Supervisors, District 2","raceDescription":"Candidate with majority vote wins seat. If no candidate reaches majority, top two candidates advance to runoff in general election.","raceReadTheStory":"https://www.kqed.org/elections/results/marin/supervisor-2nd-district","raceType":"top2","timeUpdated":"6:54 PM","dateUpdated":"March 27, 2024","totalVotes":18466,"candidates":[{"candidateName":"Brian Colbert","candidateIncumbent":false,"candidateParty":"","voteCount":7971},{"candidateName":"Heather McPhail Sridharan","candidateIncumbent":false,"candidateParty":"","voteCount":4851},{"candidateName":"Ryan O'Neil","candidateIncumbent":false,"candidateParty":"","voteCount":2647},{"candidateName":"Gabe Paulson","candidateIncumbent":false,"candidateParty":"","voteCount":2997}]},"MarinD3":{"id":"MarinD3","type":"localRace","location":"Marin","raceName":"Board of Supervisors, District 3","raceDescription":"Candidate with majority vote wins seat. If no candidate reaches majority, top two candidates advance to runoff in general election.","raceReadTheStory":"","raceType":"top1","timeUpdated":"6:54 PM","dateUpdated":"March 27, 2024","totalVotes":13274,"candidates":[{"candidateName":"Stephanie Moulton-Peters","candidateIncumbent":true,"candidateParty":"","voteCount":13274}]},"MarinD4":{"id":"MarinD4","type":"localRace","location":"Marin","raceName":"Board of Supervisors, District 4","raceDescription":"Candidate with majority vote wins seat. If no candidate reaches majority, top two candidates advance to runoff in general election.","raceReadTheStory":"","raceType":"top1","timeUpdated":"6:54 PM","dateUpdated":"March 27, 2024","totalVotes":12986,"candidates":[{"candidateName":"Dennis Rodoni","candidateIncumbent":true,"candidateParty":"","voteCount":10086},{"candidateName":"Francis Drouillard","candidateIncumbent":false,"candidateParty":"","voteCount":2900}]},"MarinLarkspurCC":{"id":"MarinLarkspurCC","type":"localRace","location":"Marin","raceName":"Larkspur City Council (Short Term)","raceDescription":"Top candidate wins seat.","raceReadTheStory":"","raceType":"top1","timeUpdated":"6:54 PM","dateUpdated":"March 27, 2024","totalVotes":4176,"candidates":[{"candidateName":"Stephanie Andre","candidateIncumbent":false,"candidateParty":"","voteCount":2514},{"candidateName":"Claire Paquette","candidateIncumbent":false,"candidateParty":"","voteCount":1008},{"candidateName":"Lana Scott","candidateIncumbent":false,"candidateParty":"","voteCount":654}]},"MarinRossCouncil":{"id":"MarinRossCouncil","type":"localRace","location":"Marin","raceName":"Ross Town Council","raceDescription":"Top three candidates win seat.","raceReadTheStory":"","raceType":"top3","timeUpdated":"6:54 PM","dateUpdated":"March 27, 2024","totalVotes":1740,"candidates":[{"candidateName":"Charles William \"Bill\" Kircher, Jr.","candidateIncumbent":false,"candidateParty":"","voteCount":536},{"candidateName":"Mathew Salter","candidateIncumbent":false,"candidateParty":"","voteCount":502},{"candidateName":"Shadi Aboukhater","candidateIncumbent":false,"candidateParty":"","voteCount":187},{"candidateName":"Teri Dowling","candidateIncumbent":false,"candidateParty":"","voteCount":515}]},"MarinMeasureA":{"id":"MarinMeasureA","type":"localRace","location":"Marin","raceName":"Measure A","raceDescription":"Tamalpais Union High School District. School bond. Passes with 55% vote.","raceReadTheStory":"","raceType":"yesNo","timeUpdated":"6:54 PM","dateUpdated":"March 27, 2024","totalVotes":45345,"candidates":[{"candidateName":"Yes","candidateIncumbent":false,"candidateParty":"","voteCount":24376},{"candidateName":"No","candidateIncumbent":false,"candidateParty":"","voteCount":20969}]},"MarinMeasureB":{"id":"MarinMeasureB","type":"localRace","location":"Marin","raceName":"Measure B","raceDescription":"Petaluma Joint Union High School District. Parcel tax. Passes with 2/3 vote.","raceReadTheStory":"","raceType":"yesNo","timeUpdated":"6:54 PM","dateUpdated":"March 27, 2024","totalVotes":132,"candidates":[{"candidateName":"Yes","candidateIncumbent":false,"candidateParty":"","voteCount":62},{"candidateName":"No","candidateIncumbent":false,"candidateParty":"","voteCount":70}]},"MarinMeasureC":{"id":"MarinMeasureC","type":"localRace","location":"Marin","raceName":"Measure C","raceDescription":"Belvedere. Appropriation limit. Passes with majority vote.","raceReadTheStory":"","raceType":"yesNo","timeUpdated":"6:54 PM","dateUpdated":"March 27, 2024","totalVotes":870,"candidates":[{"candidateName":"Yes","candidateIncumbent":false,"candidateParty":"","voteCount":679},{"candidateName":"No","candidateIncumbent":false,"candidateParty":"","voteCount":191}]},"MarinMeasureD":{"id":"MarinMeasureD","type":"localRace","location":"Marin","raceName":"Measure D","raceDescription":"Larkspur. Rent stabilization. Passes with majority vote.","raceReadTheStory":"https://www.kqed.org/elections/results/marin/measure-d","raceType":"yesNo","timeUpdated":"6:54 PM","dateUpdated":"March 27, 2024","totalVotes":4955,"candidates":[{"candidateName":"Yes","candidateIncumbent":false,"candidateParty":"","voteCount":2573},{"candidateName":"No","candidateIncumbent":false,"candidateParty":"","voteCount":2382}]},"MarinMeasureE":{"id":"MarinMeasureE","type":"localRace","location":"Marin","raceName":"Measure E","raceDescription":"Ross. Special tax. Passes with 2/3 vote.","raceReadTheStory":"https://www.kqed.org/elections/results/marin/measure-e","raceType":"yesNo","timeUpdated":"6:54 PM","dateUpdated":"March 27, 2024","totalVotes":874,"candidates":[{"candidateName":"Yes","candidateIncumbent":false,"candidateParty":"","voteCount":683},{"candidateName":"No","candidateIncumbent":false,"candidateParty":"","voteCount":191}]},"MarinMeasureF":{"id":"MarinMeasureF","type":"localRace","location":"Marin","raceName":"Measure F","raceDescription":"San Anselmo. Flood Control and Water Conservation District. Passes with majority vote.","raceReadTheStory":"","raceType":"yesNo","timeUpdated":"6:54 PM","dateUpdated":"March 27, 2024","totalVotes":5193,"candidates":[{"candidateName":"Yes","candidateIncumbent":false,"candidateParty":"","voteCount":3083},{"candidateName":"No","candidateIncumbent":false,"candidateParty":"","voteCount":2110}]},"MarinMeasureG":{"id":"MarinMeasureG","type":"localRace","location":"Marin","raceName":"Measure G","raceDescription":"Bel Marin Keys Community Services District. Special tax. Passes with 2/3 vote.","raceReadTheStory":"","raceType":"yesNo","timeUpdated":"6:54 PM","dateUpdated":"March 27, 2024","totalVotes":830,"candidates":[{"candidateName":"Yes","candidateIncumbent":false,"candidateParty":"","voteCount":661},{"candidateName":"No","candidateIncumbent":false,"candidateParty":"","voteCount":169}]},"MarinMeasureH":{"id":"MarinMeasureH","type":"localRace","location":"Marin","raceName":"Measure H","raceDescription":"Marinwood Community Services District. Appropriations limit, fire protection. Passes with a majority vote.","raceReadTheStory":"","raceType":"yesNo","timeUpdated":"6:54 PM","dateUpdated":"March 27, 2024","totalVotes":1738,"candidates":[{"candidateName":"Yes","candidateIncumbent":false,"candidateParty":"","voteCount":1369},{"candidateName":"No","candidateIncumbent":false,"candidateParty":"","voteCount":369}]},"MarinMeasureI":{"id":"MarinMeasureI","type":"localRace","location":"Marin","raceName":"Measure I","raceDescription":"Marinwood Community Services District. Appropriations limit, parks. Passes with a majority vote.","raceReadTheStory":"","raceType":"yesNo","timeUpdated":"6:54 PM","dateUpdated":"March 27, 2024","totalVotes":1735,"candidates":[{"candidateName":"Yes","candidateIncumbent":false,"candidateParty":"","voteCount":1336},{"candidateName":"No","candidateIncumbent":false,"candidateParty":"","voteCount":399}]},"NapaD2":{"id":"NapaD2","type":"localRace","location":"Napa","raceName":"Board of Supervisors, District 2","raceDescription":"Candidate with majority vote wins seat. If no candidate reaches majority, top two candidates advance to runoff in general election.","raceReadTheStory":"","raceType":"top1","timeUpdated":"6:50 PM","dateUpdated":"April 3, 2024","totalVotes":8351,"candidates":[{"candidateName":"Liz Alessio","candidateIncumbent":false,"candidateParty":"","voteCount":6340},{"candidateName":"Doris Gentry","candidateIncumbent":false,"candidateParty":"","voteCount":2011}]},"NapaD4":{"id":"NapaD4","type":"localRace","location":"Napa","raceName":"Board of Supervisors, District 4","raceDescription":"Candidate with majority vote wins seat. If no candidate reaches majority, top two candidates advance to runoff in general election.","raceReadTheStory":"https://www.kqed.org/elections/results/napa/supervisor-4th-district","raceType":"top1","timeUpdated":"6:50 PM","dateUpdated":"April 3, 2024","totalVotes":7306,"candidates":[{"candidateName":"Amber Manfree","candidateIncumbent":false,"candidateParty":"","voteCount":3913},{"candidateName":"Pete Mott","candidateIncumbent":false,"candidateParty":"","voteCount":3393}]},"NapaD5":{"id":"NapaD5","type":"localRace","location":"Napa","raceName":"Board of Supervisors, District 5","raceDescription":"Candidate with majority vote wins seat. If no candidate reaches majority, top two candidates advance to runoff in general election.","raceReadTheStory":"https://www.kqed.org/elections/results/napa/supervisor-5th-district","raceType":"top1","timeUpdated":"6:50 PM","dateUpdated":"April 3, 2024","totalVotes":5356,"candidates":[{"candidateName":"Mariam Aboudamous","candidateIncumbent":false,"candidateParty":"","voteCount":2379},{"candidateName":"Belia Ramos","candidateIncumbent":true,"candidateParty":"","voteCount":2977}]},"NapaMeasureD":{"id":"NapaMeasureD","type":"localRace","location":"Napa","raceName":"Measure D","raceDescription":"Howell Mountain Elementary School District. School bond. Passes with 55% vote.","raceReadTheStory":"","raceType":"yesNo","timeUpdated":"6:50 PM","dateUpdated":"April 3, 2024","totalVotes":741,"candidates":[{"candidateName":"Yes","candidateIncumbent":false,"candidateParty":"","voteCount":367},{"candidateName":"No","candidateIncumbent":false,"candidateParty":"","voteCount":374}]},"NapaMeasureU":{"id":"NapaMeasureU","type":"localRace","location":"Napa","raceName":"Measure U","raceDescription":"Lake Berryessa Resort Improvement District. Appropriations limit. Passes with majority vote. ","raceReadTheStory":"","raceType":"yesNo","timeUpdated":"6:50 PM","dateUpdated":"April 3, 2024","totalVotes":86,"candidates":[{"candidateName":"Yes","candidateIncumbent":false,"candidateParty":"","voteCount":63},{"candidateName":"No","candidateIncumbent":false,"candidateParty":"","voteCount":23}]},"NapaMeasureU1":{"id":"NapaMeasureU1","type":"localRace","location":"Napa","raceName":"Measure U","raceDescription":"Yountville. Appropriations limit. Passes with majority vote. ","raceReadTheStory":"","raceType":"yesNo","timeUpdated":"6:50 PM","dateUpdated":"April 3, 2024","totalVotes":925,"candidates":[{"candidateName":"Yes","candidateIncumbent":false,"candidateParty":"","voteCount":793},{"candidateName":"No","candidateIncumbent":false,"candidateParty":"","voteCount":132}]},"SFJudge1":{"id":"SFJudge1","type":"localRace","location":"San Francisco","raceName":"Superior Court Judge, Seat 1","raceDescription":"Candidate with majority vote wins seat. If no candidate reaches majority, top two candidates advance to runoff in general election.","raceReadTheStory":"https://www.kqed.org/elections/results/sanfrancisco/superior-court-seat-1","raceType":"top1","timeUpdated":"6:50 PM","dateUpdated":"March 21, 2024","totalVotes":202960,"candidates":[{"candidateName":"Michael Begert","candidateIncumbent":true,"candidateParty":"","voteCount":124943},{"candidateName":"Chip Zecher","candidateIncumbent":false,"candidateParty":"","voteCount":78017}]},"SFJudge13":{"id":"SFJudge13","type":"localRace","location":"San Francisco","raceName":"Superior Court Judge, Seat 13","raceDescription":"Candidate with majority vote wins seat. If no candidate reaches majority, top two candidates advance to runoff in general election.","raceReadTheStory":"https://www.kqed.org/elections/results/sanfrancisco/superior-court-seat-13","raceType":"top1","timeUpdated":"6:50 PM","dateUpdated":"March 21, 2024","totalVotes":202386,"candidates":[{"candidateName":"Jean Myungjin Roland","candidateIncumbent":false,"candidateParty":"","voteCount":90012},{"candidateName":"Patrick S. Thompson","candidateIncumbent":true,"candidateParty":"","voteCount":112374}]},"SFPropA":{"id":"SFPropA","type":"localRace","location":"San Francisco","raceName":"Proposition A","raceDescription":"Housing bond. Passes with 2/3 vote.","raceReadTheStory":"https://www.kqed.org/elections/results/sanfrancisco/proposition-a","raceType":"yesNo","timeUpdated":"6:50 PM","dateUpdated":"March 21, 2024","totalVotes":225187,"candidates":[{"candidateName":"Yes","candidateIncumbent":false,"candidateParty":"","voteCount":158497},{"candidateName":"No","candidateIncumbent":false,"candidateParty":"","voteCount":66690}]},"SFPropB":{"id":"SFPropB","type":"localRace","location":"San Francisco","raceName":"Proposition B","raceDescription":"Police staffing. Passes with majority vote.","raceReadTheStory":"","raceType":"yesNo","timeUpdated":"6:50 PM","dateUpdated":"March 21, 2024","totalVotes":222954,"candidates":[{"candidateName":"Yes","candidateIncumbent":false,"candidateParty":"","voteCount":61580},{"candidateName":"No","candidateIncumbent":false,"candidateParty":"","voteCount":161374}]},"SFPropC":{"id":"SFPropC","type":"localRace","location":"San Francisco","raceName":"Proposition C","raceDescription":"Transfer tax exemption. Passes with majority vote.","raceReadTheStory":"","raceType":"yesNo","timeUpdated":"6:50 PM","dateUpdated":"March 21, 2024","totalVotes":220349,"candidates":[{"candidateName":"Yes","candidateIncumbent":false,"candidateParty":"","voteCount":116311},{"candidateName":"No","candidateIncumbent":false,"candidateParty":"","voteCount":104038}]},"SFPropD":{"id":"SFPropD","type":"localRace","location":"San Francisco","raceName":"Proposition D","raceDescription":"Ethics laws. Passes with majority vote.","raceReadTheStory":"","raceType":"yesNo","timeUpdated":"6:50 PM","dateUpdated":"March 21, 2024","totalVotes":222615,"candidates":[{"candidateName":"Yes","candidateIncumbent":false,"candidateParty":"","voteCount":198584},{"candidateName":"No","candidateIncumbent":false,"candidateParty":"","voteCount":24031}]},"SFPropE":{"id":"SFPropE","type":"localRace","location":"San Francisco","raceName":"Proposition E","raceDescription":"Police policies. Passes with majority vote.","raceReadTheStory":"https://www.kqed.org/elections/results/sanfrancisco/proposition-e","raceType":"yesNo","timeUpdated":"6:50 PM","dateUpdated":"March 21, 2024","totalVotes":222817,"candidates":[{"candidateName":"Yes","candidateIncumbent":false,"candidateParty":"","voteCount":120529},{"candidateName":"No","candidateIncumbent":false,"candidateParty":"","voteCount":102288}]},"SFPropF":{"id":"SFPropF","type":"localRace","location":"San Francisco","raceName":"Proposition F","raceDescription":"Drug screening. Passes with majority vote.","raceReadTheStory":"https://www.kqed.org/elections/results/sanfrancisco/proposition-f","raceType":"yesNo","timeUpdated":"6:50 PM","dateUpdated":"March 21, 2024","totalVotes":224004,"candidates":[{"candidateName":"Yes","candidateIncumbent":false,"candidateParty":"","voteCount":130214},{"candidateName":"No","candidateIncumbent":false,"candidateParty":"","voteCount":93790}]},"SFPropG":{"id":"SFPropG","type":"localRace","location":"San Francisco","raceName":"Proposition G","raceDescription":"Eighth-grade algebra. Passes with majority vote.","raceReadTheStory":"","raceType":"yesNo","timeUpdated":"6:50 PM","dateUpdated":"March 21, 2024","totalVotes":222704,"candidates":[{"candidateName":"Yes","candidateIncumbent":false,"candidateParty":"","voteCount":182066},{"candidateName":"No","candidateIncumbent":false,"candidateParty":"","voteCount":40638}]},"SMJudge4":{"id":"SMJudge4","type":"localRace","location":"San Mateo","raceName":"Superior Court Judge, Office 4","raceDescription":"Candidate with majority vote wins seat. If no candidate reaches majority, top two candidates advance to runoff in general election.","raceReadTheStory":"","raceType":"top1","timeUpdated":"6:56 PM","dateUpdated":"April 4, 2024","totalVotes":108919,"candidates":[{"candidateName":"Sarah Burdick","candidateIncumbent":false,"candidateParty":"","voteCount":108919}]},"SMD1":{"id":"SMD1","type":"localRace","location":"San Mateo","raceName":"Board of Supervisors, District 1","raceDescription":"Candidate with majority vote wins seat. If no candidate reaches majority, top two candidates advance to runoff in general election.","raceReadTheStory":"https://www.kqed.org/elections/results/sanmateo/supervisor-1st-district","raceType":"top1","timeUpdated":"6:56 PM","dateUpdated":"April 4, 2024","totalVotes":29650,"candidates":[{"candidateName":"Jackie Speier","candidateIncumbent":false,"candidateParty":"","voteCount":20353},{"candidateName":"Ann Schneider","candidateIncumbent":false,"candidateParty":"","voteCount":9297}]},"SMD4":{"id":"SMD4","type":"localRace","location":"San Mateo","raceName":"Board of Supervisors, District 4","raceDescription":"Candidate with majority vote wins seat. If no candidate reaches majority, top two candidates advance to runoff in general election.","raceReadTheStory":"https://www.kqed.org/elections/results/sanmateo/supervisor-4th-district","raceType":"top2","timeUpdated":"6:56 PM","dateUpdated":"April 4, 2024","totalVotes":22725,"candidates":[{"candidateName":"Antonio Lopez","candidateIncumbent":false,"candidateParty":"","voteCount":5730},{"candidateName":"Lisa Gauthier","candidateIncumbent":false,"candidateParty":"","voteCount":10358},{"candidateName":"Celeste Brevard","candidateIncumbent":false,"candidateParty":"","voteCount":1268},{"candidateName":"Paul Bocanegra","candidateIncumbent":false,"candidateParty":"","voteCount":1909},{"candidateName":"Maggie Cornejo","candidateIncumbent":false,"candidateParty":"","voteCount":3460}]},"SMD5":{"id":"SMD5","type":"localRace","location":"San Mateo","raceName":"Board of Supervisors, District 5","raceDescription":"Candidate with majority vote wins seat. If no candidate reaches majority, top two candidates advance to runoff in general election.","raceReadTheStory":"","raceType":"top1","timeUpdated":"6:56 PM","dateUpdated":"April 4, 2024","totalVotes":19937,"candidates":[{"candidateName":"David Canepa","candidateIncumbent":true,"candidateParty":"","voteCount":19937}]},"SMMeasureB":{"id":"SMMeasureB","type":"localRace","location":"San Mateo","raceName":"Measure B","raceDescription":"County Service Area #1 (Highlands). Special tax. Passes with 2/3 vote.","raceReadTheStory":"","raceType":"yesNo","timeUpdated":"6:56 PM","dateUpdated":"April 4, 2024","totalVotes":1549,"candidates":[{"candidateName":"Yes","candidateIncumbent":false,"candidateParty":"","voteCount":1360},{"candidateName":"No","candidateIncumbent":false,"candidateParty":"","voteCount":189}]},"SMMeasureC":{"id":"SMMeasureC","type":"localRace","location":"San Mateo","raceName":"Measure C","raceDescription":"Jefferson Elementary School District. Parcel tax. Passes with 2/3 vote","raceReadTheStory":"","raceType":"yesNo","timeUpdated":"6:56 PM","dateUpdated":"April 4, 2024","totalVotes":12234,"candidates":[{"candidateName":"Yes","candidateIncumbent":false,"candidateParty":"","voteCount":8543},{"candidateName":"No","candidateIncumbent":false,"candidateParty":"","voteCount":3691}]},"SMMeasureE":{"id":"SMMeasureE","type":"localRace","location":"San Mateo","raceName":"Measure E","raceDescription":"Woodside Elementary School District. School bond. Passes with 55% vote.","raceReadTheStory":"","raceType":"yesNo","timeUpdated":"6:56 PM","dateUpdated":"April 4, 2024","totalVotes":1392,"candidates":[{"candidateName":"Yes","candidateIncumbent":false,"candidateParty":"","voteCount":910},{"candidateName":"No","candidateIncumbent":false,"candidateParty":"","voteCount":482}]},"SMMeasureG":{"id":"SMMeasureG","type":"localRace","location":"San Mateo","raceName":"Measure G","raceDescription":"Pacifica School District. School bond. Passes with 55% vote.","raceReadTheStory":"","raceType":"yesNo","timeUpdated":"6:56 PM","dateUpdated":"April 4, 2024","totalVotes":11548,"candidates":[{"candidateName":"Yes","candidateIncumbent":false,"candidateParty":"","voteCount":7067},{"candidateName":"No","candidateIncumbent":false,"candidateParty":"","voteCount":4481}]},"SMMeasureH":{"id":"SMMeasureH","type":"localRace","location":"San Mateo","raceName":"Measure H","raceDescription":"San Carlos School District. School bond. Passes with 55% vote.","raceReadTheStory":"","raceType":"yesNo","timeUpdated":"6:56 PM","dateUpdated":"April 4, 2024","totalVotes":9938,"candidates":[{"candidateName":"Yes","candidateIncumbent":false,"candidateParty":"","voteCount":6283},{"candidateName":"No","candidateIncumbent":false,"candidateParty":"","voteCount":3655}]},"SCJudge5":{"id":"SCJudge5","type":"localRace","location":"Santa Clara","raceName":"Superior Court Judge, Office 5","raceDescription":"Candidate with majority vote wins seat. If no candidate reaches majority, top two candidates advance to runoff in general election.","raceReadTheStory":"","raceType":"top1","timeUpdated":"7:05 PM","dateUpdated":"April 4, 2024","totalVotes":301953,"candidates":[{"candidateName":"Jay Boyarsky","candidateIncumbent":false,"candidateParty":"","voteCount":142549},{"candidateName":"Nicole M. Ford","candidateIncumbent":false,"candidateParty":"","voteCount":52147},{"candidateName":"Johnene Linda Stebbins","candidateIncumbent":false,"candidateParty":"","voteCount":107257}]},"SCD2":{"id":"SCD2","type":"localRace","location":"Santa Clara","raceName":"Board of Supervisors, District 2","raceDescription":"Candidate with majority vote wins seat. If no candidate reaches majority, top two candidates advance to runoff in general election.","raceReadTheStory":"https://www.kqed.org/elections/results/santaclara/supervisor-2nd-district","raceType":"top2","timeUpdated":"7:05 PM","dateUpdated":"April 4, 2024","totalVotes":44059,"candidates":[{"candidateName":"Corina Herrera-Loera","candidateIncumbent":false,"candidateParty":"","voteCount":10519},{"candidateName":"Jennifer Margaret Celaya","candidateIncumbent":false,"candidateParty":"","voteCount":2394},{"candidateName":"Madison Nguyen","candidateIncumbent":false,"candidateParty":"","voteCount":12794},{"candidateName":"Betty Duong","candidateIncumbent":false,"candidateParty":"","voteCount":14031},{"candidateName":"Nelson McElmurry","candidateIncumbent":false,"candidateParty":"","voteCount":4321}]},"SCD3":{"id":"SCD3","type":"localRace","location":"Santa Clara","raceName":"Board of Supervisors, District 3","raceDescription":"Candidate with majority vote wins seat. If no candidate reaches majority, top two candidates advance to runoff in general election.","raceReadTheStory":"","raceType":"top1","timeUpdated":"7:05 PM","dateUpdated":"April 4, 2024","totalVotes":42549,"candidates":[{"candidateName":"Otto Lee","candidateIncumbent":true,"candidateParty":"","voteCount":42549}]},"SCD5":{"id":"SCD5","type":"localRace","location":"Santa Clara","raceName":"Board of Supervisors, District 5","raceDescription":"Candidate with majority vote wins seat. If no candidate reaches majority, top two candidates advance to runoff in general election.","raceReadTheStory":"https://www.kqed.org/elections/results/santaclara/supervisor-5th-district","raceType":"top2","timeUpdated":"7:05 PM","dateUpdated":"April 4, 2024","totalVotes":88712,"candidates":[{"candidateName":"Margaret Abe-Koga","candidateIncumbent":false,"candidateParty":"","voteCount":37172},{"candidateName":"Sally J. Lieber","candidateIncumbent":false,"candidateParty":"","voteCount":21962},{"candidateName":"Barry Chang","candidateIncumbent":false,"candidateParty":"","voteCount":6164},{"candidateName":"Peter C. Fung","candidateIncumbent":false,"candidateParty":"","voteCount":17892},{"candidateName":"Sandy Sans","candidateIncumbent":false,"candidateParty":"","voteCount":5522}]},"SCSJMayor":{"id":"SCSJMayor","type":"localRace","location":"Santa Clara","raceName":"San José Mayor","raceDescription":"Candidate with majority vote wins seat. If no candidate reaches majority, top two candidates advance to runoff in general election.","raceReadTheStory":"","raceType":"top1","timeUpdated":"7:05 PM","dateUpdated":"April 4, 2024","totalVotes":167064,"candidates":[{"candidateName":"Matt Mahan","candidateIncumbent":true,"candidateParty":"","voteCount":144701},{"candidateName":"Tyrone Wade","candidateIncumbent":false,"candidateParty":"","voteCount":22363}]},"SCSJD2":{"id":"SCSJD2","type":"localRace","location":"Santa Clara","raceName":"San José City Council, District 2","raceDescription":"Candidate with majority vote wins seat. If no candidate reaches majority, top two candidates advance to runoff in general election.","raceReadTheStory":"","raceType":"top2","timeUpdated":"7:05 PM","dateUpdated":"April 4, 2024","totalVotes":14131,"candidates":[{"candidateName":"Joe Lopez","candidateIncumbent":false,"candidateParty":"","voteCount":4950},{"candidateName":"Pamela Campos","candidateIncumbent":false,"candidateParty":"","voteCount":3436},{"candidateName":"Vanessa Sandoval","candidateIncumbent":false,"candidateParty":"","voteCount":2719},{"candidateName":"Babu Prasad","candidateIncumbent":false,"candidateParty":"","voteCount":3026}]},"SCSJD4":{"id":"SCSJD4","type":"localRace","location":"Santa Clara","raceName":"San José City Council, District 4","raceDescription":"Candidate with majority vote wins seat. If no candidate reaches majority, top two candidates advance to runoff in general election.","raceReadTheStory":"","raceType":"top1","timeUpdated":"7:05 PM","dateUpdated":"April 4, 2024","totalVotes":14322,"candidates":[{"candidateName":"Kansen Chu","candidateIncumbent":false,"candidateParty":"","voteCount":5931},{"candidateName":"David Cohen","candidateIncumbent":true,"candidateParty":"","voteCount":8391}]},"SCSJD6":{"id":"SCSJD6","type":"localRace","location":"Santa Clara","raceName":"San José City Council, District 6","raceDescription":"Candidate with majority vote wins seat. If no candidate reaches majority, top two candidates advance to runoff in general election.","raceReadTheStory":"","raceType":"top2","timeUpdated":"7:05 PM","dateUpdated":"April 4, 2024","totalVotes":25108,"candidates":[{"candidateName":"David Cohen","candidateIncumbent":false,"candidateParty":"","voteCount":9875},{"candidateName":"Alex Shoor","candidateIncumbent":false,"candidateParty":"","voteCount":3850},{"candidateName":"Angelo \"A.J.\" Pasciuti","candidateIncumbent":false,"candidateParty":"","voteCount":2688},{"candidateName":"Michael Mulcahy","candidateIncumbent":false,"candidateParty":"","voteCount":8695}]},"SCSJD8":{"id":"SCSJD8","type":"localRace","location":"Santa Clara","raceName":"San José City Council, District 8","raceDescription":"Candidate with majority vote wins seat. If no candidate reaches majority, top two candidates advance to runoff in general election.","raceReadTheStory":"","raceType":"top2","timeUpdated":"7:05 PM","dateUpdated":"April 4, 2024","totalVotes":21462,"candidates":[{"candidateName":"Tam Truong","candidateIncumbent":false,"candidateParty":"","voteCount":6982},{"candidateName":"Domingo Candelas","candidateIncumbent":true,"candidateParty":"","voteCount":8466},{"candidateName":"Sukhdev Singh Bainiwal","candidateIncumbent":false,"candidateParty":"","voteCount":5513},{"candidateName":"Surinder Kaur Dhaliwal","candidateIncumbent":false,"candidateParty":"","voteCount":501}]},"SCSJD10":{"id":"SCSJD10","type":"localRace","location":"Santa Clara","raceName":"San José City Council, District 10","raceDescription":"Candidate with majority vote wins seat. If no candidate reaches majority, top two candidates advance to runoff in general election.","raceReadTheStory":"","raceType":"top2","timeUpdated":"7:05 PM","dateUpdated":"April 4, 2024","totalVotes":22799,"candidates":[{"candidateName":"George Casey","candidateIncumbent":false,"candidateParty":"","voteCount":8805},{"candidateName":"Arjun Batra","candidateIncumbent":true,"candidateParty":"","voteCount":8354},{"candidateName":"Lenka Wright","candidateIncumbent":false,"candidateParty":"","voteCount":5640}]},"SCMeasureA":{"id":"SCMeasureA","type":"localRace","location":"Santa Clara","raceName":"Measure A","raceDescription":"Santa Clara. Appointed city clerk. Passes with majority vote.","raceReadTheStory":"","raceType":"yesNo","timeUpdated":"7:05 PM","dateUpdated":"April 4, 2024","totalVotes":20315,"candidates":[{"candidateName":"Yes","candidateIncumbent":false,"candidateParty":"","voteCount":6580},{"candidateName":"No","candidateIncumbent":false,"candidateParty":"","voteCount":13735}]},"SCMeasureB":{"id":"SCMeasureB","type":"localRace","location":"Santa Clara","raceName":"Measure B","raceDescription":"Santa Clara. Appointed police chief. Passes with majority vote.","raceReadTheStory":"","raceType":"yesNo","timeUpdated":"7:05 PM","dateUpdated":"April 4, 2024","totalVotes":20567,"candidates":[{"candidateName":"Yes","candidateIncumbent":false,"candidateParty":"","voteCount":5680},{"candidateName":"No","candidateIncumbent":false,"candidateParty":"","voteCount":14887}]},"SCMeasureC":{"id":"SCMeasureC","type":"localRace","location":"Santa Clara","raceName":"Measure C","raceDescription":"Sunnyvale School District. School bond. Passes with 55% vote.","raceReadTheStory":"","raceType":"yesNo","timeUpdated":"7:05 PM","dateUpdated":"April 4, 2024","totalVotes":14656,"candidates":[{"candidateName":"Yes","candidateIncumbent":false,"candidateParty":"","voteCount":10261},{"candidateName":"No","candidateIncumbent":false,"candidateParty":"","voteCount":4395}]},"SolanoD15":{"id":"SolanoD15","type":"localRace","location":"Solano","raceName":"Superior Court Judge, Department 15","raceDescription":"Candidate with majority vote wins seat. If no candidate reaches majority, top two candidates advance to runoff in general election.","raceReadTheStory":"","raceType":"","timeUpdated":"7:08 PM","dateUpdated":"March 28, 2024","totalVotes":81709,"candidates":[{"candidateName":"Mike Thompson","candidateIncumbent":false,"candidateParty":"","voteCount":36844},{"candidateName":"Bryan J. Kim","candidateIncumbent":false,"candidateParty":"","voteCount":44865}]},"SolanoD1":{"id":"SolanoD1","type":"localRace","location":"Solano","raceName":"Board of Supervisors, District 1","raceDescription":"Candidate with majority vote wins seat. If no candidate reaches majority, top two candidates advance to runoff in general election.","raceReadTheStory":"https://www.kqed.org/elections/results/solano/supervisor-1st-district","raceType":"","timeUpdated":"7:08 PM","dateUpdated":"March 28, 2024","totalVotes":13786,"candidates":[{"candidateName":"Michael Wilson","candidateIncumbent":false,"candidateParty":"","voteCount":6401},{"candidateName":"Cassandra James","candidateIncumbent":false,"candidateParty":"","voteCount":7385}]},"SolanoD2":{"id":"SolanoD2","type":"localRace","location":"Solano","raceName":"Board of Supervisors, District 2","raceDescription":"Candidate with majority vote wins seat. If no candidate reaches majority, top two candidates advance to runoff in general election.","raceReadTheStory":"","raceType":"","timeUpdated":"7:08 PM","dateUpdated":"March 28, 2024","totalVotes":19903,"candidates":[{"candidateName":"Monica Brown","candidateIncumbent":true,"candidateParty":"","voteCount":10951},{"candidateName":"Nora Dizon","candidateIncumbent":false,"candidateParty":"","voteCount":3135},{"candidateName":"Rochelle Sherlock","candidateIncumbent":false,"candidateParty":"","voteCount":5817}]},"SolanoD5":{"id":"SolanoD5","type":"localRace","location":"Solano","raceName":"Board of Supervisors, District 5","raceDescription":"Candidate with majority vote wins seat. If no candidate reaches majority, top two candidates advance to runoff in general election.","raceReadTheStory":"","raceType":"","timeUpdated":"7:08 PM","dateUpdated":"March 28, 2024","totalVotes":17888,"candidates":[{"candidateName":"Mitch Mashburn","candidateIncumbent":true,"candidateParty":"","voteCount":11210},{"candidateName":"Chadwick J. Ledoux","candidateIncumbent":false,"candidateParty":"","voteCount":6678}]},"SolanoEducation":{"id":"SolanoEducation","type":"localRace","location":"Solano","raceName":"Sacramento County Board of Education","raceDescription":"Candidate with majority vote wins seat. If no candidate reaches majority, top two candidates advance to runoff in general election.","raceReadTheStory":"","raceType":"","timeUpdated":"7:08 PM","dateUpdated":"March 28, 2024","totalVotes":3650,"candidates":[{"candidateName":"Heather Davis","candidateIncumbent":true,"candidateParty":"","voteCount":2960},{"candidateName":"Shazleen Khan","candidateIncumbent":false,"candidateParty":"","voteCount":690}]},"SolanoMeasureA":{"id":"SolanoMeasureA","type":"localRace","location":"Solano","raceName":"Measure A","raceDescription":"Benicia. Hotel tax. Passes with majority vote.","raceReadTheStory":"https://www.kqed.org/elections/results/solano/measure-a","raceType":"yesNo","timeUpdated":"7:08 PM","dateUpdated":"March 28, 2024","totalVotes":10136,"candidates":[{"candidateName":"Yes","candidateIncumbent":false,"candidateParty":"","voteCount":7869},{"candidateName":"No","candidateIncumbent":false,"candidateParty":"","voteCount":2267}]},"SolanoMeasureB":{"id":"SolanoMeasureB","type":"localRace","location":"Solano","raceName":"Measure B","raceDescription":"Benicia. Sales tax. Passes with majority vote.","raceReadTheStory":"https://www.kqed.org/elections/results/solano/measure-b","raceType":"yesNo","timeUpdated":"7:08 PM","dateUpdated":"March 28, 2024","totalVotes":10164,"candidates":[{"candidateName":"Yes","candidateIncumbent":false,"candidateParty":"","voteCount":7335},{"candidateName":"No","candidateIncumbent":false,"candidateParty":"","voteCount":2829}]},"SolanoMeasureC":{"id":"SolanoMeasureC","type":"localRace","location":"Solano","raceName":"Measure C","raceDescription":"Benicia Unified School District. School bond. Passes with 55% vote.","raceReadTheStory":"","raceType":"yesNo","timeUpdated":"7:08 PM","dateUpdated":"March 28, 2024","totalVotes":10112,"candidates":[{"candidateName":"Yes","candidateIncumbent":false,"candidateParty":"","voteCount":6316},{"candidateName":"No","candidateIncumbent":false,"candidateParty":"","voteCount":3796}]},"SolanoMeasureN":{"id":"SolanoMeasureN","type":"localRace","location":"Solano","raceName":"Measure N","raceDescription":"Davis Joint Unified School District. Parcel tax. Passes with 2/3 vote.","raceReadTheStory":"","raceType":"yesNo","timeUpdated":"7:08 PM","dateUpdated":"March 28, 2024","totalVotes":15,"candidates":[{"candidateName":"Yes","candidateIncumbent":false,"candidateParty":"","voteCount":5},{"candidateName":"No","candidateIncumbent":false,"candidateParty":"","voteCount":10}]},"SonomaJudge3":{"id":"SonomaJudge3","type":"localRace","location":"Sonoma","raceName":"Superior Court Judge, Office 3","raceDescription":"Candidate with majority vote wins seat. If no candidate reaches majority, top two candidates advance to runoff in general election.","raceReadTheStory":"","raceType":"top1","timeUpdated":"6:51 PM","dateUpdated":"March 29, 2024","totalVotes":115405,"candidates":[{"candidateName":"Kristine M. Burk","candidateIncumbent":false,"candidateParty":"","voteCount":79498},{"candidateName":"Beki Berrey","candidateIncumbent":false,"candidateParty":"","voteCount":35907}]},"SonomaJudge4":{"id":"SonomaJudge4","type":"localRace","location":"Sonoma","raceName":"Superior Court Judge, Office 4","raceDescription":"Candidate with majority vote wins seat. If no candidate reaches majority, top two candidates advance to runoff in general election.","raceReadTheStory":"","raceType":"top1","timeUpdated":"6:51 PM","dateUpdated":"March 29, 2024","totalVotes":86789,"candidates":[{"candidateName":"Paul J. Lozada","candidateIncumbent":false,"candidateParty":"","voteCount":86789}]},"SonomaJudge6":{"id":"SonomaJudge6","type":"localRace","location":"Sonoma","raceName":"Superior Court Judge, Office 6","raceDescription":"Candidate with majority vote wins seat. If no candidate reaches majority, top two candidates advance to runoff in general election.","raceReadTheStory":"","raceType":"top1","timeUpdated":"6:51 PM","dateUpdated":"March 29, 2024","totalVotes":117990,"candidates":[{"candidateName":"Omar Figueroa","candidateIncumbent":false,"candidateParty":"","voteCount":42236},{"candidateName":"Kenneth English","candidateIncumbent":false,"candidateParty":"","voteCount":75754}]},"SonomaD1":{"id":"SonomaD1","type":"localRace","location":"Sonoma","raceName":"Board of Supervisors, District 1","raceDescription":"Candidate with majority vote wins seat. If no candidate reaches majority, top two candidates advance to runoff in general election.","raceReadTheStory":"","raceType":"top1","timeUpdated":"6:51 PM","dateUpdated":"March 29, 2024","totalVotes":30348,"candidates":[{"candidateName":"Rebecca Hermosillo","candidateIncumbent":false,"candidateParty":"","voteCount":23958},{"candidateName":"Jonathan Mathieu","candidateIncumbent":false,"candidateParty":"","voteCount":6390}]},"SonomaD3":{"id":"SonomaD3","type":"localRace","location":"Sonoma","raceName":"Board of Supervisors, District 3","raceDescription":"Candidate with majority vote wins seat. If no candidate reaches majority, top two candidates advance to runoff in general election.","raceReadTheStory":"https://www.kqed.org/elections/results/sonoma/supervisor-3rd-district","raceType":"top1","timeUpdated":"6:51 PM","dateUpdated":"March 29, 2024","totalVotes":16312,"candidates":[{"candidateName":"Chris Coursey","candidateIncumbent":true,"candidateParty":"","voteCount":11346},{"candidateName":"Omar Medina","candidateIncumbent":false,"candidateParty":"","voteCount":4966}]},"SonomaD5":{"id":"SonomaD5","type":"localRace","location":"Sonoma","raceName":"Board of Supervisors, District 5","raceDescription":"Candidate with majority vote wins seat. If no candidate reaches majority, top two candidates advance to runoff in general election.","raceReadTheStory":"","raceType":"top1","timeUpdated":"6:51 PM","dateUpdated":"March 29, 2024","totalVotes":23356,"candidates":[{"candidateName":"Lynda Hopkins","candidateIncumbent":true,"candidateParty":"","voteCount":23356}]},"SonomaMeasureA":{"id":"SonomaMeasureA","type":"localRace","location":"Sonoma","raceName":"Measure A","raceDescription":"Cotati-Rohnert Park Unified School District. Parcel tax. Passes with 2/3 vote.","raceReadTheStory":"","raceType":"yesNo","timeUpdated":"6:51 PM","dateUpdated":"March 29, 2024","totalVotes":13756,"candidates":[{"candidateName":"Yes","candidateIncumbent":false,"candidateParty":"","voteCount":10320},{"candidateName":"No","candidateIncumbent":false,"candidateParty":"","voteCount":3436}]},"SonomaMeasureB":{"id":"SonomaMeasureB","type":"localRace","location":"Sonoma","raceName":"Measure B","raceDescription":"Petaluma Joint Union High School District. Parcel tax. Passes with 2/3 vote.","raceReadTheStory":"","raceType":"yesNo","timeUpdated":"6:51 PM","dateUpdated":"March 29, 2024","totalVotes":24877,"candidates":[{"candidateName":"Yes","candidateIncumbent":false,"candidateParty":"","voteCount":15795},{"candidateName":"No","candidateIncumbent":false,"candidateParty":"","voteCount":9082}]},"SonomaMeasureC":{"id":"SonomaMeasureC","type":"localRace","location":"Sonoma","raceName":"Measure C","raceDescription":"Fort Ross School District. School bond. Passes with 55% vote.","raceReadTheStory":"","raceType":"yesNo","timeUpdated":"6:51 PM","dateUpdated":"March 29, 2024","totalVotes":286,"candidates":[{"candidateName":"Yes","candidateIncumbent":false,"candidateParty":"","voteCount":159},{"candidateName":"No","candidateIncumbent":false,"candidateParty":"","voteCount":127}]},"SonomaMeasureD":{"id":"SonomaMeasureD","type":"localRace","location":"Sonoma","raceName":"Measure D","raceDescription":"Harmony Union School District. School bond. Passes with 55% vote.","raceReadTheStory":"","raceType":"yesNo","timeUpdated":"6:51 PM","dateUpdated":"March 29, 2024","totalVotes":1925,"candidates":[{"candidateName":"Yes","candidateIncumbent":false,"candidateParty":"","voteCount":1089},{"candidateName":"No","candidateIncumbent":false,"candidateParty":"","voteCount":836}]},"SonomaMeasureE":{"id":"SonomaMeasureE","type":"localRace","location":"Sonoma","raceName":"Measure E","raceDescription":"Petaluma City (Elementary) School District. Parcel tax. Passes with 2/3 vote.","raceReadTheStory":"","raceType":"yesNo","timeUpdated":"6:51 PM","dateUpdated":"March 29, 2024","totalVotes":11133,"candidates":[{"candidateName":"Yes","candidateIncumbent":false,"candidateParty":"","voteCount":7622},{"candidateName":"No","candidateIncumbent":false,"candidateParty":"","voteCount":3511}]},"SonomaMeasureG":{"id":"SonomaMeasureG","type":"localRace","location":"Sonoma","raceName":"Measure G","raceDescription":"Rincon Valley Union School District. School bond. Passes with 55% vote.","raceReadTheStory":"","raceType":"yesNo","timeUpdated":"6:51 PM","dateUpdated":"March 29, 2024","totalVotes":14577,"candidates":[{"candidateName":"Yes","candidateIncumbent":false,"candidateParty":"","voteCount":8668},{"candidateName":"No","candidateIncumbent":false,"candidateParty":"","voteCount":5909}]},"SonomaMeasureH":{"id":"SonomaMeasureH","type":"localRace","location":"Sonoma","raceName":"Measure H","raceDescription":"Sonoma County. Sales tax. Passes with majority vote.","raceReadTheStory":"https://www.kqed.org/elections/results/sonoma/measure-h","raceType":"yesNo","timeUpdated":"6:51 PM","dateUpdated":"March 29, 2024","totalVotes":145261,"candidates":[{"candidateName":"Yes","candidateIncumbent":false,"candidateParty":"","voteCount":89646},{"candidateName":"No","candidateIncumbent":false,"candidateParty":"","voteCount":55615}]}},"radioSchedulesReducer":{},"listsReducer":{"posts/bayareabites?tag=butter":{"isFetching":false,"latestQuery":{"from":0,"postsToRender":9},"tag":null,"vitalsOnly":true,"totalRequested":7,"isLoading":false,"isLoadingMore":false,"total":7,"items":["bayareabites_103395","bayareabites_94059","bayareabites_90334","bayareabites_64654","bayareabites_11324","bayareabites_6783","bayareabites_1334"]}},"recallGuideReducer":{"intros":{},"policy":{},"candidates":{}},"savedPostsReducer":{},"pfsSessionReducer":{},"siteSettingsReducer":{},"subscriptionsReducer":{},"termsReducer":{"about":{"name":"About","type":"terms","id":"about","slug":"about","link":"/about","taxonomy":"site"},"arts":{"name":"Arts & Culture","grouping":["arts","pop","trulyca"],"description":"KQED Arts provides daily in-depth coverage of the Bay Area's music, art, film, performing arts, literature and arts news, as well as cultural commentary and criticism.","type":"terms","id":"arts","slug":"arts","link":"/arts","taxonomy":"site"},"artschool":{"name":"Art School","parent":"arts","type":"terms","id":"artschool","slug":"artschool","link":"/artschool","taxonomy":"site"},"bayareabites":{"name":"KQED food","grouping":["food","bayareabites","checkplease"],"parent":"food","type":"terms","id":"bayareabites","slug":"bayareabites","link":"/food","taxonomy":"site"},"bayareahiphop":{"name":"Bay Area Hiphop","type":"terms","id":"bayareahiphop","slug":"bayareahiphop","link":"/bayareahiphop","taxonomy":"site"},"campaign21":{"name":"Campaign 21","type":"terms","id":"campaign21","slug":"campaign21","link":"/campaign21","taxonomy":"site"},"checkplease":{"name":"KQED food","grouping":["food","bayareabites","checkplease"],"parent":"food","type":"terms","id":"checkplease","slug":"checkplease","link":"/food","taxonomy":"site"},"education":{"name":"Education","grouping":["education"],"type":"terms","id":"education","slug":"education","link":"/education","taxonomy":"site"},"elections":{"name":"Elections","type":"terms","id":"elections","slug":"elections","link":"/elections","taxonomy":"site"},"events":{"name":"Events","type":"terms","id":"events","slug":"events","link":"/events","taxonomy":"site"},"event":{"name":"Event","alias":"events","type":"terms","id":"event","slug":"event","link":"/event","taxonomy":"site"},"filmschoolshorts":{"name":"Film School Shorts","type":"terms","id":"filmschoolshorts","slug":"filmschoolshorts","link":"/filmschoolshorts","taxonomy":"site"},"food":{"name":"KQED food","grouping":["food","bayareabites","checkplease"],"type":"terms","id":"food","slug":"food","link":"/food","taxonomy":"site"},"forum":{"name":"Forum","relatedContentQuery":"posts/forum?","parent":"news","type":"terms","id":"forum","slug":"forum","link":"/forum","taxonomy":"site"},"futureofyou":{"name":"Future of You","grouping":["science","futureofyou"],"parent":"science","type":"terms","id":"futureofyou","slug":"futureofyou","link":"/futureofyou","taxonomy":"site"},"jpepinheart":{"name":"KQED food","relatedContentQuery":"trending/food,bayareabites,checkplease","parent":"food","type":"terms","id":"jpepinheart","slug":"jpepinheart","link":"/food","taxonomy":"site"},"liveblog":{"name":"Live Blog","type":"terms","id":"liveblog","slug":"liveblog","link":"/liveblog","taxonomy":"site"},"livetv":{"name":"Live TV","parent":"tv","type":"terms","id":"livetv","slug":"livetv","link":"/livetv","taxonomy":"site"},"lowdown":{"name":"The Lowdown","relatedContentQuery":"posts/lowdown?","parent":"news","type":"terms","id":"lowdown","slug":"lowdown","link":"/lowdown","taxonomy":"site"},"mindshift":{"name":"Mindshift","parent":"news","description":"MindShift explores the future of education by highlighting the innovative – and sometimes counterintuitive – ways educators and parents are helping all children succeed.","type":"terms","id":"mindshift","slug":"mindshift","link":"/mindshift","taxonomy":"site"},"news":{"name":"News","grouping":["news","forum"],"type":"terms","id":"news","slug":"news","link":"/news","taxonomy":"site"},"perspectives":{"name":"Perspectives","parent":"radio","type":"terms","id":"perspectives","slug":"perspectives","link":"/perspectives","taxonomy":"site"},"podcasts":{"name":"Podcasts","type":"terms","id":"podcasts","slug":"podcasts","link":"/podcasts","taxonomy":"site"},"pop":{"name":"Pop","parent":"arts","type":"terms","id":"pop","slug":"pop","link":"/pop","taxonomy":"site"},"pressroom":{"name":"Pressroom","type":"terms","id":"pressroom","slug":"pressroom","link":"/pressroom","taxonomy":"site"},"quest":{"name":"Quest","parent":"science","type":"terms","id":"quest","slug":"quest","link":"/quest","taxonomy":"site"},"radio":{"name":"Radio","grouping":["forum","perspectives"],"description":"Listen to KQED Public Radio – home of Forum and The California Report – on 88.5 FM in San Francisco, 89.3 FM in Sacramento, 88.3 FM in Santa Rosa and 88.1 FM in Martinez.","type":"terms","id":"radio","slug":"radio","link":"/radio","taxonomy":"site"},"root":{"name":"KQED","image":"https://ww2.kqed.org/app/uploads/2020/02/KQED-OG-Image@1x.png","imageWidth":1200,"imageHeight":630,"headData":{"title":"KQED | News, Radio, Podcasts, TV | Public Media for Northern California","description":"KQED provides public radio, television, and independent reporting on issues that matter to the Bay Area. We’re the NPR and PBS member station for Northern California."},"type":"terms","id":"root","slug":"root","link":"/root","taxonomy":"site"},"science":{"name":"Science","grouping":["science","futureofyou"],"description":"KQED Science brings you award-winning science and environment coverage from the Bay Area and beyond.","type":"terms","id":"science","slug":"science","link":"/science","taxonomy":"site"},"stateofhealth":{"name":"State of Health","parent":"science","type":"terms","id":"stateofhealth","slug":"stateofhealth","link":"/stateofhealth","taxonomy":"site"},"support":{"name":"Support","type":"terms","id":"support","slug":"support","link":"/support","taxonomy":"site"},"thedolist":{"name":"The Do List","parent":"arts","type":"terms","id":"thedolist","slug":"thedolist","link":"/thedolist","taxonomy":"site"},"trulyca":{"name":"Truly CA","grouping":["arts","pop","trulyca"],"parent":"arts","type":"terms","id":"trulyca","slug":"trulyca","link":"/trulyca","taxonomy":"site"},"tv":{"name":"TV","type":"terms","id":"tv","slug":"tv","link":"/tv","taxonomy":"site"},"voterguide":{"name":"Voter Guide","parent":"elections","alias":"elections","type":"terms","id":"voterguide","slug":"voterguide","link":"/voterguide","taxonomy":"site"},"bayareabites_1288":{"type":"terms","id":"bayareabites_1288","meta":{"index":"terms_1591234321","site":"bayareabites","id":"1288","found":true},"relationships":{},"included":{},"name":"butter","slug":"butter","taxonomy":"tag","description":null,"featImg":null,"headData":{"title":"butter Archives | KQED Bay Area Bites","description":null,"ogTitle":null,"ogDescription":null,"ogImgId":null,"twTitle":null,"twDescription":null,"twImgId":null,"imageData":{"ogImageSize":{"file":"https://cdn.kqed.org/wp-content/uploads/2020/02/KQED-OG-Image@1x.png","width":1200,"height":630},"twImageSize":{"file":"https://cdn.kqed.org/wp-content/uploads/2020/02/KQED-OG-Image@1x.png"},"twitterCard":"summary_large_image"}},"ttid":1127,"isLoading":false,"link":"/bayareabites/tag/butter"},"bayareabites_12493":{"type":"terms","id":"bayareabites_12493","meta":{"index":"terms_1591234321","site":"bayareabites","id":"12493","found":true},"relationships":{},"included":{},"name":"Food & Spirituality","slug":"food-spirituality","taxonomy":"category","description":null,"featImg":null,"headData":{"title":"Food & Spirituality Archives | KQED Bay Area Bites","description":null,"ogTitle":null,"ogDescription":null,"ogImgId":null,"twTitle":null,"twDescription":null,"twImgId":null},"ttid":6956,"isLoading":false,"link":"/bayareabites/category/food-spirituality"},"bayareabites_1245":{"type":"terms","id":"bayareabites_1245","meta":{"index":"terms_1591234321","site":"bayareabites","id":"1245","found":true},"relationships":{},"included":{},"name":"health and nutrition","slug":"health-and-nutrition","taxonomy":"category","description":null,"featImg":null,"headData":{"title":"health and nutrition Archives | KQED Bay Area Bites","description":null,"ogTitle":null,"ogDescription":null,"ogImgId":null,"twTitle":null,"twDescription":null,"twImgId":null},"ttid":1078,"isLoading":false,"link":"/bayareabites/category/health-and-nutrition"},"bayareabites_12869":{"type":"terms","id":"bayareabites_12869","meta":{"index":"terms_1591234321","site":"bayareabites","id":"12869","found":true},"relationships":{},"included":{},"name":"healthy recipes and guides","slug":"healthy-recipes","taxonomy":"category","description":null,"featImg":null,"headData":{"title":"healthy recipes and guides Archives | KQED Bay Area Bites","description":null,"ogTitle":null,"ogDescription":null,"ogImgId":null,"twTitle":null,"twDescription":null,"twImgId":null},"ttid":7332,"isLoading":false,"link":"/bayareabites/category/healthy-recipes"},"bayareabites_12":{"type":"terms","id":"bayareabites_12","meta":{"index":"terms_1591234321","site":"bayareabites","id":"12","found":true},"relationships":{},"included":{},"name":"recipes","slug":"recipes","taxonomy":"category","description":null,"featImg":null,"headData":{"title":"recipes Archives | KQED Bay Area Bites","description":null,"ogTitle":null,"ogDescription":null,"ogImgId":null,"twTitle":null,"twDescription":null,"twImgId":null},"ttid":10,"isLoading":false,"link":"/bayareabites/category/recipes"},"bayareabites_15082":{"type":"terms","id":"bayareabites_15082","meta":{"index":"terms_1591234321","site":"bayareabites","id":"15082","found":true},"relationships":{},"included":{},"name":"clarified butter","slug":"clarified-butter","taxonomy":"tag","description":null,"featImg":null,"headData":{"title":"clarified butter Archives | KQED Bay Area Bites","description":null,"ogTitle":null,"ogDescription":null,"ogImgId":null,"twTitle":null,"twDescription":null,"twImgId":null},"ttid":99412,"isLoading":false,"link":"/bayareabites/tag/clarified-butter"},"bayareabites_15081":{"type":"terms","id":"bayareabites_15081","meta":{"index":"terms_1591234321","site":"bayareabites","id":"15081","found":true},"relationships":{},"included":{},"name":"ghee","slug":"ghee","taxonomy":"tag","description":null,"featImg":null,"headData":{"title":"ghee Archives | KQED Bay Area Bites","description":null,"ogTitle":null,"ogDescription":null,"ogImgId":null,"twTitle":null,"twDescription":null,"twImgId":null},"ttid":99411,"isLoading":false,"link":"/bayareabites/tag/ghee"},"bayareabites_8435":{"type":"terms","id":"bayareabites_8435","meta":{"index":"terms_1591234321","site":"bayareabites","id":"8435","found":true},"relationships":{},"included":{},"name":"indian","slug":"indian","taxonomy":"tag","description":null,"featImg":null,"headData":{"title":"indian Archives | KQED Bay Area Bites","description":null,"ogTitle":null,"ogDescription":null,"ogImgId":null,"twTitle":null,"twDescription":null,"twImgId":null},"ttid":2888,"isLoading":false,"link":"/bayareabites/tag/indian"},"bayareabites_15083":{"type":"terms","id":"bayareabites_15083","meta":{"index":"terms_1591234321","site":"bayareabites","id":"15083","found":true},"relationships":{},"included":{},"name":"vinita jacinto","slug":"vinita-jacinto","taxonomy":"tag","description":null,"featImg":null,"headData":{"title":"vinita jacinto Archives | KQED Bay Area Bites","description":null,"ogTitle":null,"ogDescription":null,"ogImgId":null,"twTitle":null,"twDescription":null,"twImgId":null},"ttid":99413,"isLoading":false,"link":"/bayareabites/tag/vinita-jacinto"},"bayareabites_2090":{"type":"terms","id":"bayareabites_2090","meta":{"index":"terms_1591234321","site":"bayareabites","id":"2090","found":true},"relationships":{},"included":{},"name":"food history and celebrities","slug":"food-history-and-celebrities","taxonomy":"category","description":null,"featImg":null,"headData":{"title":"food history and celebrities Archives | KQED Bay Area Bites","description":null,"ogTitle":null,"ogDescription":null,"ogImgId":null,"twTitle":null,"twDescription":null,"twImgId":null},"ttid":1561,"isLoading":false,"link":"/bayareabites/category/food-history-and-celebrities"},"bayareabites_1763":{"type":"terms","id":"bayareabites_1763","meta":{"index":"terms_1591234321","site":"bayareabites","id":"1763","found":true},"relationships":{},"included":{},"name":"holidays and traditions","slug":"holidays-and-traditions","taxonomy":"category","description":null,"featImg":null,"headData":{"title":"holidays and traditions Archives | KQED Bay Area Bites","description":null,"ogTitle":null,"ogDescription":null,"ogImgId":null,"twTitle":null,"twDescription":null,"twImgId":null},"ttid":1254,"isLoading":false,"link":"/bayareabites/category/holidays-and-traditions"},"bayareabites_10916":{"type":"terms","id":"bayareabites_10916","meta":{"index":"terms_1591234321","site":"bayareabites","id":"10916","found":true},"relationships":{},"included":{},"name":"NPR food","slug":"npr-food","taxonomy":"category","description":null,"featImg":null,"headData":{"title":"NPR food Archives | KQED Bay Area Bites","description":null,"ogTitle":null,"ogDescription":null,"ogImgId":null,"twTitle":null,"twDescription":null,"twImgId":null},"ttid":5375,"isLoading":false,"link":"/bayareabites/category/npr-food"},"bayareabites_16272":{"type":"terms","id":"bayareabites_16272","meta":{"index":"terms_1591234321","site":"bayareabites","id":"16272","found":true},"relationships":{},"included":{},"name":"npr food","slug":"npr-food","taxonomy":"tag","description":null,"featImg":null,"headData":{"title":"npr food Archives | KQED Bay Area Bites","description":null,"ogTitle":null,"ogDescription":null,"ogImgId":null,"twTitle":null,"twDescription":null,"twImgId":null},"ttid":100602,"isLoading":false,"link":"/bayareabites/tag/npr-food"},"bayareabites_123":{"type":"terms","id":"bayareabites_123","meta":{"index":"terms_1591234321","site":"bayareabites","id":"123","found":true},"relationships":{},"included":{},"name":"st. patrick's day","slug":"st-patricks-day","taxonomy":"tag","description":null,"featImg":null,"headData":{"title":"st. patrick's day Archives | KQED Bay Area Bites","description":null,"ogTitle":null,"ogDescription":null,"ogImgId":null,"twTitle":null,"twDescription":null,"twImgId":null},"ttid":87,"isLoading":false,"link":"/bayareabites/tag/st-patricks-day"},"bayareabites_15012":{"type":"terms","id":"bayareabites_15012","meta":{"index":"terms_1591234321","site":"bayareabites","id":"15012","found":true},"relationships":{},"included":{},"name":"Thanksgiving Recipes","slug":"thanksgiving-recipes","taxonomy":"series","description":"\u003cimg src=\"http://ww2.kqed.org/bayareabites/wp-content/uploads/sites/24/2015/11/THANKSGIVING-centerpiece1000-1.jpg\" alt=\"THANKSGIVING-centerpiece1000 (1)\" width=\"1000\" height=\"666\" class=\"aligncenter size-full wp-image-103674\" />\r\n\r\nEntrees, sides, desserts, vegan and gluten-free -- our special collection of autumn-themed recipes will help you create a sumptuous Thanksgiving feast for any of your holiday guests. ","featImg":null,"headData":{"title":"Thanksgiving Recipes Archives | KQED Bay Area Bites","description":"Entrees, sides, desserts, vegan and gluten-free -- our special collection of autumn-themed recipes will help you create a sumptuous Thanksgiving feast for any of your holiday guests.","ogTitle":null,"ogDescription":null,"ogImgId":null,"twTitle":null,"twDescription":null,"twImgId":null},"ttid":99342,"isLoading":false,"link":"/bayareabites/series/thanksgiving-recipes"},"bayareabites_752":{"type":"terms","id":"bayareabites_752","meta":{"index":"terms_1591234321","site":"bayareabites","id":"752","found":true},"relationships":{},"included":{},"name":"Bay Area Bites Food + Drink","slug":"food-and-drink","taxonomy":"category","description":null,"featImg":null,"headData":{"title":"Bay Area Bites Food + Drink Archives | KQED Bay Area Bites","description":null,"ogTitle":null,"ogDescription":null,"ogImgId":null,"twTitle":null,"twDescription":null,"twImgId":null},"ttid":1,"isLoading":false,"link":"/bayareabites/category/food-and-drink"},"bayareabites_2638":{"type":"terms","id":"bayareabites_2638","meta":{"index":"terms_1591234321","site":"bayareabites","id":"2638","found":true},"relationships":{},"included":{},"name":"DIY, foraging, urban homesteading","slug":"diy-and-urban-homesteading","taxonomy":"category","description":null,"featImg":null,"headData":{"title":"DIY, foraging, urban homesteading Archives | KQED Bay Area Bites","description":null,"ogTitle":null,"ogDescription":null,"ogImgId":null,"twTitle":null,"twDescription":null,"twImgId":null},"ttid":1880,"isLoading":false,"link":"/bayareabites/category/diy-and-urban-homesteading"},"bayareabites_12550":{"type":"terms","id":"bayareabites_12550","meta":{"index":"terms_1591234321","site":"bayareabites","id":"12550","found":true},"relationships":{},"included":{},"name":"holiday recipes","slug":"holiday-recipes","taxonomy":"category","description":null,"featImg":null,"headData":{"title":"holiday recipes Archives | KQED Bay Area Bites","description":null,"ogTitle":null,"ogDescription":null,"ogImgId":null,"twTitle":null,"twDescription":null,"twImgId":null},"ttid":7013,"isLoading":false,"link":"/bayareabites/category/holiday-recipes"},"bayareabites_13949":{"type":"terms","id":"bayareabites_13949","meta":{"index":"terms_1591234321","site":"bayareabites","id":"13949","found":true},"relationships":{},"included":{},"name":"compound butter","slug":"compound-butter","taxonomy":"tag","description":null,"featImg":null,"headData":{"title":"compound butter Archives | KQED Bay Area Bites","description":null,"ogTitle":null,"ogDescription":null,"ogImgId":null,"twTitle":null,"twDescription":null,"twImgId":null},"ttid":8423,"isLoading":false,"link":"/bayareabites/tag/compound-butter"},"bayareabites_530":{"type":"terms","id":"bayareabites_530","meta":{"index":"terms_1591234321","site":"bayareabites","id":"530","found":true},"relationships":{},"included":{},"name":"thanksgiving","slug":"thanksgiving","taxonomy":"tag","description":null,"featImg":null,"headData":{"title":"thanksgiving Archives | KQED Bay Area Bites","description":null,"ogTitle":null,"ogDescription":null,"ogImgId":null,"twTitle":null,"twDescription":null,"twImgId":null},"ttid":495,"isLoading":false,"link":"/bayareabites/tag/thanksgiving"},"bayareabites_2962":{"type":"terms","id":"bayareabites_2962","meta":{"index":"terms_1591234321","site":"bayareabites","id":"2962","found":true},"relationships":{},"included":{},"name":"thanksgiving recipes","slug":"thanksgiving-recipes","taxonomy":"tag","description":null,"featImg":null,"headData":{"title":"thanksgiving recipes Archives | KQED Bay Area Bites","description":null,"ogTitle":null,"ogDescription":null,"ogImgId":null,"twTitle":null,"twDescription":null,"twImgId":null},"ttid":2067,"isLoading":false,"link":"/bayareabites/tag/thanksgiving-recipes"},"bayareabites_34":{"type":"terms","id":"bayareabites_34","meta":{"index":"terms_1591234321","site":"bayareabites","id":"34","found":true},"relationships":{},"included":{},"name":"radio","slug":"radio","taxonomy":"category","description":null,"featImg":null,"headData":{"title":"radio Archives | KQED Bay Area Bites","description":null,"ogTitle":null,"ogDescription":null,"ogImgId":null,"twTitle":null,"twDescription":null,"twImgId":null},"ttid":1158,"isLoading":false,"link":"/bayareabites/category/radio"},"bayareabites_11943":{"type":"terms","id":"bayareabites_11943","meta":{"index":"terms_1591234321","site":"bayareabites","id":"11943","found":true},"relationships":{},"included":{},"name":"butter-churning","slug":"butter-churning","taxonomy":"tag","description":null,"featImg":null,"headData":{"title":"butter-churning Archives | KQED Bay Area Bites","description":null,"ogTitle":null,"ogDescription":null,"ogImgId":null,"twTitle":null,"twDescription":null,"twImgId":null},"ttid":6405,"isLoading":false,"link":"/bayareabites/tag/butter-churning"},"bayareabites_11942":{"type":"terms","id":"bayareabites_11942","meta":{"index":"terms_1591234321","site":"bayareabites","id":"11942","found":true},"relationships":{},"included":{},"name":"churning butter","slug":"churning-butter","taxonomy":"tag","description":null,"featImg":null,"headData":{"title":"churning butter Archives | KQED Bay Area Bites","description":null,"ogTitle":null,"ogDescription":null,"ogImgId":null,"twTitle":null,"twDescription":null,"twImgId":null},"ttid":6404,"isLoading":false,"link":"/bayareabites/tag/churning-butter"},"bayareabites_987":{"type":"terms","id":"bayareabites_987","meta":{"index":"terms_1591234321","site":"bayareabites","id":"987","found":true},"relationships":{},"included":{},"name":"DIY","slug":"diy","taxonomy":"tag","description":null,"featImg":null,"headData":{"title":"DIY Archives | KQED Bay Area Bites","description":null,"ogTitle":null,"ogDescription":null,"ogImgId":null,"twTitle":null,"twDescription":null,"twImgId":null},"ttid":898,"isLoading":false,"link":"/bayareabites/tag/diy"},"bayareabites_1893":{"type":"terms","id":"bayareabites_1893","meta":{"index":"terms_1591234321","site":"bayareabites","id":"1893","found":true},"relationships":{},"included":{},"name":"ricotta","slug":"ricotta","taxonomy":"tag","description":null,"featImg":null,"headData":{"title":"ricotta Archives | KQED Bay Area Bites","description":null,"ogTitle":null,"ogDescription":null,"ogImgId":null,"twTitle":null,"twDescription":null,"twImgId":null},"ttid":1459,"isLoading":false,"link":"/bayareabites/tag/ricotta"},"bayareabites_10921":{"type":"terms","id":"bayareabites_10921","meta":{"index":"terms_1591234321","site":"bayareabites","id":"10921","found":true},"relationships":{},"included":{},"name":"the salt","slug":"the-salt","taxonomy":"tag","description":null,"featImg":null,"headData":{"title":"the salt Archives | KQED Bay Area Bites","description":null,"ogTitle":null,"ogDescription":null,"ogImgId":null,"twTitle":null,"twDescription":null,"twImgId":null},"ttid":5380,"isLoading":false,"link":"/bayareabites/tag/the-salt"},"bayareabites_109":{"type":"terms","id":"bayareabites_109","meta":{"index":"terms_1591234321","site":"bayareabites","id":"109","found":true},"relationships":{},"included":{},"name":"bay area","slug":"bay-area","taxonomy":"category","description":null,"featImg":null,"headData":{"title":"bay area Archives | KQED Bay Area Bites","description":null,"ogTitle":null,"ogDescription":null,"ogImgId":null,"twTitle":null,"twDescription":null,"twImgId":null},"ttid":73,"isLoading":false,"link":"/bayareabites/category/bay-area"},"bayareabites_1807":{"type":"terms","id":"bayareabites_1807","meta":{"index":"terms_1591234321","site":"bayareabites","id":"1807","found":true},"relationships":{},"included":{},"name":"restaurants, bars, cafes, pop-ups","slug":"restaurants-and-bars","taxonomy":"category","description":null,"featImg":null,"headData":{"title":"restaurants, bars, cafes, pop-ups Archives | KQED Bay Area Bites","description":null,"ogTitle":null,"ogDescription":null,"ogImgId":null,"twTitle":null,"twDescription":null,"twImgId":null},"ttid":56,"isLoading":false,"link":"/bayareabites/category/restaurants-and-bars"},"bayareabites_90":{"type":"terms","id":"bayareabites_90","meta":{"index":"terms_1591234321","site":"bayareabites","id":"90","found":true},"relationships":{},"included":{},"name":"san francisco","slug":"san-francisco","taxonomy":"category","description":null,"featImg":null,"headData":{"title":"san francisco Archives | KQED Bay Area Bites","description":null,"ogTitle":null,"ogDescription":null,"ogImgId":null,"twTitle":null,"twDescription":null,"twImgId":null},"ttid":54,"isLoading":false,"link":"/bayareabites/category/san-francisco"},"bayareabites_61":{"type":"terms","id":"bayareabites_61","meta":{"index":"terms_1591234321","site":"bayareabites","id":"61","found":true},"relationships":{},"included":{},"name":"travel","slug":"travel","taxonomy":"category","description":null,"featImg":null,"headData":{"title":"travel Archives | KQED Bay Area Bites","description":null,"ogTitle":null,"ogDescription":null,"ogImgId":null,"twTitle":null,"twDescription":null,"twImgId":null},"ttid":1216,"isLoading":false,"link":"/bayareabites/category/travel"},"bayareabites_772":{"type":"terms","id":"bayareabites_772","meta":{"index":"terms_1591234321","site":"bayareabites","id":"772","found":true},"relationships":{},"included":{},"name":"bars","slug":"bars","taxonomy":"tag","description":null,"featImg":null,"headData":{"title":"bars Archives | KQED Bay Area Bites","description":null,"ogTitle":null,"ogDescription":null,"ogImgId":null,"twTitle":null,"twDescription":null,"twImgId":null},"ttid":754,"isLoading":false,"link":"/bayareabites/tag/bars"},"bayareabites_3590":{"type":"terms","id":"bayareabites_3590","meta":{"index":"terms_1591234321","site":"bayareabites","id":"3590","found":true},"relationships":{},"included":{},"name":"bigfoot","slug":"bigfoot","taxonomy":"tag","description":null,"featImg":null,"headData":{"title":"bigfoot Archives | KQED Bay Area Bites","description":null,"ogTitle":null,"ogDescription":null,"ogImgId":null,"twTitle":null,"twDescription":null,"twImgId":null},"ttid":2378,"isLoading":false,"link":"/bayareabites/tag/bigfoot"},"bayareabites_989":{"type":"terms","id":"bayareabites_989","meta":{"index":"terms_1591234321","site":"bayareabites","id":"989","found":true},"relationships":{},"included":{},"name":"japan","slug":"japan","taxonomy":"tag","description":null,"featImg":null,"headData":{"title":"japan Archives | KQED Bay Area Bites","description":null,"ogTitle":null,"ogDescription":null,"ogImgId":null,"twTitle":null,"twDescription":null,"twImgId":null},"ttid":900,"isLoading":false,"link":"/bayareabites/tag/japan"},"bayareabites_3588":{"type":"terms","id":"bayareabites_3588","meta":{"index":"terms_1591234321","site":"bayareabites","id":"3588","found":true},"relationships":{},"included":{},"name":"kyoto","slug":"kyoto","taxonomy":"tag","description":null,"featImg":null,"headData":{"title":"kyoto Archives | KQED Bay Area Bites","description":null,"ogTitle":null,"ogDescription":null,"ogImgId":null,"twTitle":null,"twDescription":null,"twImgId":null},"ttid":2376,"isLoading":false,"link":"/bayareabites/tag/kyoto"},"bayareabites_3589":{"type":"terms","id":"bayareabites_3589","meta":{"index":"terms_1591234321","site":"bayareabites","id":"3589","found":true},"relationships":{},"included":{},"name":"themes","slug":"themes","taxonomy":"tag","description":null,"featImg":null,"headData":{"title":"themes Archives | KQED Bay Area Bites","description":null,"ogTitle":null,"ogDescription":null,"ogImgId":null,"twTitle":null,"twDescription":null,"twImgId":null},"ttid":2377,"isLoading":false,"link":"/bayareabites/tag/themes"},"bayareabites_3591":{"type":"terms","id":"bayareabites_3591","meta":{"index":"terms_1591234321","site":"bayareabites","id":"3591","found":true},"relationships":{},"included":{},"name":"tonga","slug":"tonga","taxonomy":"tag","description":null,"featImg":null,"headData":{"title":"tonga Archives | KQED Bay Area Bites","description":null,"ogTitle":null,"ogDescription":null,"ogImgId":null,"twTitle":null,"twDescription":null,"twImgId":null},"ttid":2379,"isLoading":false,"link":"/bayareabites/tag/tonga"},"bayareabites_2695":{"type":"terms","id":"bayareabites_2695","meta":{"index":"terms_1591234321","site":"bayareabites","id":"2695","found":true},"relationships":{},"included":{},"name":"cooking techniques and tips","slug":"cooking-techniques-and-tips","taxonomy":"category","description":null,"featImg":null,"headData":{"title":"cooking techniques and tips Archives | KQED Bay Area Bites","description":null,"ogTitle":null,"ogDescription":null,"ogImgId":null,"twTitle":null,"twDescription":null,"twImgId":null},"ttid":1905,"isLoading":false,"link":"/bayareabites/category/cooking-techniques-and-tips"},"bayareabites_569":{"type":"terms","id":"bayareabites_569","meta":{"index":"terms_1591234321","site":"bayareabites","id":"569","found":true},"relationships":{},"included":{},"name":"cooking","slug":"cooking","taxonomy":"tag","description":null,"featImg":null,"headData":{"title":"cooking Archives | KQED Bay Area Bites","description":null,"ogTitle":null,"ogDescription":null,"ogImgId":null,"twTitle":null,"twDescription":null,"twImgId":null},"ttid":534,"isLoading":false,"link":"/bayareabites/tag/cooking"},"bayareabites_2292":{"type":"terms","id":"bayareabites_2292","meta":{"index":"terms_1591234321","site":"bayareabites","id":"2292","found":true},"relationships":{},"included":{},"name":"eggplant","slug":"eggplant","taxonomy":"tag","description":null,"featImg":null,"headData":{"title":"eggplant Archives | KQED Bay Area Bites","description":null,"ogTitle":null,"ogDescription":null,"ogImgId":null,"twTitle":null,"twDescription":null,"twImgId":null},"ttid":1706,"isLoading":false,"link":"/bayareabites/tag/eggplant"},"bayareabites_2694":{"type":"terms","id":"bayareabites_2694","meta":{"index":"terms_1591234321","site":"bayareabites","id":"2694","found":true},"relationships":{},"included":{},"name":"techniques","slug":"techniques","taxonomy":"tag","description":null,"featImg":null,"headData":{"title":"techniques Archives | KQED Bay Area Bites","description":null,"ogTitle":null,"ogDescription":null,"ogImgId":null,"twTitle":null,"twDescription":null,"twImgId":null},"ttid":1904,"isLoading":false,"link":"/bayareabites/tag/techniques"},"bayareabites_199":{"type":"terms","id":"bayareabites_199","meta":{"index":"terms_1591234321","site":"bayareabites","id":"199","found":true},"relationships":{},"included":{},"name":"vegetables","slug":"vegetables","taxonomy":"tag","description":null,"featImg":null,"headData":{"title":"vegetables Archives | KQED Bay Area Bites","description":null,"ogTitle":null,"ogDescription":null,"ogImgId":null,"twTitle":null,"twDescription":null,"twImgId":null},"ttid":164,"isLoading":false,"link":"/bayareabites/tag/vegetables"}},"userAgentReducer":{"userAgent":"Mozilla/5.0 AppleWebKit/537.36 (KHTML, like Gecko; compatible; ClaudeBot/1.0; +claudebot@anthropic.com)","isBot":true},"userPermissionsReducer":{"wpLoggedIn":false},"localStorageReducer":{},"browserHistoryReducer":[],"eventsReducer":{},"fssReducer":{},"tvDailyScheduleReducer":{},"tvWeeklyScheduleReducer":{},"tvPrimetimeScheduleReducer":{},"tvMonthlyScheduleReducer":{},"userAccountReducer":{"routeTo":"","showDeleteConfirmModal":false,"user":{"userId":"","isFound":false,"firstName":"","lastName":"","phoneNumber":"","email":"","articles":[]}},"youthMediaReducer":{},"checkPleaseReducer":{"filterData":{},"restaurantData":[]},"reframeReducer":{"attendee":null},"location":{"pathname":"/bayareabites/tag/butter/","previousPathname":"/"}}