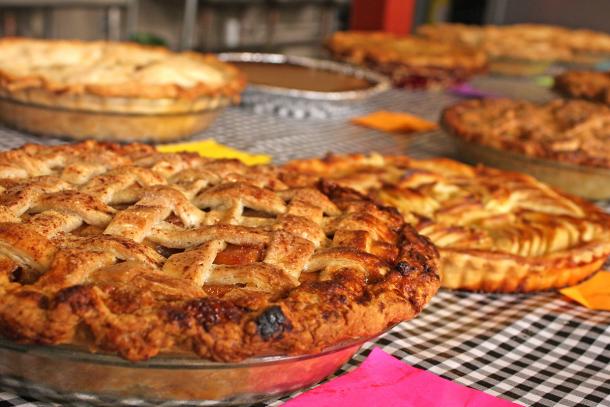
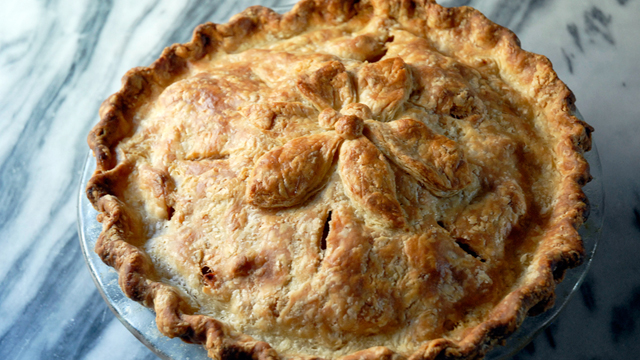
All-American Dessert Recipe: Classic Apple Pie for Thanksgiving
Strawberry Rhubarb Tarts
Black Tart
A Week at The San Francisco Baking Institute
Baking Pie with Kate McDermott
Calling the Pie Therapist
Pie Crust and Sebastopol Gravenstein Apple Fair
Sponsored
window.__IS_SSR__=true
window.__INITIAL_STATE__={"attachmentsReducer":{"audio_0":{"type":"attachments","id":"audio_0","imgSizes":{"kqedFullSize":{"file":"https://ww2.kqed.org/news/wp-content/themes/KQED-unified/img/audio_bgs/background0.jpg"}}},"audio_1":{"type":"attachments","id":"audio_1","imgSizes":{"kqedFullSize":{"file":"https://ww2.kqed.org/news/wp-content/themes/KQED-unified/img/audio_bgs/background1.jpg"}}},"audio_2":{"type":"attachments","id":"audio_2","imgSizes":{"kqedFullSize":{"file":"https://ww2.kqed.org/news/wp-content/themes/KQED-unified/img/audio_bgs/background2.jpg"}}},"audio_3":{"type":"attachments","id":"audio_3","imgSizes":{"kqedFullSize":{"file":"https://ww2.kqed.org/news/wp-content/themes/KQED-unified/img/audio_bgs/background3.jpg"}}},"audio_4":{"type":"attachments","id":"audio_4","imgSizes":{"kqedFullSize":{"file":"https://ww2.kqed.org/news/wp-content/themes/KQED-unified/img/audio_bgs/background4.jpg"}}},"placeholder":{"type":"attachments","id":"placeholder","imgSizes":{"thumbnail":{"file":"https://ww2.kqed.org/wp-content/uploads/sites/10/2018/01/GettyImages-896326950-160x96.jpg","width":160,"height":96,"mimeType":"image/jpeg"},"medium":{"file":"https://ww2.kqed.org/wp-content/uploads/sites/10/2018/01/GettyImages-896326950-800x478.jpg","width":800,"height":478,"mimeType":"image/jpeg"},"large":{"file":"https://ww2.kqed.org/wp-content/uploads/sites/10/2018/01/GettyImages-896326950-1020x610.jpg","width":1020,"height":610,"mimeType":"image/jpeg"},"fd-lrg":{"file":"https://ww2.kqed.org/wp-content/uploads/sites/10/2018/01/GettyImages-896326950-1920x1148.jpg","width":1920,"height":1148,"mimeType":"image/jpeg"},"fd-med":{"file":"https://ww2.kqed.org/wp-content/uploads/sites/10/2018/01/GettyImages-896326950-1180x705.jpg","width":1180,"height":705,"mimeType":"image/jpeg"},"fd-sm":{"file":"https://ww2.kqed.org/wp-content/uploads/sites/10/2018/01/GettyImages-896326950-960x574.jpg","width":960,"height":574,"mimeType":"image/jpeg"},"post-thumbnail":{"file":"https://ww2.kqed.org/wp-content/uploads/sites/10/2018/01/GettyImages-896326950-672x372.jpg","width":672,"height":372,"mimeType":"image/jpeg"},"twentyfourteen-full-width":{"file":"https://ww2.kqed.org/wp-content/uploads/sites/10/2018/01/GettyImages-896326950-1038x576.jpg","width":1038,"height":576,"mimeType":"image/jpeg"},"xxsmall":{"file":"https://ww2.kqed.org/wp-content/uploads/sites/10/2018/01/GettyImages-896326950-240x143.jpg","width":240,"height":143,"mimeType":"image/jpeg"},"xsmall":{"file":"https://ww2.kqed.org/wp-content/uploads/sites/10/2018/01/GettyImages-896326950-375x224.jpg","width":375,"height":224,"mimeType":"image/jpeg"},"small":{"file":"https://ww2.kqed.org/wp-content/uploads/sites/10/2018/01/GettyImages-896326950-520x311.jpg","width":520,"height":311,"mimeType":"image/jpeg"},"xlarge":{"file":"https://ww2.kqed.org/wp-content/uploads/sites/10/2018/01/GettyImages-896326950-1180x705.jpg","width":1180,"height":705,"mimeType":"image/jpeg"},"full-width":{"file":"https://ww2.kqed.org/wp-content/uploads/sites/10/2018/01/GettyImages-896326950-1920x1148.jpg","width":1920,"height":1148,"mimeType":"image/jpeg"},"guest-author-32":{"file":"https://ww2.kqed.org/wp-content/uploads/sites/10/2018/01/GettyImages-896326950-32x32.jpg","width":32,"height":32,"mimeType":"image/jpeg"},"guest-author-50":{"file":"https://ww2.kqed.org/wp-content/uploads/sites/10/2018/01/GettyImages-896326950-50x50.jpg","width":50,"height":50,"mimeType":"image/jpeg"},"guest-author-64":{"file":"https://ww2.kqed.org/wp-content/uploads/sites/10/2018/01/GettyImages-896326950-64x64.jpg","width":64,"height":64,"mimeType":"image/jpeg"},"guest-author-96":{"file":"https://ww2.kqed.org/wp-content/uploads/sites/10/2018/01/GettyImages-896326950-96x96.jpg","width":96,"height":96,"mimeType":"image/jpeg"},"guest-author-128":{"file":"https://ww2.kqed.org/wp-content/uploads/sites/10/2018/01/GettyImages-896326950-128x128.jpg","width":128,"height":128,"mimeType":"image/jpeg"},"detail":{"file":"https://ww2.kqed.org/wp-content/uploads/sites/10/2018/01/GettyImages-896326950-150x150.jpg","width":150,"height":150,"mimeType":"image/jpeg"},"kqedFullSize":{"file":"https://ww2.kqed.org/wp-content/uploads/sites/10/2018/01/GettyImages-896326950-e1514998105161.jpg","width":1920,"height":1148}}},"bayareabites_102266":{"type":"attachments","id":"bayareabites_102266","meta":{"index":"attachments_1591205162","site":"bayareabites","id":"102266","found":true},"title":"Pie contest","publishDate":1445028881,"status":"inherit","parent":102262,"modified":1445028930,"caption":"Pie contest ","credit":"CUESA","description":"Pie contest ","imgSizes":{"thumbnail":{"file":"https://ww2.kqed.org/app/uploads/sites/24/2015/10/pie_contest-400x267.jpg","width":400,"height":267,"mimeType":"image/jpeg"},"post-thumbnail":{"file":"https://ww2.kqed.org/app/uploads/sites/24/2015/10/pie_contest-610x372.jpg","width":610,"height":372,"mimeType":"image/jpeg"},"guest-author-32":{"file":"https://ww2.kqed.org/app/uploads/sites/24/2015/10/pie_contest-32x32.jpg","width":32,"height":32,"mimeType":"image/jpeg"},"guest-author-64":{"file":"https://ww2.kqed.org/app/uploads/sites/24/2015/10/pie_contest-64x64.jpg","width":64,"height":64,"mimeType":"image/jpeg"},"guest-author-96":{"file":"https://ww2.kqed.org/app/uploads/sites/24/2015/10/pie_contest-96x96.jpg","width":96,"height":96,"mimeType":"image/jpeg"},"guest-author-128":{"file":"https://ww2.kqed.org/app/uploads/sites/24/2015/10/pie_contest-128x128.jpg","width":128,"height":128,"mimeType":"image/jpeg"},"cat_post_thumb_sizecategory-posts-2":{"file":"https://ww2.kqed.org/app/uploads/sites/24/2015/10/pie_contest-150x150.jpg","width":150,"height":150,"mimeType":"image/jpeg"},"detail":{"file":"https://ww2.kqed.org/app/uploads/sites/24/2015/10/pie_contest-75x75.jpg","width":75,"height":75,"mimeType":"image/jpeg"},"kqedFullSize":{"file":"https://ww2.kqed.org/app/uploads/sites/24/2015/10/pie_contest.jpg","width":610,"height":407}},"fetchFailed":false,"isLoading":false},"bayareabites_74614":{"type":"attachments","id":"bayareabites_74614","meta":{"index":"attachments_1591205162","site":"bayareabites","id":"74614","found":true},"title":"apple-final1000640x360","publishDate":1385523794,"status":"inherit","parent":74069,"modified":1385523794,"caption":null,"credit":null,"description":null,"imgSizes":{"kqedFullSize":{"file":"https://ww2.kqed.org/app/uploads/sites/24/2013/11/apple-final1000640x360.jpg","width":640,"height":360}},"fetchFailed":false,"isLoading":false}},"audioPlayerReducer":{"postId":"stream_live"},"authorsReducer":{"wendy-goodfriend":{"type":"authors","id":"5014","meta":{"index":"authors_1591205172","id":"5014","found":true},"name":"Wendy Goodfriend","firstName":"Wendy","lastName":"Goodfriend","slug":"wendy-goodfriend","email":"wendy@wendygoodfriend.com","display_author_email":false,"staff_mastheads":[],"title":null,"bio":"I was the Senior Digital Producer for KQED Food up until July, 2018. Since 2001, I designed, produced, managed and contributed to mostly food-related websites and blogs for KQED including: KQED.org; KQED Food; Bay Area Bites; Check, Please! Bay Area; Taste This; Celebrity Chefs; seven of Jacques Pepin's TV series websites; and Joanne Weir's Cooking in the City. I initiated the majority of KQED Food's social media feeds and maintained them up until 2017. As far as content creation, photography is my passion and I also shoot video and write stories. My photos have been used in articles for KQED Food, News, Arts, and Science as well as for promotional purposes in print and online. Professional education and training includes: clinical psychology, photography, commercial cooking, web design, information architecture and UX.","avatar":"https://secure.gravatar.com/avatar/dfba64372339cc34cf17e446e6f18fa8?s=600&d=blank&r=g","twitter":null,"facebook":"bayareabites","instagram":null,"linkedin":"wendygoodfriend","sites":[{"site":"jpepinheart","roles":["administrator"]},{"site":"about","roles":["editor"]},{"site":"bayareabites","roles":["subscriber"]},{"site":"science","roles":["administrator"]},{"site":"checkplease","roles":["subscriber"]},{"site":"food","roles":["author"]},{"site":"essentialpepin","roles":["administrator"]}],"headData":{"title":"Wendy Goodfriend | KQED","description":null,"ogImgSrc":"https://secure.gravatar.com/avatar/dfba64372339cc34cf17e446e6f18fa8?s=600&d=blank&r=g","twImgSrc":"https://secure.gravatar.com/avatar/dfba64372339cc34cf17e446e6f18fa8?s=600&d=blank&r=g"},"isLoading":false,"link":"/author/wendy-goodfriend"},"stephanie-rosenbaum":{"type":"authors","id":"5038","meta":{"index":"authors_1591205172","id":"5038","found":true},"name":"Stephanie Rosenbaum Klassen","firstName":"Stephanie","lastName":"Rosenbaum Klassen","slug":"stephanie-rosenbaum","email":"dixieday@aol.com","display_author_email":false,"staff_mastheads":[],"title":null,"bio":"Stephanie Rosenbaum Klassen is a longtime local food writer, author, and cook. Her books include The Art of Vintage Cocktails (Egg & Dart Press), World of Doughnuts (Egg & Dart Press); Kids in the Kitchen: Fun Food (Williams Sonoma); Honey from Flower to Table (Chronicle Books) and The Astrology Cookbook: A Cosmic Guide to Feasts of Love (Manic D Press). She has studied organic farming at UCSC and holds a certificate in Ecological Horticulture from the Center for Agroecology and Sustainable Food Systems. She does frequent cooking demonstrations at local farmers’ markets and has taught food writing at Media Alliance in San Francisco and the Continuing Education program at Stanford University. She has been the lead restaurant critic for the San Francisco Bay Guardian as well as for San Francisco magazine. She has been an assistant chef at the Headlands Center for the Arts, an artists' residency program located in the Marin Headlands, and a production cook at the Marin Sun Farms Cafe in Pt Reyes Station. After some 20 years in San Francisco interspersed with stints in Oakland, Santa Cruz, Brooklyn, and Manhattan, she recently moved to Sonoma county but still writes in San Francisco several days a week.","avatar":"https://secure.gravatar.com/avatar/46bf004da7b42de11bfd2b1614ecadcf?s=600&d=blank&r=g","twitter":"sjrosenbaum","facebook":null,"instagram":null,"linkedin":null,"sites":[{"site":"bayareabites","roles":["author"]},{"site":"food","roles":["contributor"]}],"headData":{"title":"Stephanie Rosenbaum Klassen | KQED","description":null,"ogImgSrc":"https://secure.gravatar.com/avatar/46bf004da7b42de11bfd2b1614ecadcf?s=600&d=blank&r=g","twImgSrc":"https://secure.gravatar.com/avatar/46bf004da7b42de11bfd2b1614ecadcf?s=600&d=blank&r=g"},"isLoading":false,"link":"/author/stephanie-rosenbaum"},"megangordon":{"type":"authors","id":"5072","meta":{"index":"authors_1591205172","id":"5072","found":true},"name":"Megan Gordon","firstName":"Megan","lastName":"Gordon","slug":"megangordon","email":"meganjgordon@gmail.com","display_author_email":false,"staff_mastheads":[],"title":null,"bio":"Megan Gordon is originally from Eureka, CA although she's lived in numerous college towns around the country (another story altogether). A freelance food and travel writer, Megan has written for publications like \u003cem>Ready Made Magazine\u003c/em>, \u003cem>The San Francisco Examiner\u003c/em>, \u003cem>Edible SF\u003c/em> and \u003cem>Edible Marin & Wine Country\u003c/em>, \u003cem>Olive Oil Times\u003c/em> and \u003cem>The San Francisco Bay Guardian\u003c/em>. She writes regularly for Apartment Therapy's \u003ca href=\"http://www.thekitchn.com/thekitchn/author/megang\">The Kitchn\u003c/a> and maintains her own local food blog, \u003ca href=\"http://asweetspoonful.com/\">A Sweet Spoonful\u003c/a>. Yes, Megan even tweets \u003ca href=\"http://twitter.com/#!/meganjanesf\">@meganjanesf\u003c/a>. In addition to writing and photographing food, Megan is the founder (and head baker) of \u003ca href=\"http://www.margebakery.com/\">Marge\u003c/a>, a Bay Area baking company specializing in classic American pies and nostalgic desserts.","avatar":"https://secure.gravatar.com/avatar/22ee897e8f9c116d49655fe9cd376ec4?s=600&d=blank&r=g","twitter":null,"facebook":null,"instagram":null,"linkedin":null,"sites":[{"site":"bayareabites","roles":["contributor"]}],"headData":{"title":"Megan Gordon | KQED","description":null,"ogImgSrc":"https://secure.gravatar.com/avatar/22ee897e8f9c116d49655fe9cd376ec4?s=600&d=blank&r=g","twImgSrc":"https://secure.gravatar.com/avatar/22ee897e8f9c116d49655fe9cd376ec4?s=600&d=blank&r=g"},"isLoading":false,"link":"/author/megangordon"},"cuesa":{"type":"authors","id":"5484","meta":{"index":"authors_1591205172","id":"5484","found":true},"name":"CUESA","firstName":"CUESA","lastName":null,"slug":"cuesa","email":"brie@cuesa.org","display_author_email":false,"staff_mastheads":[],"title":null,"bio":"CUESA (Center for Urban Education about Sustainable Agriculture) is a nonprofit organization dedicated to cultivating a sustainable food system through the operation of the Ferry Plaza Farmers Market and its educational programs. Learn more at \u003ca href=\"http://www.cuesa.org/\">cuesa.org\u003c/a>.","avatar":"https://secure.gravatar.com/avatar/323b5bab8e802e76af5b72a66b7c6987?s=600&d=blank&r=g","twitter":"cuesa","facebook":"CUESA","instagram":null,"linkedin":null,"sites":[{"site":"arts","roles":["author"]},{"site":"bayareabites","roles":["contributor"]},{"site":"food","roles":["contributor"]}],"headData":{"title":"CUESA | KQED","description":null,"ogImgSrc":"https://secure.gravatar.com/avatar/323b5bab8e802e76af5b72a66b7c6987?s=600&d=blank&r=g","twImgSrc":"https://secure.gravatar.com/avatar/323b5bab8e802e76af5b72a66b7c6987?s=600&d=blank&r=g"},"isLoading":false,"link":"/author/cuesa"}},"breakingNewsReducer":{},"campaignFinanceReducer":{},"firebase":{"requesting":{},"requested":{},"timestamps":{},"data":{},"ordered":{},"auth":{"isLoaded":false,"isEmpty":true},"authError":null,"profile":{"isLoaded":false,"isEmpty":true},"listeners":{"byId":{},"allIds":[]},"isInitializing":false,"errors":[]},"navBarReducer":{"navBarId":"arts","fullView":true,"showPlayer":false},"navMenuReducer":{"menus":[{"key":"menu1","items":[{"name":"News","link":"/","type":"title"},{"name":"Politics","link":"/politics"},{"name":"Science","link":"/science"},{"name":"Education","link":"/educationnews"},{"name":"Housing","link":"/housing"},{"name":"Immigration","link":"/immigration"},{"name":"Criminal Justice","link":"/criminaljustice"},{"name":"Silicon Valley","link":"/siliconvalley"},{"name":"Forum","link":"/forum"},{"name":"The California Report","link":"/californiareport"}]},{"key":"menu2","items":[{"name":"Arts & Culture","link":"/arts","type":"title"},{"name":"Critics’ Picks","link":"/thedolist"},{"name":"Cultural Commentary","link":"/artscommentary"},{"name":"Food & Drink","link":"/food"},{"name":"Bay Area Hip-Hop","link":"/bayareahiphop"},{"name":"Rebel Girls","link":"/rebelgirls"},{"name":"Arts Video","link":"/artsvideos"}]},{"key":"menu3","items":[{"name":"Podcasts","link":"/podcasts","type":"title"},{"name":"Bay Curious","link":"/podcasts/baycurious"},{"name":"Rightnowish","link":"/podcasts/rightnowish"},{"name":"The Bay","link":"/podcasts/thebay"},{"name":"On Our Watch","link":"/podcasts/onourwatch"},{"name":"Mindshift","link":"/podcasts/mindshift"},{"name":"Consider This","link":"/podcasts/considerthis"},{"name":"Political Breakdown","link":"/podcasts/politicalbreakdown"}]},{"key":"menu4","items":[{"name":"Live Radio","link":"/radio","type":"title"},{"name":"TV","link":"/tv","type":"title"},{"name":"Events","link":"/events","type":"title"},{"name":"For Educators","link":"/education","type":"title"},{"name":"Support KQED","link":"/support","type":"title"},{"name":"About","link":"/about","type":"title"},{"name":"Help Center","link":"https://kqed-helpcenter.kqed.org/s","type":"title"}]}]},"pagesReducer":{},"postsReducer":{"stream_live":{"type":"live","id":"stream_live","audioUrl":"https://streams.kqed.org/kqedradio","title":"Live Stream","excerpt":"Live Stream information currently unavailable.","link":"/radio","featImg":"","label":{"name":"KQED Live","link":"/"}},"stream_kqedNewscast":{"type":"posts","id":"stream_kqedNewscast","audioUrl":"https://www.kqed.org/.stream/anon/radio/RDnews/newscast.mp3?_=1","title":"KQED Newscast","featImg":"","label":{"name":"88.5 FM","link":"/"}},"bayareabites_102262":{"type":"posts","id":"bayareabites_102262","meta":{"index":"posts_1591205157","site":"bayareabites","id":"102262","score":null,"sort":[1445373616000]},"guestAuthors":[],"slug":"pie-dos-and-donts-from-three-babes-bakeshop","title":"Pie Do’s and Don’ts from Three Babes Bakeshop","publishDate":1445373616,"format":"standard","headTitle":"Bay Area Bites | KQED Food","labelTerm":{},"content":"\u003cp>The perfect pie is delicate dance: the meeting of a sweet, luscious filling and a flaky, tender, golden crust. On Sunday, October 25, you’re invited to put your pie making chops to the test at \u003ca href=\"http://www.cuesa.org/event/2015/cuesas-harvest-festival-fall-fruit-pie-contest\">CUESA’s Fall Fruit Pie Contest at The Yard at Mission Rock\u003c/a>.\u003c/p>\n\u003cp>Lenore Estrada and Anna Derivi-Castellanos know pie. They both started baking as children with their families, and in high school they made pies together to give to their friends. Years later, they started \u003ca href=\"http://www.cuesa.org/seller/three-babes-bakeshop\">Three Babes Bakeshop\u003c/a>, a from-scratch pie business that pops up at the Ferry Plaza Farmers Market on Saturdays. They’ve experimented with hundreds of varieties of pie, and through trial and error, they’ve streamlined their lineup to a seasonally rotating selection, including hits like Classic Apple, Bourbon Pecan, and their famous Salty Honey Walnut.\u003c/p>\n\u003cp>The two have also judged their share of pie contests (they estimate around a dozen or so), and, for the third year in a row, they’ll both be on our \u003ca href=\"http://www.cuesa.org/event/2015/cuesas-harvest-festival-fall-fruit-pie-contest#judges\">esteemed panel of pie judges\u003c/a>.\u003c/p>\n\u003cp>Even if they feel a bit sugar shocked by the end of a marathon tasting session, Anna and Lenore love the judging process. “Lenore and I are really interested in seeing these budding bakers enter their best pies,” Anna says. “We like to steer people in the right direction and help them grow as pie makers.” To give our pie contestants a leg up, we asked the Babes to share some of their fall pie-making do’s and don’ts.\u003c/p>\n\u003cp>\u003cstrong>Do be creative.\u003c/strong>\u003c/p>\n\u003cp>[ad fullwidth]\u003c/p>\n\u003cp>\u003cem>Anna:\u003c/em> The home cook can do more adventurous things in a contest than we can in our business, since they’re just making one pie. We get pretty adventurous with our pies at Three Babes, but we’re not going to make a pineapple-guava-infused persimmon custard pie with a walnut crust. That’s interesting when it works out well, but sometimes it doesn’t.\u003c/p>\n\u003cp>\u003cstrong>Don’t overdo it.\u003c/strong>\u003c/p>\n\u003cp>\u003cem>Lenore:\u003c/em> Ultimately, the best way to stand out is to have a well-executed product. We want people to be creative, but when people try to stand out by doing something crazy, it often that backfires. A lot of times people try to use unusual ingredients like rosewater or tea, but they wind up overdoing it. Same with alcohol in your pie. We think alcohol is great, and it can really heighten the other flavors, but if you put too much bourbon in a bourbon pecan pie, it’s like drinking a shot of alcohol, which is unpleasant when you’re eating a dessert. If you’re going to get creative, moderation is really important.\u003c/p>\n\u003cp>\u003cstrong>Do use quality ingredients.\u003c/strong>\u003c/p>\n\u003cp>\u003cem>Anna: \u003c/em>If you are entering a CUESA Pie Contest, we expect that you probably already have your heart in the right place as far as sourcing really excellent ingredients goes, from getting fruit from the farmers market to using flour that’s organic or locally sourced.\u003c/p>\n\u003cp>\u003cstrong>Do use \u003c/strong>\u003ca href=\"http://www.cuesa.org/eat-seasonally/charts/fruit\">\u003cstrong>what’s in season\u003c/strong>\u003c/a>\u003cstrong>.\u003c/strong>\u003c/p>\n\u003cp>\u003cem>Anna: \u003c/em>Apples are exciting right now because there are so many varieties to choose from at the Ferry Plaza Farmers Market. We love to mix different varieties. Right now we’re mixing Granny Smith from \u003ca href=\"http://www.cuesa.org/seller/hidden-star-orchards\">Hidden Star Orchards\u003c/a> and Jonathans from \u003ca href=\"http://www.cuesa.org/seller/devoto-gardens-orchards\">Devoto Orchards\u003c/a>, because there’s one really crisp tart apple and another softer, more floral red-skinned apple that imparts a beautiful pink to the filling. It’s fun to play with apples, and you can taste the difference when you use a mix of tart and sweet, rather than using just a single variety.\u003c/p>\n\u003cp>Fall is also an interesting time because we’re so lucky to live in California and benefit from the insanely long growing period of freshly grown berries. You wouldn’t necessarily think of berries in the fall, but we have a pear-blackberry crumble on our Thanksgiving menu because you can get blackberries so late in the season. Pears are definitely fall, but we like to spice our pie up with some tart berries.\u003c/p>\n\u003cp>We also use walnuts from \u003ca href=\"http://www.cuesa.org/seller/old-dog-ranch\">Old Dog Ranch\u003c/a> in our Salty Honey Walnut pie. Nuts are one of those awesome pantry items that, when stored properly, can be kept for a long time. There’s definitely a clean taste that comes from the new crop in the fall.\u003c/p>\n\u003cp>\u003cstrong>Don’t underbake your crust.\u003c/strong>\u003c/p>\n\u003cp>\u003cem>Lenore: \u003c/em>Our number one tip: don’t underbake your pie crust. Most of the entries we get are underbaked.\u003c/p>\n\u003cp>\u003cem>Anna: \u003c/em>People are really afraid that their pie is going to be overdone, and they’re really afraid of the browning of crust. But there’s nothing worse than an underbaked pie, when the dough and filling aren’t properly cooked. Don’t be afraid to get a nice brown tone on your pie.\u003c/p>\n\u003cp>\u003cstrong>Do know how to use thickeners.\u003c/strong>\u003c/p>\n\u003cp>\u003cem>Anna: \u003c/em>Thickeners mystify people. One time we had an employee add twice the amount of cornstarch to some of our pies. That’s one of those ingredients in a pie that you never want to be noticeably present. You want to make sure you can slice a pie well and not have it oozing out over everything. You also don’t want the filling to be gelatinous.\u003c/p>\n\u003cp>\u003cstrong>Do make sure it tastes good.\u003c/strong>\u003c/p>\n\u003cp>\u003cem>Lenore: \u003c/em>The question we ask ourselves when tasting a pie is, “Does this taste good?” One of the big ways to mess that up is adding too much of something. If a flavor enhancer really jumps out at us, that’s usually a negative thing. I remember we tasted one pie in a contest that was really creative, using a lattice of bacon on top, but the pie had large chunks of congealed lard inside. It was really unpleasant to eat. For the pies that don’t win, it’s usually because of something really obvious like that.\u003c/p>\n\u003cp>\u003cstrong>Do learn from your mistakes.\u003c/strong>\u003c/p>\n\u003cp>\u003cem>Lenore: \u003c/em>One time we had someone donate us some plums that were super delicious when we ate them, but when we cooked them the skins imparted this sourness that was terrible.\u003c/p>\n\u003cp>\u003cem>Anna: \u003c/em>The lesson is, be familiar with your ingredients. Don’t enter a pie contest using ingredients you’ve never worked with.\u003c/p>\n\u003cp>\u003cstrong>Do have fun!\u003c/strong>\u003c/p>\n\u003cp>\u003cem>Lenore: \u003c/em>We think this pie contest is a lot of fun, and there are always great prizes, so we encourage everyone to enter. Even if you don’t win, it’s just good practice. With pie making, like many things in life, you have to keep practicing to get a good feel for it.\u003c/p>\n\u003cp>[ad floatright]\u003c/p>\n\u003cp>Also, if people are interested in learning more or pie baking professionally, they can either come to our \u003ca href=\"http://www.cuesa.org/event/2015/cuesa-mission-rock-farmers-market-pop-yard-harvest-festival\">apple pie demo at The Yard\u003c/a>, or they can apply to work with us. We’re recruiting for our pie army! Apply at \u003ca href=\"mailto:jobs@threebakesbakeshop.com\">jobs@threebakesbakeshop.com\u003c/a>. We’ll train you.\u003c/p>\n\n","blocks":[],"excerpt":"Lenore Estrada and Anna Derivi-Castellanos owners of Three Babes Bakeshop share fall pie-making do’s and don’ts. And on Sunday, October 25, you’re invited to put your pie making chops to the test at CUESA’s Fall Fruit Pie Contest at The Yard at Mission Rock.","status":"publish","parent":0,"modified":1445373616,"stats":{"hasAudio":false,"hasVideo":false,"hasChartOrMap":false,"iframeSrcs":[],"hasGoogleForm":false,"hasGallery":false,"hasHearkenModule":false,"hasPolis":false,"paragraphCount":29,"wordCount":1210},"headData":{"title":"Pie Do’s and Don’ts from Three Babes Bakeshop | KQED","description":"Lenore Estrada and Anna Derivi-Castellanos owners of Three Babes Bakeshop share fall pie-making do’s and don’ts. And on Sunday, October 25, you’re invited to put your pie making chops to the test at CUESA’s Fall Fruit Pie Contest at The Yard at Mission Rock.","ogTitle":"","ogDescription":"","ogImgId":"","twTitle":"","twDescription":"","twImgId":"","schema":{"@context":"http://schema.org","@type":"Article","headline":"Pie Do’s and Don’ts from Three Babes Bakeshop","datePublished":"2015-10-20T20:40:16.000Z","dateModified":"2015-10-20T20:40:16.000Z","image":"https://cdn.kqed.org/wp-content/uploads/2020/02/KQED-OG-Image@1x.png"}},"disqusIdentifier":"102262 http://ww2.kqed.org/bayareabites/?p=102262","disqusUrl":"https://ww2.kqed.org/bayareabites/2015/10/20/pie-dos-and-donts-from-three-babes-bakeshop/","disqusTitle":"Pie Do’s and Don’ts from Three Babes Bakeshop","source":"Cooking Techniques and Tips","sourceUrl":"https://ww2.kqed.org/bayareabites/category/cooking-techniques-and-tips/","path":"/bayareabites/102262/pie-dos-and-donts-from-three-babes-bakeshop","audioTrackLength":null,"parsedContent":[{"type":"contentString","content":"\u003cdiv class=\"post-body\">\u003cp>\u003cp>The perfect pie is delicate dance: the meeting of a sweet, luscious filling and a flaky, tender, golden crust. On Sunday, October 25, you’re invited to put your pie making chops to the test at \u003ca href=\"http://www.cuesa.org/event/2015/cuesas-harvest-festival-fall-fruit-pie-contest\">CUESA’s Fall Fruit Pie Contest at The Yard at Mission Rock\u003c/a>.\u003c/p>\n\u003cp>Lenore Estrada and Anna Derivi-Castellanos know pie. They both started baking as children with their families, and in high school they made pies together to give to their friends. Years later, they started \u003ca href=\"http://www.cuesa.org/seller/three-babes-bakeshop\">Three Babes Bakeshop\u003c/a>, a from-scratch pie business that pops up at the Ferry Plaza Farmers Market on Saturdays. They’ve experimented with hundreds of varieties of pie, and through trial and error, they’ve streamlined their lineup to a seasonally rotating selection, including hits like Classic Apple, Bourbon Pecan, and their famous Salty Honey Walnut.\u003c/p>\n\u003cp>The two have also judged their share of pie contests (they estimate around a dozen or so), and, for the third year in a row, they’ll both be on our \u003ca href=\"http://www.cuesa.org/event/2015/cuesas-harvest-festival-fall-fruit-pie-contest#judges\">esteemed panel of pie judges\u003c/a>.\u003c/p>\n\u003cp>Even if they feel a bit sugar shocked by the end of a marathon tasting session, Anna and Lenore love the judging process. “Lenore and I are really interested in seeing these budding bakers enter their best pies,” Anna says. “We like to steer people in the right direction and help them grow as pie makers.” To give our pie contestants a leg up, we asked the Babes to share some of their fall pie-making do’s and don’ts.\u003c/p>\n\u003cp>\u003cstrong>Do be creative.\u003c/strong>\u003c/p>\n\u003cp>\u003c/p>\u003c/div>","attributes":{"named":{},"numeric":[]}},{"type":"component","content":"","name":"ad","attributes":{"named":{"label":"fullwidth"},"numeric":["fullwidth"]}},{"type":"contentString","content":"\u003cdiv class=\"post-body\">\u003cp>\u003c/p>\n\u003cp>\u003cem>Anna:\u003c/em> The home cook can do more adventurous things in a contest than we can in our business, since they’re just making one pie. We get pretty adventurous with our pies at Three Babes, but we’re not going to make a pineapple-guava-infused persimmon custard pie with a walnut crust. That’s interesting when it works out well, but sometimes it doesn’t.\u003c/p>\n\u003cp>\u003cstrong>Don’t overdo it.\u003c/strong>\u003c/p>\n\u003cp>\u003cem>Lenore:\u003c/em> Ultimately, the best way to stand out is to have a well-executed product. We want people to be creative, but when people try to stand out by doing something crazy, it often that backfires. A lot of times people try to use unusual ingredients like rosewater or tea, but they wind up overdoing it. Same with alcohol in your pie. We think alcohol is great, and it can really heighten the other flavors, but if you put too much bourbon in a bourbon pecan pie, it’s like drinking a shot of alcohol, which is unpleasant when you’re eating a dessert. If you’re going to get creative, moderation is really important.\u003c/p>\n\u003cp>\u003cstrong>Do use quality ingredients.\u003c/strong>\u003c/p>\n\u003cp>\u003cem>Anna: \u003c/em>If you are entering a CUESA Pie Contest, we expect that you probably already have your heart in the right place as far as sourcing really excellent ingredients goes, from getting fruit from the farmers market to using flour that’s organic or locally sourced.\u003c/p>\n\u003cp>\u003cstrong>Do use \u003c/strong>\u003ca href=\"http://www.cuesa.org/eat-seasonally/charts/fruit\">\u003cstrong>what’s in season\u003c/strong>\u003c/a>\u003cstrong>.\u003c/strong>\u003c/p>\n\u003cp>\u003cem>Anna: \u003c/em>Apples are exciting right now because there are so many varieties to choose from at the Ferry Plaza Farmers Market. We love to mix different varieties. Right now we’re mixing Granny Smith from \u003ca href=\"http://www.cuesa.org/seller/hidden-star-orchards\">Hidden Star Orchards\u003c/a> and Jonathans from \u003ca href=\"http://www.cuesa.org/seller/devoto-gardens-orchards\">Devoto Orchards\u003c/a>, because there’s one really crisp tart apple and another softer, more floral red-skinned apple that imparts a beautiful pink to the filling. It’s fun to play with apples, and you can taste the difference when you use a mix of tart and sweet, rather than using just a single variety.\u003c/p>\n\u003cp>Fall is also an interesting time because we’re so lucky to live in California and benefit from the insanely long growing period of freshly grown berries. You wouldn’t necessarily think of berries in the fall, but we have a pear-blackberry crumble on our Thanksgiving menu because you can get blackberries so late in the season. Pears are definitely fall, but we like to spice our pie up with some tart berries.\u003c/p>\n\u003cp>We also use walnuts from \u003ca href=\"http://www.cuesa.org/seller/old-dog-ranch\">Old Dog Ranch\u003c/a> in our Salty Honey Walnut pie. Nuts are one of those awesome pantry items that, when stored properly, can be kept for a long time. There’s definitely a clean taste that comes from the new crop in the fall.\u003c/p>\n\u003cp>\u003cstrong>Don’t underbake your crust.\u003c/strong>\u003c/p>\n\u003cp>\u003cem>Lenore: \u003c/em>Our number one tip: don’t underbake your pie crust. Most of the entries we get are underbaked.\u003c/p>\n\u003cp>\u003cem>Anna: \u003c/em>People are really afraid that their pie is going to be overdone, and they’re really afraid of the browning of crust. But there’s nothing worse than an underbaked pie, when the dough and filling aren’t properly cooked. Don’t be afraid to get a nice brown tone on your pie.\u003c/p>\n\u003cp>\u003cstrong>Do know how to use thickeners.\u003c/strong>\u003c/p>\n\u003cp>\u003cem>Anna: \u003c/em>Thickeners mystify people. One time we had an employee add twice the amount of cornstarch to some of our pies. That’s one of those ingredients in a pie that you never want to be noticeably present. You want to make sure you can slice a pie well and not have it oozing out over everything. You also don’t want the filling to be gelatinous.\u003c/p>\n\u003cp>\u003cstrong>Do make sure it tastes good.\u003c/strong>\u003c/p>\n\u003cp>\u003cem>Lenore: \u003c/em>The question we ask ourselves when tasting a pie is, “Does this taste good?” One of the big ways to mess that up is adding too much of something. If a flavor enhancer really jumps out at us, that’s usually a negative thing. I remember we tasted one pie in a contest that was really creative, using a lattice of bacon on top, but the pie had large chunks of congealed lard inside. It was really unpleasant to eat. For the pies that don’t win, it’s usually because of something really obvious like that.\u003c/p>\n\u003cp>\u003cstrong>Do learn from your mistakes.\u003c/strong>\u003c/p>\n\u003cp>\u003cem>Lenore: \u003c/em>One time we had someone donate us some plums that were super delicious when we ate them, but when we cooked them the skins imparted this sourness that was terrible.\u003c/p>\n\u003cp>\u003cem>Anna: \u003c/em>The lesson is, be familiar with your ingredients. Don’t enter a pie contest using ingredients you’ve never worked with.\u003c/p>\n\u003cp>\u003cstrong>Do have fun!\u003c/strong>\u003c/p>\n\u003cp>\u003cem>Lenore: \u003c/em>We think this pie contest is a lot of fun, and there are always great prizes, so we encourage everyone to enter. Even if you don’t win, it’s just good practice. With pie making, like many things in life, you have to keep practicing to get a good feel for it.\u003c/p>\n\u003cp>\u003c/p>\u003c/div>","attributes":{"named":{},"numeric":[]}},{"type":"component","content":"","name":"ad","attributes":{"named":{"label":"floatright"},"numeric":["floatright"]}},{"type":"contentString","content":"\u003cdiv class=\"post-body\">\u003cp>\u003c/p>\n\u003cp>Also, if people are interested in learning more or pie baking professionally, they can either come to our \u003ca href=\"http://www.cuesa.org/event/2015/cuesa-mission-rock-farmers-market-pop-yard-harvest-festival\">apple pie demo at The Yard\u003c/a>, or they can apply to work with us. We’re recruiting for our pie army! Apply at \u003ca href=\"mailto:jobs@threebakesbakeshop.com\">jobs@threebakesbakeshop.com\u003c/a>. We’ll train you.\u003c/p>\n\n\u003c/div>\u003c/p>","attributes":{"named":{},"numeric":[]}}],"link":"/bayareabites/102262/pie-dos-and-donts-from-three-babes-bakeshop","authors":["5484"],"categories":["bayareabites_1516","bayareabites_2695","bayareabites_12276","bayareabites_1653","bayareabites_50","bayareabites_95","bayareabites_1763","bayareabites_1246","bayareabites_90"],"tags":["bayareabites_228","bayareabites_2596","bayareabites_2594"],"featImg":"bayareabites_102266","label":"source_bayareabites_102262"},"bayareabites_74069":{"type":"posts","id":"bayareabites_74069","meta":{"index":"posts_1591205157","site":"bayareabites","id":"74069","score":null,"sort":[1385587408000]},"guestAuthors":[],"slug":"all-american-dessert-recipe-classic-apple-pie-for-thanksgiving","title":"All-American Dessert Recipe: Classic Apple Pie for Thanksgiving","publishDate":1385587408,"format":"aside","headTitle":"Thanksgiving Recipes | Bay Area Bites | KQED Food","labelTerm":{"term":15012,"site":"bayareabites"},"content":"\u003cfigure id=\"attachment_74575\" class=\"wp-caption aligncenter\" style=\"max-width: 1000px\">\u003ca href=\"http://ww2.kqed.org/bayareabites/wp-content/uploads/sites/24/2013/11/apple-final1000a.jpg\">\u003cimg class=\"size-full wp-image-74575\" src=\"http://ww2.kqed.org/bayareabites/wp-content/uploads/sites/24/2013/11/apple-final1000a.jpg\" alt=\"Classic Apple Pie. Photo: Wendy Goodfriend\" width=\"1000\" height=\"669\">\u003c/a>\u003cfigcaption class=\"wp-caption-text\">Classic Apple Pie. Photo: Wendy Goodfriend\u003c/figcaption>\u003c/figure>\n\u003cp>All Photos: \u003ca href=\"http://ww2.kqed.org/bayareabites/author/wendy-goodfriend/\">Wendy Goodfriend\u003c/a>\u003c/p>\n\u003cp>Be gone, Mrs. Smith! A frozen pie may fill your pie-hole any other day of the year. But for Thanksgiving, on this celebratory day of gratitude, as close as we get to a ritual harvest festival, make a real pie. Yes, from scratch. Because, with our step-by-step approach, you can turn apples, sugar, flour, butter, and spices into a better pie that you or your friends have ever tasted, much less made.\u003c/p>\n\u003cp>So, let us begin. The first step, before you pick up a measuring cup, is to clear your mind. Are you stressed out by family demands? Worried about getting it all right? Put all this out of your head. A perfect turkey, a perfect pie, the most splendid gravy in the universe cannot ensure family harmony, just as even a sorry stuffing won't, by its underseasoned blandness or wayward lumpiness, ruin the day. (Not that you should settle for bad stuffing, not with Kim Laidlaw's fine \u003ca href=\"http://ww2.kqed.org/bayareabites/2013/11/23/thanksgiving-recipe-an-elevated-version-of-classic-sage-and-chestnut-stuffing/\">Sage and Chestnut Stuffing\u003c/a> recipe available here on this very blog.)\u003c/p>\n\u003cp>All too often, it seems, we placate our fears by obsessing over the minutia of kitchen work. Brine or dry rub? Breast up, breast down? Deep-fried or smoked? Should there been mac and cheese, and is adding \u003ca href=\"http://brokeassgourmet.com/articles/brown-butter-pumpkin-mac-and-cheese\">brown butter and pumpkin\u003c/a> brilliance or heresy? Here's what I can tell you, courtesy of years of writing Thanksgiving cooking advice: it is easier to worry about turkey, or cranberry sauce, or the flakiness of your pie crust than it is to be in the moment, with no distractions from the clamor of your own emotions, the ringing of your own wishful, overflowing, bruised or fearful heart.\u003c/p>\n\u003cp>Keep it in mind, then, as you seek to control in the kitchen what you may not be able to conquer in the dining room. More to the point, take heed of Fergus Henderson, chef and author of \u003ca href=\"http://www.amazon.com/exec/obidos/ASIN/0062282611/kqedorg-20\">The Complete Nose to Tail\u003c/a>, who advises, “Do not be afraid of cooking, as your ingredients will know, and misbehave.\" So, now that you're happy, and focused, and not leaning all the weight of your perfect-holiday expectations on one frangible crust, let's bake!\u003c/p>\n\u003cp>[ad fullwidth]\u003c/p>\n\u003cp>First, the apples. I like farmers' market apples, where you can be sure of getting this season's fruit, still tangy and snappy-crunchy. You want apples with some complexity and density to them. Fujis and Galas are too sweet and too full of juice--they'll make a wet pie that's closer to applesauce. Granny Smiths are the opposite: too hard, too tart. I like to use a mix of whatever looks good. This pie was made with a combination of Black Twig and Pink Ladies, but Pippins, Jonagolds, Russets, Romes, and/or Braeburns would also work well.\u003c/p>\n\u003cfigure id=\"attachment_74580\" class=\"wp-caption aligncenter\" style=\"max-width: 1000px\">\u003ca href=\"http://ww2.kqed.org/bayareabites/wp-content/uploads/sites/24/2013/11/apple-pie-apples1000.jpg\">\u003cimg class=\"size-full wp-image-74580\" src=\"http://ww2.kqed.org/bayareabites/wp-content/uploads/sites/24/2013/11/apple-pie-apples1000.jpg\" alt=\"Apples: Black Twig and Pink Ladies. Photo: Wendy Goodfriend\" width=\"1000\" height=\"669\">\u003c/a>\u003cfigcaption class=\"wp-caption-text\">Apples: Black Twig and Pink Ladies. Photo: Wendy Goodfriend\u003c/figcaption>\u003c/figure>\n\u003cp>The crust is easiest to handle if you let it chill before rolling, so it's wise to get your dough mixed before you start on the filling. Put your butter--preferably, a high-fat, European-style butter like \u003ca href=\"http://strausfamilycreamery.com/products/item/organic-sweet-butter\">Straus Family Creamery European-Style Organic Butter\u003c/a> or Plugra--in the freezer to chill. You want it very cold and firm but not actually frozen.\u003c/p>\n\u003cp>Measure the full amount of cold water and vinegar into a glass (or see-through plastic) wet measuring cup. Add a handful of ice cubes. Measure your flour by dipping a dry-measure cup into the flour, then sweeping off the excess with the flat side of a knife. Don't pack it, don't shake it! Whisk the sugar and salt into the flour.\u003c/p>\n\u003cp>Using the coarse holes on a box grater, grate in the butter. Grating transforms the butter into thin, near-translucent curls. Once you've lightly but thoroughly mixed them into the flour, carefully breaking up any butter clumps, you're almost done. The texture will be nubbly-perfect, and you'll hardly have touched it.\u003c/p>\n\u003cp>Quickly pour in about half your ice water (not including the cubes). Using a wooden spoon or a large fork, gently and quickly mix the water into the flour. Drizzle in remaining water as needed over any dry patches, about a tablespoon at a time. If you are using high-fat butter, which has a lower water content, you'll probably need more water than if you're using a regular supermarket brand. Stop when a handful of dough will just hold together when squeezed. A little crumbly is fine; it will get moister as it chills.\u003c/p>\n\u003cp>If you have time, it's a good idea to chill your dough before you roll it out. It's not crucial; I've gone straight from mixing to rolling to baking on occasion, and it worked just fine. However, chilling lets the butter firm up again before you roll, and cold butter leads to a flakier crust. Also, cold dough is less likely to turn into a a sticky, recalcitrant dough-child that flings itself face down onto the counter and refuses to come up without tearing once you start rolling.\u003c/p>\n\u003cp>Divide your dough into equal parts. Scoop the dough into two resealable plastic bags. Flatten each into a round, squeezing out any remaining air from the bag, and seal. Chill the dough for an hour in the freezer or 2 hours in the refrigerator. The dough can also be refrigerated for 1-2 days ahead of baking.\u003c/p>\n\u003cp>[gallery type=\"slideshow\" link=\"file\" ids=\"74348,74346,74345,74342,74343,74338,74339,74337,74336,74334,74603,74605,74608,74599,74597,74606,74594,74578,74582,74583,74592\"]\u003c/p>\n\u003cp>Lightly sprinkle a large, clean work surface with flour. Rub a light coating of flour on your rolling pin. Take 1 bag of dough out the freezer or fridge, remove its bag, and pat the dough into a roughly symmetrical round. Roll from the middle out to the edges, using the equal amounts of pressure as you go. After every few rolls, pick the dough up from the counter and revolve it a quarter turn. This helps keep the dough from sticking to your work surface. If it seems like it's sticking, loosen with a spatula, then sprinkle a little more flour underneath. Imagine you're rolling sun rays all the way around from the center of the dough.\u003c/p>\n\u003cp>If the dough keeps sticking to the rolling pin and/or counter, try rolling it out between two sheets of plastic wrap, waxed paper, or parchment paper. You can also sprinkle a small amount of flour over the dough, but be stingy.\u003c/p>\n\u003cp>Once you’ve got a nice, more-or-less round of evenly rolled dough, lift it into your pie pan. Press it gently into the pan. You should have about an inch of dough hanging over the edge; trim off any excess. Fold the extra dough inwards (towards the middle of the pie) to make a sort of flattened mesa or bulwark. Wrap the whole crust loosely in plastic wrap or waxed paper and return it to the fridge to chill while you make the filling.\u003c/p>\n\u003cp>Peel, core, and slice your apples. Toss with sugar, salt, and spices. Let stand for about 10 minutes, until there is a puddle of liquid at the bottom of the bowl. Pour the liquid into a small pan and boil, watching carefully, until it has cooked down to the consistency of maple syrup. Pour back into the bowl of apples. Sprinkle with flour and mix thoroughly.\u003c/p>\n\u003cp>Preheat the oven to 400ºF. Take the second bag out of the fridge, remove and roll like you did the first crust. When your large round of top crust is ready, take the bottom-crust-lined pie pan out of the fridge. Scoop your filling into the bottom crust. Drape the top crust over the filling, and trim off any extra so you have about 1/2 inch hanging over the edges. Tuck the excess crust under, pressing to join it to the bottom crust, making a thicker mesa/ridge this time.\u003c/p>\n\u003cp>[gallery type=\"slideshow\" link=\"file\" ids=\"74598,74607,74609,74587,74586,74602\"]\u003c/p>\n\u003cp>You're almost done, but not yet. Crimping--making a decorative edge around the crust--is the artistic part of pie-shaping, and there are many, many ways to do this. I like to gently pinch the edge between the thumb and forefinger of each hand. You move up with the left hand, down with the right, going neatly all the way around the pie until the whole thing has been crimped. The main thing is do something, even if it’s just a plain or rolled ridge of dough along the edge. A good crimp will both keep any excess filling from spilling out and to make the pie look nice and finished. Too many pies just sort of peter out at the edges, with no definition--no, no, no. Define your boundaries, even if you're just flattening the two layers of dough together with fork tines.\u003c/p>\n\u003cp>[gallery type=\"slideshow\" link=\"file\" ids=\"74589,74588,74610,74601,74595,74613\"]\u003c/p>\n\u003cp>To make the pastry leaves shown here, gather together your extra pastry scraps and roll out. Using a small, sharp knife, cut 4 or 5 leaf-shaped ovals. To make the leaf \"veins,\" use the knife to mark a line down the center of each oval, then mark matching diagonal lines on either side. Be careful not to cut all the way through the pastry. Arrange the pastry leaves on the center of the top crust. You can also add \"berries\" by rolling a few small balls of dough and adding them where the leaves come together at the center. Using a sharp knife, slash top crust in several places to let steam escape.\u003c/p>\n\u003cp>If you want a little shine on your crust, brush with milk or half-and-half. Use a clean pastry brush if you have one (i.e., not the one you use to baste the turkey, which will be all clotted and stuck together with grease). If you're light-handed and very quick, you can dip your fingertips in the cream and brush it like that. You don't need to get into every crimp; just concentrate on the top dome.\u003c/p>\n\u003cp>Place your pie on a baking sheet. Bake for 45 to 60 minutes. Cover the edges with foil or a pie shield if they seem to getting too brown. The filling should be bubbling gently; sticky pie juices may drip out (hence the baking sheet). The apples within should be tender but not cooked to mush, and most importantly, the crust must be brown--distinctly golden on top, toasty around the edges. Having recently been a judge at \u003ca href=\"http://www.cuesa.org/article/congratulations-pie-contest-winners\">CUESA's Pie Contest\u003c/a>, sharing the duties at my table with professional bakers from \u003ca href=\"http://www.kneadpatisserie.com/\">Knead Patisserie\u003c/a> and \u003ca href=\"http://threebabesbakeshop.com/\">3 Babes Bakeshop\u003c/a>, we saw, with disappointment, so many sadly underbaked crusts. If you're using a clear Pyrex pan, look at that bottom crust, and look for gold, not platinum. A pallid crust is a soft, dull crust. Don't be nervous.\u003c/p>\n\u003cp>Take it out, put it on a cooling rack, and walk away. It may seem lovely to launch right into your hot-from-the-oven pie, but like turkey, pie needs time to collect itself. A hot pie is a runny, runny pie. You will cut the first piece and wonder how you went so wrong as all the juices in the pie gush to fill the slice-shaped hole. But, let the pie sit for a couple of hours, til it's on the room temperature side of warm, and your patience will be rewarded: crisp, almost-shattering crust, melting apples, just enough cinnamon-fragrant juice to prove that no gelatinous glop went into the making of your perfect pie.\u003c/p>\n\u003cfigure id=\"attachment_74611\" class=\"wp-caption aligncenter\" style=\"max-width: 1000px\">\u003ca href=\"http://ww2.kqed.org/bayareabites/wp-content/uploads/sites/24/2013/11/apple1000-open.jpg\">\u003cimg class=\"size-full wp-image-74611\" src=\"http://ww2.kqed.org/bayareabites/wp-content/uploads/sites/24/2013/11/apple1000-open.jpg\" alt=\"An interior view of the Classic Apple Pie. Photo: Wendy Goodfriend\" width=\"1000\" height=\"669\">\u003c/a>\u003cfigcaption class=\"wp-caption-text\">An interior view of the Classic Apple Pie. Photo: Wendy Goodfriend\u003c/figcaption>\u003c/figure>\n\u003ch3>Recipe: Classic Apple Pie\u003c/h3>\n\u003cp>Personally, I love an apple pie with raisins in it, but I know this is a minority view. You could add dried cranberries, though, or even a handful of fresh ones, in which case you may want to bump up the sugar a little, since fresh cranberries are quite sour.\u003c/p>\n\u003cp>\u003cem>Makes 1 pie\u003c/em>\u003c/p>\n\u003cp>\u003cstrong>Ingredients:\u003c/strong>\u003c/p>\n\u003cp>\u003cstrong>Crust:\u003c/strong>\u003c/p>\n\u003cul>\n\u003cli>2 1/2 cups all-purpose flour\u003c/li>\n\u003cli>1 1/2 tablespoons sugar\u003c/li>\n\u003cli>1/2 teaspoon salt\u003c/li>\n\u003cli>8 oz (16 tablespoons/2 sticks) butter, preferably a high-fat, European style butter, chilled until very cold\u003c/li>\n\u003cli>6-8 tablespoons ice water\u003c/li>\n\u003cli>2 tsp apple cider vinegar\u003c/li>\n\u003c/ul>\n\u003cp>\u003cstrong>Filling:\u003c/strong>\u003c/p>\n\u003cul>\n\u003cli>3 lbs apples, 8-10 apples, depending on size\u003c/li>\n\u003cli>1/2 cup granulated sugar\u003c/li>\n\u003cli>1 tsp cinnamon\u003c/li>\n\u003cli>1/4 tsp freshly grated nutmeg\u003c/li>\n\u003cli>generous pinch of allspice\u003c/li>\n\u003cli>1/4 tsp salt\u003c/li>\n\u003cli>1 1/2 tablespoons flour\u003c/li>\n\u003c/ul>\n\u003cp>\u003cstrong>For Shine on Crust:\u003c/strong>\u003c/p>\n\u003cul>\n\u003cli>1 tbsp milk or half-or-half, optional\u003c/li>\n\u003c/ul>\n\u003cp>\u003cstrong>Instructions:\u003c/strong>\u003cbr>\n1. To make the pie crust, pour water and vinegar into a glass measuring cup. Add a handful of ice cubes, and set aside.\u003c/p>\n\u003cp>2. Mix flour, sugar, and salt in a large bowl. Using the large holes on a box grater, grate the butter into the flour. Toss lightly to coat butter curls with flour.\u003c/p>\n\u003cp>3. Pour half the water (not the cubes) into flour mixture. Stir gently with a wooden spoon to moisten the flour. Drizzle in remaining water (you may not need all of it) a tablespoon at a time, stirring gently, until you can just squeeze together a handful of dough. Stop adding water while dough is still slightly crumbly.\u003c/p>\n\u003cp>4. Flatten dough into two rounds and seal in a resealable plastic bag. Chill in freezer for 1 hour or in the refrigerator for 2 hours.\u003c/p>\n\u003cp>5. Sprinkle a work surface with flour. Using a lightly floured rolling pin, roll out the first dough round, moving from the center to the edges. After every 2-3 rolls, pick up the dough and rotate it a quarter turn to keep it from sticking to the counter.\u003c/p>\n\u003cp>6. Once dough is rolled evenly into a round about 2″ bigger than your pie plate, lift it up and drape it over the pie plate. Press gently into the pan.\u003c/p>\n\u003cp>7. Fold excess dough inwards to make an even ridge. Wrap loosely in plastic wrap and chill until needed.\u003c/p>\n\u003cp>8. To make the filling, peel, core, and slice the apples. Toss with sugar, spices, and salt. Let sit for 10 minutes.\u003c/p>\n\u003cp>9. Pour accumulated liquid from apples into a small saucepan. Bring to a boil and cook, watching carefully, until liquid has reduced down to the consistency of maple syrup. Remove from heat and pour over apples. Sprinkle on flour and mix thoroughly.\u003c/p>\n\u003cp>10. Preheat oven to 400ºF. Remove second dough round from the fridge and roll out as above. Remove crust-lined pan from the fridge. Scoop filling into pan. Drape top crust over filling. Fold extra dough under to form a ridge around the edge of the pan. Crimp edges together. Brush lightly with milk or half-and-half, if desired. Using a sharp knife, slash top crust in several places to let steam escape.\u003c/p>\n\u003cp>11. Place pie on a baking sheet and bake for 45-60 minutes, covering edges with foil if they brown too fast.\u003c/p>\n\u003cp>[ad floatright]\u003c/p>\n\u003cp>12. When pie is done, remove from oven and let cool on a rack for at least 2 hours before cutting.\u003c/p>\n\n","blocks":[],"excerpt":"It's not Thanksgiving without apple pie. Stephanie Rosenbaum Klassen shares step-by-step instructions for this holiday classic, better than you've ever made before. ","status":"publish","parent":0,"modified":1571963362,"stats":{"hasAudio":false,"hasVideo":false,"hasChartOrMap":false,"iframeSrcs":[],"hasGoogleForm":false,"hasGallery":true,"hasHearkenModule":false,"hasPolis":false,"paragraphCount":45,"wordCount":2570},"headData":{"title":"All-American Dessert Recipe: Classic Apple Pie for Thanksgiving | KQED","description":"It's not Thanksgiving without apple pie. Stephanie Rosenbaum Klassen shares step-by-step instructions for this holiday classic, better than you've ever made before. ","ogTitle":"","ogDescription":"","ogImgId":"","twTitle":"","twDescription":"","twImgId":"","schema":{"@context":"http://schema.org","@type":"Article","headline":"All-American Dessert Recipe: Classic Apple Pie for Thanksgiving","datePublished":"2013-11-27T21:23:28.000Z","dateModified":"2019-10-25T00:29:22.000Z","image":"https://cdn.kqed.org/wp-content/uploads/2020/02/KQED-OG-Image@1x.png"}},"disqusIdentifier":"74069 http://blogs.kqed.org/bayareabites/?p=74069","disqusUrl":"https://ww2.kqed.org/bayareabites/2013/11/27/all-american-dessert-recipe-classic-apple-pie-for-thanksgiving/","disqusTitle":"All-American Dessert Recipe: Classic Apple Pie for Thanksgiving","path":"/bayareabites/74069/all-american-dessert-recipe-classic-apple-pie-for-thanksgiving","audioTrackLength":null,"parsedContent":[{"type":"contentString","content":"\u003cdiv class=\"post-body\">\u003cp>\u003cfigure id=\"attachment_74575\" class=\"wp-caption aligncenter\" style=\"max-width: 1000px\">\u003ca href=\"http://ww2.kqed.org/bayareabites/wp-content/uploads/sites/24/2013/11/apple-final1000a.jpg\">\u003cimg class=\"size-full wp-image-74575\" src=\"http://ww2.kqed.org/bayareabites/wp-content/uploads/sites/24/2013/11/apple-final1000a.jpg\" alt=\"Classic Apple Pie. Photo: Wendy Goodfriend\" width=\"1000\" height=\"669\">\u003c/a>\u003cfigcaption class=\"wp-caption-text\">Classic Apple Pie. Photo: Wendy Goodfriend\u003c/figcaption>\u003c/figure>\n\u003cp>All Photos: \u003ca href=\"http://ww2.kqed.org/bayareabites/author/wendy-goodfriend/\">Wendy Goodfriend\u003c/a>\u003c/p>\n\u003cp>Be gone, Mrs. Smith! A frozen pie may fill your pie-hole any other day of the year. But for Thanksgiving, on this celebratory day of gratitude, as close as we get to a ritual harvest festival, make a real pie. Yes, from scratch. Because, with our step-by-step approach, you can turn apples, sugar, flour, butter, and spices into a better pie that you or your friends have ever tasted, much less made.\u003c/p>\n\u003cp>So, let us begin. The first step, before you pick up a measuring cup, is to clear your mind. Are you stressed out by family demands? Worried about getting it all right? Put all this out of your head. A perfect turkey, a perfect pie, the most splendid gravy in the universe cannot ensure family harmony, just as even a sorry stuffing won't, by its underseasoned blandness or wayward lumpiness, ruin the day. (Not that you should settle for bad stuffing, not with Kim Laidlaw's fine \u003ca href=\"http://ww2.kqed.org/bayareabites/2013/11/23/thanksgiving-recipe-an-elevated-version-of-classic-sage-and-chestnut-stuffing/\">Sage and Chestnut Stuffing\u003c/a> recipe available here on this very blog.)\u003c/p>\n\u003cp>All too often, it seems, we placate our fears by obsessing over the minutia of kitchen work. Brine or dry rub? Breast up, breast down? Deep-fried or smoked? Should there been mac and cheese, and is adding \u003ca href=\"http://brokeassgourmet.com/articles/brown-butter-pumpkin-mac-and-cheese\">brown butter and pumpkin\u003c/a> brilliance or heresy? Here's what I can tell you, courtesy of years of writing Thanksgiving cooking advice: it is easier to worry about turkey, or cranberry sauce, or the flakiness of your pie crust than it is to be in the moment, with no distractions from the clamor of your own emotions, the ringing of your own wishful, overflowing, bruised or fearful heart.\u003c/p>\n\u003cp>Keep it in mind, then, as you seek to control in the kitchen what you may not be able to conquer in the dining room. More to the point, take heed of Fergus Henderson, chef and author of \u003ca href=\"http://www.amazon.com/exec/obidos/ASIN/0062282611/kqedorg-20\">The Complete Nose to Tail\u003c/a>, who advises, “Do not be afraid of cooking, as your ingredients will know, and misbehave.\" So, now that you're happy, and focused, and not leaning all the weight of your perfect-holiday expectations on one frangible crust, let's bake!\u003c/p>\n\u003cp>\u003c/p>\u003c/div>","attributes":{"named":{},"numeric":[]}},{"type":"component","content":"","name":"ad","attributes":{"named":{"label":"fullwidth"},"numeric":["fullwidth"]}},{"type":"contentString","content":"\u003cdiv class=\"post-body\">\u003cp>\u003c/p>\n\u003cp>First, the apples. I like farmers' market apples, where you can be sure of getting this season's fruit, still tangy and snappy-crunchy. You want apples with some complexity and density to them. Fujis and Galas are too sweet and too full of juice--they'll make a wet pie that's closer to applesauce. Granny Smiths are the opposite: too hard, too tart. I like to use a mix of whatever looks good. This pie was made with a combination of Black Twig and Pink Ladies, but Pippins, Jonagolds, Russets, Romes, and/or Braeburns would also work well.\u003c/p>\n\u003cfigure id=\"attachment_74580\" class=\"wp-caption aligncenter\" style=\"max-width: 1000px\">\u003ca href=\"http://ww2.kqed.org/bayareabites/wp-content/uploads/sites/24/2013/11/apple-pie-apples1000.jpg\">\u003cimg class=\"size-full wp-image-74580\" src=\"http://ww2.kqed.org/bayareabites/wp-content/uploads/sites/24/2013/11/apple-pie-apples1000.jpg\" alt=\"Apples: Black Twig and Pink Ladies. Photo: Wendy Goodfriend\" width=\"1000\" height=\"669\">\u003c/a>\u003cfigcaption class=\"wp-caption-text\">Apples: Black Twig and Pink Ladies. Photo: Wendy Goodfriend\u003c/figcaption>\u003c/figure>\n\u003cp>The crust is easiest to handle if you let it chill before rolling, so it's wise to get your dough mixed before you start on the filling. Put your butter--preferably, a high-fat, European-style butter like \u003ca href=\"http://strausfamilycreamery.com/products/item/organic-sweet-butter\">Straus Family Creamery European-Style Organic Butter\u003c/a> or Plugra--in the freezer to chill. You want it very cold and firm but not actually frozen.\u003c/p>\n\u003cp>Measure the full amount of cold water and vinegar into a glass (or see-through plastic) wet measuring cup. Add a handful of ice cubes. Measure your flour by dipping a dry-measure cup into the flour, then sweeping off the excess with the flat side of a knife. Don't pack it, don't shake it! Whisk the sugar and salt into the flour.\u003c/p>\n\u003cp>Using the coarse holes on a box grater, grate in the butter. Grating transforms the butter into thin, near-translucent curls. Once you've lightly but thoroughly mixed them into the flour, carefully breaking up any butter clumps, you're almost done. The texture will be nubbly-perfect, and you'll hardly have touched it.\u003c/p>\n\u003cp>Quickly pour in about half your ice water (not including the cubes). Using a wooden spoon or a large fork, gently and quickly mix the water into the flour. Drizzle in remaining water as needed over any dry patches, about a tablespoon at a time. If you are using high-fat butter, which has a lower water content, you'll probably need more water than if you're using a regular supermarket brand. Stop when a handful of dough will just hold together when squeezed. A little crumbly is fine; it will get moister as it chills.\u003c/p>\n\u003cp>If you have time, it's a good idea to chill your dough before you roll it out. It's not crucial; I've gone straight from mixing to rolling to baking on occasion, and it worked just fine. However, chilling lets the butter firm up again before you roll, and cold butter leads to a flakier crust. Also, cold dough is less likely to turn into a a sticky, recalcitrant dough-child that flings itself face down onto the counter and refuses to come up without tearing once you start rolling.\u003c/p>\n\u003cp>Divide your dough into equal parts. Scoop the dough into two resealable plastic bags. Flatten each into a round, squeezing out any remaining air from the bag, and seal. Chill the dough for an hour in the freezer or 2 hours in the refrigerator. The dough can also be refrigerated for 1-2 days ahead of baking.\u003c/p>\n\u003cp>\u003c/p>\u003c/div>","attributes":{"named":{},"numeric":[]}},{"type":"component","content":"","name":"gallery","attributes":{"named":{"type":"slideshow","link":"file","ids":"74348,74346,74345,74342,74343,74338,74339,74337,74336,74334,74603,74605,74608,74599,74597,74606,74594,74578,74582,74583,74592","label":""},"numeric":[]}},{"type":"contentString","content":"\u003cdiv class=\"post-body\">\u003cp>\u003c/p>\n\u003cp>Lightly sprinkle a large, clean work surface with flour. Rub a light coating of flour on your rolling pin. Take 1 bag of dough out the freezer or fridge, remove its bag, and pat the dough into a roughly symmetrical round. Roll from the middle out to the edges, using the equal amounts of pressure as you go. After every few rolls, pick the dough up from the counter and revolve it a quarter turn. This helps keep the dough from sticking to your work surface. If it seems like it's sticking, loosen with a spatula, then sprinkle a little more flour underneath. Imagine you're rolling sun rays all the way around from the center of the dough.\u003c/p>\n\u003cp>If the dough keeps sticking to the rolling pin and/or counter, try rolling it out between two sheets of plastic wrap, waxed paper, or parchment paper. You can also sprinkle a small amount of flour over the dough, but be stingy.\u003c/p>\n\u003cp>Once you’ve got a nice, more-or-less round of evenly rolled dough, lift it into your pie pan. Press it gently into the pan. You should have about an inch of dough hanging over the edge; trim off any excess. Fold the extra dough inwards (towards the middle of the pie) to make a sort of flattened mesa or bulwark. Wrap the whole crust loosely in plastic wrap or waxed paper and return it to the fridge to chill while you make the filling.\u003c/p>\n\u003cp>Peel, core, and slice your apples. Toss with sugar, salt, and spices. Let stand for about 10 minutes, until there is a puddle of liquid at the bottom of the bowl. Pour the liquid into a small pan and boil, watching carefully, until it has cooked down to the consistency of maple syrup. Pour back into the bowl of apples. Sprinkle with flour and mix thoroughly.\u003c/p>\n\u003cp>Preheat the oven to 400ºF. Take the second bag out of the fridge, remove and roll like you did the first crust. When your large round of top crust is ready, take the bottom-crust-lined pie pan out of the fridge. Scoop your filling into the bottom crust. Drape the top crust over the filling, and trim off any extra so you have about 1/2 inch hanging over the edges. Tuck the excess crust under, pressing to join it to the bottom crust, making a thicker mesa/ridge this time.\u003c/p>\n\u003cp>\u003c/p>\u003c/div>","attributes":{"named":{},"numeric":[]}},{"type":"component","content":"","name":"gallery","attributes":{"named":{"type":"slideshow","link":"file","ids":"74598,74607,74609,74587,74586,74602","label":""},"numeric":[]}},{"type":"contentString","content":"\u003cdiv class=\"post-body\">\u003cp>\u003c/p>\n\u003cp>You're almost done, but not yet. Crimping--making a decorative edge around the crust--is the artistic part of pie-shaping, and there are many, many ways to do this. I like to gently pinch the edge between the thumb and forefinger of each hand. You move up with the left hand, down with the right, going neatly all the way around the pie until the whole thing has been crimped. The main thing is do something, even if it’s just a plain or rolled ridge of dough along the edge. A good crimp will both keep any excess filling from spilling out and to make the pie look nice and finished. Too many pies just sort of peter out at the edges, with no definition--no, no, no. Define your boundaries, even if you're just flattening the two layers of dough together with fork tines.\u003c/p>\n\u003cp>\u003c/p>\u003c/div>","attributes":{"named":{},"numeric":[]}},{"type":"component","content":"","name":"gallery","attributes":{"named":{"type":"slideshow","link":"file","ids":"74589,74588,74610,74601,74595,74613","label":""},"numeric":[]}},{"type":"contentString","content":"\u003cdiv class=\"post-body\">\u003cp>\u003c/p>\n\u003cp>To make the pastry leaves shown here, gather together your extra pastry scraps and roll out. Using a small, sharp knife, cut 4 or 5 leaf-shaped ovals. To make the leaf \"veins,\" use the knife to mark a line down the center of each oval, then mark matching diagonal lines on either side. Be careful not to cut all the way through the pastry. Arrange the pastry leaves on the center of the top crust. You can also add \"berries\" by rolling a few small balls of dough and adding them where the leaves come together at the center. Using a sharp knife, slash top crust in several places to let steam escape.\u003c/p>\n\u003cp>If you want a little shine on your crust, brush with milk or half-and-half. Use a clean pastry brush if you have one (i.e., not the one you use to baste the turkey, which will be all clotted and stuck together with grease). If you're light-handed and very quick, you can dip your fingertips in the cream and brush it like that. You don't need to get into every crimp; just concentrate on the top dome.\u003c/p>\n\u003cp>Place your pie on a baking sheet. Bake for 45 to 60 minutes. Cover the edges with foil or a pie shield if they seem to getting too brown. The filling should be bubbling gently; sticky pie juices may drip out (hence the baking sheet). The apples within should be tender but not cooked to mush, and most importantly, the crust must be brown--distinctly golden on top, toasty around the edges. Having recently been a judge at \u003ca href=\"http://www.cuesa.org/article/congratulations-pie-contest-winners\">CUESA's Pie Contest\u003c/a>, sharing the duties at my table with professional bakers from \u003ca href=\"http://www.kneadpatisserie.com/\">Knead Patisserie\u003c/a> and \u003ca href=\"http://threebabesbakeshop.com/\">3 Babes Bakeshop\u003c/a>, we saw, with disappointment, so many sadly underbaked crusts. If you're using a clear Pyrex pan, look at that bottom crust, and look for gold, not platinum. A pallid crust is a soft, dull crust. Don't be nervous.\u003c/p>\n\u003cp>Take it out, put it on a cooling rack, and walk away. It may seem lovely to launch right into your hot-from-the-oven pie, but like turkey, pie needs time to collect itself. A hot pie is a runny, runny pie. You will cut the first piece and wonder how you went so wrong as all the juices in the pie gush to fill the slice-shaped hole. But, let the pie sit for a couple of hours, til it's on the room temperature side of warm, and your patience will be rewarded: crisp, almost-shattering crust, melting apples, just enough cinnamon-fragrant juice to prove that no gelatinous glop went into the making of your perfect pie.\u003c/p>\n\u003cfigure id=\"attachment_74611\" class=\"wp-caption aligncenter\" style=\"max-width: 1000px\">\u003ca href=\"http://ww2.kqed.org/bayareabites/wp-content/uploads/sites/24/2013/11/apple1000-open.jpg\">\u003cimg class=\"size-full wp-image-74611\" src=\"http://ww2.kqed.org/bayareabites/wp-content/uploads/sites/24/2013/11/apple1000-open.jpg\" alt=\"An interior view of the Classic Apple Pie. Photo: Wendy Goodfriend\" width=\"1000\" height=\"669\">\u003c/a>\u003cfigcaption class=\"wp-caption-text\">An interior view of the Classic Apple Pie. Photo: Wendy Goodfriend\u003c/figcaption>\u003c/figure>\n\u003ch3>Recipe: Classic Apple Pie\u003c/h3>\n\u003cp>Personally, I love an apple pie with raisins in it, but I know this is a minority view. You could add dried cranberries, though, or even a handful of fresh ones, in which case you may want to bump up the sugar a little, since fresh cranberries are quite sour.\u003c/p>\n\u003cp>\u003cem>Makes 1 pie\u003c/em>\u003c/p>\n\u003cp>\u003cstrong>Ingredients:\u003c/strong>\u003c/p>\n\u003cp>\u003cstrong>Crust:\u003c/strong>\u003c/p>\n\u003cul>\n\u003cli>2 1/2 cups all-purpose flour\u003c/li>\n\u003cli>1 1/2 tablespoons sugar\u003c/li>\n\u003cli>1/2 teaspoon salt\u003c/li>\n\u003cli>8 oz (16 tablespoons/2 sticks) butter, preferably a high-fat, European style butter, chilled until very cold\u003c/li>\n\u003cli>6-8 tablespoons ice water\u003c/li>\n\u003cli>2 tsp apple cider vinegar\u003c/li>\n\u003c/ul>\n\u003cp>\u003cstrong>Filling:\u003c/strong>\u003c/p>\n\u003cul>\n\u003cli>3 lbs apples, 8-10 apples, depending on size\u003c/li>\n\u003cli>1/2 cup granulated sugar\u003c/li>\n\u003cli>1 tsp cinnamon\u003c/li>\n\u003cli>1/4 tsp freshly grated nutmeg\u003c/li>\n\u003cli>generous pinch of allspice\u003c/li>\n\u003cli>1/4 tsp salt\u003c/li>\n\u003cli>1 1/2 tablespoons flour\u003c/li>\n\u003c/ul>\n\u003cp>\u003cstrong>For Shine on Crust:\u003c/strong>\u003c/p>\n\u003cul>\n\u003cli>1 tbsp milk or half-or-half, optional\u003c/li>\n\u003c/ul>\n\u003cp>\u003cstrong>Instructions:\u003c/strong>\u003cbr>\n1. To make the pie crust, pour water and vinegar into a glass measuring cup. Add a handful of ice cubes, and set aside.\u003c/p>\n\u003cp>2. Mix flour, sugar, and salt in a large bowl. Using the large holes on a box grater, grate the butter into the flour. Toss lightly to coat butter curls with flour.\u003c/p>\n\u003cp>3. Pour half the water (not the cubes) into flour mixture. Stir gently with a wooden spoon to moisten the flour. Drizzle in remaining water (you may not need all of it) a tablespoon at a time, stirring gently, until you can just squeeze together a handful of dough. Stop adding water while dough is still slightly crumbly.\u003c/p>\n\u003cp>4. Flatten dough into two rounds and seal in a resealable plastic bag. Chill in freezer for 1 hour or in the refrigerator for 2 hours.\u003c/p>\n\u003cp>5. Sprinkle a work surface with flour. Using a lightly floured rolling pin, roll out the first dough round, moving from the center to the edges. After every 2-3 rolls, pick up the dough and rotate it a quarter turn to keep it from sticking to the counter.\u003c/p>\n\u003cp>6. Once dough is rolled evenly into a round about 2″ bigger than your pie plate, lift it up and drape it over the pie plate. Press gently into the pan.\u003c/p>\n\u003cp>7. Fold excess dough inwards to make an even ridge. Wrap loosely in plastic wrap and chill until needed.\u003c/p>\n\u003cp>8. To make the filling, peel, core, and slice the apples. Toss with sugar, spices, and salt. Let sit for 10 minutes.\u003c/p>\n\u003cp>9. Pour accumulated liquid from apples into a small saucepan. Bring to a boil and cook, watching carefully, until liquid has reduced down to the consistency of maple syrup. Remove from heat and pour over apples. Sprinkle on flour and mix thoroughly.\u003c/p>\n\u003cp>10. Preheat oven to 400ºF. Remove second dough round from the fridge and roll out as above. Remove crust-lined pan from the fridge. Scoop filling into pan. Drape top crust over filling. Fold extra dough under to form a ridge around the edge of the pan. Crimp edges together. Brush lightly with milk or half-and-half, if desired. Using a sharp knife, slash top crust in several places to let steam escape.\u003c/p>\n\u003cp>11. Place pie on a baking sheet and bake for 45-60 minutes, covering edges with foil if they brown too fast.\u003c/p>\n\u003cp>\u003c/p>\u003c/div>","attributes":{"named":{},"numeric":[]}},{"type":"component","content":"","name":"ad","attributes":{"named":{"label":"floatright"},"numeric":["floatright"]}},{"type":"contentString","content":"\u003cdiv class=\"post-body\">\u003cp>\u003c/p>\n\u003cp>12. When pie is done, remove from oven and let cool on a rack for at least 2 hours before cutting.\u003c/p>\n\n\u003c/div>\u003c/p>","attributes":{"named":{},"numeric":[]}}],"link":"/bayareabites/74069/all-american-dessert-recipe-classic-apple-pie-for-thanksgiving","authors":["5038","5014"],"series":["bayareabites_15012"],"categories":["bayareabites_1516","bayareabites_752","bayareabites_2695","bayareabites_1653","bayareabites_1874","bayareabites_95","bayareabites_12550","bayareabites_1763"],"tags":["bayareabites_8405","bayareabites_469","bayareabites_228","bayareabites_2594","bayareabites_530","bayareabites_2962"],"featImg":"bayareabites_74614","label":"bayareabites_15012"},"bayareabites_26836":{"type":"posts","id":"bayareabites_26836","meta":{"index":"posts_1591205157","site":"bayareabites","id":"26836","score":null,"sort":[1304262002000]},"guestAuthors":[],"slug":"strawberry-rhubarb-tarts","title":"Strawberry Rhubarb Tarts ","publishDate":1304262002,"format":"aside","headTitle":"Bay Area Bites | KQED Food","labelTerm":{"site":"bayareabites"},"content":"\u003cp>\u003cstrong>Happy May Day!\u003c/strong> My middle sister spent her college years at a small Seven Sisters school known for both its academic rigor and its fondness for Anglophile-ish, slightly archaic traditions (\u003cem>lots\u003c/em> of teas there). On May 1st, the president of the college would ride into campus on a white horse, and students wore flower crowns and white dresses and sang hymns to the May before having strawberries and cream for breakfast.\u003c/p>\n\u003cp>White horses, sadly, do not have full representation in my part of Temescal. But the strawberries from just south of here are finally starting to get sweet (all that rain delayed the season somewhat). If you look, you can probably find some rhubarb, too. Any new kind of fruit is very welcome right now, during this season when the weather feels like spring but winter's kales and citrus are still hanging on.\u003c/p>\n\u003cp>\u003cimg class=\"alignnone size-full wp-image-27117\" title=\"rhubarb\" src=\"http://ww2.kqed.org/bayareabites/wp-content/uploads/sites/24/2011/05/rhubarb500.jpg\" alt=\"rhubarb\" width=\"500\" height=\"375\">\u003cbr>\n\u003cem>Rhubarb\u003c/em>\u003c/p>\n\u003cp>Remember that rainy scene in the beginning of \u003ca href=\"http://www.amazon.com/exec/obidos/ASIN/0060852569/kqedorg-20\">Animal Vegetable Miracle\u003c/a>, when author Barbara Kingsolver, in the first week of her locavore experiment, is despondent at the thought of returning home to her banana-less household with no fruit? Drenched by a spring downpour, she splashes through the farmers' market and is rewarded at last with a beautiful bundle of red-stemmed rhubarb.\u003c/p>\n\u003cp>Unless you're a gardener and an old-fashioned pie-lover, you've probably never seen rhubarb growing, and you might not recognize it even if you did. A perennial plant, it forms a low, leafy mound, with wide spinachy leaves the size of a hat. Look under the leaves and you'll see long, reddish stalks coming up from the ground. Grip one firmly and pull it out. Trim off the mildly toxic leaf, and there you have it, a sour, sour stalk of what used to be called pieplant.\u003c/p>\n\u003cp>[ad fullwidth]\u003c/p>\n\u003cp>Still, it doesn't take much sweetening to bring out its lovely tangy fruitiness, one that matches incredibly well with both strawberries and orange.\u003c/p>\n\u003cp>Lots of recipes tell you to put the rhubarb through all sorts of elaborate machinations before putting it in the pie. What a bunch of, well, rhubarb! Just cut it up, toss it with sugar and a little cornstarch, and you're on your way to pie heaven. The only caveat is that rhubarb contains a lot of water, which the sugar will pull out, so you want to make your filling just before you're ready to bake your pie. Otherwise, you'll end up with a lot of small pieces of fruit floating in a big puddle of syrupy liquid.\u003c/p>\n\u003cp>Don't go overboard with the cornstarch; being juicy is one of this pie's homemade charms. Vanilla ice cream is the perfect accompaniment.\u003c/p>\n\u003cp>Because this is a very juicy pie, it's good to use a lattice crust to let the steam out. Yes, making a proper lattice does take some concentration and a little finger-dexterity, but I find the few minutes' effort to be well-rewarded by the amazement this fancy-pants basket weave inspires. If, for some smart reason, your utensil drawer contains a little crinkled-edged pastry or ravioli wheel, now's the time to use it. It will make your pie crust look incredibly 1950s-cute.\u003c/p>\n\u003cp>So, this is how you do it: Lay your longest strip of dough across the middle of the pie. Then lay another long strip crosswise across the middle. Lay another strip down next the first. Then lay down another crosswise strip, only weave it \u003cem>under\u003c/em> the first strip and \u003cem>over\u003c/em> the second one. Keep doing this, alternating vertical and horizontal strips, lifting the strips as necessary to get that cute under-and-over pattern. If your strip breaks, just jam the pieces back together or hide the broken parts under another strip.\u003c/p>\n\u003cp>[ad floatright]\u003c/p>\n\u003cp>You can make this either as one pie or six three- to four-inch tarts. In order to get the right crust-to-fruit ratio, I would use tart pans or ramekins that are at least two inches deep.\u003c/p>\n\u003cfieldset class=\"hrecipe\">\n\u003clegend class=\"fn\">Recipe: Strawberry Rhubarb Tarts\u003c/legend>\n\u003cp class=\"summary\">\u003cstrong>Summary:\u003c/strong>\u003cem>These pretty pink tarts are a sweet, tangy taste of spring. Because the filling is very moist, it's best served the day it's made, to avoid a soggy bottom crust. You can also make this as a single strawberry rhubarb pie.\u003c/em>\u003c/p>\n\u003cp>By \u003cspan class=\"author\">Stephanie Rosenbaum\u003c/span>\u003c/p>\n\u003cp>\u003cimg class=\"alignnone size-full wp-image-27111 photo\" title=\"Strawberry Rhubarb Tarts\" src=\"http://ww2.kqed.org/bayareabites/wp-content/uploads/sites/24/2011/05/strawberry-rhubarb-tarts500.jpg\" alt=\"Strawberry Rhubarb Tarts\" width=\"500\" height=\"375\">\u003c/p>\n\u003cp>\u003cstrong>Prep time:\u003c/strong> \u003cspan class=\"preptime\">2 hours, plus 1 hour chilling time for dough\u003cspan class=\"value-title\" title=\"PT3H\"> \u003c/span>\u003c/span>\u003cbr>\n\u003cstrong>Cook time:\u003c/strong> \u003cspan class=\"cooktime\">45 min\u003cspan class=\"value-title\" title=\"PT45M\"> \u003c/span>\u003c/span>\u003cbr>\n\u003cstrong>Total time:\u003c/strong> \u003cspan class=\"duration\">3 hours 45 min\u003cspan class=\"value-title\" title=\"PT3H45M\"> \u003c/span>\u003c/span>\u003cbr>\n\u003cstrong>Yield:\u003c/strong> \u003cspan class=\"yield\">6 tarts or 1 pie\u003c/span>\u003c/p>\n\u003cdiv class=\"ingredients\">\n\u003ch4>Ingredients\u003c/h4>\n\u003cul class=\"ingredients\"> \u003cstrong>Crust:\u003c/strong>\n\u003cli class=\"ingredient\">2 1/2 cups flour\u003c/li>\n\u003cli class=\"ingredient\">1/2 tsp salt\u003c/li>\n\u003cli class=\"ingredient\">1 tbsp sugar\u003c/li>\n\u003cli class=\"ingredient\">2 sticks (1/2 lb) butter, very cold\u003c/li>\n\u003cli class=\"ingredient\">1 tbsp cider vinegar\u003c/li>\n\u003cli class=\"ingredient\">6-8 tbsp ice water\u003c/li>\n\u003cp>\u003cstrong>Filling:\u003c/strong>\u003c/p>\n\u003cli class=\"ingredient\">5- 6 stalks rhubarb, about 1 1/2 lbs, trimmed and chopped into 1/2-inch pieces (should make about 4 cups)\u003c/li>\n\u003cli class=\"ingredient\">2/3 cup sugar\u003c/li>\n\u003cli class=\"ingredient\">4 tsp cornstarch\u003c/li>\n\u003cli class=\"ingredient\">1 tsp finely grated orange rind\u003c/li>\n\u003cli class=\"ingredient\">1 box organic strawberries, hulled and sliced\u003c/li>\n\u003c/ul>\n\u003c/div>\n\u003cdiv class=\"instructions\">\n\u003ch4>Instructions\u003c/h4>\n\u003col class=\"instructions\">\n\u003cli>In a large bowl, mix dry ingredients. Cut butter into cubes, and toss in dry ingredients until butter is completely coated. Using a pastry blender or your fingertips, cut butter into flour until it is the size of biggish peas. Leave it chunkier than you think you should.\u003c/li>\n\u003cli>Mix cider vinegar into water. Add 5 tbsp of water mixture all at once, stirring and tossing with your fingertips. Gently scooping and mixing in any dry patches as you go, add just enough more water so that you can squeeze a handful of dough together into a rough ball. Flatten into two disks, wrap in plastic (or pop into 2 large resealable plastic bags) and chill for at least an hour.\u003c/li>\n\u003cli>Then, roll out one round on a well-floured surface. For tarts, cut circles of dough just slightly larger than each tart pan. Drape each dough circle over a tart pan and gently press it in so pan is lined evenly. Put tart pans back in fridge to chill while you make your filling.\u003c/li>\n\u003cli>Preheat oven to 375F. Mix sugar and cornstarch together, and pour over rhubarb, strawberries, and orange rind. Toss it a few times. Set aside while you roll out the top crust.\u003c/li>\n\u003cli>Roll out your second dough round. Cut your top crust into strips for the lattice.\u003c/li>\n\u003cli>Take the chilled crusts out of the fridge. Scoop filling generously into each pan, adding in the sugary goo from the bottom of the bowl. (If it seems like you have a lot of liquid left in the bowl, pour it off before you scoop in any leftover goo.) Weave your lattice on top of each tart. Sprinkle with sugar and place on a big foil-lined baking sheet in the oven. (Why a baking sheet? Because some juice going to bubble over and burn, and a baking sheet is easier to clean than the bottom of the oven.)\u003c/li>\n\u003cli> Bake for 40-45 minutes, until crust is golden and filling is juicy and bubbling. Don't worry if filling seems a little soupy at first; it will thicken as it cools.\u003c/li>\n\u003c/ol>\n\u003c/div>\n\u003c/fieldset>\n\n","blocks":[],"excerpt":"It's May Day! Celebrate spring with a recipe for rosy pink strawberry-rhubarb tarts. ","status":"publish","parent":0,"modified":1304617273,"stats":{"hasAudio":false,"hasVideo":false,"hasChartOrMap":false,"iframeSrcs":[],"hasGoogleForm":false,"hasGallery":false,"hasHearkenModule":false,"hasPolis":false,"paragraphCount":17,"wordCount":1177},"headData":{"title":"Strawberry Rhubarb Tarts | KQED","description":"It's May Day! Celebrate spring with a recipe for rosy pink strawberry-rhubarb tarts. ","ogTitle":"","ogDescription":"","ogImgId":"","twTitle":"","twDescription":"","twImgId":"","schema":{"@context":"http://schema.org","@type":"Article","headline":"Strawberry Rhubarb Tarts ","datePublished":"2011-05-01T15:00:02.000Z","dateModified":"2011-05-05T17:41:13.000Z","image":"https://cdn.kqed.org/wp-content/uploads/2020/02/KQED-OG-Image@1x.png"}},"disqusIdentifier":"26836 http://blogs.kqed.org/bayareabites/?p=26836","disqusUrl":"https://ww2.kqed.org/bayareabites/2011/05/01/strawberry-rhubarb-tarts/","disqusTitle":"Strawberry Rhubarb Tarts ","path":"/bayareabites/26836/strawberry-rhubarb-tarts","audioTrackLength":null,"parsedContent":[{"type":"contentString","content":"\u003cdiv class=\"post-body\">\u003cp>\u003cp>\u003cstrong>Happy May Day!\u003c/strong> My middle sister spent her college years at a small Seven Sisters school known for both its academic rigor and its fondness for Anglophile-ish, slightly archaic traditions (\u003cem>lots\u003c/em> of teas there). On May 1st, the president of the college would ride into campus on a white horse, and students wore flower crowns and white dresses and sang hymns to the May before having strawberries and cream for breakfast.\u003c/p>\n\u003cp>White horses, sadly, do not have full representation in my part of Temescal. But the strawberries from just south of here are finally starting to get sweet (all that rain delayed the season somewhat). If you look, you can probably find some rhubarb, too. Any new kind of fruit is very welcome right now, during this season when the weather feels like spring but winter's kales and citrus are still hanging on.\u003c/p>\n\u003cp>\u003cimg class=\"alignnone size-full wp-image-27117\" title=\"rhubarb\" src=\"http://ww2.kqed.org/bayareabites/wp-content/uploads/sites/24/2011/05/rhubarb500.jpg\" alt=\"rhubarb\" width=\"500\" height=\"375\">\u003cbr>\n\u003cem>Rhubarb\u003c/em>\u003c/p>\n\u003cp>Remember that rainy scene in the beginning of \u003ca href=\"http://www.amazon.com/exec/obidos/ASIN/0060852569/kqedorg-20\">Animal Vegetable Miracle\u003c/a>, when author Barbara Kingsolver, in the first week of her locavore experiment, is despondent at the thought of returning home to her banana-less household with no fruit? Drenched by a spring downpour, she splashes through the farmers' market and is rewarded at last with a beautiful bundle of red-stemmed rhubarb.\u003c/p>\n\u003cp>Unless you're a gardener and an old-fashioned pie-lover, you've probably never seen rhubarb growing, and you might not recognize it even if you did. A perennial plant, it forms a low, leafy mound, with wide spinachy leaves the size of a hat. Look under the leaves and you'll see long, reddish stalks coming up from the ground. Grip one firmly and pull it out. Trim off the mildly toxic leaf, and there you have it, a sour, sour stalk of what used to be called pieplant.\u003c/p>\n\u003cp>\u003c/p>\u003c/div>","attributes":{"named":{},"numeric":[]}},{"type":"component","content":"","name":"ad","attributes":{"named":{"label":"fullwidth"},"numeric":["fullwidth"]}},{"type":"contentString","content":"\u003cdiv class=\"post-body\">\u003cp>\u003c/p>\n\u003cp>Still, it doesn't take much sweetening to bring out its lovely tangy fruitiness, one that matches incredibly well with both strawberries and orange.\u003c/p>\n\u003cp>Lots of recipes tell you to put the rhubarb through all sorts of elaborate machinations before putting it in the pie. What a bunch of, well, rhubarb! Just cut it up, toss it with sugar and a little cornstarch, and you're on your way to pie heaven. The only caveat is that rhubarb contains a lot of water, which the sugar will pull out, so you want to make your filling just before you're ready to bake your pie. Otherwise, you'll end up with a lot of small pieces of fruit floating in a big puddle of syrupy liquid.\u003c/p>\n\u003cp>Don't go overboard with the cornstarch; being juicy is one of this pie's homemade charms. Vanilla ice cream is the perfect accompaniment.\u003c/p>\n\u003cp>Because this is a very juicy pie, it's good to use a lattice crust to let the steam out. Yes, making a proper lattice does take some concentration and a little finger-dexterity, but I find the few minutes' effort to be well-rewarded by the amazement this fancy-pants basket weave inspires. If, for some smart reason, your utensil drawer contains a little crinkled-edged pastry or ravioli wheel, now's the time to use it. It will make your pie crust look incredibly 1950s-cute.\u003c/p>\n\u003cp>So, this is how you do it: Lay your longest strip of dough across the middle of the pie. Then lay another long strip crosswise across the middle. Lay another strip down next the first. Then lay down another crosswise strip, only weave it \u003cem>under\u003c/em> the first strip and \u003cem>over\u003c/em> the second one. Keep doing this, alternating vertical and horizontal strips, lifting the strips as necessary to get that cute under-and-over pattern. If your strip breaks, just jam the pieces back together or hide the broken parts under another strip.\u003c/p>\n\u003cp>\u003c/p>\u003c/div>","attributes":{"named":{},"numeric":[]}},{"type":"component","content":"","name":"ad","attributes":{"named":{"label":"floatright"},"numeric":["floatright"]}},{"type":"contentString","content":"\u003cdiv class=\"post-body\">\u003cp>\u003c/p>\n\u003cp>You can make this either as one pie or six three- to four-inch tarts. In order to get the right crust-to-fruit ratio, I would use tart pans or ramekins that are at least two inches deep.\u003c/p>\n\u003cfieldset class=\"hrecipe\">\n\u003clegend class=\"fn\">Recipe: Strawberry Rhubarb Tarts\u003c/legend>\n\u003cp class=\"summary\">\u003cstrong>Summary:\u003c/strong>\u003cem>These pretty pink tarts are a sweet, tangy taste of spring. Because the filling is very moist, it's best served the day it's made, to avoid a soggy bottom crust. You can also make this as a single strawberry rhubarb pie.\u003c/em>\u003c/p>\n\u003cp>By \u003cspan class=\"author\">Stephanie Rosenbaum\u003c/span>\u003c/p>\n\u003cp>\u003cimg class=\"alignnone size-full wp-image-27111 photo\" title=\"Strawberry Rhubarb Tarts\" src=\"http://ww2.kqed.org/bayareabites/wp-content/uploads/sites/24/2011/05/strawberry-rhubarb-tarts500.jpg\" alt=\"Strawberry Rhubarb Tarts\" width=\"500\" height=\"375\">\u003c/p>\n\u003cp>\u003cstrong>Prep time:\u003c/strong> \u003cspan class=\"preptime\">2 hours, plus 1 hour chilling time for dough\u003cspan class=\"value-title\" title=\"PT3H\"> \u003c/span>\u003c/span>\u003cbr>\n\u003cstrong>Cook time:\u003c/strong> \u003cspan class=\"cooktime\">45 min\u003cspan class=\"value-title\" title=\"PT45M\"> \u003c/span>\u003c/span>\u003cbr>\n\u003cstrong>Total time:\u003c/strong> \u003cspan class=\"duration\">3 hours 45 min\u003cspan class=\"value-title\" title=\"PT3H45M\"> \u003c/span>\u003c/span>\u003cbr>\n\u003cstrong>Yield:\u003c/strong> \u003cspan class=\"yield\">6 tarts or 1 pie\u003c/span>\u003c/p>\n\u003cdiv class=\"ingredients\">\n\u003ch4>Ingredients\u003c/h4>\n\u003cul class=\"ingredients\"> \u003cstrong>Crust:\u003c/strong>\n\u003cli class=\"ingredient\">2 1/2 cups flour\u003c/li>\n\u003cli class=\"ingredient\">1/2 tsp salt\u003c/li>\n\u003cli class=\"ingredient\">1 tbsp sugar\u003c/li>\n\u003cli class=\"ingredient\">2 sticks (1/2 lb) butter, very cold\u003c/li>\n\u003cli class=\"ingredient\">1 tbsp cider vinegar\u003c/li>\n\u003cli class=\"ingredient\">6-8 tbsp ice water\u003c/li>\n\u003cp>\u003cstrong>Filling:\u003c/strong>\u003c/p>\n\u003cli class=\"ingredient\">5- 6 stalks rhubarb, about 1 1/2 lbs, trimmed and chopped into 1/2-inch pieces (should make about 4 cups)\u003c/li>\n\u003cli class=\"ingredient\">2/3 cup sugar\u003c/li>\n\u003cli class=\"ingredient\">4 tsp cornstarch\u003c/li>\n\u003cli class=\"ingredient\">1 tsp finely grated orange rind\u003c/li>\n\u003cli class=\"ingredient\">1 box organic strawberries, hulled and sliced\u003c/li>\n\u003c/ul>\n\u003c/div>\n\u003cdiv class=\"instructions\">\n\u003ch4>Instructions\u003c/h4>\n\u003col class=\"instructions\">\n\u003cli>In a large bowl, mix dry ingredients. Cut butter into cubes, and toss in dry ingredients until butter is completely coated. Using a pastry blender or your fingertips, cut butter into flour until it is the size of biggish peas. Leave it chunkier than you think you should.\u003c/li>\n\u003cli>Mix cider vinegar into water. Add 5 tbsp of water mixture all at once, stirring and tossing with your fingertips. Gently scooping and mixing in any dry patches as you go, add just enough more water so that you can squeeze a handful of dough together into a rough ball. Flatten into two disks, wrap in plastic (or pop into 2 large resealable plastic bags) and chill for at least an hour.\u003c/li>\n\u003cli>Then, roll out one round on a well-floured surface. For tarts, cut circles of dough just slightly larger than each tart pan. Drape each dough circle over a tart pan and gently press it in so pan is lined evenly. Put tart pans back in fridge to chill while you make your filling.\u003c/li>\n\u003cli>Preheat oven to 375F. Mix sugar and cornstarch together, and pour over rhubarb, strawberries, and orange rind. Toss it a few times. Set aside while you roll out the top crust.\u003c/li>\n\u003cli>Roll out your second dough round. Cut your top crust into strips for the lattice.\u003c/li>\n\u003cli>Take the chilled crusts out of the fridge. Scoop filling generously into each pan, adding in the sugary goo from the bottom of the bowl. (If it seems like you have a lot of liquid left in the bowl, pour it off before you scoop in any leftover goo.) Weave your lattice on top of each tart. Sprinkle with sugar and place on a big foil-lined baking sheet in the oven. (Why a baking sheet? Because some juice going to bubble over and burn, and a baking sheet is easier to clean than the bottom of the oven.)\u003c/li>\n\u003cli> Bake for 40-45 minutes, until crust is golden and filling is juicy and bubbling. Don't worry if filling seems a little soupy at first; it will thicken as it cools.\u003c/li>\n\u003c/ol>\n\u003c/div>\n\u003c/fieldset>\n\n\u003c/div>\u003c/p>","attributes":{"named":{},"numeric":[]}}],"link":"/bayareabites/26836/strawberry-rhubarb-tarts","authors":["5038"],"categories":["bayareabites_1516","bayareabites_752","bayareabites_2695","bayareabites_1763","bayareabites_12"],"tags":["bayareabites_9232","bayareabites_228","bayareabites_2594","bayareabites_9239","bayareabites_2139","bayareabites_200","bayareabites_1012","bayareabites_3768","bayareabites_1284"],"label":"bayareabites"},"bayareabites_20550":{"type":"posts","id":"bayareabites_20550","meta":{"index":"posts_1591205157","site":"bayareabites","id":"20550","score":null,"sort":[1294513424000]},"guestAuthors":[],"slug":"black-tart","title":"Black Tart","publishDate":1294513424,"format":"aside","headTitle":"Bay Area Bites | KQED Food","labelTerm":{"site":"bayareabites"},"content":"\u003cp>\u003cimg src=\"http://ww2.kqed.org/bayareabites/wp-content/uploads/sites/24/2011/01/black-tart500.jpg\" alt=\"Black Tart\" title=\"Black Tart\" width=\"500\" height=\"375\" class=\"alignnone size-full wp-image-21038\">\u003c/p>\n\u003cp>Oh, you modern Americans, what is wrong with you? Why do you recoil, as if from a snake, from the very muttered hint of mincemeat? \u003ca href=\"http://www.npr.org/2011/01/02/132477830/cupcakes-are-dead-long-live-the-pie\">Pie may be sneaking back into the spotlight\u003c/a>, weary of being upstaged by all those pink cupcakes beehived with frosting, but still, you could look far and wide here and find nary a scrap of mince on our menus. \u003c/p>\n\u003cp>Once, mincemeat was our heritage, our honor guard, the leading light of American pie fillings. It was exalted at holiday time but consumed with gusto year-round, at Automats and church suppers, carried on Formica trays through cafeterias and paraded on gold-rimmed china in the dining rooms of downtown hotels. \u003c/p>\n\u003cp>The history was, of course, a British one, but the legacy of the dense, sweet-spiced, citrusy-raisiny-almondy filling stretches back at least a handful of centuries, when the line between sweet and savory was a much more porous one. Originally, mincemeat was made with both beef and beef fat, added to a rich mixture of dried fruits, spices, candied citrus peels, and almonds, preserved with a hefty dose of spirits. Over the years, the meat receded, although the fat (typically suet, the particularly pure fat taken from around the kidneys) remained, to give an unmistakable richness to the mixture. \u003c/p>\n\u003cp>You may think you'd hate it—\u003cem>prunes? suet?\u003c/em>—but not so. This holiday season I passed around many of these tarts, filled with Delia Smith's unbeatable recipe for \u003ca href=\"http://www.deliaonline.com/recipes/cuisine/european/english/christmas-easy-home-made-christmas-mincemeat.html\">Homemade Christmas Mincemeat\u003c/a>. Served up small and warm, in the late, lowering afternoon with a cup of steaming tea or after dinner with a glass of port, naught but lard-and-butter crust crumbs came back on the plate. (A word of advice, though: halve Delia's recipe, and you'll still have more than enough mincemeat to feed everyone you know.)\u003c/p>\n\u003cp>[ad fullwidth]\u003c/p>\n\u003cp>But now that the indulgence of the holidays has passed, mincemeat might be a tougher sell. Enter \u003cstrong>Black Tart,\u003c/strong> a lovely winter dessert based on a 17th-century recipe for \"black tart stuff,\" which the eminent British food writer Elizabeth David praises in \u003ca href=\"http://www.amazon.com/exec/obidos/ASIN/1599218607/kqedorg-20\">An Omelette and a Glass of Wine\u003c/a> as \"rich and dark without the cloying and heavy qualities of mincemeat.\" She also recommends it as having \"a certain originality which provides a small surprise at the end of the meal.\"\u003c/p>\n\u003cp>Leafing through cookbooks heaped from shelves to floor, I can trace the roots of my own Black Tart to several recipes: David's 1969 recipe, itself a modern interpretation of Robert May's recipe from \u003cstrong>The Accomplisht Cook \u003c/strong>(1660); the Harvest Tart from the \u003ca href=\"http://www.amazon.com/exec/obidos/ASIN/0761145974/kqedorg-20\">The Silver Palate Cookbook\u003c/a> (1982); and the Winter Fruit Tart from the \u003ca href=\"http://www.amazon.com/exec/obidos/ASIN/1580082602/kqedorg-20\">Bay Wolf Restaurant Cookbook\u003c/a> (2001). \u003c/p>\n\u003cp>Mostly, though, it came from messing around with the memories of all these things in a friend's kitchen on a raw, gray afternoon, when we both wanted something sweet to eat without having to leave the house. \u003c/p>\n\u003cp>What was on hand in the winter pantry? Dried fruit and nuts, candied fruit peel left over from holiday baking, and plenty of liquor, likewise left over from holiday parties. Thus, Black Tart, a lazy-day sort of dessert that will warm the kitchen and perfume the house with a deep medieval scent of winter at bay--a whiff of whiskey, a breath of ginger and cinnamon, a Mediterranean sparkle of fresh tangerine.\u003c/p>\n\u003cp>The dried fruits aren't poached so much as steeped. After a slow warming, they sit on the back of the stove for an hour or so, soaking up the wine and spices, swelling up soft and plump as they absorb nearly all the liquid. \u003c/p>\n\u003cp>A cookie-like tart dough, a little sweeter and richer than regular pie crust, works particularly well here. To make it, sift together two and a half cups of flour, a quarter cup sugar, and a half-teaspoon salt. Using a pastry blender, cut in 12 tablespoons (one and a half sticks, 6 oz) of chilled butter, until mixture looks sandy and flaky, like dry oatmeal. Then, instead of the usual ice water, moisten the flour with two egg yolks, one teaspoon vanilla, and three to four teaspoons of water to form a soft dough. Chill for several hours while the filling is cooking and cooling.\u003cbr>\n\u003cstrong>\u003cbr>\nBlack Tart\u003c/strong>\u003cbr>\nThis tastes best on the day it's made, but will last for several days if well wrapped. The recipe can also be used to made small individual-sized tarts. For the prettiest crust on small tarts, brush tart crust with milk and sprinkle with sugar before baking.\u003c/p>\n\u003cp>\u003cstrong>Ingredients\u003c/strong>\u003cbr>\n1 large apple, peeled, cored, and diced\u003cbr>\n1 cup dried apricots, chopped\u003cbr>\n1 cup pitted prunes, chopped\u003cbr>\n1/2 cup raisins\u003cbr>\n2-3 tbsp candied orange peel\u003cbr>\n1 cup red wine OR 1/2 cup port and 1/2 cup water\u003cbr>\n1/4 cup whiskey or brandy\u003cbr>\n1/8 tsp EACH cinnamon, cardamon, nutmeg, and ginger\u003cbr>\nBig pinch of freshly ground pepper\u003cbr>\n1/2 cup brown sugar\u003cbr>\n1/2 cup white sugar, or to taste\u003cbr>\nZest and juice of 1 tangerine\u003cbr>\n1/2 cup toasted walnuts or almonds, chopped\u003cbr>\nDough for two-crust tart (see above)\u003cbr>\nWhipped cream for serving\u003c/p>\n\u003cp>\u003cstrong>Preparation\u003c/strong>\u003cbr>\n1. In a heavy-bottomed pot, mix all filling ingredients except for walnuts. Warm over low heat, stirring occasionally, for 15 minutes. Turn off heat and let fruit absorb the rest of the liquid for an hour or so. \u003c/p>\n\u003cp>2. Divide the tart dough into two rounds and roll out. Line an 8-inch or 9-inch tart pan with first round. \u003c/p>\n\u003cp>3. Stir walnuts into filling. Cut remaining dough into 1-inch wide strips. Lay strips in a criss-cross lattice pattern to cover most of the filling. Cover entire tart with foil or waxed paper and chill in the fridge for an hour or so.\u003c/p>\n\u003cp>\u003c/p>\n\u003cp>4. Preheat oven to 400 degrees F. Unwrap tart and bake until crust in golden brown and filling is bubbling, 30-35 minutes. Cool on a rack. Serve with whipped cream.\u003c/p>\n\n","blocks":[],"excerpt":"Now's the time for Black Tart, a warming dessert from the winter pantry, succulent with dried fruits, citrus, nuts, and spices. ","status":"publish","parent":0,"modified":1356298856,"stats":{"hasAudio":false,"hasVideo":false,"hasChartOrMap":false,"iframeSrcs":[],"hasGoogleForm":false,"hasGallery":false,"hasHearkenModule":false,"hasPolis":false,"paragraphCount":18,"wordCount":1007},"headData":{"title":"Black Tart | KQED","description":"Now's the time for Black Tart, a warming dessert from the winter pantry, succulent with dried fruits, citrus, nuts, and spices. ","ogTitle":"","ogDescription":"","ogImgId":"","twTitle":"","twDescription":"","twImgId":"","schema":{"@context":"http://schema.org","@type":"Article","headline":"Black Tart","datePublished":"2011-01-08T19:03:44.000Z","dateModified":"2012-12-23T21:40:56.000Z","image":"https://cdn.kqed.org/wp-content/uploads/2020/02/KQED-OG-Image@1x.png"}},"disqusIdentifier":"20550 http://blogs.kqed.org/bayareabites/?p=20550","disqusUrl":"https://ww2.kqed.org/bayareabites/2011/01/08/black-tart/","disqusTitle":"Black Tart","path":"/bayareabites/20550/black-tart","audioTrackLength":null,"parsedContent":[{"type":"contentString","content":"\u003cdiv class=\"post-body\">\u003cp>\u003cp>\u003cimg src=\"http://ww2.kqed.org/bayareabites/wp-content/uploads/sites/24/2011/01/black-tart500.jpg\" alt=\"Black Tart\" title=\"Black Tart\" width=\"500\" height=\"375\" class=\"alignnone size-full wp-image-21038\">\u003c/p>\n\u003cp>Oh, you modern Americans, what is wrong with you? Why do you recoil, as if from a snake, from the very muttered hint of mincemeat? \u003ca href=\"http://www.npr.org/2011/01/02/132477830/cupcakes-are-dead-long-live-the-pie\">Pie may be sneaking back into the spotlight\u003c/a>, weary of being upstaged by all those pink cupcakes beehived with frosting, but still, you could look far and wide here and find nary a scrap of mince on our menus. \u003c/p>\n\u003cp>Once, mincemeat was our heritage, our honor guard, the leading light of American pie fillings. It was exalted at holiday time but consumed with gusto year-round, at Automats and church suppers, carried on Formica trays through cafeterias and paraded on gold-rimmed china in the dining rooms of downtown hotels. \u003c/p>\n\u003cp>The history was, of course, a British one, but the legacy of the dense, sweet-spiced, citrusy-raisiny-almondy filling stretches back at least a handful of centuries, when the line between sweet and savory was a much more porous one. Originally, mincemeat was made with both beef and beef fat, added to a rich mixture of dried fruits, spices, candied citrus peels, and almonds, preserved with a hefty dose of spirits. Over the years, the meat receded, although the fat (typically suet, the particularly pure fat taken from around the kidneys) remained, to give an unmistakable richness to the mixture. \u003c/p>\n\u003cp>You may think you'd hate it—\u003cem>prunes? suet?\u003c/em>—but not so. This holiday season I passed around many of these tarts, filled with Delia Smith's unbeatable recipe for \u003ca href=\"http://www.deliaonline.com/recipes/cuisine/european/english/christmas-easy-home-made-christmas-mincemeat.html\">Homemade Christmas Mincemeat\u003c/a>. Served up small and warm, in the late, lowering afternoon with a cup of steaming tea or after dinner with a glass of port, naught but lard-and-butter crust crumbs came back on the plate. (A word of advice, though: halve Delia's recipe, and you'll still have more than enough mincemeat to feed everyone you know.)\u003c/p>\n\u003cp>\u003c/p>\u003c/div>","attributes":{"named":{},"numeric":[]}},{"type":"component","content":"","name":"ad","attributes":{"named":{"label":"fullwidth"},"numeric":["fullwidth"]}},{"type":"contentString","content":"\u003cdiv class=\"post-body\">\u003cp>\u003c/p>\n\u003cp>But now that the indulgence of the holidays has passed, mincemeat might be a tougher sell. Enter \u003cstrong>Black Tart,\u003c/strong> a lovely winter dessert based on a 17th-century recipe for \"black tart stuff,\" which the eminent British food writer Elizabeth David praises in \u003ca href=\"http://www.amazon.com/exec/obidos/ASIN/1599218607/kqedorg-20\">An Omelette and a Glass of Wine\u003c/a> as \"rich and dark without the cloying and heavy qualities of mincemeat.\" She also recommends it as having \"a certain originality which provides a small surprise at the end of the meal.\"\u003c/p>\n\u003cp>Leafing through cookbooks heaped from shelves to floor, I can trace the roots of my own Black Tart to several recipes: David's 1969 recipe, itself a modern interpretation of Robert May's recipe from \u003cstrong>The Accomplisht Cook \u003c/strong>(1660); the Harvest Tart from the \u003ca href=\"http://www.amazon.com/exec/obidos/ASIN/0761145974/kqedorg-20\">The Silver Palate Cookbook\u003c/a> (1982); and the Winter Fruit Tart from the \u003ca href=\"http://www.amazon.com/exec/obidos/ASIN/1580082602/kqedorg-20\">Bay Wolf Restaurant Cookbook\u003c/a> (2001). \u003c/p>\n\u003cp>Mostly, though, it came from messing around with the memories of all these things in a friend's kitchen on a raw, gray afternoon, when we both wanted something sweet to eat without having to leave the house. \u003c/p>\n\u003cp>What was on hand in the winter pantry? Dried fruit and nuts, candied fruit peel left over from holiday baking, and plenty of liquor, likewise left over from holiday parties. Thus, Black Tart, a lazy-day sort of dessert that will warm the kitchen and perfume the house with a deep medieval scent of winter at bay--a whiff of whiskey, a breath of ginger and cinnamon, a Mediterranean sparkle of fresh tangerine.\u003c/p>\n\u003cp>The dried fruits aren't poached so much as steeped. After a slow warming, they sit on the back of the stove for an hour or so, soaking up the wine and spices, swelling up soft and plump as they absorb nearly all the liquid. \u003c/p>\n\u003cp>A cookie-like tart dough, a little sweeter and richer than regular pie crust, works particularly well here. To make it, sift together two and a half cups of flour, a quarter cup sugar, and a half-teaspoon salt. Using a pastry blender, cut in 12 tablespoons (one and a half sticks, 6 oz) of chilled butter, until mixture looks sandy and flaky, like dry oatmeal. Then, instead of the usual ice water, moisten the flour with two egg yolks, one teaspoon vanilla, and three to four teaspoons of water to form a soft dough. Chill for several hours while the filling is cooking and cooling.\u003cbr>\n\u003cstrong>\u003cbr>\nBlack Tart\u003c/strong>\u003cbr>\nThis tastes best on the day it's made, but will last for several days if well wrapped. The recipe can also be used to made small individual-sized tarts. For the prettiest crust on small tarts, brush tart crust with milk and sprinkle with sugar before baking.\u003c/p>\n\u003cp>\u003cstrong>Ingredients\u003c/strong>\u003cbr>\n1 large apple, peeled, cored, and diced\u003cbr>\n1 cup dried apricots, chopped\u003cbr>\n1 cup pitted prunes, chopped\u003cbr>\n1/2 cup raisins\u003cbr>\n2-3 tbsp candied orange peel\u003cbr>\n1 cup red wine OR 1/2 cup port and 1/2 cup water\u003cbr>\n1/4 cup whiskey or brandy\u003cbr>\n1/8 tsp EACH cinnamon, cardamon, nutmeg, and ginger\u003cbr>\nBig pinch of freshly ground pepper\u003cbr>\n1/2 cup brown sugar\u003cbr>\n1/2 cup white sugar, or to taste\u003cbr>\nZest and juice of 1 tangerine\u003cbr>\n1/2 cup toasted walnuts or almonds, chopped\u003cbr>\nDough for two-crust tart (see above)\u003cbr>\nWhipped cream for serving\u003c/p>\n\u003cp>\u003cstrong>Preparation\u003c/strong>\u003cbr>\n1. In a heavy-bottomed pot, mix all filling ingredients except for walnuts. Warm over low heat, stirring occasionally, for 15 minutes. Turn off heat and let fruit absorb the rest of the liquid for an hour or so. \u003c/p>\n\u003cp>2. Divide the tart dough into two rounds and roll out. Line an 8-inch or 9-inch tart pan with first round. \u003c/p>\n\u003cp>3. Stir walnuts into filling. Cut remaining dough into 1-inch wide strips. Lay strips in a criss-cross lattice pattern to cover most of the filling. Cover entire tart with foil or waxed paper and chill in the fridge for an hour or so.\u003c/p>\n\u003cp>\u003c/p>\n\u003cp>4. Preheat oven to 400 degrees F. Unwrap tart and bake until crust in golden brown and filling is bubbling, 30-35 minutes. Cool on a rack. Serve with whipped cream.\u003c/p>\n\n\u003c/div>\u003c/p>","attributes":{"named":{},"numeric":[]}}],"link":"/bayareabites/20550/black-tart","authors":["5038"],"categories":["bayareabites_1516","bayareabites_752","bayareabites_2090","bayareabites_1763","bayareabites_12"],"tags":["bayareabites_8784","bayareabites_558","bayareabites_8661","bayareabites_8659","bayareabites_8660","bayareabites_228","bayareabites_2594","bayareabites_8662"],"label":"bayareabites"},"bayareabites_17668":{"type":"posts","id":"bayareabites_17668","meta":{"index":"posts_1591205157","site":"bayareabites","id":"17668","score":null,"sort":[1286892050000]},"guestAuthors":[],"slug":"a-week-at-the-san-francisco-baking-institute","title":"A Week at The San Francisco Baking Institute ","publishDate":1286892050,"format":"aside","headTitle":"Bay Area Bites | KQED Food","labelTerm":{"site":"bayareabites"},"content":"\u003cp>\u003ca href=\"http://ww2.kqed.org/bayareabites/wp-content/uploads/sites/24/2010/10/Learning-.jpg\">\u003cimg src=\"http://ww2.kqed.org/bayareabites/wp-content/uploads/sites/24/2010/10/Learning-.jpg\" alt=\"Learning at San Francisco Baking Institute\" title=\"Learning at San Francisco Baking Institute\" width=\"500\" height=\"500\" class=\"alignnone size-full wp-image-17669\">\u003c/a>\u003cbr>\n\u003cem>The Exploring Ingredients Class at San Francisco Baking Institute\u003c/em>\u003c/p>\n\u003cp>Last week was big for me. I took a week off from work, returned very few emails, and my dogs suffered a severe lack of exercise. Why? I spent all week baking eight hours a day at the \u003ca href=\"http://www.sfbi.com/\">San Francisco Baking Institute\u003c/a>, brushing up on my skills and learning the \"how's\" and \"why's\" behind much of the baking I do at home (\u003cem>How exactly can I make this cookie chewier? Why add potato starch here? What effect does pastry flour have on this recipe?\u003c/em>). Each day I came home with boxes of treats to share with family, friends, and coworkers along with copious notes and a head spinning with information on technique and method. After spending the weekend debriefing, I thought I'd share the top ten things I learned from my one week in pastry school. Some of the tips here are relatively basic and fundamental, others are a bit more advanced. Each could certainly use its very own post. But sometimes broad coverage is nice--it's just enough to get you inspired to break out a muffin or cake recipe for the coming week. I'd love to hear any of your own baking tips/revelations, too! \u003c/p>\n\u003cp>\u003ca href=\"http://ww2.kqed.org/bayareabites/wp-content/uploads/sites/24/2010/10/Breakfast-Pastries.jpg\">\u003cimg src=\"http://ww2.kqed.org/bayareabites/wp-content/uploads/sites/24/2010/10/Breakfast-Pastries.jpg\" alt=\"Breakfast Pastries\" title=\"Breakfast Pastries\" width=\"500\" height=\"500\" class=\"alignnone size-full wp-image-17670\">\u003c/a>\u003cbr>\n\u003cem>Making Breakfast Pasties: Day 2\u003c/em>\u003c/p>\n\u003cp>\u003cstrong>1. Mixing Methods:\u003c/strong> It's important to understand the different mixing methods when baking. And then to follow them. For example, when using the \"Creaming Method\" for cookies, you're really just creaming together the sugar and butter until combined. However, when making brownies, you need to integrate a lot of air into your batter when mixing your sugar and butter. This acts as your leavening agent (look at most brownie recipes and you'll notice a lack of chemical leaveners like baking soda or powder). So you'll need to mix on a higher speed for a longer period of time. If you're interested in reading more on mixing methods, \u003ca href=\"http://www.reluctantgourmet.com/how_to_bake.htm\">The Reluctant Gourmet\u003c/a> has done a nice post covering them in more detail. \u003c/p>\n\u003cp>\u003cstrong>2. Pay Attention to Your Flours:\u003c/strong> People use all different kinds of flour in pastry production for a variety of reasons. Cake flour and pastry flour have the lowest amount of protein whereas bread flour and all-purpose flour have the highest. As a general rule, the higher the amount of protein, the more structure the dough will have (think of how many cakes are so light and fluffy while traditional breads are heartier). Once you become familiar with how the various flours change the outcome of your pastries and baked goods, you can begin adapting recipes to create different textures simply by swapping the flours.\u003cbr>\n\u003cstrong>\u003cbr>\n3. All About Super-Fine Sugar:\u003c/strong> I generally use granulated sugar at home. However, this past week we worked solely with superfine sugar (unless the recipe called for powdered or liquid sugar) and I learned why: superfine sugar melts in moisture more quickly than regular granulated sugar, and is really preferable for fine textured baked goods. Try it--you may just notice a difference. \u003c/p>\n\u003cp>[ad fullwidth]\u003c/p>\n\u003cp>\u003ca href=\"http://ww2.kqed.org/bayareabites/wp-content/uploads/sites/24/2010/10/desserts.jpg\">\u003cimg src=\"http://ww2.kqed.org/bayareabites/wp-content/uploads/sites/24/2010/10/desserts.jpg\" alt=\"desserts\" title=\"desserts\" width=\"500\" height=\"500\" class=\"alignnone size-full wp-image-17671\">\u003c/a>\u003cbr>\n\u003cem>From Angel Food Cake to Madelines: A Few of the Desserts\u003c/em>\u003cbr>\n\u003cstrong>\u003cbr>\n4. Temperature Matters:\u003c/strong> Much of what you're doing when mixing various batters is creating a smooth emulsion. We've all made a recipe where the batter turned out a little too chunky or broken looking, haven't we? There are many reasons why this might happen, but the main one is that the ingredients aren't the proper temperature. If you don't have time to bring your eggs up to room temperature, mix them together in a small bowl and microwave them for 20-30 seconds until warm. And for many recipes (not including pie dough, obviously) you want your butter softened but not oily or completely melted. Pay attention to the temperature of your ingredients and you'll have smooth, silky dough more often than not.\u003cbr>\n\u003cstrong>\u003cbr>\n5. Take it Slow:\u003c/strong> Ah, cakes...a relative cousin to the cookie but with much more moisture. Because of this increased moisture, you'll notice most recipes ask that you alternate between dry and wet ingredients when combining the two together. You don't want to break the emulsion (or bind) between the butter and the eggs or your batter will start to look broken or separated. Slow down. Take your time. If a recipe asks that you alternate between the wet and the dry, there's a reason for that: don't dump your ingredients in all at once. \u003c/p>\n\u003cp>\u003cstrong>6. All About Pie Dough:\u003c/strong> I love making pies and quietly judge people who don't make their own crust. It's just so basic and tastes so much better than boxed pie crust. I was humbled this week though when I learned about the different kinds of pie crusts and why you'd want to choose one over the other depending on your fillings. It would take a few additional posts to cover the different kinds of pie doughs available to you. If you're interested in reading more, I'd check out: \u003ca href=\"http://www.amazon.com/Pastry-Bible-Rose-Levy-Beranbaum/dp/0684813483\">The Pie and Pastry Bible \u003c/a>by Rose Levy Beranbaum or \u003ca href=\"http://www.amazon.com/Joy-Cooking-About-Pies-Tarts/dp/074322518X\">Joy of Cooking: All About Pies and Tarts \u003c/a>by Irma Rombauer and Marion Rombauer Becker. But for now, know that there are flaky and mealy crusts. The basic recipe is the same (a nice butter crust or a butter and lard crust), but a mealy dough is good for cream pies and wet fillings because you're incorporating the butter into the dough more (smaller chunks) thereby creating a coarse almost cornmeal like crust and a tighter dough. A flaky butter crust with large chunks of butter will always absorb more moisture making it much less ideal for cream pies and other wet fillings. \u003c/p>\n\u003cp>\u003ca href=\"http://ww2.kqed.org/bayareabites/wp-content/uploads/sites/24/2010/10/cookies.jpg\">\u003cimg src=\"http://ww2.kqed.org/bayareabites/wp-content/uploads/sites/24/2010/10/cookies.jpg\" alt=\"Meringues and Diamond Cookies\" title=\"Meringues and Diamond Cookies\" width=\"500\" height=\"295\" class=\"alignnone size-full wp-image-17672\">\u003c/a>\u003cbr>\n\u003cem>Meringues and Diamond Cookies\u003c/em>\u003c/p>\n\u003cp>\u003cstrong>7. How Do I Make My Cookie ____ ?\u003c/strong> So you like your chocolate chip cookie crispy on the outside and chewy on the inside? Or maybe you like a tender, cakey cookie? How do you look at a recipe and alter it to fit your needs? A few good pointers: if you like a crispy cookie, you're looking for a recipe with low moisture and high fat and sugar. If you're looking for more of a soft cookie, the recipe will be lower in sugar and fat with a high moisture content. And if you're a chewy cookie fan, your recipe will call for more moisture and sugar and less fat. It'll also call for a stronger flour with more protein (like bread flour). What does this mean for the home baker? Experiment. If you want a chewy cookie and you're using the typical\u003ca href=\"http://allrecipes.com//Recipe/original-nestle-toll-house-chocolate-chip-cookies/Detail.aspx\"> Toll House Recipe\u003c/a>, try bread flour instead and use a bit more sugar. Take notes and compare. With the right information, you can have more control over your recipes. \u003c/p>\n\u003cp>\u003cstrong>8. Freezing and Storing:\u003c/strong> A good rule of thumb on this is to think about the moisture in your product. If there's a lot of moisture in something you've made (custards, lemon bars etc.), you generally want to avoid freezing after baking. Something with low moisture and high fat like a cookie is o.k. to freeze whereas a product with high moisture and lower fat like a soft, crumbly muffin really isn't great to freeze once baked. \u003c/p>\n\u003cp>\u003cstrong>9. All About Chilling: \u003c/strong>Have you noticed lately that many cookie recipes ask you to chill your dough in the freezer before baking? What's going on here? The most likely answer is that chilling decreases the probability that your cookies will spread when baked. Another possbility is one the New York Times stands behind with their infamous \u003ca href=\"http://www.nytimes.com/2008/07/09/dining/091crex.html\">Chocolate Chip Cookie recipe\u003c/a>: that dough tends to develop flavors when allowed to overnight, resulting in a richer, more buttery/toffee-like dough. Try it. You decide. \u003c/p>\n\u003cp>[ad floatright]\u003c/p>\n\u003cp>\u003cstrong>10. A Few Tips for Working with Chocolate:\u003c/strong> People spend years studying chocolate and confections, but for the purposes of home baking and simple pastry production, there are a few good things to know. First, when you're melting chocolate in a double boiler, you always want to cover the bowl that the chocolate's in. The second moisture hits the chocolate mixture, you're going to run the risk of grainy chocolate. Second, don't overheat your mixture. This, too, will create lumps. Last, don't let your bowl actually touch the water. You want space in between the bowl and the water below--this is where steam is trapped and this is what's going to melt your chocolate. \u003c/p>\n\n","blocks":[],"excerpt":"Megan Gordon details her week at San Francisco Baking Institute and the Top Ten Things she Learned about Pastry Production. ","status":"publish","parent":0,"modified":1286850148,"stats":{"hasAudio":false,"hasVideo":false,"hasChartOrMap":false,"iframeSrcs":[],"hasGoogleForm":false,"hasGallery":false,"hasHearkenModule":false,"hasPolis":false,"paragraphCount":14,"wordCount":1432},"headData":{"title":"A Week at The San Francisco Baking Institute | KQED","description":"Megan Gordon details her week at San Francisco Baking Institute and the Top Ten Things she Learned about Pastry Production. ","ogTitle":"","ogDescription":"","ogImgId":"","twTitle":"","twDescription":"","twImgId":"","schema":{"@context":"http://schema.org","@type":"Article","headline":"A Week at The San Francisco Baking Institute ","datePublished":"2010-10-12T14:00:50.000Z","dateModified":"2010-10-12T02:22:28.000Z","image":"https://cdn.kqed.org/wp-content/uploads/2020/02/KQED-OG-Image@1x.png"}},"disqusIdentifier":"17668 http://blogs.kqed.org/bayareabites/?p=17668","disqusUrl":"https://ww2.kqed.org/bayareabites/2010/10/12/a-week-at-the-san-francisco-baking-institute/","disqusTitle":"A Week at The San Francisco Baking Institute ","path":"/bayareabites/17668/a-week-at-the-san-francisco-baking-institute","audioTrackLength":null,"parsedContent":[{"type":"contentString","content":"\u003cdiv class=\"post-body\">\u003cp>\u003cp>\u003ca href=\"http://ww2.kqed.org/bayareabites/wp-content/uploads/sites/24/2010/10/Learning-.jpg\">\u003cimg src=\"http://ww2.kqed.org/bayareabites/wp-content/uploads/sites/24/2010/10/Learning-.jpg\" alt=\"Learning at San Francisco Baking Institute\" title=\"Learning at San Francisco Baking Institute\" width=\"500\" height=\"500\" class=\"alignnone size-full wp-image-17669\">\u003c/a>\u003cbr>\n\u003cem>The Exploring Ingredients Class at San Francisco Baking Institute\u003c/em>\u003c/p>\n\u003cp>Last week was big for me. I took a week off from work, returned very few emails, and my dogs suffered a severe lack of exercise. Why? I spent all week baking eight hours a day at the \u003ca href=\"http://www.sfbi.com/\">San Francisco Baking Institute\u003c/a>, brushing up on my skills and learning the \"how's\" and \"why's\" behind much of the baking I do at home (\u003cem>How exactly can I make this cookie chewier? Why add potato starch here? What effect does pastry flour have on this recipe?\u003c/em>). Each day I came home with boxes of treats to share with family, friends, and coworkers along with copious notes and a head spinning with information on technique and method. After spending the weekend debriefing, I thought I'd share the top ten things I learned from my one week in pastry school. Some of the tips here are relatively basic and fundamental, others are a bit more advanced. Each could certainly use its very own post. But sometimes broad coverage is nice--it's just enough to get you inspired to break out a muffin or cake recipe for the coming week. I'd love to hear any of your own baking tips/revelations, too! \u003c/p>\n\u003cp>\u003ca href=\"http://ww2.kqed.org/bayareabites/wp-content/uploads/sites/24/2010/10/Breakfast-Pastries.jpg\">\u003cimg src=\"http://ww2.kqed.org/bayareabites/wp-content/uploads/sites/24/2010/10/Breakfast-Pastries.jpg\" alt=\"Breakfast Pastries\" title=\"Breakfast Pastries\" width=\"500\" height=\"500\" class=\"alignnone size-full wp-image-17670\">\u003c/a>\u003cbr>\n\u003cem>Making Breakfast Pasties: Day 2\u003c/em>\u003c/p>\n\u003cp>\u003cstrong>1. Mixing Methods:\u003c/strong> It's important to understand the different mixing methods when baking. And then to follow them. For example, when using the \"Creaming Method\" for cookies, you're really just creaming together the sugar and butter until combined. However, when making brownies, you need to integrate a lot of air into your batter when mixing your sugar and butter. This acts as your leavening agent (look at most brownie recipes and you'll notice a lack of chemical leaveners like baking soda or powder). So you'll need to mix on a higher speed for a longer period of time. If you're interested in reading more on mixing methods, \u003ca href=\"http://www.reluctantgourmet.com/how_to_bake.htm\">The Reluctant Gourmet\u003c/a> has done a nice post covering them in more detail. \u003c/p>\n\u003cp>\u003cstrong>2. Pay Attention to Your Flours:\u003c/strong> People use all different kinds of flour in pastry production for a variety of reasons. Cake flour and pastry flour have the lowest amount of protein whereas bread flour and all-purpose flour have the highest. As a general rule, the higher the amount of protein, the more structure the dough will have (think of how many cakes are so light and fluffy while traditional breads are heartier). Once you become familiar with how the various flours change the outcome of your pastries and baked goods, you can begin adapting recipes to create different textures simply by swapping the flours.\u003cbr>\n\u003cstrong>\u003cbr>\n3. All About Super-Fine Sugar:\u003c/strong> I generally use granulated sugar at home. However, this past week we worked solely with superfine sugar (unless the recipe called for powdered or liquid sugar) and I learned why: superfine sugar melts in moisture more quickly than regular granulated sugar, and is really preferable for fine textured baked goods. Try it--you may just notice a difference. \u003c/p>\n\u003cp>\u003c/p>\u003c/div>","attributes":{"named":{},"numeric":[]}},{"type":"component","content":"","name":"ad","attributes":{"named":{"label":"fullwidth"},"numeric":["fullwidth"]}},{"type":"contentString","content":"\u003cdiv class=\"post-body\">\u003cp>\u003c/p>\n\u003cp>\u003ca href=\"http://ww2.kqed.org/bayareabites/wp-content/uploads/sites/24/2010/10/desserts.jpg\">\u003cimg src=\"http://ww2.kqed.org/bayareabites/wp-content/uploads/sites/24/2010/10/desserts.jpg\" alt=\"desserts\" title=\"desserts\" width=\"500\" height=\"500\" class=\"alignnone size-full wp-image-17671\">\u003c/a>\u003cbr>\n\u003cem>From Angel Food Cake to Madelines: A Few of the Desserts\u003c/em>\u003cbr>\n\u003cstrong>\u003cbr>\n4. Temperature Matters:\u003c/strong> Much of what you're doing when mixing various batters is creating a smooth emulsion. We've all made a recipe where the batter turned out a little too chunky or broken looking, haven't we? There are many reasons why this might happen, but the main one is that the ingredients aren't the proper temperature. If you don't have time to bring your eggs up to room temperature, mix them together in a small bowl and microwave them for 20-30 seconds until warm. And for many recipes (not including pie dough, obviously) you want your butter softened but not oily or completely melted. Pay attention to the temperature of your ingredients and you'll have smooth, silky dough more often than not.\u003cbr>\n\u003cstrong>\u003cbr>\n5. Take it Slow:\u003c/strong> Ah, cakes...a relative cousin to the cookie but with much more moisture. Because of this increased moisture, you'll notice most recipes ask that you alternate between dry and wet ingredients when combining the two together. You don't want to break the emulsion (or bind) between the butter and the eggs or your batter will start to look broken or separated. Slow down. Take your time. If a recipe asks that you alternate between the wet and the dry, there's a reason for that: don't dump your ingredients in all at once. \u003c/p>\n\u003cp>\u003cstrong>6. All About Pie Dough:\u003c/strong> I love making pies and quietly judge people who don't make their own crust. It's just so basic and tastes so much better than boxed pie crust. I was humbled this week though when I learned about the different kinds of pie crusts and why you'd want to choose one over the other depending on your fillings. It would take a few additional posts to cover the different kinds of pie doughs available to you. If you're interested in reading more, I'd check out: \u003ca href=\"http://www.amazon.com/Pastry-Bible-Rose-Levy-Beranbaum/dp/0684813483\">The Pie and Pastry Bible \u003c/a>by Rose Levy Beranbaum or \u003ca href=\"http://www.amazon.com/Joy-Cooking-About-Pies-Tarts/dp/074322518X\">Joy of Cooking: All About Pies and Tarts \u003c/a>by Irma Rombauer and Marion Rombauer Becker. But for now, know that there are flaky and mealy crusts. The basic recipe is the same (a nice butter crust or a butter and lard crust), but a mealy dough is good for cream pies and wet fillings because you're incorporating the butter into the dough more (smaller chunks) thereby creating a coarse almost cornmeal like crust and a tighter dough. A flaky butter crust with large chunks of butter will always absorb more moisture making it much less ideal for cream pies and other wet fillings. \u003c/p>\n\u003cp>\u003ca href=\"http://ww2.kqed.org/bayareabites/wp-content/uploads/sites/24/2010/10/cookies.jpg\">\u003cimg src=\"http://ww2.kqed.org/bayareabites/wp-content/uploads/sites/24/2010/10/cookies.jpg\" alt=\"Meringues and Diamond Cookies\" title=\"Meringues and Diamond Cookies\" width=\"500\" height=\"295\" class=\"alignnone size-full wp-image-17672\">\u003c/a>\u003cbr>\n\u003cem>Meringues and Diamond Cookies\u003c/em>\u003c/p>\n\u003cp>\u003cstrong>7. How Do I Make My Cookie ____ ?\u003c/strong> So you like your chocolate chip cookie crispy on the outside and chewy on the inside? Or maybe you like a tender, cakey cookie? How do you look at a recipe and alter it to fit your needs? A few good pointers: if you like a crispy cookie, you're looking for a recipe with low moisture and high fat and sugar. If you're looking for more of a soft cookie, the recipe will be lower in sugar and fat with a high moisture content. And if you're a chewy cookie fan, your recipe will call for more moisture and sugar and less fat. It'll also call for a stronger flour with more protein (like bread flour). What does this mean for the home baker? Experiment. If you want a chewy cookie and you're using the typical\u003ca href=\"http://allrecipes.com//Recipe/original-nestle-toll-house-chocolate-chip-cookies/Detail.aspx\"> Toll House Recipe\u003c/a>, try bread flour instead and use a bit more sugar. Take notes and compare. With the right information, you can have more control over your recipes. \u003c/p>\n\u003cp>\u003cstrong>8. Freezing and Storing:\u003c/strong> A good rule of thumb on this is to think about the moisture in your product. If there's a lot of moisture in something you've made (custards, lemon bars etc.), you generally want to avoid freezing after baking. Something with low moisture and high fat like a cookie is o.k. to freeze whereas a product with high moisture and lower fat like a soft, crumbly muffin really isn't great to freeze once baked. \u003c/p>\n\u003cp>\u003cstrong>9. All About Chilling: \u003c/strong>Have you noticed lately that many cookie recipes ask you to chill your dough in the freezer before baking? What's going on here? The most likely answer is that chilling decreases the probability that your cookies will spread when baked. Another possbility is one the New York Times stands behind with their infamous \u003ca href=\"http://www.nytimes.com/2008/07/09/dining/091crex.html\">Chocolate Chip Cookie recipe\u003c/a>: that dough tends to develop flavors when allowed to overnight, resulting in a richer, more buttery/toffee-like dough. Try it. You decide. \u003c/p>\n\u003cp>\u003c/p>\u003c/div>","attributes":{"named":{},"numeric":[]}},{"type":"component","content":"","name":"ad","attributes":{"named":{"label":"floatright"},"numeric":["floatright"]}},{"type":"contentString","content":"\u003cdiv class=\"post-body\">\u003cp>\u003c/p>\n\u003cp>\u003cstrong>10. A Few Tips for Working with Chocolate:\u003c/strong> People spend years studying chocolate and confections, but for the purposes of home baking and simple pastry production, there are a few good things to know. First, when you're melting chocolate in a double boiler, you always want to cover the bowl that the chocolate's in. The second moisture hits the chocolate mixture, you're going to run the risk of grainy chocolate. Second, don't overheat your mixture. This, too, will create lumps. Last, don't let your bowl actually touch the water. You want space in between the bowl and the water below--this is where steam is trapped and this is what's going to melt your chocolate. \u003c/p>\n\n\u003c/div>\u003c/p>","attributes":{"named":{},"numeric":[]}}],"link":"/bayareabites/17668/a-week-at-the-san-francisco-baking-institute","authors":["5072"],"categories":["bayareabites_1516","bayareabites_2695","bayareabites_64"],"tags":["bayareabites_1255","bayareabites_147","bayareabites_2263","bayareabites_833","bayareabites_3015","bayareabites_2594","bayareabites_8442"],"label":"bayareabites"},"bayareabites_16729":{"type":"posts","id":"bayareabites_16729","meta":{"index":"posts_1591205157","site":"bayareabites","id":"16729","score":null,"sort":[1286202874000]},"guestAuthors":[],"slug":"baking-pie-with-kate-mcdermott-3","title":"Baking Pie with Kate McDermott","publishDate":1286202874,"format":"aside","headTitle":"Bay Area Bites | KQED Food","labelTerm":{"site":"bayareabites"},"content":"\u003cp>\u003ca href=\"http://ww2.kqed.org/bayareabites/wp-content/uploads/sites/24/2010/09/IMG_56381.jpg\">\u003cimg src=\"http://ww2.kqed.org/bayareabites/wp-content/uploads/sites/24/2010/09/IMG_56381.jpg\" alt=\"Kate McDermott\" title=\"Kate McDermott\" width=\"333\" height=\"500\" class=\"alignnone size-full wp-image-16802\">\u003c/a>\u003cbr>\n\u003cem>Kate McDermott laughing over pie\u003c/em>\u003c/p>\n\u003cp>If you haven't heard of \u003ca href=\"http://www.artofthepie.com/artofthepie/Welcome.html\">Kate McDermott\u003c/a>, you're missing out. I first learned about her from a few Seattle friends who had taken her pie-making classes and insisted that it changed the way they thought about crust. And these are kitchen savvy people. Then I read somewhere that Ruth Reichl deemed Kate's crust an \"absolutely perfect crust.\" That's about the time I started stalking Kate. I'd go to her website to see if she was planning on teaching in the Bay Area. No luck. I started following her \u003ca href=\"http://twitter.com/katemcdermott\">@katemcdermott\u003c/a> on twitter to see if she'd give away hints there. Then I finally wrote her an email asking if she'd consider teaching a class the weekend I was going to be up in Seattle in August. And voila--a few weeks later, I heard that she'd decided to do a shortened version of her regular class at \u003ca href=\"http://www.dianesmarketkitchen.com/\">Dianne's Market Kitchen\u003c/a> as a demo. I signed up immediately. And like the rest of the folks who have written \u003ca href=\"http://www.artofthepie.com/artofthepie/Testimonials.html\">testimonials\u003c/a>, I'm forever changed when it comes to pie. \u003c/p>\n\u003cp>So today, with her blessing, I'm going to share with you her infamous recipe and all of her fabulous tips. And of course some photos so you feel like you were along for the ride. Kate's come to the conclusion that there are three types of pie people in this world: makers, eaters, and seekers. After taking this class, you can literally be all three at one time. First things first: if you actually sit and listen to Kate, she's incredibly wise. Pie or no pie. While pie crust can make people uptight and anxious, Kate has a calming 'everything will turn out fine' demeanor. She says about the crust: \"Just feel it...we all know how to do this stuff.\" Later in class she states how \"it's simple--otherwise we still wouldn't all be doing it.\" And my favorite Kate quote: \"Everything turns out fine in pie.\" Ah, a breath of fresh air in an often complex pie-making world. \u003c/p>\n\u003cp>\u003ca href=\"http://ww2.kqed.org/bayareabites/wp-content/uploads/sites/24/2010/09/pie-2.jpg\">\u003cimg src=\"http://ww2.kqed.org/bayareabites/wp-content/uploads/sites/24/2010/09/pie-2.jpg\" alt=\"Making Pie with Kate McDermott\" title=\"Making Pie with Kate McDermott\" width=\"500\" height=\"500\" class=\"alignnone size-full wp-image-16794\">\u003c/a>\u003cbr>\n\u003cem>Kate and Dianne showing off the amazing peach pie\u003c/em>\u003c/p>\n\u003cp>The other thing that struck me immediately about the way Kate approaches pie is that she sets an intention for each pie. If you practice yoga, you'll recognize the practice of setting an intention before you begin: sending out some good vibes to someone struggling or someone that needs a little extra light in their day. Kate does this with each pie she makes. Regardless of whether or not this is a little too touchy-feely for you, it's a great reminder to be conscious and aware when we set out to bake pie. After Kate set an intention to send good thoughts to a friend struggling with cancer, I knew this would be a special class. This wasn't just a peach pie. This was a peach pie baked with love, skill, and deliberate thoughtfulness and care. \u003c/p>\n\u003cp>[ad fullwidth]\u003c/p>\n\u003cp>\u003ca href=\"http://ww2.kqed.org/bayareabites/wp-content/uploads/sites/24/2010/09/IMG_5631.jpg\">\u003cimg src=\"http://ww2.kqed.org/bayareabites/wp-content/uploads/sites/24/2010/09/IMG_5631.jpg\" alt=\"Kate setting an intention\" title=\"Kate setting an intention\" width=\"500\" height=\"443\" class=\"alignnone size-full wp-image-16797\">\u003c/a>\u003cbr>\n\u003cem>Setting an intention for her pie\u003c/em>\u003c/p>\n\u003cp>Now for a few nuts and bolts. Where to begin? Ingredients and equipment seems like a logical start. \u003c/p>\n\u003cp>\u003cstrong>Ingredients and Equipment\u003c/strong>\u003cbr>\nKate uses King Arthur Flour, Kerry Gold Irish Butter (she buys it from Trader Joe's--the best deal in town, she insists), and leaf lard she orders from a small farm in Pennsylvania. And perhaps most importantly, she insists on using only the most superior fruit you can buy. That way, you don't need to add much sugar at all. In our class, we used \u003ca href=\"http://www.froghollow.com/\">Frog Hollow \u003c/a>Cal Red peaches and nothing more than a little sugar, flour, salt, tapioca, and nutmeg. It turned out absolutely dreamy. \u003c/p>\n\u003cp>As far as equipment, Kate uses either an 8-inch or 9-inch pan and admits to loving many kinds of pans--from ceramic to glass. She does advise, however, to stay away from those disposable aluminum pie pans because they interfere with the even temperature of the pie crust. Kate also uses a dowel pin and a pastry cloth to roll out her dough. You can find both at your local food supply store. \u003c/p>\n\u003cp>After discussing ingredients and equipment, Kate began to speak about pie in general, and the elements that make up a good pie: \u003c/p>\n\u003cp>\u003cstrong>4 Elements of a Pie Filling:\u003c/strong>\u003cbr>\n1) Superior Fruit\u003cbr>\n2) Thickener\u003cbr>\n3) Seasoning\u003cbr>\n4) Sweetener\u003c/p>\n\u003cp>\u003cstrong>Pie Filling: Fruit\u003c/strong>\u003cbr>\nWith any good fruit pie, there are some considerations that will make a ho-hum pie extraordinary. Kate weighs in:\u003c/p>\n\u003cul>\n\u003cli>Quantity: O.K., so this tip is genius in my opinion. I always struggle with how much fruit it will take to make my pie filling. Kate uses a method where she takes whole peaches (or apples, or whatever you're using) and literally places them in the pie pan. Once it's full, you've got enough fruit. In our case with this pie, I believe we used 4 large peaches for our 8-inch dish.\u003c/li>\n\u003cli>To peel or not to peel: Kate doesn't bother. Ever. I love this about her.\u003c/li>\n\u003cli>Choosing the best fruit: With peaches, Kate says you want to see gold coming out of the rim (not green) of the peach--that way, you know it's gotten all of the sun and nutrients available to it. And when you're choosing a peach, a heavy peach means it has more sugar.\u003c/li>\n\u003c/ul>\n\u003cp>\u003ca href=\"http://ww2.kqed.org/bayareabites/wp-content/uploads/sites/24/2010/09/IMG_5635.jpg\">\u003cimg src=\"http://ww2.kqed.org/bayareabites/wp-content/uploads/sites/24/2010/09/IMG_5635.jpg\" alt=\"Pie Filling\" title=\"Pie Filling\" width=\"500\" height=\"333\" class=\"alignnone size-full wp-image-16798\">\u003c/a>\u003cbr>\n\u003cem>New Trick to Figure out How Many Peaches to Include\u003c/em>\u003c/p>\n\u003cp>As we watched Kate make, form, and roll out her crust she gave many invaluable tips that I've used since and have seen great improvements in my pies. Here they are, in no particular order:\u003c/p>\n\u003cp>\u003cstrong>Kate's Crust Tips:\u003c/strong>\u003c/p>\n\u003cul>\n\u003cli>Cold, cold, cold: Everything must be cold. I was surprised to learn that Kate not only uses cold butter and lard, but she also keeps her butter, her rolling pin, her bowl--even the pastry cloth in the freezer.\u003c/li>\n\u003cli>Adding water to your dough: Kate says two things: it's not precise, and go slow. She mentions a 3-2-1 formula where she adds 3 Tbsp. of water to begin and advises to just quickly move the dough around (you're not doing a thorough mixing here) and press together to see if it holds. If it doesn't, add 2 Tbsp. more. A good rule of thumb: the colder the fat, the more water you’re going to need. And an important side-note: Don’t get ice into the dough! When asked if she likes to err on the wet or dry side with her pie crust, Kate says she'd much rather err on the wet side (apparently, Ruth Reichl agrees).\u003c/li>\n\u003cli>Forming your dough: Cut your dough ball in half and you should see marbling. You want two “chubby disks” (about 4 inches by 1.5 inch). Wrap your disks in dough and then actually shape them how you'd like while they're in the plastic wrap (this was a revelation to me).\u003c/li>\n\u003cli>Rolling out your dough: After chilling your \"chubby disks\" for at least an hour, you want to take them out and gently tap them with your rolling pin. Kate says this is to kind of jar it awake and let it know you mean business. You want to put a nice amount of flour down on your pastry cloth, and roll out slowly (without worrying about cracks) from fingertips to palms, out and back. Brush off the extra flour as you go with a pastry brush. Kate says you want the pie dough \"as thin as glass and only as large as it needs to be.\" That's how you know when you're done.\u003c/li>\n\u003c/ul>\n\u003cp>\u003ca href=\"http://ww2.kqed.org/bayareabites/wp-content/uploads/sites/24/2010/09/pie-1.jpg\">\u003cimg src=\"http://ww2.kqed.org/bayareabites/wp-content/uploads/sites/24/2010/09/pie-1.jpg\" alt=\"Making Pie Dough\" title=\"Making Pie Dough\" width=\"500\" height=\"500\" class=\"alignnone size-full wp-image-16795\">\u003c/a>\u003cbr>\n\u003cem>Forming Our Pie!\u003c/em>\u003c/p>\n\u003cp>And now that you're inundated with tips and advice, here is the recipe for Kate's award-winning crust. I will say that nothing could ever replace sitting across from her and watching her make it herself. And I look forward to one day actually taking her longer participation course. Maybe if we all start stalking her and sending her emails, she'll decide to take this pie-crust madness on the road. Until then...\u003c/p>\n\u003cp>\u003cstrong>Kate's Infamous Pie Crust\u003c/strong>\u003c/p>\n\u003cp>\u003cem>Ingredients:\u003c/em>\u003cbr>\n2 1/2 cups King Arthur Unbleached White Flour (red bag)\u003cbr>\n8 Tbsp. leaf lard, cut into various small pieces, pea to walnut size\u003cbr>\n8 Tbsp. Irish butter, cut into various small pieces, pea to walnut size\u003cbr>\n1/2 tsp. kosher salt\u003cbr>\n6-8 Tbsp. ice water (this is an average--Kate's used anywhere between 3-15 Tbsp. at a time)\u003c/p>\n\u003cp>\u003cem>Method:\u003c/em>\u003cbr>\n1. Combine all ingredients except the ice water in a large, cold bowl.\u003cbr>\n2. With clean hands, blend the mixture together until it looks like course meal with some lumps in it. Lumps=flaky pie!\u003cbr>\n3. Sprinkle ice water over mixture and stir lightly with a fork.\u003cbr>\n4. Squeeze a handful of dough together. Mix in a bit more water if it doesn't keep together.\u003cbr>\n5. Divide the dough in half and make two chubby disks about 5 inches across. Wrap each disk separately in plastic wrap and chill for 1 hour.\u003cbr>\n6. Take out one disk and put on a well-floured board. Sprinkle some flour onto the top of the disk and thump the top several times. Turn it over and thump the other side.\u003cbr>\n7. Sprinkle more flour onto the top of the crust if needed to keep the pin from sticking and roll the crust out from the center in all directions. When it's an inch or so larger than your pie pan, fold the dough over the top of the pin and lay it in the pie pan carefully.\u003cbr>\n8. Don't worry if the crust needs to be patched together; just paint a little water where it needs to be patched and \"glue\" on the patch pieces.\u003cbr>\n9. Put the filling in the pie and repeat the process with the other disk. \u003c/p>\n\u003cp>[ad floatright]\u003c/p>\n\u003cp>\u003cem>Notes on Filling and Baking: fill with your favorite fruit filling. For a peach pie similar to the one we made in Seattle, use adequate peaches, a pinch of salt, 2.5 swipes of nutmeg (this is the one spot where she seemed quite precise), 1/2 cup sugar, 1/3 cup flour, and 1 1/2 tsp. quick cooking tapioca. Then, crimp edges and cut vent holes. Paint egg white wash on top of pie and sprinkle with a little sugar. Then bake for 15 minutes at 425 F. Reduce heat to 350 F and bake for 35 minutes more.\u003cbr>\n\u003c/em>\u003cbr>\nThen, as Kate says, \"Eat Pie, Be Happy.\"\u003cbr>\nFor more pie musings from Kate, you can check out her blog \u003ca href=\"http://artofthepie.com/wordpress/\">Art of Pie\u003c/a> for more pie musings. \u003c/p>\n\n","blocks":[],"excerpt":"If you haven't heard of Kate McDermott, you're missing out. I first learned about her from a few Seattle friends who had taken her pie-making classes and insisted that it changed the way they thought about crust. And these are kitchen savvy people. Then I read somewhere that Ruth Reichl deemed Kate's crust an \"absolutely perfect crust.\" That's about the time I started stalking Kate. I'd go to her website to see if she was planning on teaching in the Bay Area. No luck. ","status":"publish","parent":0,"modified":1286313386,"stats":{"hasAudio":false,"hasVideo":false,"hasChartOrMap":false,"iframeSrcs":[],"hasGoogleForm":false,"hasGallery":false,"hasHearkenModule":false,"hasPolis":false,"paragraphCount":23,"wordCount":1801},"headData":{"title":"Baking Pie with Kate McDermott | KQED","description":"If you haven't heard of Kate McDermott, you're missing out. I first learned about her from a few Seattle friends who had taken her pie-making classes and insisted that it changed the way they thought about crust. And these are kitchen savvy people. Then I read somewhere that Ruth Reichl deemed Kate's crust an "absolutely perfect crust." That's about the time I started stalking Kate. I'd go to her website to see if she was planning on teaching in the Bay Area. No luck. ","ogTitle":"","ogDescription":"","ogImgId":"","twTitle":"","twDescription":"","twImgId":"","schema":{"@context":"http://schema.org","@type":"Article","headline":"Baking Pie with Kate McDermott","datePublished":"2010-10-04T14:34:34.000Z","dateModified":"2010-10-05T21:16:26.000Z","image":"https://cdn.kqed.org/wp-content/uploads/2020/02/KQED-OG-Image@1x.png"}},"disqusIdentifier":"16729 http://blogs.kqed.org/bayareabites/?p=16729","disqusUrl":"https://ww2.kqed.org/bayareabites/2010/10/04/baking-pie-with-kate-mcdermott-3/","disqusTitle":"Baking Pie with Kate McDermott","path":"/bayareabites/16729/baking-pie-with-kate-mcdermott-3","audioTrackLength":null,"parsedContent":[{"type":"contentString","content":"\u003cdiv class=\"post-body\">\u003cp>\u003cp>\u003ca href=\"http://ww2.kqed.org/bayareabites/wp-content/uploads/sites/24/2010/09/IMG_56381.jpg\">\u003cimg src=\"http://ww2.kqed.org/bayareabites/wp-content/uploads/sites/24/2010/09/IMG_56381.jpg\" alt=\"Kate McDermott\" title=\"Kate McDermott\" width=\"333\" height=\"500\" class=\"alignnone size-full wp-image-16802\">\u003c/a>\u003cbr>\n\u003cem>Kate McDermott laughing over pie\u003c/em>\u003c/p>\n\u003cp>If you haven't heard of \u003ca href=\"http://www.artofthepie.com/artofthepie/Welcome.html\">Kate McDermott\u003c/a>, you're missing out. I first learned about her from a few Seattle friends who had taken her pie-making classes and insisted that it changed the way they thought about crust. And these are kitchen savvy people. Then I read somewhere that Ruth Reichl deemed Kate's crust an \"absolutely perfect crust.\" That's about the time I started stalking Kate. I'd go to her website to see if she was planning on teaching in the Bay Area. No luck. I started following her \u003ca href=\"http://twitter.com/katemcdermott\">@katemcdermott\u003c/a> on twitter to see if she'd give away hints there. Then I finally wrote her an email asking if she'd consider teaching a class the weekend I was going to be up in Seattle in August. And voila--a few weeks later, I heard that she'd decided to do a shortened version of her regular class at \u003ca href=\"http://www.dianesmarketkitchen.com/\">Dianne's Market Kitchen\u003c/a> as a demo. I signed up immediately. And like the rest of the folks who have written \u003ca href=\"http://www.artofthepie.com/artofthepie/Testimonials.html\">testimonials\u003c/a>, I'm forever changed when it comes to pie. \u003c/p>\n\u003cp>So today, with her blessing, I'm going to share with you her infamous recipe and all of her fabulous tips. And of course some photos so you feel like you were along for the ride. Kate's come to the conclusion that there are three types of pie people in this world: makers, eaters, and seekers. After taking this class, you can literally be all three at one time. First things first: if you actually sit and listen to Kate, she's incredibly wise. Pie or no pie. While pie crust can make people uptight and anxious, Kate has a calming 'everything will turn out fine' demeanor. She says about the crust: \"Just feel it...we all know how to do this stuff.\" Later in class she states how \"it's simple--otherwise we still wouldn't all be doing it.\" And my favorite Kate quote: \"Everything turns out fine in pie.\" Ah, a breath of fresh air in an often complex pie-making world. \u003c/p>\n\u003cp>\u003ca href=\"http://ww2.kqed.org/bayareabites/wp-content/uploads/sites/24/2010/09/pie-2.jpg\">\u003cimg src=\"http://ww2.kqed.org/bayareabites/wp-content/uploads/sites/24/2010/09/pie-2.jpg\" alt=\"Making Pie with Kate McDermott\" title=\"Making Pie with Kate McDermott\" width=\"500\" height=\"500\" class=\"alignnone size-full wp-image-16794\">\u003c/a>\u003cbr>\n\u003cem>Kate and Dianne showing off the amazing peach pie\u003c/em>\u003c/p>\n\u003cp>The other thing that struck me immediately about the way Kate approaches pie is that she sets an intention for each pie. If you practice yoga, you'll recognize the practice of setting an intention before you begin: sending out some good vibes to someone struggling or someone that needs a little extra light in their day. Kate does this with each pie she makes. Regardless of whether or not this is a little too touchy-feely for you, it's a great reminder to be conscious and aware when we set out to bake pie. After Kate set an intention to send good thoughts to a friend struggling with cancer, I knew this would be a special class. This wasn't just a peach pie. This was a peach pie baked with love, skill, and deliberate thoughtfulness and care. \u003c/p>\n\u003cp>\u003c/p>\u003c/div>","attributes":{"named":{},"numeric":[]}},{"type":"component","content":"","name":"ad","attributes":{"named":{"label":"fullwidth"},"numeric":["fullwidth"]}},{"type":"contentString","content":"\u003cdiv class=\"post-body\">\u003cp>\u003c/p>\n\u003cp>\u003ca href=\"http://ww2.kqed.org/bayareabites/wp-content/uploads/sites/24/2010/09/IMG_5631.jpg\">\u003cimg src=\"http://ww2.kqed.org/bayareabites/wp-content/uploads/sites/24/2010/09/IMG_5631.jpg\" alt=\"Kate setting an intention\" title=\"Kate setting an intention\" width=\"500\" height=\"443\" class=\"alignnone size-full wp-image-16797\">\u003c/a>\u003cbr>\n\u003cem>Setting an intention for her pie\u003c/em>\u003c/p>\n\u003cp>Now for a few nuts and bolts. Where to begin? Ingredients and equipment seems like a logical start. \u003c/p>\n\u003cp>\u003cstrong>Ingredients and Equipment\u003c/strong>\u003cbr>\nKate uses King Arthur Flour, Kerry Gold Irish Butter (she buys it from Trader Joe's--the best deal in town, she insists), and leaf lard she orders from a small farm in Pennsylvania. And perhaps most importantly, she insists on using only the most superior fruit you can buy. That way, you don't need to add much sugar at all. In our class, we used \u003ca href=\"http://www.froghollow.com/\">Frog Hollow \u003c/a>Cal Red peaches and nothing more than a little sugar, flour, salt, tapioca, and nutmeg. It turned out absolutely dreamy. \u003c/p>\n\u003cp>As far as equipment, Kate uses either an 8-inch or 9-inch pan and admits to loving many kinds of pans--from ceramic to glass. She does advise, however, to stay away from those disposable aluminum pie pans because they interfere with the even temperature of the pie crust. Kate also uses a dowel pin and a pastry cloth to roll out her dough. You can find both at your local food supply store. \u003c/p>\n\u003cp>After discussing ingredients and equipment, Kate began to speak about pie in general, and the elements that make up a good pie: \u003c/p>\n\u003cp>\u003cstrong>4 Elements of a Pie Filling:\u003c/strong>\u003cbr>\n1) Superior Fruit\u003cbr>\n2) Thickener\u003cbr>\n3) Seasoning\u003cbr>\n4) Sweetener\u003c/p>\n\u003cp>\u003cstrong>Pie Filling: Fruit\u003c/strong>\u003cbr>\nWith any good fruit pie, there are some considerations that will make a ho-hum pie extraordinary. Kate weighs in:\u003c/p>\n\u003cul>\n\u003cli>Quantity: O.K., so this tip is genius in my opinion. I always struggle with how much fruit it will take to make my pie filling. Kate uses a method where she takes whole peaches (or apples, or whatever you're using) and literally places them in the pie pan. Once it's full, you've got enough fruit. In our case with this pie, I believe we used 4 large peaches for our 8-inch dish.\u003c/li>\n\u003cli>To peel or not to peel: Kate doesn't bother. Ever. I love this about her.\u003c/li>\n\u003cli>Choosing the best fruit: With peaches, Kate says you want to see gold coming out of the rim (not green) of the peach--that way, you know it's gotten all of the sun and nutrients available to it. And when you're choosing a peach, a heavy peach means it has more sugar.\u003c/li>\n\u003c/ul>\n\u003cp>\u003ca href=\"http://ww2.kqed.org/bayareabites/wp-content/uploads/sites/24/2010/09/IMG_5635.jpg\">\u003cimg src=\"http://ww2.kqed.org/bayareabites/wp-content/uploads/sites/24/2010/09/IMG_5635.jpg\" alt=\"Pie Filling\" title=\"Pie Filling\" width=\"500\" height=\"333\" class=\"alignnone size-full wp-image-16798\">\u003c/a>\u003cbr>\n\u003cem>New Trick to Figure out How Many Peaches to Include\u003c/em>\u003c/p>\n\u003cp>As we watched Kate make, form, and roll out her crust she gave many invaluable tips that I've used since and have seen great improvements in my pies. Here they are, in no particular order:\u003c/p>\n\u003cp>\u003cstrong>Kate's Crust Tips:\u003c/strong>\u003c/p>\n\u003cul>\n\u003cli>Cold, cold, cold: Everything must be cold. I was surprised to learn that Kate not only uses cold butter and lard, but she also keeps her butter, her rolling pin, her bowl--even the pastry cloth in the freezer.\u003c/li>\n\u003cli>Adding water to your dough: Kate says two things: it's not precise, and go slow. She mentions a 3-2-1 formula where she adds 3 Tbsp. of water to begin and advises to just quickly move the dough around (you're not doing a thorough mixing here) and press together to see if it holds. If it doesn't, add 2 Tbsp. more. A good rule of thumb: the colder the fat, the more water you’re going to need. And an important side-note: Don’t get ice into the dough! When asked if she likes to err on the wet or dry side with her pie crust, Kate says she'd much rather err on the wet side (apparently, Ruth Reichl agrees).\u003c/li>\n\u003cli>Forming your dough: Cut your dough ball in half and you should see marbling. You want two “chubby disks” (about 4 inches by 1.5 inch). Wrap your disks in dough and then actually shape them how you'd like while they're in the plastic wrap (this was a revelation to me).\u003c/li>\n\u003cli>Rolling out your dough: After chilling your \"chubby disks\" for at least an hour, you want to take them out and gently tap them with your rolling pin. Kate says this is to kind of jar it awake and let it know you mean business. You want to put a nice amount of flour down on your pastry cloth, and roll out slowly (without worrying about cracks) from fingertips to palms, out and back. Brush off the extra flour as you go with a pastry brush. Kate says you want the pie dough \"as thin as glass and only as large as it needs to be.\" That's how you know when you're done.\u003c/li>\n\u003c/ul>\n\u003cp>\u003ca href=\"http://ww2.kqed.org/bayareabites/wp-content/uploads/sites/24/2010/09/pie-1.jpg\">\u003cimg src=\"http://ww2.kqed.org/bayareabites/wp-content/uploads/sites/24/2010/09/pie-1.jpg\" alt=\"Making Pie Dough\" title=\"Making Pie Dough\" width=\"500\" height=\"500\" class=\"alignnone size-full wp-image-16795\">\u003c/a>\u003cbr>\n\u003cem>Forming Our Pie!\u003c/em>\u003c/p>\n\u003cp>And now that you're inundated with tips and advice, here is the recipe for Kate's award-winning crust. I will say that nothing could ever replace sitting across from her and watching her make it herself. And I look forward to one day actually taking her longer participation course. Maybe if we all start stalking her and sending her emails, she'll decide to take this pie-crust madness on the road. Until then...\u003c/p>\n\u003cp>\u003cstrong>Kate's Infamous Pie Crust\u003c/strong>\u003c/p>\n\u003cp>\u003cem>Ingredients:\u003c/em>\u003cbr>\n2 1/2 cups King Arthur Unbleached White Flour (red bag)\u003cbr>\n8 Tbsp. leaf lard, cut into various small pieces, pea to walnut size\u003cbr>\n8 Tbsp. Irish butter, cut into various small pieces, pea to walnut size\u003cbr>\n1/2 tsp. kosher salt\u003cbr>\n6-8 Tbsp. ice water (this is an average--Kate's used anywhere between 3-15 Tbsp. at a time)\u003c/p>\n\u003cp>\u003cem>Method:\u003c/em>\u003cbr>\n1. Combine all ingredients except the ice water in a large, cold bowl.\u003cbr>\n2. With clean hands, blend the mixture together until it looks like course meal with some lumps in it. Lumps=flaky pie!\u003cbr>\n3. Sprinkle ice water over mixture and stir lightly with a fork.\u003cbr>\n4. Squeeze a handful of dough together. Mix in a bit more water if it doesn't keep together.\u003cbr>\n5. Divide the dough in half and make two chubby disks about 5 inches across. Wrap each disk separately in plastic wrap and chill for 1 hour.\u003cbr>\n6. Take out one disk and put on a well-floured board. Sprinkle some flour onto the top of the disk and thump the top several times. Turn it over and thump the other side.\u003cbr>\n7. Sprinkle more flour onto the top of the crust if needed to keep the pin from sticking and roll the crust out from the center in all directions. When it's an inch or so larger than your pie pan, fold the dough over the top of the pin and lay it in the pie pan carefully.\u003cbr>\n8. Don't worry if the crust needs to be patched together; just paint a little water where it needs to be patched and \"glue\" on the patch pieces.\u003cbr>\n9. Put the filling in the pie and repeat the process with the other disk. \u003c/p>\n\u003cp>\u003c/p>\u003c/div>","attributes":{"named":{},"numeric":[]}},{"type":"component","content":"","name":"ad","attributes":{"named":{"label":"floatright"},"numeric":["floatright"]}},{"type":"contentString","content":"\u003cdiv class=\"post-body\">\u003cp>\u003c/p>\n\u003cp>\u003cem>Notes on Filling and Baking: fill with your favorite fruit filling. For a peach pie similar to the one we made in Seattle, use adequate peaches, a pinch of salt, 2.5 swipes of nutmeg (this is the one spot where she seemed quite precise), 1/2 cup sugar, 1/3 cup flour, and 1 1/2 tsp. quick cooking tapioca. Then, crimp edges and cut vent holes. Paint egg white wash on top of pie and sprinkle with a little sugar. Then bake for 15 minutes at 425 F. Reduce heat to 350 F and bake for 35 minutes more.\u003cbr>\n\u003c/em>\u003cbr>\nThen, as Kate says, \"Eat Pie, Be Happy.\"\u003cbr>\nFor more pie musings from Kate, you can check out her blog \u003ca href=\"http://artofthepie.com/wordpress/\">Art of Pie\u003c/a> for more pie musings. \u003c/p>\n\n\u003c/div>\u003c/p>","attributes":{"named":{},"numeric":[]}}],"link":"/bayareabites/16729/baking-pie-with-kate-mcdermott-3","authors":["5072"],"categories":["bayareabites_1516","bayareabites_63","bayareabites_2695","bayareabites_64","bayareabites_12"],"tags":["bayareabites_253","bayareabites_8416","bayareabites_1297","bayareabites_228","bayareabites_2594","bayareabites_421"],"label":"bayareabites"},"bayareabites_8273":{"type":"posts","id":"bayareabites_8273","meta":{"index":"posts_1591205157","site":"bayareabites","id":"8273","score":null,"sort":[1258915325000]},"guestAuthors":[],"slug":"calling-the-pie-therapist","title":"Calling the Pie Therapist","publishDate":1258915325,"format":"aside","headTitle":"Bay Area Bites | KQED Food","labelTerm":{"site":"bayareabites"},"content":"\u003cp>\u003cimg src=\"http://ww2.kqed.org/bayareabites/wp-content/uploads/sites/24/2009/11/finished-pie.jpg\" alt=\"the finished pie\" title=\"the finished pie\" width=\"300\" height=\"400\" class=\"alignleft size-full wp-image-8416\">Run through your Thanksgiving menu in your head, right now. Something in there is making you nervous. Very nervous. What it is? You can admit it. It's not a phobia, more like an...inadequacy, a fear of never being as good as grandma, a lingering humiliation from that one year you tried and the knife wouldn't even cut through the bottom crust, so rock-like it was. Or when the dough glued itself to the counter in a rebellious mound, refusing to roll and instead sticking to every surface save the pie pan. But yes, it's real. We call it Fear of Pie-ing. And that's why I'm here, your Pie Therapist on call. \u003c/p>\n\u003cp>Let's get it straight: no one really worries about the filling. They might wonder if the apples should be cut thick or thin, whether to thicken with cornstarch or flour. But inevitably, it's the crust that strikes fear in the heart of grown men and women, even those who can whip out an osso bucco or tom kai gai with aplomb. They hit up the bakery, they settle for those nasty frozen pre-made crusts, they make crisp and cobbler instead. I'm here to tell you: there is NO magic about making pie crust. It takes four ingredients, about 20 minutes or less of hands-on time, and the results are so flaky, so buttery, so sublime, you will amaze your loved ones (and yourself) for life. \u003c/p>\n\u003cp>Oh, easy for you to say, I hear you muttering. You grew up making pie with Mom, pushing a crumbly handful of dough into a little Pyrex dish so you could dig into your very own pie for dessert. Fair enough. The challenge was this: could two urbanites, one a non-cook, the other a non-baker, turn into confident pie-bakers after a single session with the Pie Therapist? \u003c/p>\n\u003cp>The first patient was Kevin, a psychotherapist, who lives in the Castro. Although he has a longtime partner, he has what I think of as the bachelor fridge: limes and condiments. When I arrive with my bag of equipment, he tells me that he had to wake up his sick upstairs neighbor to borrow a pie pan. I realize quickly never to assume what someone will have in his kitchen. In this case, what's missing is anything like a mixing bowl. We make do with a small saucepan and a couple of pasta bowls. \u003c/p>\n\u003cp>First, of course, a little therapeutic assessment. His mom was a busy single working woman with no time for baking. Grandma, on the other hand, was a fantastic cook and a great baker, whose pies were memorable. Unfortunately, her recipes passed on with her, and no one in the family has been able to come close. Kevin's sole kitchen skill? Making a mean margarita, and happily, he demonstrates. We put on the Loretta Lynn and get busy. \u003c/p>\n\u003cp>[ad fullwidth]\u003c/p>\n\u003cp>First up, the dry ingredients. Flour, a little salt, a little sugar, stirred together in the pot. A glass of ice water, set aside. He's bought fancy butter, a good thing, in this case the high-butterfat, European-style butter from Straus Creamery, Marin's organic dairy. I tell him I've met the Straus family and their happy grass-roaming cows, and we rub up a little locavore glow, helped along by the tequila. Then the butter is cubed and tossed into the flour so that each cube is coated. \u003c/p>\n\u003cp>\u003cimg src=\"http://ww2.kqed.org/bayareabites/wp-content/uploads/sites/24/2009/11/butter-nickels.jpg\" alt=\"making the butter nickels\" title=\"making the butter nickels\" width=\"300\" height=\"400\" class=\"alignnone size-full wp-image-8415\">\u003c/p>\n\u003cp>\"Now, hold your hands out in front of you, palms up, like a statue of Jesus,\" I tell him, and we scoop our fingers, palms up, down and up through the butter-chunked flour. \"Now, pick up a butter cube between your thumb and fingertips. Flatten it out to a little butter nickel, and drop it back into the bowl.\"\u003c/p>\n\u003cp>Keep scooping, aerating the flour as you go, and flattening out your butter nickels. The trick is to keep everything light and airy--no squeezing, no mashing. You don't want paste, you want a crumbly mixture of flour layered with shards of cold fat. As long as you keep your palms facing up and only your thumb and fingertips working the dough, all is well. Stop when it looks somewhere between peas and rolled oatmeal, chunkier than you might imagine, and definitely before it gets to to the dry-cornmeal stage most cookbooks recommend. \u003c/p>\n\u003cp>So far, so good. Now, the water to make the dough: four or five tablespoons, mixed in lightly with a fork. Then sprinkled in, a tablespoon at a time, maybe 8 to 10 tablespoons in all. Pick up a handful of dough, and squeeze gently. It should come together in a ball that holds together but isn't wet or gluey. Err on the side of slight crumbliness, if you must.\u003c/p>\n\u003cp>\u003cimg src=\"http://ww2.kqed.org/bayareabites/wp-content/uploads/sites/24/2009/11/squeezing-the-dough.jpg\" alt=\"squeezing the dough\" title=\"squeezing the dough\" width=\"300\" height=\"400\" class=\"alignnone size-full wp-image-8418\">\u003c/p>\n\u003cp>Once the dough holds together, it goes into the pie-baker's friend, the gallon-size resealable bag. Dough firmly pushed down into a round, air pressed out from the bag and sealed, then into the freezer for 20 minutes, or the fridge for an hour (or overnight). While not absolutely necessary, it relaxes the dough and firms up the butter, increasingly flakiness and making it less likely to stick while rolling or shrink during baking. \u003c/p>\n\u003cp>The dough comes out and is divided in half, with the second half going back in the fridge. Onto a lightly floured board, we press our dough-lump into a roughly round patty. \"A rolling pin makes life easier,\" I tell Kevin as I pick up my wooden pin. \"But then again, I've also rolled out a lot of pie crusts with a wine bottle.\" \u003c/p>\n\u003cp>I hand him the pin and tell him to think of the dough as a sun, with rays radiating out from the center. \"Don't roll back and forth like you're paving a highway. Roll from the center to the edge, around and around so you make an even circle. And after every few rolls, loosen the dough with a spatula, so it doesn't get in the habit of sticking.\"\u003c/p>\n\u003cp>He rolls and rolls, and soon we've got a circle a couple of inches bigger than our pan. We loosen the dough, fold in half and in half again, and transfer it into the pan, since it's much easier to move a thick folded triangle of dough than a thin floppy circle. Unfold, press lightly, put in the fridge and repeat with the other half of the dough. The filling goes in--in this case, blueberries, mixed with sugar and a little cornstarch--the top is draped on and crimped, and it goes into the oven. An hour later, his partner is home, and they are two men with a hot pie. \u003c/p>\n\u003cp>Kevin is happy and amazed that it could be so easy. Scones, he wants to make next, and I tell him it's the same technique: mix the dry ingredients, cut in the butter, add liquid, then roll out and cut. \u003c/p>\n\u003cp>The next patient is Leslie, a great cook and a longtime cookbook editor and author. What could I possibly teach her? But baking, it turns out, is where she feels out of control. \"Bread, cake, pie,\" is how she describes her hierarchy of baking fears. We decide to start at the bottom, with pie. In this case, she has bowls galore, but no pie pan, since she never makes pies. \"I'm a crisp person,\" she admits. We go through the same steps, and I show her the fluff-it-up, palms-up technique. \"Bring it up to God!\" she laughs, and we agree. Surely there is pie in heaven, good pie. \u003c/p>\n\u003cp>\u003cimg src=\"http://ww2.kqed.org/bayareabites/wp-content/uploads/sites/24/2009/11/pie-fruit.jpg\" alt=\"Mound the filling high\" title=\"Mound the filling high\" width=\"300\" height=\"400\" class=\"alignnone size-full wp-image-8417\">\u003c/p>\n\u003cp>It's apple this time, and we slice and mound the apples high while the crust chills. This crust is a little crumbly, and wants to crack and stick as we roll. I grab the baker's friend, plastic wrap (waxed paper works well too), and we slap a sheet of plastic between the rolling pin and the dough. Suddenly, everything's easy: the dough stops sticking and the cracks seal up. We fold and drape and crimp, and the pie goes into the oven. Leslie is ecstatic: she has conquered pie! An hour later, her family sits down to steaming slices. Her nieces battle forks for the last piece of crust on the plate. And the Pie Therapist packs up her rolling pin and slips out into the night, another job done. \u003c/p>\n\u003cp>\u003cstrong>All Butter Pie Crust\u003c/strong>\u003cbr>\nYes, shortening is easier to work with. But honestly, it's not that hard to use butter, and the taste is so wonderful, there's no reason to bother with anything else. Anyway, if you're going to eat fat, eat honest tasty fat that tastes good. \u003c/p>\n\u003cp>As for baking times, it depends on the type of filling. Most double-crusted fruit pies can be baked at 375F for about 45 to 55 minutes, until crust in golden brown and filling is just bubbling up. For a single-crust pie, like pumpkin or pecan, bake at 350F for 30-40 minutes, until filling is just set but still a slightly jiggly, since filling will continue to set as it cools. \u003c/p>\n\u003cp>\u003cstrong>Equipment:\u003c/strong>\u003cbr>\na large bowl\u003cbr>\nmeasuring cups and spoons\u003cbr>\na large spoon for mixing\u003cbr>\na pie pan (metal, glass, or ceramic)\u003cbr>\na rolling pin\u003cbr>\nresealable plastic bag or plastic wrap\u003c/p>\n\u003cp>\u003cstrong>Ingredients:\u003c/strong>\u003c/p>\n\u003cp>Makes: Enough for a 9-inch 2-crust pie\u003c/p>\n\u003cp>2 1/4 cups flour\u003cbr>\n1/2 tsp salt\u003cbr>\n1 1/2 tablespoons sugar\u003cbr>\n2 sticks (8 oz, 1 cup) butter, chilled\u003cbr>\n8 to 10 tablespoons ice water\u003cbr>\nextra flour for dusting\u003c/p>\n\u003cp>\u003cstrong>Preparation:\u003c/strong>\u003c/p>\n\u003cp>1. In a large bowl, sift or whisk together flour, salt, and sugar. \u003c/p>\n\u003cp>2. Cut butter into 1/2-inch cubes. Toss butter cubes into flour mixture. Rub butter cubes between your thumb and fingertips, palms up, until butter flattens into little flour-covered nickels. Keep scooping up flour and butter cubes and flattening into nickels until all butter is flattened into shards. \u003c/p>\n\u003cp>3. Lightly stir in half the water. Add the rest in drizzles, stirring and scooping dough until it just holds together; you may not use all the water. Squeeze a handful of dough together; it should hold together without crumbling. \u003c/p>\n\u003cp>4. Scoop dough into a gallon-size resealable bag. Flatten dough into a thick patty, press air from bag and seal. Chill for at least an hour in the refrigerator, or 20 minutes in the freezer. You can make your dough up to 2 days in advance, keeping it in the refrigerator, or store for up to a month in the freezer.\u003c/p>\n\u003cp>5. To roll out dough, sprinkle a wide work surface with flour. Divide dough in half and shape into a round. Rub rolling pin with flour and roll out into a thin, even circle, loosening dough frequently with a spatula. If dough is hard to roll or cracks, it may be too cold. Let it warm up for a couple of minutes, then try again. Put a sheet of waxed paper or plastic wrap between your rolling pin and the dough if dough is very sticky. \u003c/p>\n\u003cp>6. Loosen dough with a spatula. Fold in half, and then in half again. Transfer to pie pan and press lightly into the pan. Trim so dough is nearly flush with edges of pan. Put in the fridge and roll out second half of dough. \u003c/p>\n\u003cp>7. Put filling into pie pan, top with top crust, and seal edges together, crimping in whatever decorative fashion you like. \u003c/p>\n\u003cp>[ad floatright]\u003c/p>\n\u003cp>\u003cem>Note: For a single crust, use 1 1/4 cups flour, 1/4 tsp salt, 1 tbsp sugar, 8 tbsp butter (4 oz/ 1/2 cup), 3-4 tbsp ice water\u003c/em>\u003c/p>\n\n","blocks":[],"excerpt":"I'm here to tell you: there is NO magic about making pie crust. It takes four ingredients, about 20 minutes or less of hands-on time, and the results are so flaky, so buttery, so sublime, you will amaze your loved ones (and yourself) for life. ","status":"publish","parent":0,"modified":1353524008,"stats":{"hasAudio":false,"hasVideo":false,"hasChartOrMap":false,"iframeSrcs":[],"hasGoogleForm":false,"hasGallery":false,"hasHearkenModule":false,"hasPolis":false,"paragraphCount":36,"wordCount":1972},"headData":{"title":"Calling the Pie Therapist | KQED","description":"I'm here to tell you: there is NO magic about making pie crust. It takes four ingredients, about 20 minutes or less of hands-on time, and the results are so flaky, so buttery, so sublime, you will amaze your loved ones (and yourself) for life. ","ogTitle":"","ogDescription":"","ogImgId":"","twTitle":"","twDescription":"","twImgId":"","schema":{"@context":"http://schema.org","@type":"Article","headline":"Calling the Pie Therapist","datePublished":"2009-11-22T18:42:05.000Z","dateModified":"2012-11-21T18:53:28.000Z","image":"https://cdn.kqed.org/wp-content/uploads/2020/02/KQED-OG-Image@1x.png"}},"disqusIdentifier":"8273 http://blogs.kqed.org/bayareabites/?p=8273","disqusUrl":"https://ww2.kqed.org/bayareabites/2009/11/22/calling-the-pie-therapist/","disqusTitle":"Calling the Pie Therapist","path":"/bayareabites/8273/calling-the-pie-therapist","audioTrackLength":null,"parsedContent":[{"type":"contentString","content":"\u003cdiv class=\"post-body\">\u003cp>\u003cp>\u003cimg src=\"http://ww2.kqed.org/bayareabites/wp-content/uploads/sites/24/2009/11/finished-pie.jpg\" alt=\"the finished pie\" title=\"the finished pie\" width=\"300\" height=\"400\" class=\"alignleft size-full wp-image-8416\">Run through your Thanksgiving menu in your head, right now. Something in there is making you nervous. Very nervous. What it is? You can admit it. It's not a phobia, more like an...inadequacy, a fear of never being as good as grandma, a lingering humiliation from that one year you tried and the knife wouldn't even cut through the bottom crust, so rock-like it was. Or when the dough glued itself to the counter in a rebellious mound, refusing to roll and instead sticking to every surface save the pie pan. But yes, it's real. We call it Fear of Pie-ing. And that's why I'm here, your Pie Therapist on call. \u003c/p>\n\u003cp>Let's get it straight: no one really worries about the filling. They might wonder if the apples should be cut thick or thin, whether to thicken with cornstarch or flour. But inevitably, it's the crust that strikes fear in the heart of grown men and women, even those who can whip out an osso bucco or tom kai gai with aplomb. They hit up the bakery, they settle for those nasty frozen pre-made crusts, they make crisp and cobbler instead. I'm here to tell you: there is NO magic about making pie crust. It takes four ingredients, about 20 minutes or less of hands-on time, and the results are so flaky, so buttery, so sublime, you will amaze your loved ones (and yourself) for life. \u003c/p>\n\u003cp>Oh, easy for you to say, I hear you muttering. You grew up making pie with Mom, pushing a crumbly handful of dough into a little Pyrex dish so you could dig into your very own pie for dessert. Fair enough. The challenge was this: could two urbanites, one a non-cook, the other a non-baker, turn into confident pie-bakers after a single session with the Pie Therapist? \u003c/p>\n\u003cp>The first patient was Kevin, a psychotherapist, who lives in the Castro. Although he has a longtime partner, he has what I think of as the bachelor fridge: limes and condiments. When I arrive with my bag of equipment, he tells me that he had to wake up his sick upstairs neighbor to borrow a pie pan. I realize quickly never to assume what someone will have in his kitchen. In this case, what's missing is anything like a mixing bowl. We make do with a small saucepan and a couple of pasta bowls. \u003c/p>\n\u003cp>First, of course, a little therapeutic assessment. His mom was a busy single working woman with no time for baking. Grandma, on the other hand, was a fantastic cook and a great baker, whose pies were memorable. Unfortunately, her recipes passed on with her, and no one in the family has been able to come close. Kevin's sole kitchen skill? Making a mean margarita, and happily, he demonstrates. We put on the Loretta Lynn and get busy. \u003c/p>\n\u003cp>\u003c/p>\u003c/div>","attributes":{"named":{},"numeric":[]}},{"type":"component","content":"","name":"ad","attributes":{"named":{"label":"fullwidth"},"numeric":["fullwidth"]}},{"type":"contentString","content":"\u003cdiv class=\"post-body\">\u003cp>\u003c/p>\n\u003cp>First up, the dry ingredients. Flour, a little salt, a little sugar, stirred together in the pot. A glass of ice water, set aside. He's bought fancy butter, a good thing, in this case the high-butterfat, European-style butter from Straus Creamery, Marin's organic dairy. I tell him I've met the Straus family and their happy grass-roaming cows, and we rub up a little locavore glow, helped along by the tequila. Then the butter is cubed and tossed into the flour so that each cube is coated. \u003c/p>\n\u003cp>\u003cimg src=\"http://ww2.kqed.org/bayareabites/wp-content/uploads/sites/24/2009/11/butter-nickels.jpg\" alt=\"making the butter nickels\" title=\"making the butter nickels\" width=\"300\" height=\"400\" class=\"alignnone size-full wp-image-8415\">\u003c/p>\n\u003cp>\"Now, hold your hands out in front of you, palms up, like a statue of Jesus,\" I tell him, and we scoop our fingers, palms up, down and up through the butter-chunked flour. \"Now, pick up a butter cube between your thumb and fingertips. Flatten it out to a little butter nickel, and drop it back into the bowl.\"\u003c/p>\n\u003cp>Keep scooping, aerating the flour as you go, and flattening out your butter nickels. The trick is to keep everything light and airy--no squeezing, no mashing. You don't want paste, you want a crumbly mixture of flour layered with shards of cold fat. As long as you keep your palms facing up and only your thumb and fingertips working the dough, all is well. Stop when it looks somewhere between peas and rolled oatmeal, chunkier than you might imagine, and definitely before it gets to to the dry-cornmeal stage most cookbooks recommend. \u003c/p>\n\u003cp>So far, so good. Now, the water to make the dough: four or five tablespoons, mixed in lightly with a fork. Then sprinkled in, a tablespoon at a time, maybe 8 to 10 tablespoons in all. Pick up a handful of dough, and squeeze gently. It should come together in a ball that holds together but isn't wet or gluey. Err on the side of slight crumbliness, if you must.\u003c/p>\n\u003cp>\u003cimg src=\"http://ww2.kqed.org/bayareabites/wp-content/uploads/sites/24/2009/11/squeezing-the-dough.jpg\" alt=\"squeezing the dough\" title=\"squeezing the dough\" width=\"300\" height=\"400\" class=\"alignnone size-full wp-image-8418\">\u003c/p>\n\u003cp>Once the dough holds together, it goes into the pie-baker's friend, the gallon-size resealable bag. Dough firmly pushed down into a round, air pressed out from the bag and sealed, then into the freezer for 20 minutes, or the fridge for an hour (or overnight). While not absolutely necessary, it relaxes the dough and firms up the butter, increasingly flakiness and making it less likely to stick while rolling or shrink during baking. \u003c/p>\n\u003cp>The dough comes out and is divided in half, with the second half going back in the fridge. Onto a lightly floured board, we press our dough-lump into a roughly round patty. \"A rolling pin makes life easier,\" I tell Kevin as I pick up my wooden pin. \"But then again, I've also rolled out a lot of pie crusts with a wine bottle.\" \u003c/p>\n\u003cp>I hand him the pin and tell him to think of the dough as a sun, with rays radiating out from the center. \"Don't roll back and forth like you're paving a highway. Roll from the center to the edge, around and around so you make an even circle. And after every few rolls, loosen the dough with a spatula, so it doesn't get in the habit of sticking.\"\u003c/p>\n\u003cp>He rolls and rolls, and soon we've got a circle a couple of inches bigger than our pan. We loosen the dough, fold in half and in half again, and transfer it into the pan, since it's much easier to move a thick folded triangle of dough than a thin floppy circle. Unfold, press lightly, put in the fridge and repeat with the other half of the dough. The filling goes in--in this case, blueberries, mixed with sugar and a little cornstarch--the top is draped on and crimped, and it goes into the oven. An hour later, his partner is home, and they are two men with a hot pie. \u003c/p>\n\u003cp>Kevin is happy and amazed that it could be so easy. Scones, he wants to make next, and I tell him it's the same technique: mix the dry ingredients, cut in the butter, add liquid, then roll out and cut. \u003c/p>\n\u003cp>The next patient is Leslie, a great cook and a longtime cookbook editor and author. What could I possibly teach her? But baking, it turns out, is where she feels out of control. \"Bread, cake, pie,\" is how she describes her hierarchy of baking fears. We decide to start at the bottom, with pie. In this case, she has bowls galore, but no pie pan, since she never makes pies. \"I'm a crisp person,\" she admits. We go through the same steps, and I show her the fluff-it-up, palms-up technique. \"Bring it up to God!\" she laughs, and we agree. Surely there is pie in heaven, good pie. \u003c/p>\n\u003cp>\u003cimg src=\"http://ww2.kqed.org/bayareabites/wp-content/uploads/sites/24/2009/11/pie-fruit.jpg\" alt=\"Mound the filling high\" title=\"Mound the filling high\" width=\"300\" height=\"400\" class=\"alignnone size-full wp-image-8417\">\u003c/p>\n\u003cp>It's apple this time, and we slice and mound the apples high while the crust chills. This crust is a little crumbly, and wants to crack and stick as we roll. I grab the baker's friend, plastic wrap (waxed paper works well too), and we slap a sheet of plastic between the rolling pin and the dough. Suddenly, everything's easy: the dough stops sticking and the cracks seal up. We fold and drape and crimp, and the pie goes into the oven. Leslie is ecstatic: she has conquered pie! An hour later, her family sits down to steaming slices. Her nieces battle forks for the last piece of crust on the plate. And the Pie Therapist packs up her rolling pin and slips out into the night, another job done. \u003c/p>\n\u003cp>\u003cstrong>All Butter Pie Crust\u003c/strong>\u003cbr>\nYes, shortening is easier to work with. But honestly, it's not that hard to use butter, and the taste is so wonderful, there's no reason to bother with anything else. Anyway, if you're going to eat fat, eat honest tasty fat that tastes good. \u003c/p>\n\u003cp>As for baking times, it depends on the type of filling. Most double-crusted fruit pies can be baked at 375F for about 45 to 55 minutes, until crust in golden brown and filling is just bubbling up. For a single-crust pie, like pumpkin or pecan, bake at 350F for 30-40 minutes, until filling is just set but still a slightly jiggly, since filling will continue to set as it cools. \u003c/p>\n\u003cp>\u003cstrong>Equipment:\u003c/strong>\u003cbr>\na large bowl\u003cbr>\nmeasuring cups and spoons\u003cbr>\na large spoon for mixing\u003cbr>\na pie pan (metal, glass, or ceramic)\u003cbr>\na rolling pin\u003cbr>\nresealable plastic bag or plastic wrap\u003c/p>\n\u003cp>\u003cstrong>Ingredients:\u003c/strong>\u003c/p>\n\u003cp>Makes: Enough for a 9-inch 2-crust pie\u003c/p>\n\u003cp>2 1/4 cups flour\u003cbr>\n1/2 tsp salt\u003cbr>\n1 1/2 tablespoons sugar\u003cbr>\n2 sticks (8 oz, 1 cup) butter, chilled\u003cbr>\n8 to 10 tablespoons ice water\u003cbr>\nextra flour for dusting\u003c/p>\n\u003cp>\u003cstrong>Preparation:\u003c/strong>\u003c/p>\n\u003cp>1. In a large bowl, sift or whisk together flour, salt, and sugar. \u003c/p>\n\u003cp>2. Cut butter into 1/2-inch cubes. Toss butter cubes into flour mixture. Rub butter cubes between your thumb and fingertips, palms up, until butter flattens into little flour-covered nickels. Keep scooping up flour and butter cubes and flattening into nickels until all butter is flattened into shards. \u003c/p>\n\u003cp>3. Lightly stir in half the water. Add the rest in drizzles, stirring and scooping dough until it just holds together; you may not use all the water. Squeeze a handful of dough together; it should hold together without crumbling. \u003c/p>\n\u003cp>4. Scoop dough into a gallon-size resealable bag. Flatten dough into a thick patty, press air from bag and seal. Chill for at least an hour in the refrigerator, or 20 minutes in the freezer. You can make your dough up to 2 days in advance, keeping it in the refrigerator, or store for up to a month in the freezer.\u003c/p>\n\u003cp>5. To roll out dough, sprinkle a wide work surface with flour. Divide dough in half and shape into a round. Rub rolling pin with flour and roll out into a thin, even circle, loosening dough frequently with a spatula. If dough is hard to roll or cracks, it may be too cold. Let it warm up for a couple of minutes, then try again. Put a sheet of waxed paper or plastic wrap between your rolling pin and the dough if dough is very sticky. \u003c/p>\n\u003cp>6. Loosen dough with a spatula. Fold in half, and then in half again. Transfer to pie pan and press lightly into the pan. Trim so dough is nearly flush with edges of pan. Put in the fridge and roll out second half of dough. \u003c/p>\n\u003cp>7. Put filling into pie pan, top with top crust, and seal edges together, crimping in whatever decorative fashion you like. \u003c/p>\n\u003cp>\u003c/p>\u003c/div>","attributes":{"named":{},"numeric":[]}},{"type":"component","content":"","name":"ad","attributes":{"named":{"label":"floatright"},"numeric":["floatright"]}},{"type":"contentString","content":"\u003cdiv class=\"post-body\">\u003cp>\u003c/p>\n\u003cp>\u003cem>Note: For a single crust, use 1 1/4 cups flour, 1/4 tsp salt, 1 tbsp sugar, 8 tbsp butter (4 oz/ 1/2 cup), 3-4 tbsp ice water\u003c/em>\u003c/p>\n\n\u003c/div>\u003c/p>","attributes":{"named":{},"numeric":[]}}],"link":"/bayareabites/8273/calling-the-pie-therapist","authors":["5038"],"categories":["bayareabites_1516","bayareabites_752","bayareabites_2695","bayareabites_1763","bayareabites_12"],"tags":["bayareabites_3015","bayareabites_228","bayareabites_2594","bayareabites_530"],"label":"bayareabites"},"bayareabites_5902":{"type":"posts","id":"bayareabites_5902","meta":{"index":"posts_1591205157","site":"bayareabites","id":"5902","score":null,"sort":[1250445934000]},"guestAuthors":[],"slug":"sebastopol-apple-fair","title":"Pie Crust and Sebastopol Gravenstein Apple Fair","publishDate":1250445934,"format":"aside","headTitle":"Bay Area Bites | KQED Food","labelTerm":{"site":"bayareabites"},"content":"\u003cp>\u003cimg src=\"http://ww2.kqed.org/bayareabites/wp-content/uploads/sites/24/2009/08/pies500.jpg\" alt=\"pies\" title=\"pies\" width=\"500\" height=\"375\" class=\"alignnone size-full wp-image-5992\">\u003c/p>\n\u003cp>Listen to me: good fat makes good pie crust. \u003c/p>\n\u003cp>Books like \u003ca href=\"http://www.amazon.com/Pastry-Bible-Rose-Levy-Beranbaum/dp/0684813483/ref=sr_1_1?ie=UTF8&qid=1250401722&sr=8-1\">The Pie & Pastry Bible\u003c/a>, \u003ca href=\"http://www.amazon.com/Cookwise-Revealed-Shirley-O-Corriher/dp/0688102298/ref=sr_1_1?ie=UTF8&qid=1250401771&sr=8-1\">Cookwise\u003c/a>, and others make a big fuss about technique. Freeze the butter, freeze \u003cem>half \u003c/em>the butter, use \u003cem>only\u003c/em> butter, use butter and shortening, roll it into shards, cut it into cubes, chill the dough, chill it again, on and on and on, til anyone would be convinced that you need an advanced degree from Pie Crust U to turn out anything worth eating.\u003c/p>\n\u003cp>But you know what you really need? Your two hands, some flour, a little salt, butter, and lard. \u003c/p>\n\u003cp>Yes, lard. Good lard, which is to say, rendered leaf lard made from happy pigs who spent their lives outside doing happy piggy things. In New York City, I used lard from Flying Pig Farm in the Berkshires. Here, I get my tub o' lard from\u003ca href=\"http://www.rangebrothers.com\"> Range Brothers\u003c/a>, the pig-farming arm of Prather Ranch. It's creamy-white and waxy, with a faint but unmistakeably meaty-rich aroma, something like really good drippings. For baking, it's important to look for leaf lard, the very pure fat from around the kidneys, since it's denser and firmer and less strongly flavored than fat from the rest of the animal. Sloshy, slushy lard from other parts may make fabulous tamales, but leaf lard is for baking. \u003c/p>\n\u003cp>[ad fullwidth]\u003c/p>\n\u003cp>What I like best is a mix of butter (for tenderness and flavor) and lard (for suppleness and texture). I wouldn't use lard for everything, although you probably could. For creamy custard fillings, or delicate fruits high in sugar and acid (like peaches, plums, and cherries) I'd probably stick with a lighter, more crumbly all-butter crust. But for more mellow fillings--apples, pears, pumpkin, pecan--as well for savory chicken or meat pies, lard n' butter works like a dream. \u003c/p>\n\u003cp>Why? Three words: texture, texture, texture. Lard gives a silky flakiness more like a croissant than your usual crust. The meatiness disappears and all that's left are beautiful golden-brown shards breaking up under your eager fork. If you think crust is just there to hold up the filling, this will change your mind. \u003c/p>\n\u003cp> \u003cimg src=\"http://ww2.kqed.org/bayareabites/wp-content/uploads/sites/24/2009/08/apple-booth500.jpg\" alt=\"apple booth\" title=\"apple booth\" width=\"500\" height=\"375\" class=\"alignnone size-full wp-image-5991\">\u003c/p>\n\u003cp>Obviously, I have strong feelings about this issue. So why not them to the test and see how my pie stacked up against the competition at the annual apple-pie contest held at the charmingly local Sebastopol \u003ca href=\"http://www.gravensteinapplefair.com\">Gravenstein Apple Fair\u003c/a>. This annual August event is a fund-raiser for the excellent \u003ca href=\"http://www.farmtrails.org\">Sonoma Farm Trails\u003c/a> program, as well as an all-around celebration of the Gravenstein apple, Sonoma rural know-how (from beekeeping to sheep husbandry), and middle-aged guys in Hawaiian shirts jamming loud bar blues, all under the spreading oaks of Ragle Ranch Park. (The Fair continues Sunday, Aug 16, from 10am to 5pm.)\u003c/p>\n\u003cp>Now, full disclosure: back in 2001, a pie of mine won the Grand Championship prize in this very contest. I entered again last year, though, and didn't even make it into the top three. The pie world: a fickle place!\u003c/p>\n\u003cp>One of the perks of winning in 2001 was returning as a judge the following year. Which meant I saw, and tasted, all the things that can go wrong: proud, beautifully formed crusts burnt chocolate brown; pale, pallid crusts that shouted \"I'm made with Crisco!\"; underbaked apples chalky with starch alternated with fillings flavored with weird things like lime zest and nutmeg. As Fran Lebowitz wrote in \u003ca href=\"http://www.amazon.com/Metropolitan-Life-Plume-Fran-Lebowitz/dp/0452260698/ref=sr_1_1?ie=UTF8&qid=1250403230&sr=8-1\">Metropolitan Life\u003c/a>,\u003c/p>\n\u003cblockquote>\u003cp>People have been cooking and eating for thousands of years, so if you are the very first person to think of putting fresh lime juice in scalloped potatoes, try to imagine that there must be a reason for this. \u003c/p>\u003c/blockquote>\n\u003cp>So I made a plain old pie, only with lard and with Pink Pearl apples, my favorite heirloom because not only are they tart and snappy, they're Barbie pink. Except that you wouldn't know it, because their skin is pale and creamy, nothing special, until you cut inside and wham! Fuschia! \u003c/p>\n\u003cp>The pie I made was pretty in pink and the crust divine, but all for naught: after hanging out at the fair for 2 hours, checking out the goat-milking demonstration and the 1940s tractors, sampling the multiple apple pie/cobbler/fritter stands, admiring the many face-painted children and their mom-jean-wearing moms and/or tattooed dads all happily gnawing on enormous barbecued Willie Bird turkey legs, the announcement was made, and my pie was not among those honored. \u003c/p>\n\u003cp>Oh, well. It might be a loser, but it's a beautiful one, at least. For pie, the best is always Mom's, and how can a contestant know what kind of pie the judges came home to on a sunny afternoon?\u003c/p>\n\u003cp>\u003c/p>\n\u003cp>Life is short, though. Bake pie for the people who need pie, and don't worry about the ribbons. \u003c/p>\n\n","blocks":[],"excerpt":"A lot of books make a big fuss about technique, so much that anyone would be convinced that you need an advanced degree from Pie Crust U to turn out something worth eating. But I'm here to tell you that what you need is flour, butter, a little salt, and lard. Yes, lard. ","status":"publish","parent":0,"modified":1250447402,"stats":{"hasAudio":false,"hasVideo":false,"hasChartOrMap":false,"iframeSrcs":[],"hasGoogleForm":false,"hasGallery":false,"hasHearkenModule":false,"hasPolis":false,"paragraphCount":18,"wordCount":813},"headData":{"title":"Pie Crust and Sebastopol Gravenstein Apple Fair | KQED","description":"A lot of books make a big fuss about technique, so much that anyone would be convinced that you need an advanced degree from Pie Crust U to turn out something worth eating. But I'm here to tell you that what you need is flour, butter, a little salt, and lard. Yes, lard. ","ogTitle":"","ogDescription":"","ogImgId":"","twTitle":"","twDescription":"","twImgId":"","schema":{"@context":"http://schema.org","@type":"Article","headline":"Pie Crust and Sebastopol Gravenstein Apple Fair","datePublished":"2009-08-16T18:05:34.000Z","dateModified":"2009-08-16T18:30:02.000Z","image":"https://cdn.kqed.org/wp-content/uploads/2020/02/KQED-OG-Image@1x.png"}},"disqusIdentifier":"5902 http://blogs.kqed.org/bayareabites/?p=5902","disqusUrl":"https://ww2.kqed.org/bayareabites/2009/08/16/sebastopol-apple-fair/","disqusTitle":"Pie Crust and Sebastopol Gravenstein Apple Fair","path":"/bayareabites/5902/sebastopol-apple-fair","audioTrackLength":null,"parsedContent":[{"type":"contentString","content":"\u003cdiv class=\"post-body\">\u003cp>\u003cp>\u003cimg src=\"http://ww2.kqed.org/bayareabites/wp-content/uploads/sites/24/2009/08/pies500.jpg\" alt=\"pies\" title=\"pies\" width=\"500\" height=\"375\" class=\"alignnone size-full wp-image-5992\">\u003c/p>\n\u003cp>Listen to me: good fat makes good pie crust. \u003c/p>\n\u003cp>Books like \u003ca href=\"http://www.amazon.com/Pastry-Bible-Rose-Levy-Beranbaum/dp/0684813483/ref=sr_1_1?ie=UTF8&qid=1250401722&sr=8-1\">The Pie & Pastry Bible\u003c/a>, \u003ca href=\"http://www.amazon.com/Cookwise-Revealed-Shirley-O-Corriher/dp/0688102298/ref=sr_1_1?ie=UTF8&qid=1250401771&sr=8-1\">Cookwise\u003c/a>, and others make a big fuss about technique. Freeze the butter, freeze \u003cem>half \u003c/em>the butter, use \u003cem>only\u003c/em> butter, use butter and shortening, roll it into shards, cut it into cubes, chill the dough, chill it again, on and on and on, til anyone would be convinced that you need an advanced degree from Pie Crust U to turn out anything worth eating.\u003c/p>\n\u003cp>But you know what you really need? Your two hands, some flour, a little salt, butter, and lard. \u003c/p>\n\u003cp>Yes, lard. Good lard, which is to say, rendered leaf lard made from happy pigs who spent their lives outside doing happy piggy things. In New York City, I used lard from Flying Pig Farm in the Berkshires. Here, I get my tub o' lard from\u003ca href=\"http://www.rangebrothers.com\"> Range Brothers\u003c/a>, the pig-farming arm of Prather Ranch. It's creamy-white and waxy, with a faint but unmistakeably meaty-rich aroma, something like really good drippings. For baking, it's important to look for leaf lard, the very pure fat from around the kidneys, since it's denser and firmer and less strongly flavored than fat from the rest of the animal. Sloshy, slushy lard from other parts may make fabulous tamales, but leaf lard is for baking. \u003c/p>\n\u003cp>\u003c/p>\u003c/div>","attributes":{"named":{},"numeric":[]}},{"type":"component","content":"","name":"ad","attributes":{"named":{"label":"fullwidth"},"numeric":["fullwidth"]}},{"type":"contentString","content":"\u003cdiv class=\"post-body\">\u003cp>\u003c/p>\n\u003cp>What I like best is a mix of butter (for tenderness and flavor) and lard (for suppleness and texture). I wouldn't use lard for everything, although you probably could. For creamy custard fillings, or delicate fruits high in sugar and acid (like peaches, plums, and cherries) I'd probably stick with a lighter, more crumbly all-butter crust. But for more mellow fillings--apples, pears, pumpkin, pecan--as well for savory chicken or meat pies, lard n' butter works like a dream. \u003c/p>\n\u003cp>Why? Three words: texture, texture, texture. Lard gives a silky flakiness more like a croissant than your usual crust. The meatiness disappears and all that's left are beautiful golden-brown shards breaking up under your eager fork. If you think crust is just there to hold up the filling, this will change your mind. \u003c/p>\n\u003cp> \u003cimg src=\"http://ww2.kqed.org/bayareabites/wp-content/uploads/sites/24/2009/08/apple-booth500.jpg\" alt=\"apple booth\" title=\"apple booth\" width=\"500\" height=\"375\" class=\"alignnone size-full wp-image-5991\">\u003c/p>\n\u003cp>Obviously, I have strong feelings about this issue. So why not them to the test and see how my pie stacked up against the competition at the annual apple-pie contest held at the charmingly local Sebastopol \u003ca href=\"http://www.gravensteinapplefair.com\">Gravenstein Apple Fair\u003c/a>. This annual August event is a fund-raiser for the excellent \u003ca href=\"http://www.farmtrails.org\">Sonoma Farm Trails\u003c/a> program, as well as an all-around celebration of the Gravenstein apple, Sonoma rural know-how (from beekeeping to sheep husbandry), and middle-aged guys in Hawaiian shirts jamming loud bar blues, all under the spreading oaks of Ragle Ranch Park. (The Fair continues Sunday, Aug 16, from 10am to 5pm.)\u003c/p>\n\u003cp>Now, full disclosure: back in 2001, a pie of mine won the Grand Championship prize in this very contest. I entered again last year, though, and didn't even make it into the top three. The pie world: a fickle place!\u003c/p>\n\u003cp>One of the perks of winning in 2001 was returning as a judge the following year. Which meant I saw, and tasted, all the things that can go wrong: proud, beautifully formed crusts burnt chocolate brown; pale, pallid crusts that shouted \"I'm made with Crisco!\"; underbaked apples chalky with starch alternated with fillings flavored with weird things like lime zest and nutmeg. As Fran Lebowitz wrote in \u003ca href=\"http://www.amazon.com/Metropolitan-Life-Plume-Fran-Lebowitz/dp/0452260698/ref=sr_1_1?ie=UTF8&qid=1250403230&sr=8-1\">Metropolitan Life\u003c/a>,\u003c/p>\n\u003cblockquote>\u003cp>People have been cooking and eating for thousands of years, so if you are the very first person to think of putting fresh lime juice in scalloped potatoes, try to imagine that there must be a reason for this. \u003c/p>\u003c/blockquote>\n\u003cp>So I made a plain old pie, only with lard and with Pink Pearl apples, my favorite heirloom because not only are they tart and snappy, they're Barbie pink. Except that you wouldn't know it, because their skin is pale and creamy, nothing special, until you cut inside and wham! Fuschia! \u003c/p>\n\u003cp>The pie I made was pretty in pink and the crust divine, but all for naught: after hanging out at the fair for 2 hours, checking out the goat-milking demonstration and the 1940s tractors, sampling the multiple apple pie/cobbler/fritter stands, admiring the many face-painted children and their mom-jean-wearing moms and/or tattooed dads all happily gnawing on enormous barbecued Willie Bird turkey legs, the announcement was made, and my pie was not among those honored. \u003c/p>\n\u003cp>Oh, well. It might be a loser, but it's a beautiful one, at least. For pie, the best is always Mom's, and how can a contestant know what kind of pie the judges came home to on a sunny afternoon?\u003c/p>\n\u003cp>\u003c/p>\n\u003cp>Life is short, though. Bake pie for the people who need pie, and don't worry about the ribbons. \u003c/p>\n\n\u003c/div>\u003c/p>","attributes":{"named":{},"numeric":[]}}],"link":"/bayareabites/5902/sebastopol-apple-fair","authors":["5038"],"categories":["bayareabites_1516","bayareabites_752","bayareabites_50"],"tags":["bayareabites_228","bayareabites_2596","bayareabites_2594"],"label":"bayareabites"}},"programsReducer":{"possible":{"id":"possible","title":"Possible","info":"Possible is hosted by entrepreneur Reid Hoffman and writer Aria Finger. Together in Possible, Hoffman and Finger lead enlightening discussions about building a brighter collective future. The show features interviews with visionary guests like Trevor Noah, Sam Altman and Janette Sadik-Khan. Possible paints an optimistic portrait of the world we can create through science, policy, business, art and our shared humanity. It asks: What if everything goes right for once? How can we get there? Each episode also includes a short fiction story generated by advanced AI GPT-4, serving as a thought-provoking springboard to speculate how humanity could leverage technology for good.","airtime":"SUN 2pm","imageSrc":"https://cdn.kqed.org/wp-content/uploads/2024/04/Possible-Podcast-Tile-360x360-1.jpg","officialWebsiteLink":"https://www.possible.fm/","meta":{"site":"news","source":"Possible"},"link":"/radio/program/possible","subscribe":{"apple":"https://podcasts.apple.com/us/podcast/possible/id1677184070","spotify":"https://open.spotify.com/show/730YpdUSNlMyPQwNnyjp4k"}},"1a":{"id":"1a","title":"1A","info":"1A is home to the national conversation. 1A brings on great guests and frames the best debate in ways that make you think, share and engage.","airtime":"MON-THU 11pm-12am","imageSrc":"https://ww2.kqed.org/radio/wp-content/uploads/sites/50/2018/04/1a.jpg","officialWebsiteLink":"https://the1a.org/","meta":{"site":"news","source":"npr"},"link":"/radio/program/1a","subscribe":{"npr":"https://rpb3r.app.goo.gl/RBrW","apple":"https://itunes.apple.com/WebObjects/MZStore.woa/wa/viewPodcast?s=143441&mt=2&id=1188724250&at=11l79Y&ct=nprdirectory","tuneIn":"https://tunein.com/radio/1A-p947376/","rss":"https://feeds.npr.org/510316/podcast.xml"}},"all-things-considered":{"id":"all-things-considered","title":"All Things Considered","info":"Every weekday, \u003cem>All Things Considered\u003c/em> hosts Robert Siegel, Audie Cornish, Ari Shapiro, and Kelly McEvers present the program's trademark mix of news, interviews, commentaries, reviews, and offbeat features. Michel Martin hosts on the weekends.","airtime":"MON-FRI 1pm-2pm, 4:30pm-6:30pm\u003cbr />SAT-SUN 5pm-6pm","imageSrc":"https://cdn.kqed.org/wp-content/uploads/2024/04/All-Things-Considered-Podcast-Tile-360x360-1.jpg","officialWebsiteLink":"https://www.npr.org/programs/all-things-considered/","meta":{"site":"news","source":"npr"},"link":"/radio/program/all-things-considered"},"american-suburb-podcast":{"id":"american-suburb-podcast","title":"American Suburb: The Podcast","tagline":"The flip side of gentrification, told through one town","info":"Gentrification is changing cities across America, forcing people from neighborhoods they have long called home. Call them the displaced. Now those priced out of the Bay Area are looking for a better life in an unlikely place. American Suburb follows this migration to one California town along the Delta, 45 miles from San Francisco. But is this once sleepy suburb ready for them?","imageSrc":"https://cdn.kqed.org/wp-content/uploads/2024/04/American-Suburb-Podcast-Tile-703x703-1.jpg","officialWebsiteLink":"/news/series/american-suburb-podcast","meta":{"site":"news","source":"kqed","order":"13"},"link":"/news/series/american-suburb-podcast/","subscribe":{"npr":"https://rpb3r.app.goo.gl/RBrW","apple":"https://itunes.apple.com/WebObjects/MZStore.woa/wa/viewPodcast?mt=2&id=1287748328","tuneIn":"https://tunein.com/radio/American-Suburb-p1086805/","rss":"https://ww2.kqed.org/news/series/american-suburb-podcast/feed/podcast","google":"https://podcasts.google.com/feed/aHR0cHM6Ly9mZWVkcy5tZWdhcGhvbmUuZm0vS1FJTkMzMDExODgxNjA5"}},"baycurious":{"id":"baycurious","title":"Bay Curious","tagline":"Exploring the Bay Area, one question at a time","info":"KQED’s new podcast, Bay Curious, gets to the bottom of the mysteries — both profound and peculiar — that give the Bay Area its unique identity. And we’ll do it with your help! You ask the questions. You decide what Bay Curious investigates. And you join us on the journey to find the answers.","imageSrc":"https://cdn.kqed.org/wp-content/uploads/2024/04/Bay-Curious-Podcast-Tile-703x703-1.jpg","imageAlt":"\"KQED Bay Curious","officialWebsiteLink":"/news/series/baycurious","meta":{"site":"news","source":"kqed","order":"4"},"link":"/podcasts/baycurious","subscribe":{"apple":"https://podcasts.apple.com/us/podcast/bay-curious/id1172473406","npr":"https://www.npr.org/podcasts/500557090/bay-curious","rss":"https://ww2.kqed.org/news/category/bay-curious-podcast/feed/podcast","google":"https://podcasts.google.com/feed/aHR0cHM6Ly93dzIua3FlZC5vcmcvbmV3cy9jYXRlZ29yeS9iYXktY3VyaW91cy1wb2RjYXN0L2ZlZWQvcG9kY2FzdA","stitcher":"https://www.stitcher.com/podcast/kqed/bay-curious","spotify":"https://open.spotify.com/show/6O76IdmhixfijmhTZLIJ8k"}},"bbc-world-service":{"id":"bbc-world-service","title":"BBC World Service","info":"The day's top stories from BBC News compiled twice daily in the week, once at weekends.","airtime":"MON-FRI 9pm-10pm, TUE-FRI 1am-2am","imageSrc":"https://cdn.kqed.org/wp-content/uploads/2024/04/BBC-World-Service-Podcast-Tile-360x360-1.jpg","officialWebsiteLink":"https://www.bbc.co.uk/sounds/play/live:bbc_world_service","meta":{"site":"news","source":"BBC World Service"},"link":"/radio/program/bbc-world-service","subscribe":{"apple":"https://itunes.apple.com/us/podcast/global-news-podcast/id135067274?mt=2","tuneIn":"https://tunein.com/radio/BBC-World-Service-p455581/","rss":"https://podcasts.files.bbci.co.uk/p02nq0gn.rss"}},"code-switch-life-kit":{"id":"code-switch-life-kit","title":"Code Switch / Life Kit","info":"\u003cem>Code Switch\u003c/em>, which listeners will hear in the first part of the hour, has fearless and much-needed conversations about race. Hosted by journalists of color, the show tackles the subject of race head-on, exploring how it impacts every part of society — from politics and pop culture to history, sports and more.\u003cbr />\u003cbr />\u003cem>Life Kit\u003c/em>, which will be in the second part of the hour, guides you through spaces and feelings no one prepares you for — from finances to mental health, from workplace microaggressions to imposter syndrome, from relationships to parenting. The show features experts with real world experience and shares their knowledge. Because everyone needs a little help being human.\u003cbr />\u003cbr />\u003ca href=\"https://www.npr.org/podcasts/510312/codeswitch\">\u003cem>Code Switch\u003c/em> offical site and podcast\u003c/a>\u003cbr />\u003ca href=\"https://www.npr.org/lifekit\">\u003cem>Life Kit\u003c/em> offical site and podcast\u003c/a>\u003cbr />","airtime":"SUN 9pm-10pm","imageSrc":"https://cdn.kqed.org/wp-content/uploads/2024/04/Code-Switch-Life-Kit-Podcast-Tile-360x360-1.jpg","meta":{"site":"radio","source":"npr"},"link":"/radio/program/code-switch-life-kit","subscribe":{"apple":"https://podcasts.apple.com/podcast/1112190608?mt=2&at=11l79Y&ct=nprdirectory","google":"https://podcasts.google.com/feed/aHR0cHM6Ly93d3cubnByLm9yZy9yc3MvcG9kY2FzdC5waHA_aWQ9NTEwMzEy","spotify":"https://open.spotify.com/show/3bExJ9JQpkwNhoHvaIIuyV","rss":"https://feeds.npr.org/510312/podcast.xml"}},"commonwealth-club":{"id":"commonwealth-club","title":"Commonwealth Club of California Podcast","info":"The Commonwealth Club of California is the nation's oldest and largest public affairs forum. As a non-partisan forum, The Club brings to the public airwaves diverse viewpoints on important topics. The Club's weekly radio broadcast - the oldest in the U.S., dating back to 1924 - is carried across the nation on public radio stations and is now podcasting. Our website archive features audio of our recent programs, as well as selected speeches from our long and distinguished history. This podcast feed is usually updated twice a week and is always un-edited.","airtime":"THU 10pm, FRI 1am","imageSrc":"https://cdn.kqed.org/wp-content/uploads/2024/04/Commonwealth-Club-Podcast-Tile-360x360-1.jpg","officialWebsiteLink":"https://www.commonwealthclub.org/podcasts","meta":{"site":"news","source":"Commonwealth Club of California"},"link":"/radio/program/commonwealth-club","subscribe":{"apple":"https://itunes.apple.com/us/podcast/commonwealth-club-of-california-podcast/id976334034?mt=2","google":"https://podcasts.google.com/feed/aHR0cDovL3d3dy5jb21tb253ZWFsdGhjbHViLm9yZy9hdWRpby9wb2RjYXN0L3dlZWtseS54bWw","tuneIn":"https://tunein.com/radio/Commonwealth-Club-of-California-p1060/"}},"considerthis":{"id":"considerthis","title":"Consider This","tagline":"Make sense of the day","info":"Make sense of the day. Every weekday afternoon, Consider This helps you consider the major stories of the day in less than 15 minutes, featuring the reporting and storytelling resources of NPR. Plus, KQED’s Bianca Taylor brings you the local KQED news you need to know.","imageSrc":"https://cdn.kqed.org/wp-content/uploads/2024/04/Consider-This-Podcast-Tile-703x703-1.jpg","imageAlt":"Consider This from NPR and KQED","officialWebsiteLink":"/podcasts/considerthis","meta":{"site":"news","source":"kqed","order":"7"},"link":"/podcasts/considerthis","subscribe":{"apple":"https://podcasts.apple.com/podcast/id1503226625?mt=2&at=11l79Y&ct=nprdirectory","npr":"https://rpb3r.app.goo.gl/coronavirusdaily","google":"https://podcasts.google.com/feed/aHR0cHM6Ly9mZWVkcy5ucHIub3JnLzUxMDM1NS9wb2RjYXN0LnhtbA","spotify":"https://open.spotify.com/show/3Z6JdCS2d0eFEpXHKI6WqH"}},"forum":{"id":"forum","title":"Forum","tagline":"The conversation starts here","info":"KQED’s live call-in program discussing local, state, national and international issues, as well as in-depth interviews.","airtime":"MON-FRI 9am-11am, 10pm-11pm","imageSrc":"https://cdn.kqed.org/wp-content/uploads/2024/04/Forum-Podcast-Tile-703x703-1.jpg","imageAlt":"KQED Forum with Mina Kim and Alexis Madrigal","officialWebsiteLink":"/forum","meta":{"site":"news","source":"kqed","order":"8"},"link":"/forum","subscribe":{"apple":"https://podcasts.apple.com/us/podcast/kqeds-forum/id73329719","google":"https://podcasts.google.com/feed/aHR0cHM6Ly9mZWVkcy5tZWdhcGhvbmUuZm0vS1FJTkM5NTU3MzgxNjMz","npr":"https://www.npr.org/podcasts/432307980/forum","stitcher":"https://www.stitcher.com/podcast/kqedfm-kqeds-forum-podcast","rss":"https://feeds.megaphone.fm/KQINC9557381633"}},"freakonomics-radio":{"id":"freakonomics-radio","title":"Freakonomics Radio","info":"Freakonomics Radio is a one-hour award-winning podcast and public-radio project hosted by Stephen Dubner, with co-author Steve Levitt as a regular guest. It is produced in partnership with WNYC.","imageSrc":"https://ww2.kqed.org/news/wp-content/uploads/sites/10/2018/05/freakonomicsRadio.png","officialWebsiteLink":"http://freakonomics.com/","airtime":"SUN 1am-2am, SAT 3pm-4pm","meta":{"site":"radio","source":"WNYC"},"link":"/radio/program/freakonomics-radio","subscribe":{"npr":"https://rpb3r.app.goo.gl/4s8b","apple":"https://itunes.apple.com/us/podcast/freakonomics-radio/id354668519","tuneIn":"https://tunein.com/podcasts/WNYC-Podcasts/Freakonomics-Radio-p272293/","rss":"https://feeds.feedburner.com/freakonomicsradio"}},"fresh-air":{"id":"fresh-air","title":"Fresh Air","info":"Hosted by Terry Gross, \u003cem>Fresh Air from WHYY\u003c/em> is the Peabody Award-winning weekday magazine of contemporary arts and issues. One of public radio's most popular programs, Fresh Air features intimate conversations with today's biggest luminaries.","airtime":"MON-FRI 7pm-8pm","imageSrc":"https://cdn.kqed.org/wp-content/uploads/2024/04/Fresh-Air-Podcast-Tile-360x360-1.jpg","officialWebsiteLink":"https://www.npr.org/programs/fresh-air/","meta":{"site":"radio","source":"npr"},"link":"/radio/program/fresh-air","subscribe":{"npr":"https://rpb3r.app.goo.gl/4s8b","apple":"https://itunes.apple.com/WebObjects/MZStore.woa/wa/viewPodcast?s=143441&mt=2&id=214089682&at=11l79Y&ct=nprdirectory","tuneIn":"https://tunein.com/radio/Fresh-Air-p17/","rss":"https://feeds.npr.org/381444908/podcast.xml"}},"here-and-now":{"id":"here-and-now","title":"Here & Now","info":"A live production of NPR and WBUR Boston, in collaboration with stations across the country, Here & Now reflects the fluid world of news as it's happening in the middle of the day, with timely, in-depth news, interviews and conversation. Hosted by Robin Young, Jeremy Hobson and Tonya Mosley.","airtime":"MON-THU 11am-12pm","imageSrc":"https://cdn.kqed.org/wp-content/uploads/2024/04/Here-And-Now-Podcast-Tile-360x360-1.jpg","officialWebsiteLink":"http://www.wbur.org/hereandnow","meta":{"site":"news","source":"npr"},"link":"/radio/program/here-and-now","subsdcribe":{"apple":"https://itunes.apple.com/WebObjects/MZStore.woa/wa/viewPodcast?mt=2&id=426698661","tuneIn":"https://tunein.com/radio/Here--Now-p211/","rss":"https://feeds.npr.org/510051/podcast.xml"}},"how-i-built-this":{"id":"how-i-built-this","title":"How I Built This with Guy Raz","info":"Guy Raz dives into the stories behind some of the world's best known companies. How I Built This weaves a narrative journey about innovators, entrepreneurs and idealists—and the movements they built.","imageSrc":"https://ww2.kqed.org/news/wp-content/uploads/sites/10/2018/05/howIBuiltThis.png","officialWebsiteLink":"https://www.npr.org/podcasts/510313/how-i-built-this","airtime":"SUN 7:30pm-8pm","meta":{"site":"news","source":"npr"},"link":"/radio/program/how-i-built-this","subscribe":{"npr":"https://rpb3r.app.goo.gl/3zxy","apple":"https://itunes.apple.com/us/podcast/how-i-built-this-with-guy-raz/id1150510297?mt=2","tuneIn":"https://tunein.com/podcasts/Arts--Culture-Podcasts/How-I-Built-This-p910896/","rss":"https://feeds.npr.org/510313/podcast.xml"}},"inside-europe":{"id":"inside-europe","title":"Inside Europe","info":"Inside Europe, a one-hour weekly news magazine hosted by Helen Seeney and Keith Walker, explores the topical issues shaping the continent. No other part of the globe has experienced such dynamic political and social change in recent years.","airtime":"SAT 3am-4am","imageSrc":"https://cdn.kqed.org/wp-content/uploads/2024/04/Inside-Europe-Podcast-Tile-300x300-1.jpg","meta":{"site":"news","source":"Deutsche Welle"},"link":"/radio/program/inside-europe","subscribe":{"apple":"https://itunes.apple.com/us/podcast/inside-europe/id80106806?mt=2","tuneIn":"https://tunein.com/radio/Inside-Europe-p731/","rss":"https://partner.dw.com/xml/podcast_inside-europe"}},"latino-usa":{"id":"latino-usa","title":"Latino USA","airtime":"MON 1am-2am, SUN 6pm-7pm","info":"Latino USA, the radio journal of news and culture, is the only national, English-language radio program produced from a Latino perspective.","imageSrc":"https://ww2.kqed.org/radio/wp-content/uploads/sites/50/2018/04/latinoUsa.jpg","officialWebsiteLink":"http://latinousa.org/","meta":{"site":"news","source":"npr"},"link":"/radio/program/latino-usa","subscribe":{"npr":"https://rpb3r.app.goo.gl/xtTd","apple":"https://itunes.apple.com/WebObjects/MZStore.woa/wa/viewPodcast?s=143441&mt=2&id=79681317&at=11l79Y&ct=nprdirectory","tuneIn":"https://tunein.com/radio/Latino-USA-p621/","rss":"https://feeds.npr.org/510016/podcast.xml"}},"live-from-here-highlights":{"id":"live-from-here-highlights","title":"Live from Here Highlights","info":"Chris Thile steps to the mic as the host of Live from Here (formerly A Prairie Home Companion), a live public radio variety show. Download Chris’s Song of the Week plus other highlights from the broadcast. Produced by American Public Media.","airtime":"SAT 6pm-8pm, SUN 11am-1pm","imageSrc":"https://cdn.kqed.org/wp-content/uploads/2024/04/Live-From-Here-Podcast-Tile-360x360-1.jpg","officialWebsiteLink":"https://www.livefromhere.org/","meta":{"site":"arts","source":"american public media"},"link":"/radio/program/live-from-here-highlights","subscribe":{"apple":"https://itunes.apple.com/us/podcast/id1167173941","tuneIn":"https://tunein.com/radio/Live-from-Here-Highlights-p921744/","rss":"https://feeds.publicradio.org/public_feeds/a-prairie-home-companion-highlights/rss/rss"}},"marketplace":{"id":"marketplace","title":"Marketplace","info":"Our flagship program, helmed by Kai Ryssdal, examines what the day in money delivered, through stories, conversations, newsworthy numbers and more. Updated Monday through Friday at about 3:30 p.m. PT.","airtime":"MON-FRI 4pm-4:30pm, MON-WED 6:30pm-7pm","imageSrc":"https://cdn.kqed.org/wp-content/uploads/2024/04/Marketplace-Podcast-Tile-360x360-1.jpg","officialWebsiteLink":"https://www.marketplace.org/","meta":{"site":"news","source":"American Public Media"},"link":"/radio/program/marketplace","subscribe":{"apple":"https://itunes.apple.com/WebObjects/MZStore.woa/wa/viewPodcast?s=143441&mt=2&id=201853034&at=11l79Y&ct=nprdirectory","tuneIn":"https://tunein.com/radio/APM-Marketplace-p88/","rss":"https://feeds.publicradio.org/public_feeds/marketplace-pm/rss/rss"}},"mindshift":{"id":"mindshift","title":"MindShift","tagline":"A podcast about the future of learning and how we raise our kids","info":"The MindShift podcast explores the innovations in education that are shaping how kids learn. Hosts Ki Sung and Katrina Schwartz introduce listeners to educators, researchers, parents and students who are developing effective ways to improve how kids learn. We cover topics like how fed-up administrators are developing surprising tactics to deal with classroom disruptions; how listening to podcasts are helping kids develop reading skills; the consequences of overparenting; and why interdisciplinary learning can engage students on all ends of the traditional achievement spectrum. This podcast is part of the MindShift education site, a division of KQED News. KQED is an NPR/PBS member station based in San Francisco. You can also visit the MindShift website for episodes and supplemental blog posts or tweet us \u003ca href=\"https://twitter.com/MindShiftKQED\">@MindShiftKQED\u003c/a> or visit us at \u003ca href=\"/mindshift\">MindShift.KQED.org\u003c/a>","imageSrc":"https://cdn.kqed.org/wp-content/uploads/2024/04/Mindshift-Podcast-Tile-703x703-1.jpg","imageAlt":"KQED MindShift: How We Will Learn","officialWebsiteLink":"/mindshift/","meta":{"site":"news","source":"kqed","order":"2"},"link":"/podcasts/mindshift","subscribe":{"apple":"https://podcasts.apple.com/us/podcast/mindshift-podcast/id1078765985","google":"https://podcasts.google.com/feed/aHR0cHM6Ly9mZWVkcy5tZWdhcGhvbmUuZm0vS1FJTkM1NzY0NjAwNDI5","npr":"https://www.npr.org/podcasts/464615685/mind-shift-podcast","stitcher":"https://www.stitcher.com/podcast/kqed/stories-teachers-share","spotify":"https://open.spotify.com/show/0MxSpNYZKNprFLCl7eEtyx"}},"morning-edition":{"id":"morning-edition","title":"Morning Edition","info":"\u003cem>Morning Edition\u003c/em> takes listeners around the country and the world with multi-faceted stories and commentaries every weekday. Hosts Steve Inskeep, David Greene and Rachel Martin bring you the latest breaking news and features to prepare you for the day.","airtime":"MON-FRI 3am-9am","imageSrc":"https://cdn.kqed.org/wp-content/uploads/2024/04/Morning-Edition-Podcast-Tile-360x360-1.jpg","officialWebsiteLink":"https://www.npr.org/programs/morning-edition/","meta":{"site":"news","source":"npr"},"link":"/radio/program/morning-edition"},"onourwatch":{"id":"onourwatch","title":"On Our Watch","tagline":"Police secrets, unsealed","info":"For decades, the process for how police police themselves has been inconsistent – if not opaque. In some states, like California, these proceedings were completely hidden. After a new police transparency law unsealed scores of internal affairs files, our reporters set out to examine these cases and the shadow world of police discipline. On Our Watch brings listeners into the rooms where officers are questioned and witnesses are interrogated to find out who this system is really protecting. Is it the officers, or the public they've sworn to serve?","imageSrc":"https://cdn.kqed.org/wp-content/uploads/2024/04/On-Our-Watch-Podcast-Tile-703x703-1.jpg","imageAlt":"On Our Watch from NPR and KQED","officialWebsiteLink":"/podcasts/onourwatch","meta":{"site":"news","source":"kqed","order":"1"},"link":"/podcasts/onourwatch","subscribe":{"apple":"https://podcasts.apple.com/podcast/id1567098962","google":"https://podcasts.google.com/feed/aHR0cHM6Ly9mZWVkcy5ucHIub3JnLzUxMDM2MC9wb2RjYXN0LnhtbD9zYz1nb29nbGVwb2RjYXN0cw","npr":"https://rpb3r.app.goo.gl/onourwatch","spotify":"https://open.spotify.com/show/0OLWoyizopu6tY1XiuX70x","tuneIn":"https://tunein.com/radio/On-Our-Watch-p1436229/","stitcher":"https://www.stitcher.com/show/on-our-watch","rss":"https://feeds.npr.org/510360/podcast.xml"}},"on-the-media":{"id":"on-the-media","title":"On The Media","info":"Our weekly podcast explores how the media 'sausage' is made, casts an incisive eye on fluctuations in the marketplace of ideas, and examines threats to the freedom of information and expression in America and abroad. For one hour a week, the show tries to lift the veil from the process of \"making media,\" especially news media, because it's through that lens that we see the world and the world sees us","airtime":"SUN 2pm-3pm, MON 12am-1am","imageSrc":"https://ww2.kqed.org/radio/wp-content/uploads/sites/50/2018/04/onTheMedia.png","officialWebsiteLink":"https://www.wnycstudios.org/shows/otm","meta":{"site":"news","source":"wnyc"},"link":"/radio/program/on-the-media","subscribe":{"apple":"https://itunes.apple.com/us/podcast/on-the-media/id73330715?mt=2","tuneIn":"https://tunein.com/radio/On-the-Media-p69/","rss":"http://feeds.wnyc.org/onthemedia"}},"our-body-politic":{"id":"our-body-politic","title":"Our Body Politic","info":"Presented by KQED, KCRW and KPCC, and created and hosted by award-winning journalist Farai Chideya, Our Body Politic is unapologetically centered on reporting on not just how women of color experience the major political events of today, but how they’re impacting those very issues.","airtime":"SAT 6pm-7pm, SUN 1am-2am","imageSrc":"https://cdn.kqed.org/wp-content/uploads/2024/04/Our-Body-Politic-Podcast-Tile-360x360-1.jpg","officialWebsiteLink":"https://our-body-politic.simplecast.com/","meta":{"site":"news","source":"kcrw"},"link":"/radio/program/our-body-politic","subscribe":{"apple":"https://podcasts.apple.com/us/podcast/our-body-politic/id1533069868","google":"https://podcasts.google.com/feed/aHR0cHM6Ly9mZWVkcy5zaW1wbGVjYXN0LmNvbS9feGFQaHMxcw","spotify":"https://open.spotify.com/show/4ApAiLT1kV153TttWAmqmc","rss":"https://feeds.simplecast.com/_xaPhs1s","tuneIn":"https://tunein.com/podcasts/News--Politics-Podcasts/Our-Body-Politic-p1369211/"}},"pbs-newshour":{"id":"pbs-newshour","title":"PBS NewsHour","info":"Analysis, background reports and updates from the PBS NewsHour putting today's news in context.","airtime":"MON-FRI 3pm-4pm","imageSrc":"https://cdn.kqed.org/wp-content/uploads/2024/04/PBS-News-Hour-Podcast-Tile-360x360-1.jpg","officialWebsiteLink":"https://www.pbs.org/newshour/","meta":{"site":"news","source":"pbs"},"link":"/radio/program/pbs-newshour","subscribe":{"apple":"https://itunes.apple.com/us/podcast/pbs-newshour-full-show/id394432287?mt=2","tuneIn":"https://tunein.com/radio/PBS-NewsHour---Full-Show-p425698/","rss":"https://www.pbs.org/newshour/feeds/rss/podcasts/show"}},"perspectives":{"id":"perspectives","title":"Perspectives","tagline":"KQED's series of of daily listener commentaries since 1991","info":"KQED's series of of daily listener commentaries since 1991.","imageSrc":"https://cdn.kqed.org/wp-content/uploads/2024/04/Perspectives-Podcast-Tile-703x703-1.jpg","officialWebsiteLink":"/perspectives/","meta":{"site":"radio","source":"kqed","order":"15"},"link":"/perspectives","subscribe":{"apple":"https://podcasts.apple.com/us/podcast/id73801135","npr":"https://www.npr.org/podcasts/432309616/perspectives","rss":"https://ww2.kqed.org/perspectives/category/perspectives/feed/","google":"https://podcasts.google.com/feed/aHR0cHM6Ly93dzIua3FlZC5vcmcvcGVyc3BlY3RpdmVzL2NhdGVnb3J5L3BlcnNwZWN0aXZlcy9mZWVkLw"}},"planet-money":{"id":"planet-money","title":"Planet Money","info":"The economy explained. Imagine you could call up a friend and say, Meet me at the bar and tell me what's going on with the economy. Now imagine that's actually a fun evening.","airtime":"SUN 3pm-4pm","imageSrc":"https://ww2.kqed.org/radio/wp-content/uploads/sites/50/2018/04/planetmoney.jpg","officialWebsiteLink":"https://www.npr.org/sections/money/","meta":{"site":"news","source":"npr"},"link":"/radio/program/planet-money","subscribe":{"npr":"https://rpb3r.app.goo.gl/M4f5","apple":"https://itunes.apple.com/us/podcast/planet-money/id290783428?mt=2","tuneIn":"https://tunein.com/podcasts/Business--Economics-Podcasts/Planet-Money-p164680/","rss":"https://feeds.npr.org/510289/podcast.xml"}},"politicalbreakdown":{"id":"politicalbreakdown","title":"Political Breakdown","tagline":"Politics from a personal perspective","info":"Political Breakdown is a new series that explores the political intersection of California and the nation. Each week hosts Scott Shafer and Marisa Lagos are joined with a new special guest to unpack politics -- with personality — and offer an insider’s glimpse at how politics happens.","airtime":"THU 6:30pm-7pm","imageSrc":"https://cdn.kqed.org/wp-content/uploads/2024/04/Political-Breakdown-2024-Podcast-Tile-703x703-1.jpg","imageAlt":"KQED Political Breakdown","officialWebsiteLink":"/podcasts/politicalbreakdown","meta":{"site":"radio","source":"kqed","order":"11"},"link":"/podcasts/politicalbreakdown","subscribe":{"apple":"https://podcasts.apple.com/us/podcast/political-breakdown/id1327641087","google":"https://podcasts.google.com/feed/aHR0cHM6Ly9mZWVkcy5tZWdhcGhvbmUuZm0vS1FJTkM5Nzk2MzI2MTEx","npr":"https://www.npr.org/podcasts/572155894/political-breakdown","stitcher":"https://www.stitcher.com/podcast/kqed/political-breakdown","spotify":"https://open.spotify.com/show/07RVyIjIdk2WDuVehvBMoN","rss":"https://ww2.kqed.org/news/tag/political-breakdown/feed/podcast"}},"pri-the-world":{"id":"pri-the-world","title":"PRI's The World: Latest Edition","info":"Each weekday, host Marco Werman and his team of producers bring you the world's most interesting stories in an hour of radio that reminds us just how small our planet really is.","airtime":"MON-FRI 2pm-3pm","imageSrc":"https://cdn.kqed.org/wp-content/uploads/2024/04/The-World-Podcast-Tile-360x360-1.jpg","officialWebsiteLink":"https://www.pri.org/programs/the-world","meta":{"site":"news","source":"PRI"},"link":"/radio/program/pri-the-world","subscribe":{"apple":"https://itunes.apple.com/us/podcast/pris-the-world-latest-edition/id278196007?mt=2","tuneIn":"https://tunein.com/podcasts/News--Politics-Podcasts/PRIs-The-World-p24/","rss":"http://feeds.feedburner.com/pri/theworld"}},"radiolab":{"id":"radiolab","title":"Radiolab","info":"A two-time Peabody Award-winner, Radiolab is an investigation told through sounds and stories, and centered around one big idea. In the Radiolab world, information sounds like music and science and culture collide. Hosted by Jad Abumrad and Robert Krulwich, the show is designed for listeners who demand skepticism, but appreciate wonder. WNYC Studios is the producer of other leading podcasts including Freakonomics Radio, Death, Sex & Money, On the Media and many more.","airtime":"SUN 12am-1am, SAT 2pm-3pm","imageSrc":"https://ww2.kqed.org/radio/wp-content/uploads/sites/50/2018/04/radiolab1400.png","officialWebsiteLink":"https://www.wnycstudios.org/shows/radiolab/","meta":{"site":"science","source":"WNYC"},"link":"/radio/program/radiolab","subscribe":{"apple":"https://itunes.apple.com/us/podcast/radiolab/id152249110?mt=2","tuneIn":"https://tunein.com/radio/RadioLab-p68032/","rss":"https://feeds.wnyc.org/radiolab"}},"reveal":{"id":"reveal","title":"Reveal","info":"Created by The Center for Investigative Reporting and PRX, Reveal is public radios first one-hour weekly radio show and podcast dedicated to investigative reporting. Credible, fact based and without a partisan agenda, Reveal combines the power and artistry of driveway moment storytelling with data-rich reporting on critically important issues. The result is stories that inform and inspire, arming our listeners with information to right injustices, hold the powerful accountable and improve lives.Reveal is hosted by Al Letson and showcases the award-winning work of CIR and newsrooms large and small across the nation. In a radio and podcast market crowded with choices, Reveal focuses on important and often surprising stories that illuminate the world for our listeners.","airtime":"SAT 4pm-5pm","imageSrc":"https://ww2.kqed.org/radio/wp-content/uploads/sites/50/2018/04/reveal300px.png","officialWebsiteLink":"https://www.revealnews.org/episodes/","meta":{"site":"news","source":"npr"},"link":"/radio/program/reveal","subscribe":{"apple":"https://itunes.apple.com/us/podcast/reveal/id886009669","tuneIn":"https://tunein.com/radio/Reveal-p679597/","rss":"http://feeds.revealradio.org/revealpodcast"}},"says-you":{"id":"says-you","title":"Says You!","info":"Public radio's game show of bluff and bluster, words and whimsy. The warmest, wittiest cocktail party - it's spirited and civil, brainy and boisterous, peppered with musical interludes. Fast paced and playful, it's the most fun you can have with language without getting your mouth washed out with soap. Our motto: It's not important to know the answers, it's important to like the answers!","airtime":"SUN 4pm-5pm","imageSrc":"https://cdn.kqed.org/wp-content/uploads/2024/04/Says-You-Podcast-Tile-360x360-1.jpg","officialWebsiteLink":"http://www.saysyouradio.com/","meta":{"site":"comedy","source":"Pipit and Finch"},"link":"/radio/program/says-you","subscribe":{"apple":"https://itunes.apple.com/us/podcast/says-you!/id1050199826","tuneIn":"https://tunein.com/radio/Says-You-p480/","rss":"https://saysyou.libsyn.com/rss"}},"science-friday":{"id":"science-friday","title":"Science Friday","info":"Science Friday is a weekly science talk show, broadcast live over public radio stations nationwide. Each week, the show focuses on science topics that are in the news and tries to bring an educated, balanced discussion to bear on the scientific issues at hand. Panels of expert guests join host Ira Flatow, a veteran science journalist, to discuss science and to take questions from listeners during the call-in portion of the program.","airtime":"FRI 11am-1pm","imageSrc":"https://cdn.kqed.org/wp-content/uploads/2024/04/Science-Friday-Podcast-Tile-360x360-1.jpg","officialWebsiteLink":"https://www.wnycstudios.org/shows/science-friday","meta":{"site":"news","source":"npr"},"link":"/radio/program/science-friday","subscribe":{"apple":"https://itunes.apple.com/WebObjects/MZStore.woa/wa/viewPodcast?s=143441&mt=2&id=73329284&at=11l79Y&ct=nprdirectory","tuneIn":"https://tunein.com/radio/Science-Friday-p394/","rss":"http://feeds.wnyc.org/science-friday"}},"science-podcast":{"id":"science-podcast","title":"KQED Science News","tagline":"From the lab, to your ears","info":"KQED Science explores science and environment news, trends, and events from the Bay Area and beyond.","imageSrc":"https://cdn.kqed.org/wp-content/uploads/2024/04/Science-News-Podcast-Tile-703x703-1.jpg","officialWebsiteLink":"https://ww2.kqed.org/science/category/science-podcast/","meta":{"site":"science","source":"kqed","order":"17"},"link":"/science/category/science-podcast","subscribe":{"apple":"https://podcasts.apple.com/us/podcast/kqed-science-news/id214663465","google":"https://podcasts.google.com/feed/aHR0cDovL2Jsb2dzLmtxZWQub3JnL3NjaWVuY2UvZmVlZC8","stitcher":"https://www.stitcher.com/podcast/kqed-science-news","rss":"https://ww2.kqed.org/science/category/science-podcast/feed/podcast"}},"selected-shorts":{"id":"selected-shorts","title":"Selected Shorts","info":"Spellbinding short stories by established and emerging writers take on a new life when they are performed by stars of the stage and screen.","airtime":"SAT 8pm-9pm","imageSrc":"https://cdn.kqed.org/wp-content/uploads/2024/04/Selected-Shorts-Podcast-Tile-360x360-1.jpg","officialWebsiteLink":"https://www.pri.org/programs/selected-shorts","meta":{"site":"arts","source":"pri"},"link":"/radio/program/selected-shorts","subscribe":{"apple":"https://itunes.apple.com/WebObjects/MZStore.woa/wa/viewPodcast?s=143441&mt=2&id=253191824&at=11l79Y&ct=nprdirectory","tuneIn":"https://tunein.com/radio/Selected-Shorts-p31792/","rss":"https://feeds.megaphone.fm/selectedshorts"}},"snap-judgment":{"id":"snap-judgment","title":"Snap Judgment","info":"Snap Judgment (Storytelling, with a BEAT) mixes real stories with killer beats to produce cinematic, dramatic, kick-ass radio. Snap’s raw, musical brand of storytelling dares listeners to see the world through the eyes of another. WNYC studios is the producer of leading podcasts including Radiolab, Freakonomics Radio, Note To Self, Here’s The Thing With Alec Baldwin, and more.","airtime":"SAT 1pm-2pm, 9pm-10pm","imageSrc":"https://ww2.kqed.org/radio/wp-content/uploads/sites/50/2018/04/snapJudgement.jpg","officialWebsiteLink":"https://snapjudgment.org","meta":{"site":"arts","source":"WNYC"},"link":"/radio/program/snap-judgment","subscribe":{"apple":"https://itunes.apple.com/WebObjects/MZStore.woa/wa/viewPodcast?s=143441&mt=2&id=283657561&at=11l79Y&ct=nprdirectory","tuneIn":"https://tunein.com/radio/Snap-Judgment-p243817/","rss":"https://feeds.feedburner.com/snapjudgment-wnyc"}},"soldout":{"id":"soldout","title":"SOLD OUT: Rethinking Housing in America","tagline":"A new future for housing","info":"Sold Out: Rethinking Housing in America","imageSrc":"https://cdn.kqed.org/wp-content/uploads/2024/04/Sold-Out-Podcast-Tile-703x703-1.jpg","imageAlt":"KQED Sold Out: Rethinking Housing in America","officialWebsiteLink":"/podcasts/soldout","meta":{"site":"news","source":"kqed","order":3},"link":"/podcasts/soldout","subscribe":{"npr":"https://www.npr.org/podcasts/911586047/s-o-l-d-o-u-t-a-new-future-for-housing","apple":"https://podcasts.apple.com/us/podcast/introducing-sold-out-rethinking-housing-in-america/id1531354937","rss":"https://feeds.megaphone.fm/soldout","spotify":"https://open.spotify.com/show/38dTBSk2ISFoPiyYNoKn1X","stitcher":"https://www.stitcher.com/podcast/kqed/sold-out-rethinking-housing-in-america","tunein":"https://tunein.com/radio/SOLD-OUT-Rethinking-Housing-in-America-p1365871/","google":"https://podcasts.google.com/feed/aHR0cHM6Ly9mZWVkcy5tZWdhcGhvbmUuZm0vc29sZG91dA"}},"ted-radio-hour":{"id":"ted-radio-hour","title":"TED Radio Hour","info":"The TED Radio Hour is a journey through fascinating ideas, astonishing inventions, fresh approaches to old problems, and new ways to think and create.","airtime":"SUN 3pm-4pm, SAT 10pm-11pm","imageSrc":"https://ww2.kqed.org/radio/wp-content/uploads/sites/50/2018/04/tedRadioHour.jpg","officialWebsiteLink":"https://www.npr.org/programs/ted-radio-hour/?showDate=2018-06-22","meta":{"site":"news","source":"npr"},"link":"/radio/program/ted-radio-hour","subscribe":{"npr":"https://rpb3r.app.goo.gl/8vsS","apple":"https://itunes.apple.com/WebObjects/MZStore.woa/wa/viewPodcast?s=143441&mt=2&id=523121474&at=11l79Y&ct=nprdirectory","tuneIn":"https://tunein.com/radio/TED-Radio-Hour-p418021/","rss":"https://feeds.npr.org/510298/podcast.xml"}},"tech-nation":{"id":"tech-nation","title":"Tech Nation Radio Podcast","info":"Tech Nation is a weekly public radio program, hosted by Dr. Moira Gunn. Founded in 1993, it has grown from a simple interview show to a multi-faceted production, featuring conversations with noted technology and science leaders, and a weekly science and technology-related commentary.","airtime":"FRI 10pm","imageSrc":"https://cdn.kqed.org/wp-content/uploads/2024/04/Tech-Nation-Radio-Podcast-Tile-360x360-1.jpg","officialWebsiteLink":"http://technation.podomatic.com/","meta":{"site":"science","source":"Tech Nation Media"},"link":"/radio/program/tech-nation","subscribe":{"rss":"https://technation.podomatic.com/rss2.xml"}},"thebay":{"id":"thebay","title":"The Bay","tagline":"Local news to keep you rooted","info":"Host Devin Katayama walks you through the biggest story of the day with reporters and newsmakers.","imageSrc":"https://cdn.kqed.org/wp-content/uploads/2024/04/The-Bay-Podcast-Tile-703x703-1.jpg","imageAlt":"\"KQED The Bay","officialWebsiteLink":"/podcasts/thebay","meta":{"site":"radio","source":"kqed","order":"6"},"link":"/podcasts/thebay","subscribe":{"apple":"https://podcasts.apple.com/us/podcast/the-bay/id1350043452","google":"https://podcasts.google.com/feed/aHR0cHM6Ly9mZWVkcy5tZWdhcGhvbmUuZm0vS1FJTkM4MjU5Nzg2MzI3","npr":"https://www.npr.org/podcasts/586725995/the-bay","stitcher":"https://www.stitcher.com/podcast/kqed/the-bay","spotify":"https://open.spotify.com/show/4BIKBKIujizLHlIlBNaAqQ","rss":"https://feeds.megaphone.fm/KQINC8259786327"}},"californiareport":{"id":"californiareport","title":"The California Report","tagline":"California, day by day","info":"KQED’s statewide radio news program providing daily coverage of issues, trends and public policy decisions.","imageSrc":"https://cdn.kqed.org/wp-content/uploads/2024/04/The-California-Report-Podcast-Tile-703x703-1.jpg","imageAlt":"KQED The California Report","officialWebsiteLink":"/californiareport","meta":{"site":"news","source":"kqed","order":"9"},"link":"/californiareport","subscribe":{"apple":"https://podcasts.apple.com/us/podcast/kqeds-the-california-report/id79681292","google":"https://podcasts.google.com/feed/aHR0cHM6Ly9mZWVkcy5tZWdhcGhvbmUuZm0vS1FJTkM1MDAyODE4NTgz","npr":"https://www.npr.org/podcasts/432285393/the-california-report","stitcher":"https://www.stitcher.com/podcast/kqedfm-kqeds-the-california-report-podcast-8838","rss":"https://ww2.kqed.org/news/tag/tcram/feed/podcast"}},"californiareportmagazine":{"id":"californiareportmagazine","title":"The California Report Magazine","tagline":"Your state, your stories","info":"Every week, The California Report Magazine takes you on a road trip for the ears: to visit the places and meet the people who make California unique. The in-depth storytelling podcast from the California Report.","airtime":"FRI 4:30pm-5pm, 6:30pm-7pm, 11pm-11:30pm","imageSrc":"https://cdn.kqed.org/wp-content/uploads/2024/04/The-California-Report-Magazine-Podcast-Tile-703x703-1.jpg","officialWebsiteLink":"/californiareportmagazine","meta":{"site":"news","source":"kqed","order":"10"},"link":"/californiareportmagazine","subscribe":{"apple":"https://podcasts.apple.com/us/podcast/the-california-report-magazine/id1314750545","google":"https://podcasts.google.com/feed/aHR0cHM6Ly9mZWVkcy5tZWdhcGhvbmUuZm0vS1FJTkM3NjkwNjk1OTAz","npr":"https://www.npr.org/podcasts/564733126/the-california-report-magazine","stitcher":"https://www.stitcher.com/podcast/kqed/the-california-report-magazine","rss":"https://ww2.kqed.org/news/tag/tcrmag/feed/podcast"}},"theleap":{"id":"theleap","title":"The Leap","tagline":"What if you closed your eyes, and jumped?","info":"Stories about people making dramatic, risky changes, told by award-winning public radio reporter Judy Campbell.","imageSrc":"https://cdn.kqed.org/wp-content/uploads/2024/04/The-Leap-Podcast-Tile-703x703-1.jpg","imageAlt":"KQED The Leap","officialWebsiteLink":"/podcasts/theleap","meta":{"site":"news","source":"kqed","order":"14"},"link":"/podcasts/theleap","subscribe":{"apple":"https://podcasts.apple.com/us/podcast/the-leap/id1046668171","google":"https://podcasts.google.com/feed/aHR0cHM6Ly9mZWVkcy5tZWdhcGhvbmUuZm0vS1FJTkM0NTcwODQ2MjY2","npr":"https://www.npr.org/podcasts/447248267/the-leap","stitcher":"https://www.stitcher.com/podcast/kqed/the-leap","spotify":"https://open.spotify.com/show/3sSlVHHzU0ytLwuGs1SD1U","rss":"https://ww2.kqed.org/news/programs/the-leap/feed/podcast"}},"masters-of-scale":{"id":"masters-of-scale","title":"Masters of Scale","info":"Masters of Scale is an original podcast in which LinkedIn co-founder and Greylock Partner Reid Hoffman sets out to describe and prove theories that explain how great entrepreneurs take their companies from zero to a gazillion in ingenious fashion.","airtime":"Every other Wednesday June 12 through October 16 at 8pm (repeats Thursdays at 2am)","imageSrc":"https://cdn.kqed.org/wp-content/uploads/2024/04/Masters-of-Scale-Podcast-Tile-360x360-1.jpg","officialWebsiteLink":"https://mastersofscale.com/","meta":{"site":"radio","source":"WaitWhat"},"link":"/radio/program/masters-of-scale","subscribe":{"apple":"http://mastersofscale.app.link/","rss":"https://rss.art19.com/masters-of-scale"}},"the-moth-radio-hour":{"id":"the-moth-radio-hour","title":"The Moth Radio Hour","info":"Since its launch in 1997, The Moth has presented thousands of true stories, told live and without notes, to standing-room-only crowds worldwide. Moth storytellers stand alone, under a spotlight, with only a microphone and a roomful of strangers. The storyteller and the audience embark on a high-wire act of shared experience which is both terrifying and exhilarating. Since 2008, The Moth podcast has featured many of our favorite stories told live on Moth stages around the country. For information on all of our programs and live events, visit themoth.org.","airtime":"SAT 8pm-9pm and SUN 11am-12pm","imageSrc":"https://ww2.kqed.org/radio/wp-content/uploads/sites/50/2018/04/theMoth.jpg","officialWebsiteLink":"https://themoth.org/","meta":{"site":"arts","source":"prx"},"link":"/radio/program/the-moth-radio-hour","subscribe":{"apple":"https://itunes.apple.com/us/podcast/the-moth-podcast/id275699983?mt=2","tuneIn":"https://tunein.com/radio/The-Moth-p273888/","rss":"http://feeds.themoth.org/themothpodcast"}},"the-new-yorker-radio-hour":{"id":"the-new-yorker-radio-hour","title":"The New Yorker Radio Hour","info":"The New Yorker Radio Hour is a weekly program presented by the magazine's editor, David Remnick, and produced by WNYC Studios and The New Yorker. Each episode features a diverse mix of interviews, profiles, storytelling, and an occasional burst of humor inspired by the magazine, and shaped by its writers, artists, and editors. This isn't a radio version of a magazine, but something all its own, reflecting the rich possibilities of audio storytelling and conversation. Theme music for the show was composed and performed by Merrill Garbus of tUnE-YArDs.","airtime":"SAT 10am-11am","imageSrc":"https://cdn.kqed.org/wp-content/uploads/2024/04/The-New-Yorker-Podcast-Tile-360x360-1.jpg","officialWebsiteLink":"https://www.wnycstudios.org/shows/tnyradiohour","meta":{"site":"arts","source":"WNYC"},"link":"/radio/program/the-new-yorker-radio-hour","subscribe":{"apple":"https://itunes.apple.com/us/podcast/id1050430296","tuneIn":"https://tunein.com/podcasts/WNYC-Podcasts/New-Yorker-Radio-Hour-p803804/","rss":"https://feeds.feedburner.com/newyorkerradiohour"}},"the-takeaway":{"id":"the-takeaway","title":"The Takeaway","info":"The Takeaway is produced in partnership with its national audience. It delivers perspective and analysis to help us better understand the day’s news. Be a part of the American conversation on-air and online.","airtime":"MON-THU 12pm-1pm","imageSrc":"https://cdn.kqed.org/wp-content/uploads/2024/04/The-Takeaway-Podcast-Tile-360x360-1.jpg","officialWebsiteLink":"https://www.wnycstudios.org/shows/takeaway","meta":{"site":"news","source":"WNYC"},"link":"/radio/program/the-takeaway","subscribe":{"apple":"https://itunes.apple.com/us/podcast/the-takeaway/id363143310?mt=2","tuneIn":"http://tunein.com/radio/The-Takeaway-p150731/","rss":"https://feeds.feedburner.com/takeawaypodcast"}},"this-american-life":{"id":"this-american-life","title":"This American Life","info":"This American Life is a weekly public radio show, heard by 2.2 million people on more than 500 stations. Another 2.5 million people download the weekly podcast. It is hosted by Ira Glass, produced in collaboration with Chicago Public Media, delivered to stations by PRX The Public Radio Exchange, and has won all of the major broadcasting awards.","airtime":"SAT 12pm-1pm, 7pm-8pm","imageSrc":"https://ww2.kqed.org/radio/wp-content/uploads/sites/50/2018/04/thisAmericanLife.png","officialWebsiteLink":"https://www.thisamericanlife.org/","meta":{"site":"news","source":"wbez"},"link":"/radio/program/this-american-life","subscribe":{"apple":"https://itunes.apple.com/WebObjects/MZStore.woa/wa/viewPodcast?s=143441&mt=2&id=201671138&at=11l79Y&ct=nprdirectory","rss":"https://www.thisamericanlife.org/podcast/rss.xml"}},"truthbetold":{"id":"truthbetold","title":"Truth Be Told","tagline":"Advice by and for people of color","info":"We’re the friend you call after a long day, the one who gets it. Through wisdom from some of the greatest thinkers of our time, host Tonya Mosley explores what it means to grow and thrive as a Black person in America, while discovering new ways of being that serve as a portal to more love, more healing, and more joy.","airtime":"","imageSrc":"https://cdn.kqed.org/wp-content/uploads/2024/04/Truth-Be-Told-Podcast-Tile-360x360-1.jpg","imageAlt":"KQED Truth Be Told with Tonya Mosley","officialWebsiteLink":"https://www.kqed.ord/podcasts/truthbetold","meta":{"site":"news","source":"npr","order":"12"},"link":"/podcasts/truthbetold","subscribe":{"apple":"https://podcasts.apple.com/us/podcast/truth-be-told/id1462216572","google":"https://podcasts.google.com/feed/aHR0cHM6Ly93dzIua3FlZC5vcmcvbmV3cy9jYXRlZ29yeS90cnV0aC1iZS10b2xkLXBvZGNhc3QvZmVlZA","npr":"https://www.npr.org/podcasts/719210818/truth-be-told","stitcher":"https://www.stitcher.com/s?fid=398170&refid=stpr","spotify":"https://open.spotify.com/show/587DhwTBxke6uvfwDfaV5N"}},"wait-wait-dont-tell-me":{"id":"wait-wait-dont-tell-me","title":"Wait Wait... Don't Tell Me!","info":"Peter Sagal and Bill Kurtis host the weekly NPR News quiz show alongside some of the best and brightest news and entertainment personalities.","airtime":"SUN 10am-11am, SAT 11am-12pm, SAT 6pm-7pm","imageSrc":"https://cdn.kqed.org/wp-content/uploads/2024/04/Wait-Wait-Podcast-Tile-300x300-1.jpg","officialWebsiteLink":"https://www.npr.org/programs/wait-wait-dont-tell-me/","meta":{"site":"news","source":"npr"},"link":"/radio/program/wait-wait-dont-tell-me","subscribe":{"npr":"https://rpb3r.app.goo.gl/Xogv","apple":"https://itunes.apple.com/WebObjects/MZStore.woa/wa/viewPodcast?s=143441&mt=2&id=121493804&at=11l79Y&ct=nprdirectory","tuneIn":"https://tunein.com/radio/Wait-Wait-Dont-Tell-Me-p46/","rss":"https://feeds.npr.org/344098539/podcast.xml"}},"washington-week":{"id":"washington-week","title":"Washington Week","info":"For 50 years, Washington Week has been the most intelligent and up to date conversation about the most important news stories of the week. Washington Week is the longest-running news and public affairs program on PBS and features journalists -- not pundits -- lending insight and perspective to the week's important news stories.","airtime":"SAT 1:30am-2am","imageSrc":"https://ww2.kqed.org/radio/wp-content/uploads/sites/50/2018/04/washington-week.jpg","officialWebsiteLink":"http://www.pbs.org/weta/washingtonweek/","meta":{"site":"news","source":"pbs"},"link":"/radio/program/washington-week","subscribe":{"apple":"https://itunes.apple.com/us/podcast/washington-week-audio-pbs/id83324702?mt=2","tuneIn":"https://tunein.com/podcasts/Current-Affairs/Washington-Week-p693/","rss":"http://feeds.pbs.org/pbs/weta/washingtonweek-audio"}},"weekend-edition-saturday":{"id":"weekend-edition-saturday","title":"Weekend Edition Saturday","info":"Weekend Edition Saturday wraps up the week's news and offers a mix of analysis and features on a wide range of topics, including arts, sports, entertainment, and human interest stories. The two-hour program is hosted by NPR's Peabody Award-winning Scott Simon.","airtime":"SAT 5am-10am","imageSrc":"https://cdn.kqed.org/wp-content/uploads/2024/04/Weekend-Edition-Podcast-Tile-360x360-1.jpg","officialWebsiteLink":"https://www.npr.org/programs/weekend-edition-saturday/","meta":{"site":"news","source":"npr"},"link":"/radio/program/weekend-edition-saturday"},"weekend-edition-sunday":{"id":"weekend-edition-sunday","title":"Weekend Edition Sunday","info":"Weekend Edition Sunday features interviews with newsmakers, artists, scientists, politicians, musicians, writers, theologians and historians. The program has covered news events from Nelson Mandela's 1990 release from a South African prison to the capture of Saddam Hussein.","airtime":"SUN 5am-10am","imageSrc":"https://cdn.kqed.org/wp-content/uploads/2024/04/Weekend-Edition-Podcast-Tile-360x360-1.jpg","officialWebsiteLink":"https://www.npr.org/programs/weekend-edition-sunday/","meta":{"site":"news","source":"npr"},"link":"/radio/program/weekend-edition-sunday"},"world-affairs":{"id":"world-affairs","title":"World Affairs","info":"The world as we knew it is undergoing a rapid transformation…so what's next? Welcome to WorldAffairs, your guide to a changing world. We give you the context you need to navigate across borders and ideologies. Through sound-rich stories and in-depth interviews, we break down what it means to be a global citizen on a hot, crowded planet. Our hosts, Ray Suarez, Teresa Cotsirilos and Philip Yun help you make sense of an uncertain world, one story at a time.","airtime":"MON 10pm, TUE 1am, SAT 3am","imageSrc":"https://cdn.kqed.org/wp-content/uploads/2024/04/World-Affairs-Podcast-Tile-360x360-1.jpg ","officialWebsiteLink":"https://www.worldaffairs.org/","meta":{"site":"news","source":"World Affairs"},"link":"/radio/program/world-affairs","subscribe":{"apple":"https://itunes.apple.com/us/podcast/world-affairs/id101215657?mt=2","tuneIn":"https://tunein.com/radio/WorldAffairs-p1665/","rss":"https://worldaffairs.libsyn.com/rss"}},"on-shifting-ground":{"id":"on-shifting-ground","title":"On Shifting Ground with Ray Suarez","info":"Geopolitical turmoil. A warming planet. Authoritarians on the rise. We live in a chaotic world that’s rapidly shifting around us. “On Shifting Ground with Ray Suarez” explores international fault lines and how they impact us all. Each week, NPR veteran Ray Suarez hosts conversations with journalists, leaders and policy experts to help us read between the headlines – and give us hope for human resilience.","airtime":"MON 10pm, TUE 1am, SAT 3am","imageSrc":"https://ww2.kqed.org/app/uploads/2022/12/onshiftingground-600x600-1.png","officialWebsiteLink":"https://worldaffairs.org/radio-podcast/","meta":{"site":"news","source":"On Shifting Ground"},"link":"/radio/program/on-shifting-ground","subscribe":{"apple":"https://podcasts.apple.com/ie/podcast/on-shifting-ground/id101215657","rss":"https://feeds.libsyn.com/36668/rss"}},"hidden-brain":{"id":"hidden-brain","title":"Hidden Brain","info":"Shankar Vedantam uses science and storytelling to reveal the unconscious patterns that drive human behavior, shape our choices and direct our relationships.","imageSrc":"https://ww2.kqed.org/radio/wp-content/uploads/sites/50/2018/05/hiddenbrain.jpg","officialWebsiteLink":"https://www.npr.org/series/423302056/hidden-brain","airtime":"SUN 7pm-8pm","meta":{"site":"news","source":"NPR"},"link":"/radio/program/hidden-brain","subscribe":{"apple":"https://itunes.apple.com/us/podcast/hidden-brain/id1028908750?mt=2","tuneIn":"https://tunein.com/podcasts/Science-Podcasts/Hidden-Brain-p787503/","rss":"https://feeds.npr.org/510308/podcast.xml"}},"city-arts":{"id":"city-arts","title":"City Arts & Lectures","info":"A one-hour radio program to hear celebrated writers, artists and thinkers address contemporary ideas and values, often discussing the creative process. Please note: tapes or transcripts are not available","imageSrc":"https://ww2.kqed.org/radio/wp-content/uploads/sites/50/2018/05/cityartsandlecture-300x300.jpg","officialWebsiteLink":"https://www.cityarts.net/","airtime":"SUN 1pm-2pm, TUE 10pm, WED 1am","meta":{"site":"news","source":"City Arts & Lectures"},"link":"https://www.cityarts.net","subscribe":{"tuneIn":"https://tunein.com/radio/City-Arts-and-Lectures-p692/","rss":"https://www.cityarts.net/feed/"}},"white-lies":{"id":"white-lies","title":"White Lies","info":"In 1965, Rev. James Reeb was murdered in Selma, Alabama. Three men were tried and acquitted, but no one was ever held to account. Fifty years later, two journalists from Alabama return to the city where it happened, expose the lies that kept the murder from being solved and uncover a story about guilt and memory that says as much about America today as it does about the past.","imageSrc":"https://cdn.kqed.org/wp-content/uploads/2024/04/White-Lies-Podcast-Tile-360x360-1.jpg","officialWebsiteLink":"https://www.npr.org/podcasts/510343/white-lies","meta":{"site":"news","source":"npr"},"link":"/radio/program/white-lies","subscribe":{"npr":"https://rpb3r.app.goo.gl/whitelies","apple":"https://podcasts.apple.com/podcast/id1462650519?mt=2&at=11l79Y&ct=nprdirectory","google":"https://podcasts.google.com/feed/aHR0cHM6Ly9mZWVkcy5ucHIub3JnLzUxMDM0My9wb2RjYXN0LnhtbA","spotify":"https://open.spotify.com/show/12yZ2j8vxqhc0QZyRES3ft?si=LfWYEK6URA63hueKVxRLAw","rss":"https://feeds.npr.org/510343/podcast.xml"}},"rightnowish":{"id":"rightnowish","title":"Rightnowish","tagline":"Art is where you find it","info":"Rightnowish digs into life in the Bay Area right now… ish. Journalist Pendarvis Harshaw takes us to galleries painted on the sides of liquor stores in West Oakland. We'll dance in warehouses in the Bayview, make smoothies with kids in South Berkeley, and listen to classical music in a 1984 Cutlass Supreme in Richmond. Every week, Pen talks to movers and shakers about how the Bay Area shapes what they create, and how they shape the place we call home.","imageSrc":"https://cdn.kqed.org/wp-content/uploads/2024/04/Rightnowish-Podcast-Tile-500x500-1.jpg","imageAlt":"KQED Rightnowish with Pendarvis Harshaw","officialWebsiteLink":"/podcasts/rightnowish","meta":{"site":"arts","source":"kqed","order":"5"},"link":"/podcasts/rightnowish","subscribe":{"npr":"https://www.npr.org/podcasts/721590300/rightnowish","rss":"https://ww2.kqed.org/arts/programs/rightnowish/feed/podcast","apple":"https://podcasts.apple.com/us/podcast/rightnowish/id1482187648","stitcher":"https://www.stitcher.com/podcast/kqed/rightnowish","google":"https://podcasts.google.com/feed/aHR0cHM6Ly9mZWVkcy5tZWdhcGhvbmUuZm0vS1FJTkMxMjU5MTY3NDc4","spotify":"https://open.spotify.com/show/7kEJuafTzTVan7B78ttz1I"}},"jerrybrown":{"id":"jerrybrown","title":"The Political Mind of Jerry Brown","tagline":"Lessons from a lifetime in politics","info":"The Political Mind of Jerry Brown brings listeners the wisdom of the former Governor, Mayor, and presidential candidate. Scott Shafer interviewed Brown for more than 40 hours, covering the former governor's life and half-century in the political game – and Brown has some lessons he'd like to share. ","imageSrc":"https://cdn.kqed.org/wp-content/uploads/2024/04/The-Political-Mind-of-Jerry-Brown-Podcast-Tile-703x703-1.jpg","imageAlt":"KQED The Political Mind of Jerry Brown","officialWebsiteLink":"/podcasts/jerrybrown","meta":{"site":"news","source":"kqed","order":"16"},"link":"/podcasts/jerrybrown","subscribe":{"npr":"https://www.npr.org/podcasts/790253322/the-political-mind-of-jerry-brown","apple":"https://itunes.apple.com/us/podcast/id1492194549","rss":"https://ww2.kqed.org/news/series/jerrybrown/feed/podcast/","tuneIn":"http://tun.in/pjGcK","stitcher":"https://www.stitcher.com/podcast/kqed/the-political-mind-of-jerry-brown","spotify":"https://open.spotify.com/show/54C1dmuyFyKMFttY6X2j6r?si=K8SgRCoISNK6ZbjpXrX5-w","google":"https://podcasts.google.com/feed/aHR0cHM6Ly93dzIua3FlZC5vcmcvbmV3cy9zZXJpZXMvamVycnlicm93bi9mZWVkL3BvZGNhc3Qv"}},"the-splendid-table":{"id":"the-splendid-table","title":"The Splendid Table","info":"\u003cem>The Splendid Table\u003c/em> hosts our nation's conversations about cooking, sustainability and food culture.","imageSrc":"https://cdn.kqed.org/wp-content/uploads/2024/04/The-Splendid-Table-Podcast-Tile-360x360-1.jpg","officialWebsiteLink":"https://www.splendidtable.org/","airtime":"SUN 10-11 pm","meta":{"site":"radio","source":"npr"},"link":"/radio/program/the-splendid-table"}},"racesReducer":{"5921":{"id":"5921","type":"apRace","location":"State of California","raceName":"U.S. House of Representatives, District 7","raceDescription":"Top candidate wins seat.","raceType":"top2","totalVotes":158422,"precinctsReportPercentage":98.97,"eevp":99,"tabulationStatus":"Tabulation Paused","dateUpdated":"March 22, 2024","timeUpdated":"4:48 PM","source":"AP","candidates":[{"candidateName":"Doris Matsui","candidateIncumbent":true,"candidateParty":"D","voteCount":89456,"isWinner":true},{"candidateName":"Tom Silva","candidateIncumbent":false,"candidateParty":"R","voteCount":48920,"isWinner":true},{"candidateName":"David Mandel","candidateIncumbent":false,"candidateParty":"D","voteCount":20046,"isWinner":false}],"winnerDateTime":"2024-03-09T01:00:38.194Z"},"5922":{"id":"5922","type":"apRace","location":"State of California","raceName":"U.S. House of Representatives, District 8","raceDescription":"Top candidate wins seat.","raceType":"top2","totalVotes":0,"uncontested":true,"precinctsReportPercentage":0,"eevp":0,"tabulationStatus":"Tabulation Paused","dateUpdated":"March 22, 2024","timeUpdated":"4:20 PM","source":"AP","candidates":[{"candidateName":"Rudy Recile","candidateIncumbent":false,"candidateParty":"R","voteCount":0,"isWinner":true},{"candidateName":"John Garamendi","candidateIncumbent":true,"candidateParty":"D","voteCount":0,"isWinner":true}],"winnerDateTime":"2024-03-06T04:00:30.000Z"},"5924":{"id":"5924","type":"apRace","location":"State of California","raceName":"U.S. House of Representatives, District 10","raceDescription":"Top candidate wins seat.","raceType":"top2","totalVotes":185034,"precinctsReportPercentage":99.07,"eevp":99,"tabulationStatus":"Tabulation Paused","dateUpdated":"March 22, 2024","timeUpdated":"4:48 PM","source":"AP","candidates":[{"candidateName":"Mark DeSaulnier","candidateIncumbent":true,"candidateParty":"D","voteCount":121265,"isWinner":true},{"candidateName":"Katherine Piccinini","candidateIncumbent":false,"candidateParty":"R","voteCount":34883,"isWinner":true},{"candidateName":"Nolan Chen","candidateIncumbent":false,"candidateParty":"R","voteCount":19459,"isWinner":false},{"candidateName":"Joe Sweeney","candidateIncumbent":false,"candidateParty":"NPP","voteCount":7606,"isWinner":false},{"candidateName":"Mohamed Elsherbini","candidateIncumbent":false,"candidateParty":"NPP","voteCount":1821,"isWinner":false}],"winnerDateTime":"2024-03-09T01:02:32.415Z"},"5926":{"id":"5926","type":"apRace","location":"State of California","raceName":"U.S. House of Representatives, District 12","raceDescription":"Top candidate wins seat.","raceType":"top2","totalVotes":153801,"precinctsReportPercentage":98.88,"eevp":99,"tabulationStatus":"Tabulation Paused","dateUpdated":"March 20, 2024","timeUpdated":"4:41 PM","source":"AP","candidates":[{"candidateName":"Lateefah Simon","candidateIncumbent":false,"candidateParty":"D","voteCount":85905,"isWinner":true},{"candidateName":"Jennifer Tran","candidateIncumbent":false,"candidateParty":"D","voteCount":22964,"isWinner":true},{"candidateName":"Tony Daysog","candidateIncumbent":false,"candidateParty":"D","voteCount":17197,"isWinner":false},{"candidateName":"Stephen Slauson","candidateIncumbent":false,"candidateParty":"R","voteCount":9699,"isWinner":false},{"candidateName":"Glenn Kaplan","candidateIncumbent":false,"candidateParty":"D","voteCount":6785,"isWinner":false},{"candidateName":"Eric Wilson","candidateIncumbent":false,"candidateParty":"D","voteCount":4243,"isWinner":false},{"candidateName":"Abdur Sikder","candidateIncumbent":false,"candidateParty":"D","voteCount":2847,"isWinner":false},{"candidateName":"Ned Nuerge","candidateIncumbent":false,"candidateParty":"R","voteCount":2532,"isWinner":false},{"candidateName":"Andre Todd","candidateIncumbent":false,"candidateParty":"D","voteCount":1629,"isWinner":false}],"winnerDateTime":"2024-03-16T00:22:36.062Z"},"5928":{"id":"5928","type":"apRace","location":"State of California","raceName":"U.S. House of Representatives, District 14","raceDescription":"Top candidate wins seat.","raceType":"top2","totalVotes":125831,"precinctsReportPercentage":99.14,"eevp":99,"tabulationStatus":"Tabulation Paused","dateUpdated":"March 20, 2024","timeUpdated":"4:41 PM","source":"AP","candidates":[{"candidateName":"Eric Swalwell","candidateIncumbent":true,"candidateParty":"D","voteCount":83989,"isWinner":true},{"candidateName":"Vin Kruttiventi","candidateIncumbent":false,"candidateParty":"R","voteCount":22106,"isWinner":true},{"candidateName":"Alison Hayden","candidateIncumbent":false,"candidateParty":"R","voteCount":11928,"isWinner":false},{"candidateName":"Luis Reynoso","candidateIncumbent":false,"candidateParty":"R","voteCount":7808,"isWinner":false}],"winnerDateTime":"2024-03-12T00:51:36.366Z"},"5930":{"id":"5930","type":"apRace","location":"State of California","raceName":"U.S. House of Representatives, District 16","raceDescription":"Top candidate wins seat.","raceType":"top2","totalVotes":182135,"precinctsReportPercentage":98.91,"eevp":99,"tabulationStatus":"Tabulation Paused","dateUpdated":"April 3, 2024","timeUpdated":"3:04 PM","source":"AP","candidates":[{"candidateName":"Sam Liccardo","candidateIncumbent":false,"candidateParty":"D","voteCount":38489,"isWinner":true},{"candidateName":"Evan Low","candidateIncumbent":false,"candidateParty":"D","voteCount":30249,"isWinner":false},{"candidateName":"Joe Simitian","candidateIncumbent":false,"candidateParty":"D","voteCount":30249,"isWinner":false},{"candidateName":"Peter Ohtaki","candidateIncumbent":false,"candidateParty":"R","voteCount":23275,"isWinner":false},{"candidateName":"Peter Dixon","candidateIncumbent":false,"candidateParty":"D","voteCount":14673,"isWinner":false},{"candidateName":"Rishi Kumar","candidateIncumbent":false,"candidateParty":"D","voteCount":12377,"isWinner":false},{"candidateName":"Karl Ryan","candidateIncumbent":false,"candidateParty":"R","voteCount":11557,"isWinner":false},{"candidateName":"Julie Lythcott-Haims","candidateIncumbent":false,"candidateParty":"D","voteCount":11383,"isWinner":false},{"candidateName":"Ahmed Mostafa","candidateIncumbent":false,"candidateParty":"D","voteCount":5811,"isWinner":false},{"candidateName":"Greg Tanaka","candidateIncumbent":false,"candidateParty":"D","voteCount":2421,"isWinner":false},{"candidateName":"Joby Bernstein","candidateIncumbent":false,"candidateParty":"D","voteCount":1651,"isWinner":false}],"winnerDateTime":"2024-03-12T00:32:05.002Z"},"5931":{"id":"5931","type":"apRace","location":"State of California","raceName":"U.S. House of Representatives, District 17","raceDescription":"Top candidate wins seat.","raceType":"top2","totalVotes":117534,"precinctsReportPercentage":98.92,"eevp":99,"tabulationStatus":"Tabulation Paused","dateUpdated":"March 22, 2024","timeUpdated":"4:20 PM","source":"AP","candidates":[{"candidateName":"Ro Khanna","candidateIncumbent":true,"candidateParty":"D","voteCount":73941,"isWinner":true},{"candidateName":"Anita Chen","candidateIncumbent":false,"candidateParty":"R","voteCount":31539,"isWinner":true},{"candidateName":"Ritesh Tandon","candidateIncumbent":false,"candidateParty":"D","voteCount":5728,"isWinner":false},{"candidateName":"Mario Ramirez","candidateIncumbent":false,"candidateParty":"D","voteCount":4491,"isWinner":false},{"candidateName":"Joe Dehn","candidateIncumbent":false,"candidateParty":"Lib","voteCount":1835,"isWinner":false}],"winnerDateTime":"2024-03-08T01:50:53.956Z"},"5932":{"id":"5932","type":"apRace","location":"State of California","raceName":"U.S. House of Representatives, District 18","raceDescription":"Top candidate wins seat.","raceType":"top2","totalVotes":96302,"precinctsReportPercentage":98.93,"eevp":98.83,"tabulationStatus":"Tabulation Paused","dateUpdated":"March 25, 2024","timeUpdated":"5:47 AM","source":"AP","candidates":[{"candidateName":"Zoe Lofgren","candidateIncumbent":true,"candidateParty":"D","voteCount":49323,"isWinner":true},{"candidateName":"Peter Hernandez","candidateIncumbent":false,"candidateParty":"R","voteCount":31622,"isWinner":true},{"candidateName":"Charlene Nijmeh","candidateIncumbent":false,"candidateParty":"D","voteCount":10614,"isWinner":false},{"candidateName":"Lawrence Milan","candidateIncumbent":false,"candidateParty":"D","voteCount":2712,"isWinner":false},{"candidateName":"Luele Kifle","candidateIncumbent":false,"candidateParty":"D","voteCount":2031,"isWinner":false}],"winnerDateTime":"2024-03-12T00:26:02.706Z"},"5963":{"id":"5963","type":"apRace","location":"State of California","raceName":"State House, District 2","raceDescription":"Top candidate wins seat.","raceType":"top2","totalVotes":139085,"precinctsReportPercentage":98.62,"eevp":98.6,"tabulationStatus":"Tabulation Paused","dateUpdated":"March 22, 2024","timeUpdated":"4:20 PM","source":"AP","candidates":[{"candidateName":"Michael Greer","candidateIncumbent":false,"candidateParty":"R","voteCount":38079,"isWinner":true},{"candidateName":"Chris Rogers","candidateIncumbent":false,"candidateParty":"D","voteCount":27126,"isWinner":true},{"candidateName":"Rusty Hicks","candidateIncumbent":false,"candidateParty":"D","voteCount":25615,"isWinner":false},{"candidateName":"Ariel Kelley","candidateIncumbent":false,"candidateParty":"D","voteCount":19483,"isWinner":false},{"candidateName":"Frankie Myers","candidateIncumbent":false,"candidateParty":"D","voteCount":17694,"isWinner":false},{"candidateName":"Ted Williams","candidateIncumbent":false,"candidateParty":"D","voteCount":9550,"isWinner":false},{"candidateName":"Cynthia Click","candidateIncumbent":false,"candidateParty":"D","voteCount":1538,"isWinner":false}],"winnerDateTime":"2024-03-22T21:38:36.711Z"},"5972":{"id":"5972","type":"apRace","location":"State of California","raceName":"State House, District 11","raceDescription":"Top candidate wins seat.","raceType":"top2","totalVotes":99775,"precinctsReportPercentage":99,"eevp":99,"tabulationStatus":"Tabulation Paused","dateUpdated":"March 22, 2024","timeUpdated":"4:48 PM","source":"AP","candidates":[{"candidateName":"Lori Wilson","candidateIncumbent":true,"candidateParty":"D","voteCount":50085,"isWinner":true},{"candidateName":"Dave Ennis","candidateIncumbent":false,"candidateParty":"R","voteCount":26074,"isWinner":true},{"candidateName":"Wanda Wallis","candidateIncumbent":false,"candidateParty":"R","voteCount":14638,"isWinner":false},{"candidateName":"Jeffrey Flack","candidateIncumbent":false,"candidateParty":"D","voteCount":8978,"isWinner":false}],"winnerDateTime":"2024-03-08T02:01:24.524Z"},"5973":{"id":"5973","type":"apRace","location":"State of California","raceName":"State House, District 12","raceDescription":"Top candidate wins seat.","raceType":"top2","totalVotes":143532,"precinctsReportPercentage":99.19,"eevp":99,"tabulationStatus":"Tabulation Paused","dateUpdated":"March 22, 2024","timeUpdated":"4:38 PM","source":"AP","candidates":[{"candidateName":"Damon Connolly","candidateIncumbent":true,"candidateParty":"D","voteCount":111275,"isWinner":true},{"candidateName":"Andy Podshadley","candidateIncumbent":false,"candidateParty":"R","voteCount":17240,"isWinner":true},{"candidateName":"Eryn Cervantes","candidateIncumbent":false,"candidateParty":"R","voteCount":15017,"isWinner":false}],"winnerDateTime":"2024-03-21T00:25:32.262Z"},"5975":{"id":"5975","type":"apRace","location":"State of California","raceName":"State House, District 14","raceDescription":"Top candidate wins seat.","raceType":"top2","totalVotes":106997,"precinctsReportPercentage":99.06,"eevp":99,"tabulationStatus":"Tabulation Paused","dateUpdated":"March 22, 2024","timeUpdated":"4:48 PM","source":"AP","candidates":[{"candidateName":"Buffy Wicks","candidateIncumbent":true,"candidateParty":"D","voteCount":78678,"isWinner":true},{"candidateName":"Margot Smith","candidateIncumbent":false,"candidateParty":"D","voteCount":18251,"isWinner":true},{"candidateName":"Utkarsh Jain","candidateIncumbent":false,"candidateParty":"R","voteCount":10068,"isWinner":false}],"winnerDateTime":"2024-03-15T01:30:34.539Z"},"5976":{"id":"5976","type":"apRace","location":"State of California","raceName":"State House, District 15","raceDescription":"Top candidate wins seat.","raceType":"top2","totalVotes":97144,"precinctsReportPercentage":98.98,"eevp":99,"tabulationStatus":"Tabulation Paused","dateUpdated":"March 22, 2024","timeUpdated":"4:48 PM","source":"AP","candidates":[{"candidateName":"Sonia Ledo","candidateIncumbent":false,"candidateParty":"R","voteCount":30946,"isWinner":true},{"candidateName":"Anamarie Farias","candidateIncumbent":false,"candidateParty":"D","voteCount":29512,"isWinner":true},{"candidateName":"Monica Wilson","candidateIncumbent":false,"candidateParty":"D","voteCount":24775,"isWinner":false},{"candidateName":"Karen Mitchoff","candidateIncumbent":false,"candidateParty":"D","voteCount":11911,"isWinner":false}],"winnerDateTime":"2024-03-14T00:19:38.858Z"},"5977":{"id":"5977","type":"apRace","location":"State of California","raceName":"State House, District 16","raceDescription":"Top candidate wins seat.","raceType":"top2","totalVotes":0,"uncontested":true,"precinctsReportPercentage":0,"eevp":0,"tabulationStatus":"Tabulation Paused","dateUpdated":"March 22, 2024","timeUpdated":"4:20 PM","source":"AP","candidates":[{"candidateName":"Joseph Rubay","candidateIncumbent":false,"candidateParty":"R","voteCount":0,"isWinner":true},{"candidateName":"Rebecca Bauer-Kahan","candidateIncumbent":true,"candidateParty":"D","voteCount":0,"isWinner":true}],"winnerDateTime":"2024-03-06T04:00:30.000Z"},"5978":{"id":"5978","type":"apRace","location":"State of California","raceName":"State House, District 17","raceDescription":"Top candidate wins seat.","raceType":"top2","totalVotes":111003,"precinctsReportPercentage":98.99,"eevp":99,"tabulationStatus":"Tabulation Paused","dateUpdated":"March 22, 2024","timeUpdated":"8:25 AM","source":"AP","candidates":[{"candidateName":"Matt Haney","candidateIncumbent":true,"candidateParty":"D","voteCount":90915,"isWinner":true},{"candidateName":"Manuel Noris-Barrera","candidateIncumbent":false,"candidateParty":"R","voteCount":13843,"isWinner":true},{"candidateName":"Otto Duke","candidateIncumbent":false,"candidateParty":"D","voteCount":6245,"isWinner":false}],"winnerDateTime":"2024-03-12T00:36:19.697Z"},"5979":{"id":"5979","type":"apRace","location":"State of California","raceName":"State House, District 18","raceDescription":"Top candidate wins seat.","raceType":"top2","totalVotes":86008,"precinctsReportPercentage":99.1,"eevp":99,"tabulationStatus":"Tabulation Paused","dateUpdated":"March 20, 2024","timeUpdated":"4:41 PM","source":"AP","candidates":[{"candidateName":"Mia Bonta","candidateIncumbent":true,"candidateParty":"D","voteCount":73040,"isWinner":true},{"candidateName":"Andre Sandford","candidateIncumbent":false,"candidateParty":"AIP","voteCount":4575,"isWinner":false},{"candidateName":"Mindy Pechenuk","candidateIncumbent":false,"candidateParty":"R","voteCount":4389,"isWinner":false},{"candidateName":"Cheyenne Kenney","candidateIncumbent":false,"candidateParty":"R","voteCount":4004,"isWinner":false}],"winnerDateTime":"2024-03-06T08:03:23.729Z"},"5980":{"id":"5980","type":"apRace","location":"State of California","raceName":"State House, District 19","raceDescription":"Top candidate wins seat.","raceType":"top2","totalVotes":113959,"precinctsReportPercentage":98.8,"eevp":99,"tabulationStatus":"Tabulation Paused","dateUpdated":"March 22, 2024","timeUpdated":"4:20 PM","source":"AP","candidates":[{"candidateName":"Catherine Stefani","candidateIncumbent":false,"candidateParty":"D","voteCount":64960,"isWinner":true},{"candidateName":"David Lee","candidateIncumbent":false,"candidateParty":"D","voteCount":33035,"isWinner":true},{"candidateName":"Nadia Flamenco","candidateIncumbent":false,"candidateParty":"R","voteCount":8335,"isWinner":false},{"candidateName":"Arjun Sodhani","candidateIncumbent":false,"candidateParty":"R","voteCount":7629,"isWinner":false}],"winnerDateTime":"2024-03-11T23:50:23.109Z"},"5981":{"id":"5981","type":"apRace","location":"State of California","raceName":"State House, District 20","raceDescription":"Top candidate wins seat.","raceType":"top2","totalVotes":0,"uncontested":true,"precinctsReportPercentage":0,"eevp":0,"tabulationStatus":"Tabulation Paused","dateUpdated":"March 20, 2024","timeUpdated":"4:36 PM","source":"AP","candidates":[{"candidateName":"Liz Ortega","candidateIncumbent":true,"candidateParty":"D","voteCount":0,"isWinner":true}],"winnerDateTime":"2024-03-06T04:00:30.000Z"},"5982":{"id":"5982","type":"apRace","location":"State of California","raceName":"State House, District 21","raceDescription":"Top candidate wins seat.","raceType":"top2","totalVotes":0,"uncontested":true,"precinctsReportPercentage":0,"eevp":0,"tabulationStatus":"Tabulation Paused","dateUpdated":"March 22, 2024","timeUpdated":"4:20 PM","source":"AP","candidates":[{"candidateName":"Mark Gilham","candidateIncumbent":false,"candidateParty":"R","voteCount":0,"isWinner":true},{"candidateName":"Diane Papan","candidateIncumbent":true,"candidateParty":"D","voteCount":0,"isWinner":true}],"winnerDateTime":"2024-03-06T04:00:30.000Z"},"5984":{"id":"5984","type":"apRace","location":"State of California","raceName":"State House, District 23","raceDescription":"Top candidate wins seat.","raceType":"top2","totalVotes":116963,"precinctsReportPercentage":98.91,"eevp":99,"tabulationStatus":"Tabulation Paused","dateUpdated":"March 22, 2024","timeUpdated":"4:20 PM","source":"AP","candidates":[{"candidateName":"Marc Berman","candidateIncumbent":true,"candidateParty":"D","voteCount":67106,"isWinner":true},{"candidateName":"Lydia Kou","candidateIncumbent":false,"candidateParty":"D","voteCount":23699,"isWinner":true},{"candidateName":"Gus Mattammal","candidateIncumbent":false,"candidateParty":"R","voteCount":13277,"isWinner":false},{"candidateName":"Allan Marson","candidateIncumbent":false,"candidateParty":"R","voteCount":12881,"isWinner":false}],"winnerDateTime":"2024-03-12T01:13:06.280Z"},"5987":{"id":"5987","type":"apRace","location":"State of California","raceName":"State House, District 26","raceDescription":"Top candidate wins seat.","raceType":"top2","totalVotes":72753,"precinctsReportPercentage":99.19,"eevp":99,"tabulationStatus":"Tabulation Paused","dateUpdated":"March 22, 2024","timeUpdated":"4:20 PM","source":"AP","candidates":[{"candidateName":"Patrick Ahrens","candidateIncumbent":false,"candidateParty":"D","voteCount":25036,"isWinner":true},{"candidateName":"Tara Sreekrishnan","candidateIncumbent":false,"candidateParty":"D","voteCount":19600,"isWinner":true},{"candidateName":"Sophie Song","candidateIncumbent":false,"candidateParty":"R","voteCount":15954,"isWinner":false},{"candidateName":"Omar Din","candidateIncumbent":false,"candidateParty":"D","voteCount":8772,"isWinner":false},{"candidateName":"Bob Goodwyn","candidateIncumbent":false,"candidateParty":"Lib","voteCount":2170,"isWinner":false},{"candidateName":"Ashish Garg","candidateIncumbent":false,"candidateParty":"NPP","voteCount":1221,"isWinner":false}],"winnerDateTime":"2024-03-13T21:06:29.070Z"},"5989":{"id":"5989","type":"apRace","location":"State of California","raceName":"State House, District 28","raceDescription":"Top candidate wins seat.","raceType":"top2","totalVotes":0,"uncontested":true,"precinctsReportPercentage":0,"eevp":0,"tabulationStatus":"Tabulation Paused","dateUpdated":"March 22, 2024","timeUpdated":"5:10 PM","source":"AP","candidates":[{"candidateName":"Gail Pellerin","candidateIncumbent":true,"candidateParty":"D","voteCount":0,"isWinner":true},{"candidateName":"Liz Lawler","candidateIncumbent":false,"candidateParty":"R","voteCount":0,"isWinner":true}],"winnerDateTime":"2024-03-06T04:00:30.000Z"},"6010":{"id":"6010","type":"apRace","location":"State of California","raceName":"State House, District 49","raceDescription":"Top candidate wins seat.","raceType":"top2","totalVotes":0,"uncontested":true,"precinctsReportPercentage":0,"eevp":0,"tabulationStatus":"Tabulation Paused","dateUpdated":"March 22, 2024","timeUpdated":"4:36 PM","source":"AP","candidates":[{"candidateName":"Mike Fong","candidateIncumbent":true,"candidateParty":"D","voteCount":0,"isWinner":true},{"candidateName":"Long Liu","candidateIncumbent":false,"candidateParty":"R","voteCount":0,"isWinner":true}],"winnerDateTime":"2024-03-06T04:00:30.000Z"},"6018":{"id":"6018","type":"apRace","location":"State of California","raceName":"U.S. House of Representatives, District 2","raceDescription":"Top candidate wins seat.","raceType":"top2","totalVotes":229348,"precinctsReportPercentage":99.05,"eevp":99,"tabulationStatus":"Tabulation Paused","dateUpdated":"March 22, 2024","timeUpdated":"4:38 PM","source":"AP","candidates":[{"candidateName":"Jared Huffman","candidateIncumbent":true,"candidateParty":"D","voteCount":169005,"isWinner":true},{"candidateName":"Chris Coulombe","candidateIncumbent":false,"candidateParty":"R","voteCount":37372,"isWinner":true},{"candidateName":"Tief Gibbs","candidateIncumbent":false,"candidateParty":"R","voteCount":18437,"isWinner":false},{"candidateName":"Jolian Kangas","candidateIncumbent":false,"candidateParty":"NPP","voteCount":3166,"isWinner":false},{"candidateName":"Jason Brisendine","candidateIncumbent":false,"candidateParty":"NPP","voteCount":1368,"isWinner":false}],"winnerDateTime":"2024-03-12T00:46:10.103Z"},"6020":{"id":"6020","type":"apRace","location":"State of California","raceName":"U.S. House of Representatives, District 4","raceDescription":"Top candidate wins seat.","raceType":"top2","totalVotes":187640,"precinctsReportPercentage":96.32,"eevp":96.36,"tabulationStatus":"Tabulation Paused","dateUpdated":"March 22, 2024","timeUpdated":"4:20 PM","source":"AP","candidates":[{"candidateName":"Mike Thompson","candidateIncumbent":true,"candidateParty":"D","voteCount":118147,"isWinner":true},{"candidateName":"John Munn","candidateIncumbent":false,"candidateParty":"R","voteCount":56232,"isWinner":true},{"candidateName":"Andrew Engdahl","candidateIncumbent":false,"candidateParty":"D","voteCount":11202,"isWinner":false},{"candidateName":"Niket Patwardhan","candidateIncumbent":false,"candidateParty":"NPP","voteCount":2059,"isWinner":false}],"winnerDateTime":"2024-03-07T00:30:57.980Z"},"6025":{"id":"6025","type":"apRace","location":"State of California","raceName":"U.S. House of Representatives, District 9","raceDescription":"Top candidate wins seat.","raceType":"top2","totalVotes":121271,"precinctsReportPercentage":99.17,"eevp":99,"tabulationStatus":"Tabulation Paused","dateUpdated":"March 22, 2024","timeUpdated":"5:10 PM","source":"AP","candidates":[{"candidateName":"Josh Harder","candidateIncumbent":true,"candidateParty":"D","voteCount":60396,"isWinner":true},{"candidateName":"Kevin Lincoln","candidateIncumbent":false,"candidateParty":"R","voteCount":36346,"isWinner":true},{"candidateName":"John McBride","candidateIncumbent":false,"candidateParty":"R","voteCount":15525,"isWinner":false},{"candidateName":"Khalid Jafri","candidateIncumbent":false,"candidateParty":"R","voteCount":9004,"isWinner":false}],"winnerDateTime":"2024-03-12T00:49:44.113Z"},"6031":{"id":"6031","type":"apRace","location":"State of California","raceName":"U.S. House of Representatives, District 15","raceDescription":"Top candidate wins seat.","raceType":"top2","totalVotes":0,"uncontested":true,"precinctsReportPercentage":0,"eevp":0,"tabulationStatus":"Tabulation Paused","dateUpdated":"March 22, 2024","timeUpdated":"4:20 PM","source":"AP","candidates":[{"candidateName":"Anna Kramer","candidateIncumbent":false,"candidateParty":"R","voteCount":0,"isWinner":true},{"candidateName":"Kevin Mullin","candidateIncumbent":true,"candidateParty":"D","voteCount":0,"isWinner":true}],"winnerDateTime":"2024-03-06T04:00:30.000Z"},"6035":{"id":"6035","type":"apRace","location":"State of California","raceName":"U.S. House of Representatives, District 19","raceDescription":"Top candidate wins seat.","raceType":"top2","totalVotes":203670,"precinctsReportPercentage":99.11,"eevp":99,"tabulationStatus":"Tabulation Paused","dateUpdated":"March 25, 2024","timeUpdated":"5:47 AM","source":"AP","candidates":[{"candidateName":"Jimmy Panetta","candidateIncumbent":true,"candidateParty":"D","voteCount":132540,"isWinner":true},{"candidateName":"Jason Anderson","candidateIncumbent":false,"candidateParty":"R","voteCount":58120,"isWinner":true},{"candidateName":"Sean Dougherty","candidateIncumbent":false,"candidateParty":"Grn","voteCount":13010,"isWinner":false}],"winnerDateTime":"2024-03-07T00:23:46.779Z"},"6066":{"id":"6066","type":"apRace","location":"State of California","raceName":"State House, District 3","raceDescription":"Top candidate wins seat.","raceType":"top2","totalVotes":0,"uncontested":true,"precinctsReportPercentage":0,"eevp":0,"tabulationStatus":"Tabulation Paused","dateUpdated":"March 22, 2024","timeUpdated":"5:10 PM","source":"AP","candidates":[{"candidateName":"Jamie Gallagher","candidateIncumbent":true,"candidateParty":"R","voteCount":0,"isWinner":true},{"candidateName":"Aaron Draper","candidateIncumbent":false,"candidateParty":"D","voteCount":0,"isWinner":true}],"winnerDateTime":"2024-03-06T04:00:30.000Z"},"6067":{"id":"6067","type":"apRace","location":"State of California","raceName":"State House, District 4","raceDescription":"Top candidate wins seat.","raceType":"top2","totalVotes":0,"uncontested":true,"precinctsReportPercentage":0,"eevp":0,"tabulationStatus":"Tabulation Paused","dateUpdated":"March 22, 2024","timeUpdated":"4:20 PM","source":"AP","candidates":[{"candidateName":"Cecilia Aguiar-Curry","candidateIncumbent":true,"candidateParty":"D","voteCount":0,"isWinner":true}],"winnerDateTime":"2024-03-06T04:00:30.000Z"},"6087":{"id":"6087","type":"apRace","location":"State of California","raceName":"State House, District 24","raceDescription":"Top candidate wins seat.","raceType":"top2","totalVotes":66643,"precinctsReportPercentage":99.19,"eevp":99,"tabulationStatus":"Tabulation Paused","dateUpdated":"March 22, 2024","timeUpdated":"4:20 PM","source":"AP","candidates":[{"candidateName":"Alex Lee","candidateIncumbent":true,"candidateParty":"D","voteCount":45544,"isWinner":true},{"candidateName":"Bob Brunton","candidateIncumbent":false,"candidateParty":"R","voteCount":14951,"isWinner":true},{"candidateName":"Marti Souza","candidateIncumbent":false,"candidateParty":"R","voteCount":6148,"isWinner":false}],"winnerDateTime":"2024-03-14T23:23:49.770Z"},"6088":{"id":"6088","type":"apRace","location":"State of California","raceName":"State House, District 25","raceDescription":"Top candidate wins seat.","raceType":"top2","totalVotes":69560,"precinctsReportPercentage":99.31,"eevp":99,"tabulationStatus":"Tabulation Paused","dateUpdated":"March 22, 2024","timeUpdated":"4:20 PM","source":"AP","candidates":[{"candidateName":"Ash Kalra","candidateIncumbent":true,"candidateParty":"D","voteCount":35821,"isWinner":true},{"candidateName":"Ted Stroll","candidateIncumbent":false,"candidateParty":"R","voteCount":18255,"isWinner":true},{"candidateName":"Lan Ngo","candidateIncumbent":false,"candidateParty":"D","voteCount":15484,"isWinner":false}],"winnerDateTime":"2024-03-14T02:40:57.200Z"},"6092":{"id":"6092","type":"apRace","location":"State of California","raceName":"State House, District 29","raceDescription":"Top candidate wins seat.","raceType":"top2","totalVotes":0,"uncontested":true,"precinctsReportPercentage":0,"eevp":0,"tabulationStatus":"Tabulation Paused","dateUpdated":"March 25, 2024","timeUpdated":"5:47 AM","source":"AP","candidates":[{"candidateName":"Robert Rivas","candidateIncumbent":true,"candidateParty":"D","voteCount":0,"isWinner":true},{"candidateName":"J.W. Paine","candidateIncumbent":false,"candidateParty":"R","voteCount":0,"isWinner":true}],"winnerDateTime":"2024-03-06T04:00:30.000Z"},"6223":{"id":"6223","type":"apRace","location":"State of California","raceName":"U.S. House of Representatives, District 46","raceDescription":"Top candidate wins seat.","raceType":"top2","totalVotes":0,"uncontested":true,"precinctsReportPercentage":0,"eevp":0,"tabulationStatus":"Tabulation Paused","dateUpdated":"March 22, 2024","timeUpdated":"5:16 PM","source":"AP","candidates":[{"candidateName":"Lou Correa","candidateIncumbent":true,"candidateParty":"D","voteCount":0,"isWinner":true},{"candidateName":"David Pan","candidateIncumbent":false,"candidateParty":"R","voteCount":0,"isWinner":true}],"winnerDateTime":"2024-03-06T04:00:30.000Z"},"6530":{"id":"6530","type":"apRace","location":"State of California","raceName":"State Senate, District 3","raceDescription":"Top candidate wins seat.","raceType":"top2","totalVotes":222193,"precinctsReportPercentage":98.99,"eevp":99,"tabulationStatus":"Tabulation Paused","dateUpdated":"March 22, 2024","timeUpdated":"4:48 PM","source":"AP","candidates":[{"candidateName":"Thom Bogue","candidateIncumbent":false,"candidateParty":"R","voteCount":61776,"isWinner":true},{"candidateName":"Christopher Cabaldon","candidateIncumbent":false,"candidateParty":"D","voteCount":59041,"isWinner":true},{"candidateName":"Rozzana Verder-Aliga","candidateIncumbent":false,"candidateParty":"D","voteCount":45546,"isWinner":false},{"candidateName":"Jackie Elward","candidateIncumbent":false,"candidateParty":"D","voteCount":41127,"isWinner":false},{"candidateName":"Jimih Jones","candidateIncumbent":false,"candidateParty":"R","voteCount":14703,"isWinner":false}],"winnerDateTime":"2024-03-15T01:24:31.539Z"},"6531":{"id":"6531","type":"apRace","location":"State of California","raceName":"State Senate, District 5","raceDescription":"Top candidate wins seat.","raceType":"top2","totalVotes":171623,"precinctsReportPercentage":99.09,"eevp":99,"tabulationStatus":"Tabulation Paused","dateUpdated":"March 22, 2024","timeUpdated":"5:10 PM","source":"AP","candidates":[{"candidateName":"Jim Shoemaker","candidateIncumbent":false,"candidateParty":"R","voteCount":74935,"isWinner":true},{"candidateName":"Jerry McNerney","candidateIncumbent":false,"candidateParty":"D","voteCount":57040,"isWinner":true},{"candidateName":"Carlos Villapudua","candidateIncumbent":false,"candidateParty":"D","voteCount":39648,"isWinner":false}],"winnerDateTime":"2024-03-13T20:07:46.382Z"},"6532":{"id":"6532","type":"apRace","location":"State of California","raceName":"State Senate, District 7","raceDescription":"Top candidate wins seat.","raceType":"top2","totalVotes":192446,"precinctsReportPercentage":98.72,"eevp":98.78,"tabulationStatus":"Tabulation Paused","dateUpdated":"March 22, 2024","timeUpdated":"4:48 PM","source":"AP","candidates":[{"candidateName":"Jesse Arreguín","candidateIncumbent":false,"candidateParty":"D","voteCount":61837,"isWinner":true},{"candidateName":"Jovanka Beckles","candidateIncumbent":false,"candidateParty":"D","voteCount":34025,"isWinner":true},{"candidateName":"Dan Kalb","candidateIncumbent":false,"candidateParty":"D","voteCount":28842,"isWinner":false},{"candidateName":"Kathryn Lybarger","candidateIncumbent":false,"candidateParty":"D","voteCount":28041,"isWinner":false},{"candidateName":"Sandre Swanson","candidateIncumbent":false,"candidateParty":"D","voteCount":22862,"isWinner":false},{"candidateName":"Jeanne Solnordal","candidateIncumbent":false,"candidateParty":"R","voteCount":16839,"isWinner":false}],"winnerDateTime":"2024-03-16T00:58:11.533Z"},"6533":{"id":"6533","type":"apRace","location":"State of California","raceName":"State Senate, District 9","raceDescription":"Top candidate wins seat.","raceType":"top2","totalVotes":0,"uncontested":true,"precinctsReportPercentage":0,"eevp":0,"tabulationStatus":"Tabulation Paused","dateUpdated":"March 22, 2024","timeUpdated":"4:20 PM","source":"AP","candidates":[{"candidateName":"Tim Grayson","candidateIncumbent":false,"candidateParty":"D","voteCount":0,"isWinner":true},{"candidateName":"Marisol Rubio","candidateIncumbent":false,"candidateParty":"D","voteCount":0,"isWinner":true}],"winnerDateTime":"2024-03-06T04:00:30.000Z"},"6534":{"id":"6534","type":"apRace","location":"State of California","raceName":"State Senate, District 11","raceDescription":"Top candidate wins seat.","raceType":"top2","totalVotes":228260,"precinctsReportPercentage":99.09,"eevp":99,"tabulationStatus":"Tabulation Paused","dateUpdated":"March 22, 2024","timeUpdated":"4:20 PM","source":"AP","candidates":[{"candidateName":"Scott Wiener","candidateIncumbent":true,"candidateParty":"D","voteCount":166592,"isWinner":true},{"candidateName":"Yvette Corkrean","candidateIncumbent":false,"candidateParty":"R","voteCount":34438,"isWinner":true},{"candidateName":"Cynthia Cravens","candidateIncumbent":false,"candidateParty":"D","voteCount":18513,"isWinner":false},{"candidateName":"Jing Xiong","candidateIncumbent":false,"candidateParty":"NPP","voteCount":8717,"isWinner":false}],"winnerDateTime":"2024-03-12T02:01:51.597Z"},"6535":{"id":"6535","type":"apRace","location":"State of California","raceName":"State Senate, District 13","raceDescription":"Top candidate wins seat.","raceType":"top2","totalVotes":227191,"precinctsReportPercentage":98.88,"eevp":99,"tabulationStatus":"Tabulation Paused","dateUpdated":"March 22, 2024","timeUpdated":"4:20 PM","source":"AP","candidates":[{"candidateName":"Josh Becker","candidateIncumbent":true,"candidateParty":"D","voteCount":167127,"isWinner":true},{"candidateName":"Alexander Glew","candidateIncumbent":false,"candidateParty":"R","voteCount":42788,"isWinner":true},{"candidateName":"Christina Laskowski","candidateIncumbent":false,"candidateParty":"R","voteCount":17276,"isWinner":false}],"winnerDateTime":"2024-03-12T01:56:24.964Z"},"6536":{"id":"6536","type":"apRace","location":"State of California","raceName":"State Senate, District 15","raceDescription":"Top candidate wins seat.","raceType":"top2","totalVotes":180231,"precinctsReportPercentage":98.81,"eevp":98.95,"tabulationStatus":"Tabulation Paused","dateUpdated":"March 22, 2024","timeUpdated":"4:20 PM","source":"AP","candidates":[{"candidateName":"Dave Cortese","candidateIncumbent":true,"candidateParty":"D","voteCount":124440,"isWinner":true},{"candidateName":"Robert Howell","candidateIncumbent":false,"candidateParty":"R","voteCount":34173,"isWinner":true},{"candidateName":"Tony Loaiza","candidateIncumbent":false,"candidateParty":"R","voteCount":21618,"isWinner":false}],"winnerDateTime":"2024-03-13T01:15:45.365Z"},"6548":{"id":"6548","type":"apRace","location":"State of California","raceName":"State Senate, District 39","raceDescription":"Top candidate wins seat.","raceType":"top2","totalVotes":0,"uncontested":true,"precinctsReportPercentage":0,"eevp":0,"tabulationStatus":"Tabulation Paused","dateUpdated":"March 20, 2024","timeUpdated":"4:55 PM","source":"AP","candidates":[{"candidateName":"Akilah Weber","candidateIncumbent":false,"candidateParty":"D","voteCount":0,"isWinner":true},{"candidateName":"Bob Divine","candidateIncumbent":false,"candidateParty":"R","voteCount":0,"isWinner":true}],"winnerDateTime":"2024-03-06T04:00:30.000Z"},"6611":{"id":"6611","type":"apRace","location":"State of California","raceName":"U.S. House of Representatives, District 11","raceDescription":"Top candidate wins seat.","raceType":"top2","totalVotes":188732,"precinctsReportPercentage":98.89,"eevp":99,"tabulationStatus":"Tabulation Paused","dateUpdated":"March 22, 2024","timeUpdated":"8:25 AM","source":"AP","candidates":[{"candidateName":"Nancy Pelosi","candidateIncumbent":true,"candidateParty":"D","voteCount":138285,"isWinner":true},{"candidateName":"Bruce Lou","candidateIncumbent":false,"candidateParty":"R","voteCount":16285,"isWinner":true},{"candidateName":"Marjorie Mikels","candidateIncumbent":false,"candidateParty":"D","voteCount":9363,"isWinner":false},{"candidateName":"Bianca Von Krieg","candidateIncumbent":false,"candidateParty":"D","voteCount":7634,"isWinner":false},{"candidateName":"Jason Zeng","candidateIncumbent":false,"candidateParty":"R","voteCount":6607,"isWinner":false},{"candidateName":"Jason Boyce","candidateIncumbent":false,"candidateParty":"D","voteCount":4325,"isWinner":false},{"candidateName":"Larry Nichelson","candidateIncumbent":false,"candidateParty":"R","voteCount":3482,"isWinner":false},{"candidateName":"Eve Del Castello","candidateIncumbent":false,"candidateParty":"R","voteCount":2751,"isWinner":false}],"winnerDateTime":"2024-03-12T00:31:55.445Z"},"8589":{"id":"8589","type":"apRace","location":"State of California","raceName":"U.S. Senate, Class I","raceDescription":"Top candidate wins seat.","raceType":"top2","totalVotes":7276537,"precinctsReportPercentage":99,"eevp":99,"tabulationStatus":"Tabulation Paused","dateUpdated":"March 25, 2024","timeUpdated":"5:47 AM","source":"AP","candidates":[{"candidateName":"Adam Schiff","candidateIncumbent":false,"candidateParty":"D","voteCount":2299507,"isWinner":true},{"candidateName":"Steve Garvey","candidateIncumbent":false,"candidateParty":"R","voteCount":2292414,"isWinner":true},{"candidateName":"Katie Porter","candidateIncumbent":false,"candidateParty":"D","voteCount":1115606,"isWinner":false},{"candidateName":"Barbara Lee","candidateIncumbent":false,"candidateParty":"D","voteCount":714408,"isWinner":false},{"candidateName":"Eric Early","candidateIncumbent":false,"candidateParty":"R","voteCount":240723,"isWinner":false},{"candidateName":"James Bradley","candidateIncumbent":false,"candidateParty":"R","voteCount":98180,"isWinner":false},{"candidateName":"Christina Pascucci","candidateIncumbent":false,"candidateParty":"D","voteCount":61755,"isWinner":false},{"candidateName":"Sharleta Bassett","candidateIncumbent":false,"candidateParty":"R","voteCount":54422,"isWinner":false},{"candidateName":"Sarah Liew","candidateIncumbent":false,"candidateParty":"R","voteCount":38483,"isWinner":false},{"candidateName":"Laura Garza ","candidateIncumbent":false,"candidateParty":"NPP","voteCount":34320,"isWinner":false},{"candidateName":"Jonathan Reiss","candidateIncumbent":false,"candidateParty":"R","voteCount":34283,"isWinner":false},{"candidateName":"Sepi Gilani","candidateIncumbent":false,"candidateParty":"D","voteCount":34056,"isWinner":false},{"candidateName":"Gail Lightfoot","candidateIncumbent":false,"candidateParty":"Lib","voteCount":33046,"isWinner":false},{"candidateName":"Denice Gary-Pandol","candidateIncumbent":false,"candidateParty":"R","voteCount":25494,"isWinner":false},{"candidateName":"James Macauley","candidateIncumbent":false,"candidateParty":"R","voteCount":23168,"isWinner":false},{"candidateName":"Harmesh Kumar","candidateIncumbent":false,"candidateParty":"D","voteCount":21522,"isWinner":false},{"candidateName":"David Peterson","candidateIncumbent":false,"candidateParty":"D","voteCount":21076,"isWinner":false},{"candidateName":"Douglas Pierce","candidateIncumbent":false,"candidateParty":"D","voteCount":19371,"isWinner":false},{"candidateName":"Major Singh","candidateIncumbent":false,"candidateParty":"NPP","voteCount":16965,"isWinner":false},{"candidateName":"John Rose","candidateIncumbent":false,"candidateParty":"D","voteCount":14577,"isWinner":false},{"candidateName":"Perry Pound","candidateIncumbent":false,"candidateParty":"D","voteCount":14134,"isWinner":false},{"candidateName":"Raji Rab","candidateIncumbent":false,"candidateParty":"D","voteCount":13558,"isWinner":false},{"candidateName":"Mark Ruzon","candidateIncumbent":false,"candidateParty":"NPP","voteCount":13429,"isWinner":false},{"candidateName":"Forrest Jones","candidateIncumbent":false,"candidateParty":"AIP","voteCount":13027,"isWinner":false},{"candidateName":"Stefan Simchowitz","candidateIncumbent":false,"candidateParty":"R","voteCount":12717,"isWinner":false},{"candidateName":"Martin Veprauskas","candidateIncumbent":false,"candidateParty":"R","voteCount":9714,"isWinner":false},{"candidateName":"Don Grundmann","candidateIncumbent":false,"candidateParty":"NPP","voteCount":6582,"isWinner":false}],"winnerDateTime":"2024-03-06T05:01:46.589Z"},"8686":{"id":"8686","type":"apRace","location":"State of California","raceName":"President,","raceDescription":"Top candidate wins seat.","raceType":"top1","totalVotes":3589127,"precinctsReportPercentage":99,"eevp":99,"tabulationStatus":"Tabulation Paused","dateUpdated":"March 25, 2024","timeUpdated":"5:48 AM","source":"AP","candidates":[{"candidateName":"Joe Biden","candidateIncumbent":true,"candidateParty":"D","voteCount":3200188,"isWinner":true},{"candidateName":"Marianne Williamson","candidateIncumbent":false,"candidateParty":"D","voteCount":145690,"isWinner":false},{"candidateName":"Dean Phillips","candidateIncumbent":false,"candidateParty":"D","voteCount":99981,"isWinner":false},{"candidateName":"Armando Perez-Serrato","candidateIncumbent":false,"candidateParty":"D","voteCount":42925,"isWinner":false},{"candidateName":"Gabriel Cornejo","candidateIncumbent":false,"candidateParty":"D","voteCount":41261,"isWinner":false},{"candidateName":"President Boddie","candidateIncumbent":false,"candidateParty":"D","voteCount":25373,"isWinner":false},{"candidateName":"Stephen Lyons","candidateIncumbent":false,"candidateParty":"D","voteCount":21008,"isWinner":false},{"candidateName":"Eban Cambridge","candidateIncumbent":false,"candidateParty":"D","voteCount":12701,"isWinner":false}],"winnerDateTime":"2024-03-06T04:12:27.559Z"},"8688":{"id":"8688","type":"apRace","location":"State of California","raceName":"President,","raceDescription":"Top candidate wins seat.","raceType":"top1","totalVotes":2466569,"precinctsReportPercentage":99,"eevp":99,"tabulationStatus":"Tabulation Paused","dateUpdated":"March 25, 2024","timeUpdated":"5:47 AM","source":"AP","candidates":[{"candidateName":"Donald Trump","candidateIncumbent":false,"candidateParty":"R","voteCount":1953947,"isWinner":true},{"candidateName":"Nikki Haley","candidateIncumbent":false,"candidateParty":"R","voteCount":430792,"isWinner":false},{"candidateName":"Ron DeSantis","candidateIncumbent":false,"candidateParty":"R","voteCount":35581,"isWinner":false},{"candidateName":"Chris Christie","candidateIncumbent":false,"candidateParty":"R","voteCount":20164,"isWinner":false},{"candidateName":"Vivek Ramaswamy","candidateIncumbent":false,"candidateParty":"R","voteCount":11069,"isWinner":false},{"candidateName":"Rachel Swift","candidateIncumbent":false,"candidateParty":"R","voteCount":4231,"isWinner":false},{"candidateName":"David Stuckenberg","candidateIncumbent":false,"candidateParty":"R","voteCount":3895,"isWinner":false},{"candidateName":"Ryan Binkley","candidateIncumbent":false,"candidateParty":"R","voteCount":3563,"isWinner":false},{"candidateName":"Asa Hutchinson","candidateIncumbent":false,"candidateParty":"R","voteCount":3327,"isWinner":false}],"winnerDateTime":"2024-03-06T04:13:19.766Z"},"81993":{"id":"81993","type":"apRace","location":"State of California","raceName":"U.S. Senate, Class I Unexpired Term","raceDescription":"Top candidate wins seat.","raceType":"top2","totalVotes":7358837,"precinctsReportPercentage":99,"eevp":99,"tabulationStatus":"Tabulation Paused","dateUpdated":"March 25, 2024","timeUpdated":"5:47 AM","source":"AP","candidates":[{"candidateName":"Steve Garvey","candidateIncumbent":false,"candidateParty":"R","voteCount":2444940,"isWinner":true},{"candidateName":"Adam Schiff","candidateIncumbent":false,"candidateParty":"D","voteCount":2155146,"isWinner":true},{"candidateName":"Katie Porter","candidateIncumbent":false,"candidateParty":"D","voteCount":1269194,"isWinner":false},{"candidateName":"Barbara Lee","candidateIncumbent":false,"candidateParty":"D","voteCount":863278,"isWinner":false},{"candidateName":"Eric Early","candidateIncumbent":false,"candidateParty":"R","voteCount":448788,"isWinner":false},{"candidateName":"Christina Pascucci","candidateIncumbent":false,"candidateParty":"D","voteCount":109421,"isWinner":false},{"candidateName":"Sepi Gilani","candidateIncumbent":false,"candidateParty":"D","voteCount":68070,"isWinner":false}],"winnerDateTime":"2024-03-06T04:31:08.186Z"},"82014":{"id":"82014","type":"apRace","location":"State of California","raceName":"Proposition, 1 - Behavioral Health Services Program","raceDescription":"Top candidate wins seat.","raceType":"top1","totalVotes":7221972,"precinctsReportPercentage":99,"eevp":99,"tabulationStatus":"Tabulation Paused","dateUpdated":"March 25, 2024","timeUpdated":"5:47 AM","source":"AP","candidates":[{"candidateName":"Yes","candidateIncumbent":false,"candidateParty":null,"voteCount":3624998,"isWinner":true},{"candidateName":"No","candidateIncumbent":false,"candidateParty":null,"voteCount":3596974,"isWinner":false}],"winnerDateTime":"2024-03-21T00:11:06.265Z"},"timeLoaded":"April 19, 2024 12:33 PM","nationalRacesLoaded":true,"localRacesLoaded":true,"overrides":[{"id":"5921","raceName":"U.S. House of Representatives, District 7","raceDescription":"Top two candidates advance to general election.","raceReadTheStory":""},{"id":"5922","raceName":"U.S. House of Representatives, District 8","raceDescription":"Top two candidates advance to general election.","raceReadTheStory":""},{"id":"5924","raceName":"U.S. House of Representatives, District 10","raceDescription":"Top two candidates advance to general election.","raceReadTheStory":""},{"id":"5926","raceName":"U.S. House of Representatives, District 12","raceDescription":"Top two candidates advance to general election.","raceReadTheStory":"https://www.kqed.org/elections/results/alameda/congress-12th-district"},{"id":"5928","raceName":"U.S. House of Representatives, District 14","raceDescription":"Top two candidates advance to general election.","raceReadTheStory":""},{"id":"5930","raceName":"U.S. House of Representatives, District 16","raceDescription":"Top two candidates advance to general election.","raceReadTheStory":"https://www.kqed.org/elections/results/california/congress-16th-district"},{"id":"5931","raceName":"U.S. House of Representatives, District 17","raceDescription":"Top two candidates advance to general election.","raceReadTheStory":""},{"id":"5932","raceName":"U.S. House of Representatives, District 18","raceDescription":"Top two candidates advance to general election.","raceReadTheStory":""},{"id":"5963","raceName":"State Assembly, District 2","raceDescription":"Top two candidates advance to general election.","raceReadTheStory":""},{"id":"5972","raceName":"State Assembly, District 11","raceDescription":"Top two candidates advance to general election.","raceReadTheStory":""},{"id":"5973","raceName":"State Assembly, District 12","raceDescription":"Top two candidates advance to general election.","raceReadTheStory":""},{"id":"5975","raceName":"State Assembly, District 14","raceDescription":"Top two candidates advance to general election.","raceReadTheStory":""},{"id":"5976","raceName":"State Assembly, District 15","raceDescription":"Top two candidates advance to general election.","raceReadTheStory":"https://www.kqed.org/elections/results/contracosta/state-assembly"},{"id":"5977","raceName":"State Assembly, District 16","raceDescription":"Top two candidates advance to general election.","raceReadTheStory":""},{"id":"5978","raceName":"State Assembly, District 17","raceDescription":"Top two candidates advance to general election.","raceReadTheStory":""},{"id":"5979","raceName":"State Assembly, District 18","raceDescription":"Top two candidates advance to general election.","raceReadTheStory":""},{"id":"5980","raceName":"State Assembly, District 19","raceDescription":"Top two candidates advance to general election.","raceReadTheStory":""},{"id":"5981","raceName":"State Assembly, District 20","raceDescription":"Top two candidates advance to general election.","raceReadTheStory":""},{"id":"5982","raceName":"State Assembly, District 21","raceDescription":"Top two candidates advance to general election.","raceReadTheStory":""},{"id":"5984","raceName":"State Assembly, District 23","raceDescription":"Top two candidates advance to general election.","raceReadTheStory":"https://www.kqed.org/elections/results/california/state-assembly-23rd-district"},{"id":"5987","raceName":"State Assembly, District 26","raceDescription":"Top two candidates advance to general election.","raceReadTheStory":"https://www.kqed.org/elections/results/santaclara/state-assembly-26th-district"},{"id":"5989","raceName":"State Assembly, District 28","raceDescription":"Top two candidates advance to general election.","raceReadTheStory":""},{"id":"6010","raceName":"State Assembly, District 4","raceDescription":"Top two candidates advance to general election.","raceReadTheStory":""},{"id":"6018","raceName":"U.S. House of Representatives, District 2","raceDescription":"Top two candidates advance to general election.","raceReadTheStory":""},{"id":"6020","raceName":"U.S. House of Representatives, District 4","raceDescription":"Top two candidates advance to general election.","raceReadTheStory":""},{"id":"6025","raceName":"U.S. House of Representatives, District 9","raceDescription":"Top two candidates advance to general election.","raceReadTheStory":""},{"id":"6031","raceName":"U.S. House of Representatives, District 15","raceDescription":"Top two candidates advance to general election.","raceReadTheStory":""},{"id":"6035","raceName":"U.S. House of Representatives, District 19","raceDescription":"Top two candidates advance to general election.","raceReadTheStory":""},{"id":"6067","raceName":"State Assembly, District 4","raceDescription":"Top two candidates advance to general election.","raceReadTheStory":""},{"id":"6087","raceName":"State Assembly, District 24","raceDescription":"Top two candidates advance to general election.","raceReadTheStory":""},{"id":"6088","raceName":"State Assembly, District 25","raceDescription":"Top two candidates advance to general election.","raceReadTheStory":""},{"id":"6092","raceName":"State Assembly, District 29","raceDescription":"Top two candidates advance to general election.","raceReadTheStory":""},{"id":"6223","raceName":"U.S. House of Representatives, District 4","raceDescription":"Top two candidates advance to general election.","raceReadTheStory":""},{"id":"6530","raceName":"State Senate, District 3","raceDescription":"Top two candidates advance to general election.","raceReadTheStory":"https://www.kqed.org/elections/results/california/state-senate-3rd-district"},{"id":"6531","raceName":"State Senate, District 5","raceDescription":"Top two candidates advance to general election.","raceReadTheStory":""},{"id":"6532","raceName":"State Senate, District 7","raceDescription":"Top two candidates advance to general election.","raceReadTheStory":"https://www.kqed.org/elections/results/california/state-senate-7th-district"},{"id":"6533","raceName":"State Senate, District 9","raceDescription":"Top two candidates advance to general election.","raceReadTheStory":""},{"id":"6534","raceName":"State Senate, District 11","raceDescription":"Top two candidates advance to general election.","raceReadTheStory":""},{"id":"6535","raceName":"State Senate, District 13","raceDescription":"Top two candidates advance to general election.","raceReadTheStory":""},{"id":"6536","raceName":"State Senate, District 15","raceDescription":"Top two candidates advance to general election.","raceReadTheStory":""},{"id":"6611","raceName":"U.S. House of Representatives, District 11","raceDescription":"Top two candidates advance to general election.","raceReadTheStory":""},{"id":"8589","raceName":"U.S. Senate (Full Term)","raceDescription":"Top two candidates advance to general election.","raceReadTheStory":"https://www.kqed.org/elections/results/california/senator"},{"id":"8686","raceName":"California Democratic Presidential Primary","raceDescription":"Candidates are competing for 496 delegates.","raceReadTheStory":"https://www.kqed.org/elections/results/president/democrat"},{"id":"8688","raceName":"California Republican Presidential Primary","raceDescription":"Candidates are competing for 169 delegates.","raceReadTheStory":"https://kqed.org/elections/results/president/republican"},{"id":"81993","raceName":"U.S. Senate (Partial/Unexpired Term)","raceDescription":"Top two candidates advance to general election."},{"id":"82014","raceName":"Proposition 1","raceDescription":"Bond and mental health reforms. Passes with majority vote.","raceReadTheStory":"https://www.kqed.org/elections/results/california/proposition-1"}],"AlamedaJudge5":{"id":"AlamedaJudge5","type":"localRace","location":"Alameda","raceName":"Superior Court Judge, Office 5","raceDescription":"Top candidate wins seat.","raceReadTheStory":"","raceType":"top1","timeUpdated":"7:02 PM","dateUpdated":"April 1, 2024","totalVotes":200601,"candidates":[{"candidateName":"Terry Wiley","candidateIncumbent":true,"candidateParty":"","voteCount":200601}]},"AlamedaJudge12":{"id":"AlamedaJudge12","type":"localRace","location":"Alameda","raceName":"Superior Court Judge, Office 12","raceDescription":"Top candidate wins seat.","raceReadTheStory":"","raceType":"top1","timeUpdated":"7:02 PM","dateUpdated":"April 1, 2024","totalVotes":240853,"candidates":[{"candidateName":"Mark Fickes","candidateIncumbent":false,"candidateParty":"","voteCount":133009},{"candidateName":"Michael P. Johnson","candidateIncumbent":false,"candidateParty":"","voteCount":107844}]},"AlamedaBoard2":{"id":"AlamedaBoard2","type":"localRace","location":"Alameda","raceName":"Board of Education, Trustee Area 2","raceDescription":"Top candidate wins seat.","raceReadTheStory":"","raceType":"top1","timeUpdated":"7:02 PM","dateUpdated":"April 1, 2024","totalVotes":33580,"candidates":[{"candidateName":"John Lewis","candidateIncumbent":false,"candidateParty":"","voteCount":6943},{"candidateName":"Angela Normand","candidateIncumbent":true,"candidateParty":"","voteCount":26637}]},"AlamedaBoard5":{"id":"AlamedaBoard5","type":"localRace","location":"Alameda","raceName":"Board of Education, Trustee Area 5","raceDescription":"Top candidate wins seat.","raceReadTheStory":"","raceType":"top1","timeUpdated":"7:02 PM","dateUpdated":"April 1, 2024","totalVotes":26072,"candidates":[{"candidateName":"Guadalupe \"Lupe\" Angulo","candidateIncumbent":false,"candidateParty":"","voteCount":7521},{"candidateName":"Janevette Cole","candidateIncumbent":true,"candidateParty":"","voteCount":13338},{"candidateName":"Joe Orlando Ramos","candidateIncumbent":false,"candidateParty":"","voteCount":5213}]},"AlamedaBoard6":{"id":"AlamedaBoard6","type":"localRace","location":"Alameda","raceName":"Board of Education, Trustee Area 6","raceDescription":"Top candidate wins seat.","raceReadTheStory":"","raceType":"top1","timeUpdated":"7:02 PM","dateUpdated":"April 1, 2024","totalVotes":30864,"candidates":[{"candidateName":"John Guerrero","candidateIncumbent":false,"candidateParty":"","voteCount":9989},{"candidateName":"Eileen McDonald","candidateIncumbent":true,"candidateParty":"","voteCount":20875}]},"AlamedaSup1":{"id":"AlamedaSup1","type":"localRace","location":"Alameda","raceName":"Board of Supervisors, District 1","raceDescription":"Candidate with majority vote wins seat. If no candidate reaches majority, top two candidates advance to runoff in general election.","raceReadTheStory":"","raceType":"top1","timeUpdated":"7:02 PM","dateUpdated":"April 1, 2024","totalVotes":41038,"candidates":[{"candidateName":"David Haubert","candidateIncumbent":true,"candidateParty":"","voteCount":41038}]},"AlamedaSup2":{"id":"AlamedaSup2","type":"localRace","location":"Alameda","raceName":"Board of Supervisors, District 2","raceDescription":"Candidate with majority vote wins seat. If no candidate reaches majority, top two candidates advance to runoff in general election.","raceReadTheStory":"","raceType":"top2","timeUpdated":"7:02 PM","dateUpdated":"April 1, 2024","totalVotes":31034,"candidates":[{"candidateName":"Elisa Márquez","candidateIncumbent":true,"candidateParty":"","voteCount":31034}]},"AlamedaSup4":{"id":"AlamedaSup4","type":"localRace","location":"Alameda","raceName":"Board of Supervisors, District 4","raceDescription":"Candidate with majority vote wins seat. If no candidate reaches majority, top two candidates advance to runoff in general election.","raceReadTheStory":"https://www.kqed.org/elections/results/alameda/supervisor-4th-district","raceType":"top2","timeUpdated":"7:02 PM","dateUpdated":"April 1, 2024","totalVotes":57007,"candidates":[{"candidateName":"Jennifer Esteen","candidateIncumbent":false,"candidateParty":"","voteCount":22400},{"candidateName":"Nate Miley","candidateIncumbent":true,"candidateParty":"","voteCount":34607}]},"AlamedaSup5":{"id":"AlamedaSup5","type":"localRace","location":"Alameda","raceName":"Board of Supervisors, District 5","raceDescription":"Candidate with majority vote wins seat. If no candidate reaches majority, top two candidates advance to runoff in general election.","raceReadTheStory":"https://www.kqed.org/elections/results/alameda/supervisor-5th-district","raceType":"top2","timeUpdated":"7:02 PM","dateUpdated":"April 1, 2024","totalVotes":81059,"candidates":[{"candidateName":"Ben Bartlett","candidateIncumbent":false,"candidateParty":"","voteCount":13518},{"candidateName":"Nikki Fortunato Bas","candidateIncumbent":false,"candidateParty":"","voteCount":27597},{"candidateName":"John J. Bauters","candidateIncumbent":false,"candidateParty":"","voteCount":16783},{"candidateName":"Ken Berrick","candidateIncumbent":false,"candidateParty":"","voteCount":7520},{"candidateName":"Omar Farmer","candidateIncumbent":false,"candidateParty":"","voteCount":1240},{"candidateName":"Gregory Hodge","candidateIncumbent":false,"candidateParty":"","voteCount":3419},{"candidateName":"Chris Moore","candidateIncumbent":false,"candidateParty":"","voteCount":7428},{"candidateName":"Gerald Pechenuk","candidateIncumbent":false,"candidateParty":"","voteCount":305},{"candidateName":"Lorrel Plimier","candidateIncumbent":false,"candidateParty":"","voteCount":3249}]},"AlamedaBoard7":{"id":"AlamedaBoard7","type":"localRace","location":"Alameda","raceName":"Flood Control & Water Conservation District Director, Zone 7, Full Term","raceDescription":"Top three candidates win seat.","raceReadTheStory":"","raceType":"top3","timeUpdated":"7:02 PM","dateUpdated":"April 1, 2024","totalVotes":134340,"candidates":[{"candidateName":"Alan Burnham","candidateIncumbent":false,"candidateParty":"","voteCount":15723},{"candidateName":"Sandy Figuers","candidateIncumbent":false,"candidateParty":"","voteCount":22454},{"candidateName":"Laurene K. Green","candidateIncumbent":false,"candidateParty":"","voteCount":30343},{"candidateName":"Kathy Narum","candidateIncumbent":true,"candidateParty":"","voteCount":23833},{"candidateName":"Seema Badar","candidateIncumbent":false,"candidateParty":"","voteCount":7468},{"candidateName":"Catherine Brown","candidateIncumbent":false,"candidateParty":"","voteCount":34519}]},"AlamedaAuditor":{"id":"AlamedaAuditor","type":"localRace","location":"Alameda","raceName":"Oakland Auditor","raceDescription":"Top candidate wins seat.","raceReadTheStory":"","raceType":"top1","timeUpdated":"7:02 PM","dateUpdated":"April 1, 2024","totalVotes":59227,"candidates":[{"candidateName":"Michael Houston","candidateIncumbent":true,"candidateParty":"","voteCount":59227}]},"AlamedaMeasureA":{"id":"AlamedaMeasureA","type":"localRace","location":"Alameda","raceName":"Measure A","raceDescription":"Alameda County. Civil service. Passes with majority vote.","raceReadTheStory":"","raceType":"yesNo","timeUpdated":"7:02 PM","dateUpdated":"April 1, 2024","totalVotes":282335,"candidates":[{"candidateName":"Yes","candidateIncumbent":false,"candidateParty":"","voteCount":167903},{"candidateName":"No","candidateIncumbent":false,"candidateParty":"","voteCount":114432}]},"AlamedaMeasureB":{"id":"AlamedaMeasureB","type":"localRace","location":"Alameda","raceName":"Measure B","raceDescription":"Alameda County. Recall rules. Passes with majority vote.","raceReadTheStory":"https://www.kqed.org/elections/results/alameda/measure-b","raceType":"yesNo","timeUpdated":"7:02 PM","dateUpdated":"April 1, 2024","totalVotes":282683,"candidates":[{"candidateName":"Yes","candidateIncumbent":false,"candidateParty":"","voteCount":182200},{"candidateName":"No","candidateIncumbent":false,"candidateParty":"","voteCount":100483}]},"AlamedaMeasureD":{"id":"AlamedaMeasureD","type":"localRace","location":"Alameda","raceName":"Measure D","raceDescription":"Oakland. Appropriations limit. Passes with majority vote.","raceReadTheStory":"","raceType":"yesNo","timeUpdated":"7:02 PM","dateUpdated":"April 1, 2024","totalVotes":79797,"candidates":[{"candidateName":"Yes","candidateIncumbent":false,"candidateParty":"","voteCount":59852},{"candidateName":"No","candidateIncumbent":false,"candidateParty":"","voteCount":19945}]},"AlamedaMeasureE":{"id":"AlamedaMeasureE","type":"localRace","location":"Alameda","raceName":"Measure E","raceDescription":"Alameda Unified School District. Parcel tax. Passes with 2/3 vote.","raceReadTheStory":"","raceType":"yesNo","timeUpdated":"7:02 PM","dateUpdated":"April 1, 2024","totalVotes":22692,"candidates":[{"candidateName":"Yes","candidateIncumbent":false,"candidateParty":"","voteCount":17280},{"candidateName":"No","candidateIncumbent":false,"candidateParty":"","voteCount":5412}]},"AlamedaMeasureF":{"id":"AlamedaMeasureF","type":"localRace","location":"Alameda","raceName":"Measure F","raceDescription":"Piedmont. Parcel tax. Passes with 2/3 vote.","raceReadTheStory":"","raceType":"yesNo","timeUpdated":"7:02 PM","dateUpdated":"April 1, 2024","totalVotes":4855,"candidates":[{"candidateName":"Yes","candidateIncumbent":false,"candidateParty":"","voteCount":3673},{"candidateName":"No","candidateIncumbent":false,"candidateParty":"","voteCount":1182}]},"AlamedaMeasureG":{"id":"AlamedaMeasureG","type":"localRace","location":"Alameda","raceName":"Measure G","raceDescription":"Albany Unified School District. Parcel tax. Passes with 2/3 vote. ","raceReadTheStory":"","raceType":"yesNo","timeUpdated":"7:02 PM","dateUpdated":"April 1, 2024","totalVotes":5898,"candidates":[{"candidateName":"Yes","candidateIncumbent":false,"candidateParty":"","voteCount":4651},{"candidateName":"No","candidateIncumbent":false,"candidateParty":"","voteCount":1247}]},"AlamedaMeasureH":{"id":"AlamedaMeasureH","type":"localRace","location":"Alameda","raceName":"Measure H","raceDescription":"Berkeley Unified School District. Parcel tax. Passes with 2/3 vote.","raceReadTheStory":"","raceType":"yesNo","timeUpdated":"7:02 PM","dateUpdated":"April 1, 2024","totalVotes":33331,"candidates":[{"candidateName":"Yes","candidateIncumbent":false,"candidateParty":"","voteCount":29418},{"candidateName":"No","candidateIncumbent":false,"candidateParty":"","voteCount":3913}]},"AlamedaMeasureI":{"id":"AlamedaMeasureI","type":"localRace","location":"Alameda","raceName":"Measure I","raceDescription":"Hayward Unified School District. School bond. Passes with 55% vote.","raceReadTheStory":"","raceType":"yesNo","timeUpdated":"7:02 PM","dateUpdated":"April 1, 2024","totalVotes":21929,"candidates":[{"candidateName":"Yes","candidateIncumbent":false,"candidateParty":"","voteCount":14151},{"candidateName":"No","candidateIncumbent":false,"candidateParty":"","voteCount":7778}]},"AlamedaMeasureJ":{"id":"AlamedaMeasureJ","type":"localRace","location":"Alameda","raceName":"Measure J","raceDescription":"San Leandro Unified School District. School bond. Passes with 55% vote.","raceReadTheStory":"","raceType":"yesNo","timeUpdated":"7:02 PM","dateUpdated":"April 1, 2024","totalVotes":12338,"candidates":[{"candidateName":"Yes","candidateIncumbent":false,"candidateParty":"","voteCount":7784},{"candidateName":"No","candidateIncumbent":false,"candidateParty":"","voteCount":4554}]},"CCD2":{"id":"CCD2","type":"localRace","location":"Contra Costa","raceName":"Board of Supervisors, District 2","raceDescription":"Candidate with majority vote wins seat. If no candidate reaches majority, top two candidates advance to runoff in general election.","raceReadTheStory":"","raceType":"yesNo","timeUpdated":"6:45 PM","dateUpdated":"March 28, 2024","totalVotes":45776,"candidates":[{"candidateName":"Candace Andersen","candidateIncumbent":true,"candidateParty":"","voteCount":45776}]},"CCD3":{"id":"CCD3","type":"localRace","location":"Contra Costa","raceName":"Board of Supervisors, District 3","raceDescription":"Candidate with majority vote wins seat. If no candidate reaches majority, top two candidates advance to runoff in general election.","raceReadTheStory":"","raceType":"top1","timeUpdated":"6:45 PM","dateUpdated":"March 28, 2024","totalVotes":25120,"candidates":[{"candidateName":"Diane Burgis","candidateIncumbent":true,"candidateParty":"","voteCount":25120}]},"CCD5":{"id":"CCD5","type":"localRace","location":"Contra Costa","raceName":"Board of Supervisors, District 5","raceDescription":"Candidate with majority vote wins seat. If no candidate reaches majority, top two candidates advance to runoff in general election.","raceReadTheStory":"https://www.kqed.org/elections/results/contracosta/supervisor-5th-district","raceType":"top2","timeUpdated":"6:45 PM","dateUpdated":"March 28, 2024","totalVotes":37045,"candidates":[{"candidateName":"Mike Barbanica","candidateIncumbent":false,"candidateParty":"","voteCount":14338},{"candidateName":"Jelani Killings","candidateIncumbent":false,"candidateParty":"","voteCount":5683},{"candidateName":"Shanelle Scales-Preston","candidateIncumbent":false,"candidateParty":"","voteCount":12993},{"candidateName":"Iztaccuauhtli Hector Gonzalez","candidateIncumbent":false,"candidateParty":"","voteCount":4031}]},"CCMeasureA":{"id":"CCMeasureA","type":"localRace","location":"Contra Costa","raceName":"Measure A","raceDescription":"Martinez. Appoint City Clerk. Passes with a majority vote.","raceReadTheStory":"","raceType":"yesNo","timeUpdated":"6:45 PM","dateUpdated":"March 28, 2024","totalVotes":11513,"candidates":[{"candidateName":"Yes","candidateIncumbent":false,"candidateParty":"","voteCount":7554},{"candidateName":"No","candidateIncumbent":false,"candidateParty":"","voteCount":3959}]},"CCMeasureB":{"id":"CCMeasureB","type":"localRace","location":"Contra Costa","raceName":"Measure B","raceDescription":"Antioch Unified School District. School bond. Passes with 55% vote.","raceReadTheStory":"","raceType":"yesNo","timeUpdated":"6:45 PM","dateUpdated":"March 28, 2024","totalVotes":17971,"candidates":[{"candidateName":"Yes","candidateIncumbent":false,"candidateParty":"","voteCount":10397},{"candidateName":"No","candidateIncumbent":false,"candidateParty":"","voteCount":7574}]},"CCMeasureC":{"id":"CCMeasureC","type":"localRace","location":"Contra Costa","raceName":"Measure C","raceDescription":"Martinez Unified School District. Parcel tax. Passes with 2/3 vote.","raceReadTheStory":"","raceType":"yesNo","timeUpdated":"6:45 PM","dateUpdated":"March 28, 2024","totalVotes":9230,"candidates":[{"candidateName":"Yes","candidateIncumbent":false,"candidateParty":"","voteCount":6917},{"candidateName":"No","candidateIncumbent":false,"candidateParty":"","voteCount":2313}]},"CCMeasureD":{"id":"CCMeasureD","type":"localRace","location":"Contra Costa","raceName":"Measure D","raceDescription":"Moraga School District. School bond. Passes with 55% vote.","raceReadTheStory":"","raceType":"yesNo","timeUpdated":"6:45 PM","dateUpdated":"March 28, 2024","totalVotes":6007,"candidates":[{"candidateName":"Yes","candidateIncumbent":false,"candidateParty":"","voteCount":4052},{"candidateName":"No","candidateIncumbent":false,"candidateParty":"","voteCount":1955}]},"MarinD2":{"id":"MarinD2","type":"localRace","location":"Marin","raceName":"Board of Supervisors, District 2","raceDescription":"Candidate with majority vote wins seat. If no candidate reaches majority, top two candidates advance to runoff in general election.","raceReadTheStory":"https://www.kqed.org/elections/results/marin/supervisor-2nd-district","raceType":"top2","timeUpdated":"6:54 PM","dateUpdated":"March 27, 2024","totalVotes":18466,"candidates":[{"candidateName":"Brian Colbert","candidateIncumbent":false,"candidateParty":"","voteCount":7971},{"candidateName":"Heather McPhail Sridharan","candidateIncumbent":false,"candidateParty":"","voteCount":4851},{"candidateName":"Ryan O'Neil","candidateIncumbent":false,"candidateParty":"","voteCount":2647},{"candidateName":"Gabe Paulson","candidateIncumbent":false,"candidateParty":"","voteCount":2997}]},"MarinD3":{"id":"MarinD3","type":"localRace","location":"Marin","raceName":"Board of Supervisors, District 3","raceDescription":"Candidate with majority vote wins seat. If no candidate reaches majority, top two candidates advance to runoff in general election.","raceReadTheStory":"","raceType":"top1","timeUpdated":"6:54 PM","dateUpdated":"March 27, 2024","totalVotes":13274,"candidates":[{"candidateName":"Stephanie Moulton-Peters","candidateIncumbent":true,"candidateParty":"","voteCount":13274}]},"MarinD4":{"id":"MarinD4","type":"localRace","location":"Marin","raceName":"Board of Supervisors, District 4","raceDescription":"Candidate with majority vote wins seat. If no candidate reaches majority, top two candidates advance to runoff in general election.","raceReadTheStory":"","raceType":"top1","timeUpdated":"6:54 PM","dateUpdated":"March 27, 2024","totalVotes":12986,"candidates":[{"candidateName":"Dennis Rodoni","candidateIncumbent":true,"candidateParty":"","voteCount":10086},{"candidateName":"Francis Drouillard","candidateIncumbent":false,"candidateParty":"","voteCount":2900}]},"MarinLarkspurCC":{"id":"MarinLarkspurCC","type":"localRace","location":"Marin","raceName":"Larkspur City Council (Short Term)","raceDescription":"Top candidate wins seat.","raceReadTheStory":"","raceType":"top1","timeUpdated":"6:54 PM","dateUpdated":"March 27, 2024","totalVotes":4176,"candidates":[{"candidateName":"Stephanie Andre","candidateIncumbent":false,"candidateParty":"","voteCount":2514},{"candidateName":"Claire Paquette","candidateIncumbent":false,"candidateParty":"","voteCount":1008},{"candidateName":"Lana Scott","candidateIncumbent":false,"candidateParty":"","voteCount":654}]},"MarinRossCouncil":{"id":"MarinRossCouncil","type":"localRace","location":"Marin","raceName":"Ross Town Council","raceDescription":"Top three candidates win seat.","raceReadTheStory":"","raceType":"top3","timeUpdated":"6:54 PM","dateUpdated":"March 27, 2024","totalVotes":1740,"candidates":[{"candidateName":"Charles William \"Bill\" Kircher, Jr.","candidateIncumbent":false,"candidateParty":"","voteCount":536},{"candidateName":"Mathew Salter","candidateIncumbent":false,"candidateParty":"","voteCount":502},{"candidateName":"Shadi Aboukhater","candidateIncumbent":false,"candidateParty":"","voteCount":187},{"candidateName":"Teri Dowling","candidateIncumbent":false,"candidateParty":"","voteCount":515}]},"MarinMeasureA":{"id":"MarinMeasureA","type":"localRace","location":"Marin","raceName":"Measure A","raceDescription":"Tamalpais Union High School District. School bond. Passes with 55% vote.","raceReadTheStory":"","raceType":"yesNo","timeUpdated":"6:54 PM","dateUpdated":"March 27, 2024","totalVotes":45345,"candidates":[{"candidateName":"Yes","candidateIncumbent":false,"candidateParty":"","voteCount":24376},{"candidateName":"No","candidateIncumbent":false,"candidateParty":"","voteCount":20969}]},"MarinMeasureB":{"id":"MarinMeasureB","type":"localRace","location":"Marin","raceName":"Measure B","raceDescription":"Petaluma Joint Union High School District. Parcel tax. Passes with 2/3 vote.","raceReadTheStory":"","raceType":"yesNo","timeUpdated":"6:54 PM","dateUpdated":"March 27, 2024","totalVotes":132,"candidates":[{"candidateName":"Yes","candidateIncumbent":false,"candidateParty":"","voteCount":62},{"candidateName":"No","candidateIncumbent":false,"candidateParty":"","voteCount":70}]},"MarinMeasureC":{"id":"MarinMeasureC","type":"localRace","location":"Marin","raceName":"Measure C","raceDescription":"Belvedere. Appropriation limit. Passes with majority vote.","raceReadTheStory":"","raceType":"yesNo","timeUpdated":"6:54 PM","dateUpdated":"March 27, 2024","totalVotes":870,"candidates":[{"candidateName":"Yes","candidateIncumbent":false,"candidateParty":"","voteCount":679},{"candidateName":"No","candidateIncumbent":false,"candidateParty":"","voteCount":191}]},"MarinMeasureD":{"id":"MarinMeasureD","type":"localRace","location":"Marin","raceName":"Measure D","raceDescription":"Larkspur. Rent stabilization. Passes with majority vote.","raceReadTheStory":"https://www.kqed.org/elections/results/marin/measure-d","raceType":"yesNo","timeUpdated":"6:54 PM","dateUpdated":"March 27, 2024","totalVotes":4955,"candidates":[{"candidateName":"Yes","candidateIncumbent":false,"candidateParty":"","voteCount":2573},{"candidateName":"No","candidateIncumbent":false,"candidateParty":"","voteCount":2382}]},"MarinMeasureE":{"id":"MarinMeasureE","type":"localRace","location":"Marin","raceName":"Measure E","raceDescription":"Ross. Special tax. Passes with 2/3 vote.","raceReadTheStory":"https://www.kqed.org/elections/results/marin/measure-e","raceType":"yesNo","timeUpdated":"6:54 PM","dateUpdated":"March 27, 2024","totalVotes":874,"candidates":[{"candidateName":"Yes","candidateIncumbent":false,"candidateParty":"","voteCount":683},{"candidateName":"No","candidateIncumbent":false,"candidateParty":"","voteCount":191}]},"MarinMeasureF":{"id":"MarinMeasureF","type":"localRace","location":"Marin","raceName":"Measure F","raceDescription":"San Anselmo. Flood Control and Water Conservation District. Passes with majority vote.","raceReadTheStory":"","raceType":"yesNo","timeUpdated":"6:54 PM","dateUpdated":"March 27, 2024","totalVotes":5193,"candidates":[{"candidateName":"Yes","candidateIncumbent":false,"candidateParty":"","voteCount":3083},{"candidateName":"No","candidateIncumbent":false,"candidateParty":"","voteCount":2110}]},"MarinMeasureG":{"id":"MarinMeasureG","type":"localRace","location":"Marin","raceName":"Measure G","raceDescription":"Bel Marin Keys Community Services District. Special tax. Passes with 2/3 vote.","raceReadTheStory":"","raceType":"yesNo","timeUpdated":"6:54 PM","dateUpdated":"March 27, 2024","totalVotes":830,"candidates":[{"candidateName":"Yes","candidateIncumbent":false,"candidateParty":"","voteCount":661},{"candidateName":"No","candidateIncumbent":false,"candidateParty":"","voteCount":169}]},"MarinMeasureH":{"id":"MarinMeasureH","type":"localRace","location":"Marin","raceName":"Measure H","raceDescription":"Marinwood Community Services District. Appropriations limit, fire protection. Passes with a majority vote.","raceReadTheStory":"","raceType":"yesNo","timeUpdated":"6:54 PM","dateUpdated":"March 27, 2024","totalVotes":1738,"candidates":[{"candidateName":"Yes","candidateIncumbent":false,"candidateParty":"","voteCount":1369},{"candidateName":"No","candidateIncumbent":false,"candidateParty":"","voteCount":369}]},"MarinMeasureI":{"id":"MarinMeasureI","type":"localRace","location":"Marin","raceName":"Measure I","raceDescription":"Marinwood Community Services District. Appropriations limit, parks. Passes with a majority vote.","raceReadTheStory":"","raceType":"yesNo","timeUpdated":"6:54 PM","dateUpdated":"March 27, 2024","totalVotes":1735,"candidates":[{"candidateName":"Yes","candidateIncumbent":false,"candidateParty":"","voteCount":1336},{"candidateName":"No","candidateIncumbent":false,"candidateParty":"","voteCount":399}]},"NapaD2":{"id":"NapaD2","type":"localRace","location":"Napa","raceName":"Board of Supervisors, District 2","raceDescription":"Candidate with majority vote wins seat. If no candidate reaches majority, top two candidates advance to runoff in general election.","raceReadTheStory":"","raceType":"top1","timeUpdated":"6:50 PM","dateUpdated":"April 3, 2024","totalVotes":8351,"candidates":[{"candidateName":"Liz Alessio","candidateIncumbent":false,"candidateParty":"","voteCount":6340},{"candidateName":"Doris Gentry","candidateIncumbent":false,"candidateParty":"","voteCount":2011}]},"NapaD4":{"id":"NapaD4","type":"localRace","location":"Napa","raceName":"Board of Supervisors, District 4","raceDescription":"Candidate with majority vote wins seat. If no candidate reaches majority, top two candidates advance to runoff in general election.","raceReadTheStory":"https://www.kqed.org/elections/results/napa/supervisor-4th-district","raceType":"top1","timeUpdated":"6:50 PM","dateUpdated":"April 3, 2024","totalVotes":7306,"candidates":[{"candidateName":"Amber Manfree","candidateIncumbent":false,"candidateParty":"","voteCount":3913},{"candidateName":"Pete Mott","candidateIncumbent":false,"candidateParty":"","voteCount":3393}]},"NapaD5":{"id":"NapaD5","type":"localRace","location":"Napa","raceName":"Board of Supervisors, District 5","raceDescription":"Candidate with majority vote wins seat. If no candidate reaches majority, top two candidates advance to runoff in general election.","raceReadTheStory":"https://www.kqed.org/elections/results/napa/supervisor-5th-district","raceType":"top1","timeUpdated":"6:50 PM","dateUpdated":"April 3, 2024","totalVotes":5356,"candidates":[{"candidateName":"Mariam Aboudamous","candidateIncumbent":false,"candidateParty":"","voteCount":2379},{"candidateName":"Belia Ramos","candidateIncumbent":true,"candidateParty":"","voteCount":2977}]},"NapaMeasureD":{"id":"NapaMeasureD","type":"localRace","location":"Napa","raceName":"Measure D","raceDescription":"Howell Mountain Elementary School District. School bond. Passes with 55% vote.","raceReadTheStory":"","raceType":"yesNo","timeUpdated":"6:50 PM","dateUpdated":"April 3, 2024","totalVotes":741,"candidates":[{"candidateName":"Yes","candidateIncumbent":false,"candidateParty":"","voteCount":367},{"candidateName":"No","candidateIncumbent":false,"candidateParty":"","voteCount":374}]},"NapaMeasureU":{"id":"NapaMeasureU","type":"localRace","location":"Napa","raceName":"Measure U","raceDescription":"Lake Berryessa Resort Improvement District. Appropriations limit. Passes with majority vote. ","raceReadTheStory":"","raceType":"yesNo","timeUpdated":"6:50 PM","dateUpdated":"April 3, 2024","totalVotes":86,"candidates":[{"candidateName":"Yes","candidateIncumbent":false,"candidateParty":"","voteCount":63},{"candidateName":"No","candidateIncumbent":false,"candidateParty":"","voteCount":23}]},"NapaMeasureU1":{"id":"NapaMeasureU1","type":"localRace","location":"Napa","raceName":"Measure U","raceDescription":"Yountville. Appropriations limit. Passes with majority vote. ","raceReadTheStory":"","raceType":"yesNo","timeUpdated":"6:50 PM","dateUpdated":"April 3, 2024","totalVotes":925,"candidates":[{"candidateName":"Yes","candidateIncumbent":false,"candidateParty":"","voteCount":793},{"candidateName":"No","candidateIncumbent":false,"candidateParty":"","voteCount":132}]},"SFJudge1":{"id":"SFJudge1","type":"localRace","location":"San Francisco","raceName":"Superior Court Judge, Seat 1","raceDescription":"Candidate with majority vote wins seat. If no candidate reaches majority, top two candidates advance to runoff in general election.","raceReadTheStory":"https://www.kqed.org/elections/results/sanfrancisco/superior-court-seat-1","raceType":"top1","timeUpdated":"6:50 PM","dateUpdated":"March 21, 2024","totalVotes":202960,"candidates":[{"candidateName":"Michael Begert","candidateIncumbent":true,"candidateParty":"","voteCount":124943},{"candidateName":"Chip Zecher","candidateIncumbent":false,"candidateParty":"","voteCount":78017}]},"SFJudge13":{"id":"SFJudge13","type":"localRace","location":"San Francisco","raceName":"Superior Court Judge, Seat 13","raceDescription":"Candidate with majority vote wins seat. If no candidate reaches majority, top two candidates advance to runoff in general election.","raceReadTheStory":"https://www.kqed.org/elections/results/sanfrancisco/superior-court-seat-13","raceType":"top1","timeUpdated":"6:50 PM","dateUpdated":"March 21, 2024","totalVotes":202386,"candidates":[{"candidateName":"Jean Myungjin Roland","candidateIncumbent":false,"candidateParty":"","voteCount":90012},{"candidateName":"Patrick S. Thompson","candidateIncumbent":true,"candidateParty":"","voteCount":112374}]},"SFPropA":{"id":"SFPropA","type":"localRace","location":"San Francisco","raceName":"Proposition A","raceDescription":"Housing bond. Passes with 2/3 vote.","raceReadTheStory":"https://www.kqed.org/elections/results/sanfrancisco/proposition-a","raceType":"yesNo","timeUpdated":"6:50 PM","dateUpdated":"March 21, 2024","totalVotes":225187,"candidates":[{"candidateName":"Yes","candidateIncumbent":false,"candidateParty":"","voteCount":158497},{"candidateName":"No","candidateIncumbent":false,"candidateParty":"","voteCount":66690}]},"SFPropB":{"id":"SFPropB","type":"localRace","location":"San Francisco","raceName":"Proposition B","raceDescription":"Police staffing. Passes with majority vote.","raceReadTheStory":"","raceType":"yesNo","timeUpdated":"6:50 PM","dateUpdated":"March 21, 2024","totalVotes":222954,"candidates":[{"candidateName":"Yes","candidateIncumbent":false,"candidateParty":"","voteCount":61580},{"candidateName":"No","candidateIncumbent":false,"candidateParty":"","voteCount":161374}]},"SFPropC":{"id":"SFPropC","type":"localRace","location":"San Francisco","raceName":"Proposition C","raceDescription":"Transfer tax exemption. Passes with majority vote.","raceReadTheStory":"","raceType":"yesNo","timeUpdated":"6:50 PM","dateUpdated":"March 21, 2024","totalVotes":220349,"candidates":[{"candidateName":"Yes","candidateIncumbent":false,"candidateParty":"","voteCount":116311},{"candidateName":"No","candidateIncumbent":false,"candidateParty":"","voteCount":104038}]},"SFPropD":{"id":"SFPropD","type":"localRace","location":"San Francisco","raceName":"Proposition D","raceDescription":"Ethics laws. Passes with majority vote.","raceReadTheStory":"","raceType":"yesNo","timeUpdated":"6:50 PM","dateUpdated":"March 21, 2024","totalVotes":222615,"candidates":[{"candidateName":"Yes","candidateIncumbent":false,"candidateParty":"","voteCount":198584},{"candidateName":"No","candidateIncumbent":false,"candidateParty":"","voteCount":24031}]},"SFPropE":{"id":"SFPropE","type":"localRace","location":"San Francisco","raceName":"Proposition E","raceDescription":"Police policies. Passes with majority vote.","raceReadTheStory":"https://www.kqed.org/elections/results/sanfrancisco/proposition-e","raceType":"yesNo","timeUpdated":"6:50 PM","dateUpdated":"March 21, 2024","totalVotes":222817,"candidates":[{"candidateName":"Yes","candidateIncumbent":false,"candidateParty":"","voteCount":120529},{"candidateName":"No","candidateIncumbent":false,"candidateParty":"","voteCount":102288}]},"SFPropF":{"id":"SFPropF","type":"localRace","location":"San Francisco","raceName":"Proposition F","raceDescription":"Drug screening. Passes with majority vote.","raceReadTheStory":"https://www.kqed.org/elections/results/sanfrancisco/proposition-f","raceType":"yesNo","timeUpdated":"6:50 PM","dateUpdated":"March 21, 2024","totalVotes":224004,"candidates":[{"candidateName":"Yes","candidateIncumbent":false,"candidateParty":"","voteCount":130214},{"candidateName":"No","candidateIncumbent":false,"candidateParty":"","voteCount":93790}]},"SFPropG":{"id":"SFPropG","type":"localRace","location":"San Francisco","raceName":"Proposition G","raceDescription":"Eighth-grade algebra. Passes with majority vote.","raceReadTheStory":"","raceType":"yesNo","timeUpdated":"6:50 PM","dateUpdated":"March 21, 2024","totalVotes":222704,"candidates":[{"candidateName":"Yes","candidateIncumbent":false,"candidateParty":"","voteCount":182066},{"candidateName":"No","candidateIncumbent":false,"candidateParty":"","voteCount":40638}]},"SMJudge4":{"id":"SMJudge4","type":"localRace","location":"San Mateo","raceName":"Superior Court Judge, Office 4","raceDescription":"Candidate with majority vote wins seat. If no candidate reaches majority, top two candidates advance to runoff in general election.","raceReadTheStory":"","raceType":"top1","timeUpdated":"6:56 PM","dateUpdated":"April 4, 2024","totalVotes":108919,"candidates":[{"candidateName":"Sarah Burdick","candidateIncumbent":false,"candidateParty":"","voteCount":108919}]},"SMD1":{"id":"SMD1","type":"localRace","location":"San Mateo","raceName":"Board of Supervisors, District 1","raceDescription":"Candidate with majority vote wins seat. If no candidate reaches majority, top two candidates advance to runoff in general election.","raceReadTheStory":"https://www.kqed.org/elections/results/sanmateo/supervisor-1st-district","raceType":"top1","timeUpdated":"6:56 PM","dateUpdated":"April 4, 2024","totalVotes":29650,"candidates":[{"candidateName":"Jackie Speier","candidateIncumbent":false,"candidateParty":"","voteCount":20353},{"candidateName":"Ann Schneider","candidateIncumbent":false,"candidateParty":"","voteCount":9297}]},"SMD4":{"id":"SMD4","type":"localRace","location":"San Mateo","raceName":"Board of Supervisors, District 4","raceDescription":"Candidate with majority vote wins seat. If no candidate reaches majority, top two candidates advance to runoff in general election.","raceReadTheStory":"https://www.kqed.org/elections/results/sanmateo/supervisor-4th-district","raceType":"top2","timeUpdated":"6:56 PM","dateUpdated":"April 4, 2024","totalVotes":22725,"candidates":[{"candidateName":"Antonio Lopez","candidateIncumbent":false,"candidateParty":"","voteCount":5730},{"candidateName":"Lisa Gauthier","candidateIncumbent":false,"candidateParty":"","voteCount":10358},{"candidateName":"Celeste Brevard","candidateIncumbent":false,"candidateParty":"","voteCount":1268},{"candidateName":"Paul Bocanegra","candidateIncumbent":false,"candidateParty":"","voteCount":1909},{"candidateName":"Maggie Cornejo","candidateIncumbent":false,"candidateParty":"","voteCount":3460}]},"SMD5":{"id":"SMD5","type":"localRace","location":"San Mateo","raceName":"Board of Supervisors, District 5","raceDescription":"Candidate with majority vote wins seat. If no candidate reaches majority, top two candidates advance to runoff in general election.","raceReadTheStory":"","raceType":"top1","timeUpdated":"6:56 PM","dateUpdated":"April 4, 2024","totalVotes":19937,"candidates":[{"candidateName":"David Canepa","candidateIncumbent":true,"candidateParty":"","voteCount":19937}]},"SMMeasureB":{"id":"SMMeasureB","type":"localRace","location":"San Mateo","raceName":"Measure B","raceDescription":"County Service Area #1 (Highlands). Special tax. Passes with 2/3 vote.","raceReadTheStory":"","raceType":"yesNo","timeUpdated":"6:56 PM","dateUpdated":"April 4, 2024","totalVotes":1549,"candidates":[{"candidateName":"Yes","candidateIncumbent":false,"candidateParty":"","voteCount":1360},{"candidateName":"No","candidateIncumbent":false,"candidateParty":"","voteCount":189}]},"SMMeasureC":{"id":"SMMeasureC","type":"localRace","location":"San Mateo","raceName":"Measure C","raceDescription":"Jefferson Elementary School District. Parcel tax. Passes with 2/3 vote","raceReadTheStory":"","raceType":"yesNo","timeUpdated":"6:56 PM","dateUpdated":"April 4, 2024","totalVotes":12234,"candidates":[{"candidateName":"Yes","candidateIncumbent":false,"candidateParty":"","voteCount":8543},{"candidateName":"No","candidateIncumbent":false,"candidateParty":"","voteCount":3691}]},"SMMeasureE":{"id":"SMMeasureE","type":"localRace","location":"San Mateo","raceName":"Measure E","raceDescription":"Woodside Elementary School District. School bond. Passes with 55% vote.","raceReadTheStory":"","raceType":"yesNo","timeUpdated":"6:56 PM","dateUpdated":"April 4, 2024","totalVotes":1392,"candidates":[{"candidateName":"Yes","candidateIncumbent":false,"candidateParty":"","voteCount":910},{"candidateName":"No","candidateIncumbent":false,"candidateParty":"","voteCount":482}]},"SMMeasureG":{"id":"SMMeasureG","type":"localRace","location":"San Mateo","raceName":"Measure G","raceDescription":"Pacifica School District. School bond. Passes with 55% vote.","raceReadTheStory":"","raceType":"yesNo","timeUpdated":"6:56 PM","dateUpdated":"April 4, 2024","totalVotes":11548,"candidates":[{"candidateName":"Yes","candidateIncumbent":false,"candidateParty":"","voteCount":7067},{"candidateName":"No","candidateIncumbent":false,"candidateParty":"","voteCount":4481}]},"SMMeasureH":{"id":"SMMeasureH","type":"localRace","location":"San Mateo","raceName":"Measure H","raceDescription":"San Carlos School District. School bond. Passes with 55% vote.","raceReadTheStory":"","raceType":"yesNo","timeUpdated":"6:56 PM","dateUpdated":"April 4, 2024","totalVotes":9938,"candidates":[{"candidateName":"Yes","candidateIncumbent":false,"candidateParty":"","voteCount":6283},{"candidateName":"No","candidateIncumbent":false,"candidateParty":"","voteCount":3655}]},"SCJudge5":{"id":"SCJudge5","type":"localRace","location":"Santa Clara","raceName":"Superior Court Judge, Office 5","raceDescription":"Candidate with majority vote wins seat. If no candidate reaches majority, top two candidates advance to runoff in general election.","raceReadTheStory":"","raceType":"top1","timeUpdated":"7:05 PM","dateUpdated":"April 4, 2024","totalVotes":301953,"candidates":[{"candidateName":"Jay Boyarsky","candidateIncumbent":false,"candidateParty":"","voteCount":142549},{"candidateName":"Nicole M. Ford","candidateIncumbent":false,"candidateParty":"","voteCount":52147},{"candidateName":"Johnene Linda Stebbins","candidateIncumbent":false,"candidateParty":"","voteCount":107257}]},"SCD2":{"id":"SCD2","type":"localRace","location":"Santa Clara","raceName":"Board of Supervisors, District 2","raceDescription":"Candidate with majority vote wins seat. If no candidate reaches majority, top two candidates advance to runoff in general election.","raceReadTheStory":"https://www.kqed.org/elections/results/santaclara/supervisor-2nd-district","raceType":"top2","timeUpdated":"7:05 PM","dateUpdated":"April 4, 2024","totalVotes":44059,"candidates":[{"candidateName":"Corina Herrera-Loera","candidateIncumbent":false,"candidateParty":"","voteCount":10519},{"candidateName":"Jennifer Margaret Celaya","candidateIncumbent":false,"candidateParty":"","voteCount":2394},{"candidateName":"Madison Nguyen","candidateIncumbent":false,"candidateParty":"","voteCount":12794},{"candidateName":"Betty Duong","candidateIncumbent":false,"candidateParty":"","voteCount":14031},{"candidateName":"Nelson McElmurry","candidateIncumbent":false,"candidateParty":"","voteCount":4321}]},"SCD3":{"id":"SCD3","type":"localRace","location":"Santa Clara","raceName":"Board of Supervisors, District 3","raceDescription":"Candidate with majority vote wins seat. If no candidate reaches majority, top two candidates advance to runoff in general election.","raceReadTheStory":"","raceType":"top1","timeUpdated":"7:05 PM","dateUpdated":"April 4, 2024","totalVotes":42549,"candidates":[{"candidateName":"Otto Lee","candidateIncumbent":true,"candidateParty":"","voteCount":42549}]},"SCD5":{"id":"SCD5","type":"localRace","location":"Santa Clara","raceName":"Board of Supervisors, District 5","raceDescription":"Candidate with majority vote wins seat. If no candidate reaches majority, top two candidates advance to runoff in general election.","raceReadTheStory":"https://www.kqed.org/elections/results/santaclara/supervisor-5th-district","raceType":"top2","timeUpdated":"7:05 PM","dateUpdated":"April 4, 2024","totalVotes":88712,"candidates":[{"candidateName":"Margaret Abe-Koga","candidateIncumbent":false,"candidateParty":"","voteCount":37172},{"candidateName":"Sally J. Lieber","candidateIncumbent":false,"candidateParty":"","voteCount":21962},{"candidateName":"Barry Chang","candidateIncumbent":false,"candidateParty":"","voteCount":6164},{"candidateName":"Peter C. Fung","candidateIncumbent":false,"candidateParty":"","voteCount":17892},{"candidateName":"Sandy Sans","candidateIncumbent":false,"candidateParty":"","voteCount":5522}]},"SCSJMayor":{"id":"SCSJMayor","type":"localRace","location":"Santa Clara","raceName":"San José Mayor","raceDescription":"Candidate with majority vote wins seat. If no candidate reaches majority, top two candidates advance to runoff in general election.","raceReadTheStory":"","raceType":"top1","timeUpdated":"7:05 PM","dateUpdated":"April 4, 2024","totalVotes":167064,"candidates":[{"candidateName":"Matt Mahan","candidateIncumbent":true,"candidateParty":"","voteCount":144701},{"candidateName":"Tyrone Wade","candidateIncumbent":false,"candidateParty":"","voteCount":22363}]},"SCSJD2":{"id":"SCSJD2","type":"localRace","location":"Santa Clara","raceName":"San José City Council, District 2","raceDescription":"Candidate with majority vote wins seat. If no candidate reaches majority, top two candidates advance to runoff in general election.","raceReadTheStory":"","raceType":"top2","timeUpdated":"7:05 PM","dateUpdated":"April 4, 2024","totalVotes":14131,"candidates":[{"candidateName":"Joe Lopez","candidateIncumbent":false,"candidateParty":"","voteCount":4950},{"candidateName":"Pamela Campos","candidateIncumbent":false,"candidateParty":"","voteCount":3436},{"candidateName":"Vanessa Sandoval","candidateIncumbent":false,"candidateParty":"","voteCount":2719},{"candidateName":"Babu Prasad","candidateIncumbent":false,"candidateParty":"","voteCount":3026}]},"SCSJD4":{"id":"SCSJD4","type":"localRace","location":"Santa Clara","raceName":"San José City Council, District 4","raceDescription":"Candidate with majority vote wins seat. If no candidate reaches majority, top two candidates advance to runoff in general election.","raceReadTheStory":"","raceType":"top1","timeUpdated":"7:05 PM","dateUpdated":"April 4, 2024","totalVotes":14322,"candidates":[{"candidateName":"Kansen Chu","candidateIncumbent":false,"candidateParty":"","voteCount":5931},{"candidateName":"David Cohen","candidateIncumbent":true,"candidateParty":"","voteCount":8391}]},"SCSJD6":{"id":"SCSJD6","type":"localRace","location":"Santa Clara","raceName":"San José City Council, District 6","raceDescription":"Candidate with majority vote wins seat. If no candidate reaches majority, top two candidates advance to runoff in general election.","raceReadTheStory":"","raceType":"top2","timeUpdated":"7:05 PM","dateUpdated":"April 4, 2024","totalVotes":25108,"candidates":[{"candidateName":"David Cohen","candidateIncumbent":false,"candidateParty":"","voteCount":9875},{"candidateName":"Alex Shoor","candidateIncumbent":false,"candidateParty":"","voteCount":3850},{"candidateName":"Angelo \"A.J.\" Pasciuti","candidateIncumbent":false,"candidateParty":"","voteCount":2688},{"candidateName":"Michael Mulcahy","candidateIncumbent":false,"candidateParty":"","voteCount":8695}]},"SCSJD8":{"id":"SCSJD8","type":"localRace","location":"Santa Clara","raceName":"San José City Council, District 8","raceDescription":"Candidate with majority vote wins seat. If no candidate reaches majority, top two candidates advance to runoff in general election.","raceReadTheStory":"","raceType":"top2","timeUpdated":"7:05 PM","dateUpdated":"April 4, 2024","totalVotes":21462,"candidates":[{"candidateName":"Tam Truong","candidateIncumbent":false,"candidateParty":"","voteCount":6982},{"candidateName":"Domingo Candelas","candidateIncumbent":true,"candidateParty":"","voteCount":8466},{"candidateName":"Sukhdev Singh Bainiwal","candidateIncumbent":false,"candidateParty":"","voteCount":5513},{"candidateName":"Surinder Kaur Dhaliwal","candidateIncumbent":false,"candidateParty":"","voteCount":501}]},"SCSJD10":{"id":"SCSJD10","type":"localRace","location":"Santa Clara","raceName":"San José City Council, District 10","raceDescription":"Candidate with majority vote wins seat. If no candidate reaches majority, top two candidates advance to runoff in general election.","raceReadTheStory":"","raceType":"top2","timeUpdated":"7:05 PM","dateUpdated":"April 4, 2024","totalVotes":22799,"candidates":[{"candidateName":"George Casey","candidateIncumbent":false,"candidateParty":"","voteCount":8805},{"candidateName":"Arjun Batra","candidateIncumbent":true,"candidateParty":"","voteCount":8354},{"candidateName":"Lenka Wright","candidateIncumbent":false,"candidateParty":"","voteCount":5640}]},"SCMeasureA":{"id":"SCMeasureA","type":"localRace","location":"Santa Clara","raceName":"Measure A","raceDescription":"Santa Clara. Appointed city clerk. Passes with majority vote.","raceReadTheStory":"","raceType":"yesNo","timeUpdated":"7:05 PM","dateUpdated":"April 4, 2024","totalVotes":20315,"candidates":[{"candidateName":"Yes","candidateIncumbent":false,"candidateParty":"","voteCount":6580},{"candidateName":"No","candidateIncumbent":false,"candidateParty":"","voteCount":13735}]},"SCMeasureB":{"id":"SCMeasureB","type":"localRace","location":"Santa Clara","raceName":"Measure B","raceDescription":"Santa Clara. Appointed police chief. Passes with majority vote.","raceReadTheStory":"","raceType":"yesNo","timeUpdated":"7:05 PM","dateUpdated":"April 4, 2024","totalVotes":20567,"candidates":[{"candidateName":"Yes","candidateIncumbent":false,"candidateParty":"","voteCount":5680},{"candidateName":"No","candidateIncumbent":false,"candidateParty":"","voteCount":14887}]},"SCMeasureC":{"id":"SCMeasureC","type":"localRace","location":"Santa Clara","raceName":"Measure C","raceDescription":"Sunnyvale School District. School bond. Passes with 55% vote.","raceReadTheStory":"","raceType":"yesNo","timeUpdated":"7:05 PM","dateUpdated":"April 4, 2024","totalVotes":14656,"candidates":[{"candidateName":"Yes","candidateIncumbent":false,"candidateParty":"","voteCount":10261},{"candidateName":"No","candidateIncumbent":false,"candidateParty":"","voteCount":4395}]},"SolanoD15":{"id":"SolanoD15","type":"localRace","location":"Solano","raceName":"Superior Court Judge, Department 15","raceDescription":"Candidate with majority vote wins seat. If no candidate reaches majority, top two candidates advance to runoff in general election.","raceReadTheStory":"","raceType":"","timeUpdated":"7:08 PM","dateUpdated":"March 28, 2024","totalVotes":81709,"candidates":[{"candidateName":"Mike Thompson","candidateIncumbent":false,"candidateParty":"","voteCount":36844},{"candidateName":"Bryan J. Kim","candidateIncumbent":false,"candidateParty":"","voteCount":44865}]},"SolanoD1":{"id":"SolanoD1","type":"localRace","location":"Solano","raceName":"Board of Supervisors, District 1","raceDescription":"Candidate with majority vote wins seat. If no candidate reaches majority, top two candidates advance to runoff in general election.","raceReadTheStory":"https://www.kqed.org/elections/results/solano/supervisor-1st-district","raceType":"","timeUpdated":"7:08 PM","dateUpdated":"March 28, 2024","totalVotes":13786,"candidates":[{"candidateName":"Michael Wilson","candidateIncumbent":false,"candidateParty":"","voteCount":6401},{"candidateName":"Cassandra James","candidateIncumbent":false,"candidateParty":"","voteCount":7385}]},"SolanoD2":{"id":"SolanoD2","type":"localRace","location":"Solano","raceName":"Board of Supervisors, District 2","raceDescription":"Candidate with majority vote wins seat. If no candidate reaches majority, top two candidates advance to runoff in general election.","raceReadTheStory":"","raceType":"","timeUpdated":"7:08 PM","dateUpdated":"March 28, 2024","totalVotes":19903,"candidates":[{"candidateName":"Monica Brown","candidateIncumbent":true,"candidateParty":"","voteCount":10951},{"candidateName":"Nora Dizon","candidateIncumbent":false,"candidateParty":"","voteCount":3135},{"candidateName":"Rochelle Sherlock","candidateIncumbent":false,"candidateParty":"","voteCount":5817}]},"SolanoD5":{"id":"SolanoD5","type":"localRace","location":"Solano","raceName":"Board of Supervisors, District 5","raceDescription":"Candidate with majority vote wins seat. If no candidate reaches majority, top two candidates advance to runoff in general election.","raceReadTheStory":"","raceType":"","timeUpdated":"7:08 PM","dateUpdated":"March 28, 2024","totalVotes":17888,"candidates":[{"candidateName":"Mitch Mashburn","candidateIncumbent":true,"candidateParty":"","voteCount":11210},{"candidateName":"Chadwick J. Ledoux","candidateIncumbent":false,"candidateParty":"","voteCount":6678}]},"SolanoEducation":{"id":"SolanoEducation","type":"localRace","location":"Solano","raceName":"Sacramento County Board of Education","raceDescription":"Candidate with majority vote wins seat. If no candidate reaches majority, top two candidates advance to runoff in general election.","raceReadTheStory":"","raceType":"","timeUpdated":"7:08 PM","dateUpdated":"March 28, 2024","totalVotes":3650,"candidates":[{"candidateName":"Heather Davis","candidateIncumbent":true,"candidateParty":"","voteCount":2960},{"candidateName":"Shazleen Khan","candidateIncumbent":false,"candidateParty":"","voteCount":690}]},"SolanoMeasureA":{"id":"SolanoMeasureA","type":"localRace","location":"Solano","raceName":"Measure A","raceDescription":"Benicia. Hotel tax. Passes with majority vote.","raceReadTheStory":"https://www.kqed.org/elections/results/solano/measure-a","raceType":"yesNo","timeUpdated":"7:08 PM","dateUpdated":"March 28, 2024","totalVotes":10136,"candidates":[{"candidateName":"Yes","candidateIncumbent":false,"candidateParty":"","voteCount":7869},{"candidateName":"No","candidateIncumbent":false,"candidateParty":"","voteCount":2267}]},"SolanoMeasureB":{"id":"SolanoMeasureB","type":"localRace","location":"Solano","raceName":"Measure B","raceDescription":"Benicia. Sales tax. Passes with majority vote.","raceReadTheStory":"https://www.kqed.org/elections/results/solano/measure-b","raceType":"yesNo","timeUpdated":"7:08 PM","dateUpdated":"March 28, 2024","totalVotes":10164,"candidates":[{"candidateName":"Yes","candidateIncumbent":false,"candidateParty":"","voteCount":7335},{"candidateName":"No","candidateIncumbent":false,"candidateParty":"","voteCount":2829}]},"SolanoMeasureC":{"id":"SolanoMeasureC","type":"localRace","location":"Solano","raceName":"Measure C","raceDescription":"Benicia Unified School District. School bond. Passes with 55% vote.","raceReadTheStory":"","raceType":"yesNo","timeUpdated":"7:08 PM","dateUpdated":"March 28, 2024","totalVotes":10112,"candidates":[{"candidateName":"Yes","candidateIncumbent":false,"candidateParty":"","voteCount":6316},{"candidateName":"No","candidateIncumbent":false,"candidateParty":"","voteCount":3796}]},"SolanoMeasureN":{"id":"SolanoMeasureN","type":"localRace","location":"Solano","raceName":"Measure N","raceDescription":"Davis Joint Unified School District. Parcel tax. Passes with 2/3 vote.","raceReadTheStory":"","raceType":"yesNo","timeUpdated":"7:08 PM","dateUpdated":"March 28, 2024","totalVotes":15,"candidates":[{"candidateName":"Yes","candidateIncumbent":false,"candidateParty":"","voteCount":5},{"candidateName":"No","candidateIncumbent":false,"candidateParty":"","voteCount":10}]},"SonomaJudge3":{"id":"SonomaJudge3","type":"localRace","location":"Sonoma","raceName":"Superior Court Judge, Office 3","raceDescription":"Candidate with majority vote wins seat. If no candidate reaches majority, top two candidates advance to runoff in general election.","raceReadTheStory":"","raceType":"top1","timeUpdated":"6:51 PM","dateUpdated":"March 29, 2024","totalVotes":115405,"candidates":[{"candidateName":"Kristine M. Burk","candidateIncumbent":false,"candidateParty":"","voteCount":79498},{"candidateName":"Beki Berrey","candidateIncumbent":false,"candidateParty":"","voteCount":35907}]},"SonomaJudge4":{"id":"SonomaJudge4","type":"localRace","location":"Sonoma","raceName":"Superior Court Judge, Office 4","raceDescription":"Candidate with majority vote wins seat. If no candidate reaches majority, top two candidates advance to runoff in general election.","raceReadTheStory":"","raceType":"top1","timeUpdated":"6:51 PM","dateUpdated":"March 29, 2024","totalVotes":86789,"candidates":[{"candidateName":"Paul J. Lozada","candidateIncumbent":false,"candidateParty":"","voteCount":86789}]},"SonomaJudge6":{"id":"SonomaJudge6","type":"localRace","location":"Sonoma","raceName":"Superior Court Judge, Office 6","raceDescription":"Candidate with majority vote wins seat. If no candidate reaches majority, top two candidates advance to runoff in general election.","raceReadTheStory":"","raceType":"top1","timeUpdated":"6:51 PM","dateUpdated":"March 29, 2024","totalVotes":117990,"candidates":[{"candidateName":"Omar Figueroa","candidateIncumbent":false,"candidateParty":"","voteCount":42236},{"candidateName":"Kenneth English","candidateIncumbent":false,"candidateParty":"","voteCount":75754}]},"SonomaD1":{"id":"SonomaD1","type":"localRace","location":"Sonoma","raceName":"Board of Supervisors, District 1","raceDescription":"Candidate with majority vote wins seat. If no candidate reaches majority, top two candidates advance to runoff in general election.","raceReadTheStory":"","raceType":"top1","timeUpdated":"6:51 PM","dateUpdated":"March 29, 2024","totalVotes":30348,"candidates":[{"candidateName":"Rebecca Hermosillo","candidateIncumbent":false,"candidateParty":"","voteCount":23958},{"candidateName":"Jonathan Mathieu","candidateIncumbent":false,"candidateParty":"","voteCount":6390}]},"SonomaD3":{"id":"SonomaD3","type":"localRace","location":"Sonoma","raceName":"Board of Supervisors, District 3","raceDescription":"Candidate with majority vote wins seat. If no candidate reaches majority, top two candidates advance to runoff in general election.","raceReadTheStory":"https://www.kqed.org/elections/results/sonoma/supervisor-3rd-district","raceType":"top1","timeUpdated":"6:51 PM","dateUpdated":"March 29, 2024","totalVotes":16312,"candidates":[{"candidateName":"Chris Coursey","candidateIncumbent":true,"candidateParty":"","voteCount":11346},{"candidateName":"Omar Medina","candidateIncumbent":false,"candidateParty":"","voteCount":4966}]},"SonomaD5":{"id":"SonomaD5","type":"localRace","location":"Sonoma","raceName":"Board of Supervisors, District 5","raceDescription":"Candidate with majority vote wins seat. If no candidate reaches majority, top two candidates advance to runoff in general election.","raceReadTheStory":"","raceType":"top1","timeUpdated":"6:51 PM","dateUpdated":"March 29, 2024","totalVotes":23356,"candidates":[{"candidateName":"Lynda Hopkins","candidateIncumbent":true,"candidateParty":"","voteCount":23356}]},"SonomaMeasureA":{"id":"SonomaMeasureA","type":"localRace","location":"Sonoma","raceName":"Measure A","raceDescription":"Cotati-Rohnert Park Unified School District. Parcel tax. Passes with 2/3 vote.","raceReadTheStory":"","raceType":"yesNo","timeUpdated":"6:51 PM","dateUpdated":"March 29, 2024","totalVotes":13756,"candidates":[{"candidateName":"Yes","candidateIncumbent":false,"candidateParty":"","voteCount":10320},{"candidateName":"No","candidateIncumbent":false,"candidateParty":"","voteCount":3436}]},"SonomaMeasureB":{"id":"SonomaMeasureB","type":"localRace","location":"Sonoma","raceName":"Measure B","raceDescription":"Petaluma Joint Union High School District. Parcel tax. Passes with 2/3 vote.","raceReadTheStory":"","raceType":"yesNo","timeUpdated":"6:51 PM","dateUpdated":"March 29, 2024","totalVotes":24877,"candidates":[{"candidateName":"Yes","candidateIncumbent":false,"candidateParty":"","voteCount":15795},{"candidateName":"No","candidateIncumbent":false,"candidateParty":"","voteCount":9082}]},"SonomaMeasureC":{"id":"SonomaMeasureC","type":"localRace","location":"Sonoma","raceName":"Measure C","raceDescription":"Fort Ross School District. School bond. Passes with 55% vote.","raceReadTheStory":"","raceType":"yesNo","timeUpdated":"6:51 PM","dateUpdated":"March 29, 2024","totalVotes":286,"candidates":[{"candidateName":"Yes","candidateIncumbent":false,"candidateParty":"","voteCount":159},{"candidateName":"No","candidateIncumbent":false,"candidateParty":"","voteCount":127}]},"SonomaMeasureD":{"id":"SonomaMeasureD","type":"localRace","location":"Sonoma","raceName":"Measure D","raceDescription":"Harmony Union School District. School bond. Passes with 55% vote.","raceReadTheStory":"","raceType":"yesNo","timeUpdated":"6:51 PM","dateUpdated":"March 29, 2024","totalVotes":1925,"candidates":[{"candidateName":"Yes","candidateIncumbent":false,"candidateParty":"","voteCount":1089},{"candidateName":"No","candidateIncumbent":false,"candidateParty":"","voteCount":836}]},"SonomaMeasureE":{"id":"SonomaMeasureE","type":"localRace","location":"Sonoma","raceName":"Measure E","raceDescription":"Petaluma City (Elementary) School District. Parcel tax. Passes with 2/3 vote.","raceReadTheStory":"","raceType":"yesNo","timeUpdated":"6:51 PM","dateUpdated":"March 29, 2024","totalVotes":11133,"candidates":[{"candidateName":"Yes","candidateIncumbent":false,"candidateParty":"","voteCount":7622},{"candidateName":"No","candidateIncumbent":false,"candidateParty":"","voteCount":3511}]},"SonomaMeasureG":{"id":"SonomaMeasureG","type":"localRace","location":"Sonoma","raceName":"Measure G","raceDescription":"Rincon Valley Union School District. School bond. Passes with 55% vote.","raceReadTheStory":"","raceType":"yesNo","timeUpdated":"6:51 PM","dateUpdated":"March 29, 2024","totalVotes":14577,"candidates":[{"candidateName":"Yes","candidateIncumbent":false,"candidateParty":"","voteCount":8668},{"candidateName":"No","candidateIncumbent":false,"candidateParty":"","voteCount":5909}]},"SonomaMeasureH":{"id":"SonomaMeasureH","type":"localRace","location":"Sonoma","raceName":"Measure H","raceDescription":"Sonoma County. Sales tax. Passes with majority vote.","raceReadTheStory":"https://www.kqed.org/elections/results/sonoma/measure-h","raceType":"yesNo","timeUpdated":"6:51 PM","dateUpdated":"March 29, 2024","totalVotes":145261,"candidates":[{"candidateName":"Yes","candidateIncumbent":false,"candidateParty":"","voteCount":89646},{"candidateName":"No","candidateIncumbent":false,"candidateParty":"","voteCount":55615}]}},"radioSchedulesReducer":{},"listsReducer":{"posts/bayareabites?tag=pie-crust":{"isFetching":false,"latestQuery":{"from":0,"postsToRender":9},"tag":null,"vitalsOnly":true,"totalRequested":8,"isLoading":false,"isLoadingMore":false,"total":8,"items":["bayareabites_102262","bayareabites_74069","bayareabites_26836","bayareabites_20550","bayareabites_17668","bayareabites_16729","bayareabites_8273","bayareabites_5902"]}},"recallGuideReducer":{"intros":{},"policy":{},"candidates":{}},"savedPostsReducer":{},"pfsSessionReducer":{},"siteSettingsReducer":{},"subscriptionsReducer":{},"termsReducer":{"about":{"name":"About","type":"terms","id":"about","slug":"about","link":"/about","taxonomy":"site"},"arts":{"name":"Arts & Culture","grouping":["arts","pop","trulyca"],"description":"KQED Arts provides daily in-depth coverage of the Bay Area's music, art, film, performing arts, literature and arts news, as well as cultural commentary and criticism.","type":"terms","id":"arts","slug":"arts","link":"/arts","taxonomy":"site"},"artschool":{"name":"Art School","parent":"arts","type":"terms","id":"artschool","slug":"artschool","link":"/artschool","taxonomy":"site"},"bayareabites":{"name":"KQED food","grouping":["food","bayareabites","checkplease"],"parent":"food","type":"terms","id":"bayareabites","slug":"bayareabites","link":"/food","taxonomy":"site"},"bayareahiphop":{"name":"Bay Area Hiphop","type":"terms","id":"bayareahiphop","slug":"bayareahiphop","link":"/bayareahiphop","taxonomy":"site"},"campaign21":{"name":"Campaign 21","type":"terms","id":"campaign21","slug":"campaign21","link":"/campaign21","taxonomy":"site"},"checkplease":{"name":"KQED food","grouping":["food","bayareabites","checkplease"],"parent":"food","type":"terms","id":"checkplease","slug":"checkplease","link":"/food","taxonomy":"site"},"education":{"name":"Education","grouping":["education"],"type":"terms","id":"education","slug":"education","link":"/education","taxonomy":"site"},"elections":{"name":"Elections","type":"terms","id":"elections","slug":"elections","link":"/elections","taxonomy":"site"},"events":{"name":"Events","type":"terms","id":"events","slug":"events","link":"/events","taxonomy":"site"},"event":{"name":"Event","alias":"events","type":"terms","id":"event","slug":"event","link":"/event","taxonomy":"site"},"filmschoolshorts":{"name":"Film School Shorts","type":"terms","id":"filmschoolshorts","slug":"filmschoolshorts","link":"/filmschoolshorts","taxonomy":"site"},"food":{"name":"KQED food","grouping":["food","bayareabites","checkplease"],"type":"terms","id":"food","slug":"food","link":"/food","taxonomy":"site"},"forum":{"name":"Forum","relatedContentQuery":"posts/forum?","parent":"news","type":"terms","id":"forum","slug":"forum","link":"/forum","taxonomy":"site"},"futureofyou":{"name":"Future of You","grouping":["science","futureofyou"],"parent":"science","type":"terms","id":"futureofyou","slug":"futureofyou","link":"/futureofyou","taxonomy":"site"},"jpepinheart":{"name":"KQED food","relatedContentQuery":"trending/food,bayareabites,checkplease","parent":"food","type":"terms","id":"jpepinheart","slug":"jpepinheart","link":"/food","taxonomy":"site"},"liveblog":{"name":"Live Blog","type":"terms","id":"liveblog","slug":"liveblog","link":"/liveblog","taxonomy":"site"},"livetv":{"name":"Live TV","parent":"tv","type":"terms","id":"livetv","slug":"livetv","link":"/livetv","taxonomy":"site"},"lowdown":{"name":"The Lowdown","relatedContentQuery":"posts/lowdown?","parent":"news","type":"terms","id":"lowdown","slug":"lowdown","link":"/lowdown","taxonomy":"site"},"mindshift":{"name":"Mindshift","parent":"news","description":"MindShift explores the future of education by highlighting the innovative – and sometimes counterintuitive – ways educators and parents are helping all children succeed.","type":"terms","id":"mindshift","slug":"mindshift","link":"/mindshift","taxonomy":"site"},"news":{"name":"News","grouping":["news","forum"],"type":"terms","id":"news","slug":"news","link":"/news","taxonomy":"site"},"perspectives":{"name":"Perspectives","parent":"radio","type":"terms","id":"perspectives","slug":"perspectives","link":"/perspectives","taxonomy":"site"},"podcasts":{"name":"Podcasts","type":"terms","id":"podcasts","slug":"podcasts","link":"/podcasts","taxonomy":"site"},"pop":{"name":"Pop","parent":"arts","type":"terms","id":"pop","slug":"pop","link":"/pop","taxonomy":"site"},"pressroom":{"name":"Pressroom","type":"terms","id":"pressroom","slug":"pressroom","link":"/pressroom","taxonomy":"site"},"quest":{"name":"Quest","parent":"science","type":"terms","id":"quest","slug":"quest","link":"/quest","taxonomy":"site"},"radio":{"name":"Radio","grouping":["forum","perspectives"],"description":"Listen to KQED Public Radio – home of Forum and The California Report – on 88.5 FM in San Francisco, 89.3 FM in Sacramento, 88.3 FM in Santa Rosa and 88.1 FM in Martinez.","type":"terms","id":"radio","slug":"radio","link":"/radio","taxonomy":"site"},"root":{"name":"KQED","image":"https://ww2.kqed.org/app/uploads/2020/02/KQED-OG-Image@1x.png","imageWidth":1200,"imageHeight":630,"headData":{"title":"KQED | News, Radio, Podcasts, TV | Public Media for Northern California","description":"KQED provides public radio, television, and independent reporting on issues that matter to the Bay Area. We’re the NPR and PBS member station for Northern California."},"type":"terms","id":"root","slug":"root","link":"/root","taxonomy":"site"},"science":{"name":"Science","grouping":["science","futureofyou"],"description":"KQED Science brings you award-winning science and environment coverage from the Bay Area and beyond.","type":"terms","id":"science","slug":"science","link":"/science","taxonomy":"site"},"stateofhealth":{"name":"State of Health","parent":"science","type":"terms","id":"stateofhealth","slug":"stateofhealth","link":"/stateofhealth","taxonomy":"site"},"support":{"name":"Support","type":"terms","id":"support","slug":"support","link":"/support","taxonomy":"site"},"thedolist":{"name":"The Do List","parent":"arts","type":"terms","id":"thedolist","slug":"thedolist","link":"/thedolist","taxonomy":"site"},"trulyca":{"name":"Truly CA","grouping":["arts","pop","trulyca"],"parent":"arts","type":"terms","id":"trulyca","slug":"trulyca","link":"/trulyca","taxonomy":"site"},"tv":{"name":"TV","type":"terms","id":"tv","slug":"tv","link":"/tv","taxonomy":"site"},"voterguide":{"name":"Voter Guide","parent":"elections","alias":"elections","type":"terms","id":"voterguide","slug":"voterguide","link":"/voterguide","taxonomy":"site"},"bayareabites_2594":{"type":"terms","id":"bayareabites_2594","meta":{"index":"terms_1591234321","site":"bayareabites","id":"2594","found":true},"relationships":{},"included":{},"name":"pie crust","slug":"pie-crust","taxonomy":"tag","description":null,"featImg":null,"headData":{"title":"pie crust Archives | KQED Bay Area Bites","description":null,"ogTitle":null,"ogDescription":null,"ogImgId":null,"twTitle":null,"twDescription":null,"twImgId":null,"imageData":{"ogImageSize":{"file":"https://cdn.kqed.org/wp-content/uploads/2020/02/KQED-OG-Image@1x.png","width":1200,"height":630},"twImageSize":{"file":"https://cdn.kqed.org/wp-content/uploads/2020/02/KQED-OG-Image@1x.png"},"twitterCard":"summary_large_image"}},"ttid":1854,"isLoading":false,"link":"/bayareabites/tag/pie-crust"},"source_bayareabites_102262":{"type":"terms","id":"source_bayareabites_102262","meta":{"override":true},"name":"Cooking Techniques and Tips","link":"https://ww2.kqed.org/bayareabites/category/cooking-techniques-and-tips/","isLoading":false},"bayareabites_1516":{"type":"terms","id":"bayareabites_1516","meta":{"index":"terms_1591234321","site":"bayareabites","id":"1516","found":true},"relationships":{},"included":{},"name":"baking and bakeries","slug":"baking-and-bakeries","taxonomy":"category","description":null,"featImg":null,"headData":{"title":"baking and bakeries Archives | KQED Bay Area Bites","description":null,"ogTitle":null,"ogDescription":null,"ogImgId":null,"twTitle":null,"twDescription":null,"twImgId":null},"ttid":1253,"isLoading":false,"link":"/bayareabites/category/baking-and-bakeries"},"bayareabites_2695":{"type":"terms","id":"bayareabites_2695","meta":{"index":"terms_1591234321","site":"bayareabites","id":"2695","found":true},"relationships":{},"included":{},"name":"cooking techniques and tips","slug":"cooking-techniques-and-tips","taxonomy":"category","description":null,"featImg":null,"headData":{"title":"cooking techniques and tips Archives | KQED Bay Area Bites","description":null,"ogTitle":null,"ogDescription":null,"ogImgId":null,"twTitle":null,"twDescription":null,"twImgId":null},"ttid":1905,"isLoading":false,"link":"/bayareabites/category/cooking-techniques-and-tips"},"bayareabites_12276":{"type":"terms","id":"bayareabites_12276","meta":{"index":"terms_1591234321","site":"bayareabites","id":"12276","found":true},"relationships":{},"included":{},"name":"CUESA","slug":"cuesa","taxonomy":"category","description":null,"featImg":null,"headData":{"title":"CUESA Archives | KQED Bay Area Bites","description":null,"ogTitle":null,"ogDescription":null,"ogImgId":null,"twTitle":null,"twDescription":null,"twImgId":null},"ttid":6738,"isLoading":false,"link":"/bayareabites/category/cuesa"},"bayareabites_1653":{"type":"terms","id":"bayareabites_1653","meta":{"index":"terms_1591234321","site":"bayareabites","id":"1653","found":true},"relationships":{},"included":{},"name":"dessert and chocolate","slug":"dessert-and-chocolate","taxonomy":"category","description":null,"featImg":null,"headData":{"title":"dessert and chocolate Archives | KQED Bay Area Bites","description":null,"ogTitle":null,"ogDescription":null,"ogImgId":null,"twTitle":null,"twDescription":null,"twImgId":null},"ttid":12,"isLoading":false,"link":"/bayareabites/category/dessert-and-chocolate"},"bayareabites_50":{"type":"terms","id":"bayareabites_50","meta":{"index":"terms_1591234321","site":"bayareabites","id":"50","found":true},"relationships":{},"included":{},"name":"events","slug":"events","taxonomy":"category","description":null,"featImg":null,"headData":{"title":"events Archives | KQED Bay Area Bites","description":null,"ogTitle":null,"ogDescription":null,"ogImgId":null,"twTitle":null,"twDescription":null,"twImgId":null},"ttid":750,"isLoading":false,"link":"/bayareabites/category/events"},"bayareabites_95":{"type":"terms","id":"bayareabites_95","meta":{"index":"terms_1591234321","site":"bayareabites","id":"95","found":true},"relationships":{},"included":{},"name":"farmers markets","slug":"farmers-markets","taxonomy":"category","description":null,"featImg":null,"headData":{"title":"farmers markets Archives | KQED Bay Area Bites","description":null,"ogTitle":null,"ogDescription":null,"ogImgId":null,"twTitle":null,"twDescription":null,"twImgId":null},"ttid":59,"isLoading":false,"link":"/bayareabites/category/farmers-markets"},"bayareabites_1763":{"type":"terms","id":"bayareabites_1763","meta":{"index":"terms_1591234321","site":"bayareabites","id":"1763","found":true},"relationships":{},"included":{},"name":"holidays and traditions","slug":"holidays-and-traditions","taxonomy":"category","description":null,"featImg":null,"headData":{"title":"holidays and traditions Archives | KQED Bay Area Bites","description":null,"ogTitle":null,"ogDescription":null,"ogImgId":null,"twTitle":null,"twDescription":null,"twImgId":null},"ttid":1254,"isLoading":false,"link":"/bayareabites/category/holidays-and-traditions"},"bayareabites_1246":{"type":"terms","id":"bayareabites_1246","meta":{"index":"terms_1591234321","site":"bayareabites","id":"1246","found":true},"relationships":{},"included":{},"name":"kids and family","slug":"kids-and-family","taxonomy":"category","description":null,"featImg":null,"headData":{"title":"kids and family Archives | KQED Bay Area Bites","description":null,"ogTitle":null,"ogDescription":null,"ogImgId":null,"twTitle":null,"twDescription":null,"twImgId":null},"ttid":1085,"isLoading":false,"link":"/bayareabites/category/kids-and-family"},"bayareabites_90":{"type":"terms","id":"bayareabites_90","meta":{"index":"terms_1591234321","site":"bayareabites","id":"90","found":true},"relationships":{},"included":{},"name":"san francisco","slug":"san-francisco","taxonomy":"category","description":null,"featImg":null,"headData":{"title":"san francisco Archives | KQED Bay Area Bites","description":null,"ogTitle":null,"ogDescription":null,"ogImgId":null,"twTitle":null,"twDescription":null,"twImgId":null},"ttid":54,"isLoading":false,"link":"/bayareabites/category/san-francisco"},"bayareabites_228":{"type":"terms","id":"bayareabites_228","meta":{"index":"terms_1591234321","site":"bayareabites","id":"228","found":true},"relationships":{},"included":{},"name":"pie","slug":"pie","taxonomy":"tag","description":null,"featImg":null,"headData":{"title":"pie Archives | KQED Bay Area Bites","description":null,"ogTitle":null,"ogDescription":null,"ogImgId":null,"twTitle":null,"twDescription":null,"twImgId":null},"ttid":193,"isLoading":false,"link":"/bayareabites/tag/pie"},"bayareabites_2596":{"type":"terms","id":"bayareabites_2596","meta":{"index":"terms_1591234321","site":"bayareabites","id":"2596","found":true},"relationships":{},"included":{},"name":"pie contest","slug":"pie-contest","taxonomy":"tag","description":null,"featImg":null,"headData":{"title":"pie contest Archives | KQED Bay Area Bites","description":null,"ogTitle":null,"ogDescription":null,"ogImgId":null,"twTitle":null,"twDescription":null,"twImgId":null},"ttid":1856,"isLoading":false,"link":"/bayareabites/tag/pie-contest"},"bayareabites_15012":{"type":"terms","id":"bayareabites_15012","meta":{"index":"terms_1591234321","site":"bayareabites","id":"15012","found":true},"relationships":{},"included":{},"name":"Thanksgiving Recipes","slug":"thanksgiving-recipes","taxonomy":"series","description":"\u003cimg src=\"http://ww2.kqed.org/bayareabites/wp-content/uploads/sites/24/2015/11/THANKSGIVING-centerpiece1000-1.jpg\" alt=\"THANKSGIVING-centerpiece1000 (1)\" width=\"1000\" height=\"666\" class=\"aligncenter size-full wp-image-103674\" />\r\n\r\nEntrees, sides, desserts, vegan and gluten-free -- our special collection of autumn-themed recipes will help you create a sumptuous Thanksgiving feast for any of your holiday guests. ","featImg":null,"headData":{"title":"Thanksgiving Recipes Archives | KQED Bay Area Bites","description":"Entrees, sides, desserts, vegan and gluten-free -- our special collection of autumn-themed recipes will help you create a sumptuous Thanksgiving feast for any of your holiday guests.","ogTitle":null,"ogDescription":null,"ogImgId":null,"twTitle":null,"twDescription":null,"twImgId":null},"ttid":99342,"isLoading":false,"link":"/bayareabites/series/thanksgiving-recipes"},"bayareabites_752":{"type":"terms","id":"bayareabites_752","meta":{"index":"terms_1591234321","site":"bayareabites","id":"752","found":true},"relationships":{},"included":{},"name":"Bay Area Bites Food + Drink","slug":"food-and-drink","taxonomy":"category","description":null,"featImg":null,"headData":{"title":"Bay Area Bites Food + Drink Archives | KQED Bay Area Bites","description":null,"ogTitle":null,"ogDescription":null,"ogImgId":null,"twTitle":null,"twDescription":null,"twImgId":null},"ttid":1,"isLoading":false,"link":"/bayareabites/category/food-and-drink"},"bayareabites_1874":{"type":"terms","id":"bayareabites_1874","meta":{"index":"terms_1591234321","site":"bayareabites","id":"1874","found":true},"relationships":{},"included":{},"name":"farmers and farms","slug":"farmers-farmers-markets","taxonomy":"category","description":null,"featImg":null,"headData":{"title":"farmers and farms Archives | KQED Bay Area Bites","description":null,"ogTitle":null,"ogDescription":null,"ogImgId":null,"twTitle":null,"twDescription":null,"twImgId":null},"ttid":1452,"isLoading":false,"link":"/bayareabites/category/farmers-farmers-markets"},"bayareabites_12550":{"type":"terms","id":"bayareabites_12550","meta":{"index":"terms_1591234321","site":"bayareabites","id":"12550","found":true},"relationships":{},"included":{},"name":"holiday recipes","slug":"holiday-recipes","taxonomy":"category","description":null,"featImg":null,"headData":{"title":"holiday recipes Archives | KQED Bay Area Bites","description":null,"ogTitle":null,"ogDescription":null,"ogImgId":null,"twTitle":null,"twDescription":null,"twImgId":null},"ttid":7013,"isLoading":false,"link":"/bayareabites/category/holiday-recipes"},"bayareabites_8405":{"type":"terms","id":"bayareabites_8405","meta":{"index":"terms_1591234321","site":"bayareabites","id":"8405","found":true},"relationships":{},"included":{},"name":"apple pie","slug":"apple-pie","taxonomy":"tag","description":null,"featImg":null,"headData":{"title":"apple pie Archives | KQED Bay Area Bites","description":null,"ogTitle":null,"ogDescription":null,"ogImgId":null,"twTitle":null,"twDescription":null,"twImgId":null},"ttid":2858,"isLoading":false,"link":"/bayareabites/tag/apple-pie"},"bayareabites_469":{"type":"terms","id":"bayareabites_469","meta":{"index":"terms_1591234321","site":"bayareabites","id":"469","found":true},"relationships":{},"included":{},"name":"apples","slug":"apples","taxonomy":"tag","description":null,"featImg":null,"headData":{"title":"apples Archives | KQED Bay Area Bites","description":null,"ogTitle":null,"ogDescription":null,"ogImgId":null,"twTitle":null,"twDescription":null,"twImgId":null},"ttid":434,"isLoading":false,"link":"/bayareabites/tag/apples"},"bayareabites_530":{"type":"terms","id":"bayareabites_530","meta":{"index":"terms_1591234321","site":"bayareabites","id":"530","found":true},"relationships":{},"included":{},"name":"thanksgiving","slug":"thanksgiving","taxonomy":"tag","description":null,"featImg":null,"headData":{"title":"thanksgiving Archives | KQED Bay Area Bites","description":null,"ogTitle":null,"ogDescription":null,"ogImgId":null,"twTitle":null,"twDescription":null,"twImgId":null},"ttid":495,"isLoading":false,"link":"/bayareabites/tag/thanksgiving"},"bayareabites_2962":{"type":"terms","id":"bayareabites_2962","meta":{"index":"terms_1591234321","site":"bayareabites","id":"2962","found":true},"relationships":{},"included":{},"name":"thanksgiving recipes","slug":"thanksgiving-recipes","taxonomy":"tag","description":null,"featImg":null,"headData":{"title":"thanksgiving recipes Archives | KQED Bay Area Bites","description":null,"ogTitle":null,"ogDescription":null,"ogImgId":null,"twTitle":null,"twDescription":null,"twImgId":null},"ttid":2067,"isLoading":false,"link":"/bayareabites/tag/thanksgiving-recipes"},"bayareabites_12":{"type":"terms","id":"bayareabites_12","meta":{"index":"terms_1591234321","site":"bayareabites","id":"12","found":true},"relationships":{},"included":{},"name":"recipes","slug":"recipes","taxonomy":"category","description":null,"featImg":null,"headData":{"title":"recipes Archives | KQED Bay Area Bites","description":null,"ogTitle":null,"ogDescription":null,"ogImgId":null,"twTitle":null,"twDescription":null,"twImgId":null},"ttid":10,"isLoading":false,"link":"/bayareabites/category/recipes"},"bayareabites_9232":{"type":"terms","id":"bayareabites_9232","meta":{"index":"terms_1591234321","site":"bayareabites","id":"9232","found":true},"relationships":{},"included":{},"name":"may day","slug":"may-day","taxonomy":"tag","description":null,"featImg":null,"headData":{"title":"may day Archives | KQED Bay Area Bites","description":null,"ogTitle":null,"ogDescription":null,"ogImgId":null,"twTitle":null,"twDescription":null,"twImgId":null},"ttid":3686,"isLoading":false,"link":"/bayareabites/tag/may-day"},"bayareabites_9239":{"type":"terms","id":"bayareabites_9239","meta":{"index":"terms_1591234321","site":"bayareabites","id":"9239","found":true},"relationships":{},"included":{},"name":"pie therapist","slug":"pie-therapist","taxonomy":"tag","description":null,"featImg":null,"headData":{"title":"pie therapist Archives | KQED Bay Area Bites","description":null,"ogTitle":null,"ogDescription":null,"ogImgId":null,"twTitle":null,"twDescription":null,"twImgId":null},"ttid":3693,"isLoading":false,"link":"/bayareabites/tag/pie-therapist"},"bayareabites_2139":{"type":"terms","id":"bayareabites_2139","meta":{"index":"terms_1591234321","site":"bayareabites","id":"2139","found":true},"relationships":{},"included":{},"name":"rhubarb","slug":"rhubarb","taxonomy":"tag","description":null,"featImg":null,"headData":{"title":"rhubarb Archives | KQED Bay Area Bites","description":null,"ogTitle":null,"ogDescription":null,"ogImgId":null,"twTitle":null,"twDescription":null,"twImgId":null},"ttid":1593,"isLoading":false,"link":"/bayareabites/tag/rhubarb"},"bayareabites_200":{"type":"terms","id":"bayareabites_200","meta":{"index":"terms_1591234321","site":"bayareabites","id":"200","found":true},"relationships":{},"included":{},"name":"spring","slug":"spring","taxonomy":"tag","description":null,"featImg":null,"headData":{"title":"spring Archives | KQED Bay Area Bites","description":null,"ogTitle":null,"ogDescription":null,"ogImgId":null,"twTitle":null,"twDescription":null,"twImgId":null},"ttid":165,"isLoading":false,"link":"/bayareabites/tag/spring"},"bayareabites_1012":{"type":"terms","id":"bayareabites_1012","meta":{"index":"terms_1591234321","site":"bayareabites","id":"1012","found":true},"relationships":{},"included":{},"name":"strawberries","slug":"strawberries","taxonomy":"tag","description":null,"featImg":null,"headData":{"title":"strawberries Archives | KQED Bay Area Bites","description":null,"ogTitle":null,"ogDescription":null,"ogImgId":null,"twTitle":null,"twDescription":null,"twImgId":null},"ttid":923,"isLoading":false,"link":"/bayareabites/tag/strawberries"},"bayareabites_3768":{"type":"terms","id":"bayareabites_3768","meta":{"index":"terms_1591234321","site":"bayareabites","id":"3768","found":true},"relationships":{},"included":{},"name":"strawberry-rhubarb","slug":"strawberry-rhubarb","taxonomy":"tag","description":null,"featImg":null,"headData":{"title":"strawberry-rhubarb Archives | KQED Bay Area Bites","description":null,"ogTitle":null,"ogDescription":null,"ogImgId":null,"twTitle":null,"twDescription":null,"twImgId":null},"ttid":2465,"isLoading":false,"link":"/bayareabites/tag/strawberry-rhubarb"},"bayareabites_1284":{"type":"terms","id":"bayareabites_1284","meta":{"index":"terms_1591234321","site":"bayareabites","id":"1284","found":true},"relationships":{},"included":{},"name":"tart","slug":"tart","taxonomy":"tag","description":null,"featImg":null,"headData":{"title":"tart Archives | KQED Bay Area Bites","description":null,"ogTitle":null,"ogDescription":null,"ogImgId":null,"twTitle":null,"twDescription":null,"twImgId":null},"ttid":1123,"isLoading":false,"link":"/bayareabites/tag/tart"},"bayareabites_2090":{"type":"terms","id":"bayareabites_2090","meta":{"index":"terms_1591234321","site":"bayareabites","id":"2090","found":true},"relationships":{},"included":{},"name":"food history and celebrities","slug":"food-history-and-celebrities","taxonomy":"category","description":null,"featImg":null,"headData":{"title":"food history and celebrities Archives | KQED Bay Area Bites","description":null,"ogTitle":null,"ogDescription":null,"ogImgId":null,"twTitle":null,"twDescription":null,"twImgId":null},"ttid":1561,"isLoading":false,"link":"/bayareabites/category/food-history-and-celebrities"},"bayareabites_8784":{"type":"terms","id":"bayareabites_8784","meta":{"index":"terms_1591234321","site":"bayareabites","id":"8784","found":true},"relationships":{},"included":{},"name":"black tart","slug":"black-tart","taxonomy":"tag","description":null,"featImg":null,"headData":{"title":"black tart Archives | KQED Bay Area Bites","description":null,"ogTitle":null,"ogDescription":null,"ogImgId":null,"twTitle":null,"twDescription":null,"twImgId":null},"ttid":3237,"isLoading":false,"link":"/bayareabites/tag/black-tart"},"bayareabites_558":{"type":"terms","id":"bayareabites_558","meta":{"index":"terms_1591234321","site":"bayareabites","id":"558","found":true},"relationships":{},"included":{},"name":"christmas","slug":"christmas","taxonomy":"tag","description":null,"featImg":null,"headData":{"title":"christmas Archives | KQED Bay Area Bites","description":null,"ogTitle":null,"ogDescription":null,"ogImgId":null,"twTitle":null,"twDescription":null,"twImgId":null},"ttid":523,"isLoading":false,"link":"/bayareabites/tag/christmas"},"bayareabites_8661":{"type":"terms","id":"bayareabites_8661","meta":{"index":"terms_1591234321","site":"bayareabites","id":"8661","found":true},"relationships":{},"included":{},"name":"holiday baking","slug":"holiday-baking","taxonomy":"tag","description":null,"featImg":null,"headData":{"title":"holiday baking Archives | KQED Bay Area Bites","description":null,"ogTitle":null,"ogDescription":null,"ogImgId":null,"twTitle":null,"twDescription":null,"twImgId":null},"ttid":3114,"isLoading":false,"link":"/bayareabites/tag/holiday-baking"},"bayareabites_8659":{"type":"terms","id":"bayareabites_8659","meta":{"index":"terms_1591234321","site":"bayareabites","id":"8659","found":true},"relationships":{},"included":{},"name":"mince pie","slug":"mince-pie","taxonomy":"tag","description":null,"featImg":null,"headData":{"title":"mince pie Archives | KQED Bay Area Bites","description":null,"ogTitle":null,"ogDescription":null,"ogImgId":null,"twTitle":null,"twDescription":null,"twImgId":null},"ttid":3112,"isLoading":false,"link":"/bayareabites/tag/mince-pie"},"bayareabites_8660":{"type":"terms","id":"bayareabites_8660","meta":{"index":"terms_1591234321","site":"bayareabites","id":"8660","found":true},"relationships":{},"included":{},"name":"mincemeat","slug":"mincemeat","taxonomy":"tag","description":null,"featImg":null,"headData":{"title":"mincemeat Archives | KQED Bay Area Bites","description":null,"ogTitle":null,"ogDescription":null,"ogImgId":null,"twTitle":null,"twDescription":null,"twImgId":null},"ttid":3113,"isLoading":false,"link":"/bayareabites/tag/mincemeat"},"bayareabites_8662":{"type":"terms","id":"bayareabites_8662","meta":{"index":"terms_1591234321","site":"bayareabites","id":"8662","found":true},"relationships":{},"included":{},"name":"raisins","slug":"raisins","taxonomy":"tag","description":null,"featImg":null,"headData":{"title":"raisins Archives | KQED Bay Area Bites","description":null,"ogTitle":null,"ogDescription":null,"ogImgId":null,"twTitle":null,"twDescription":null,"twImgId":null},"ttid":3115,"isLoading":false,"link":"/bayareabites/tag/raisins"},"bayareabites_64":{"type":"terms","id":"bayareabites_64","meta":{"index":"terms_1591234321","site":"bayareabites","id":"64","found":true},"relationships":{},"included":{},"name":"culinary education and classes","slug":"culinary-education","taxonomy":"category","description":null,"featImg":null,"headData":{"title":"culinary education and classes Archives | KQED Bay Area Bites","description":null,"ogTitle":null,"ogDescription":null,"ogImgId":null,"twTitle":null,"twDescription":null,"twImgId":null},"ttid":28,"isLoading":false,"link":"/bayareabites/category/culinary-education"},"bayareabites_1255":{"type":"terms","id":"bayareabites_1255","meta":{"index":"terms_1591234321","site":"bayareabites","id":"1255","found":true},"relationships":{},"included":{},"name":"cake","slug":"cake","taxonomy":"tag","description":null,"featImg":null,"headData":{"title":"cake Archives | KQED Bay Area Bites","description":null,"ogTitle":null,"ogDescription":null,"ogImgId":null,"twTitle":null,"twDescription":null,"twImgId":null},"ttid":1098,"isLoading":false,"link":"/bayareabites/tag/cake"},"bayareabites_147":{"type":"terms","id":"bayareabites_147","meta":{"index":"terms_1591234321","site":"bayareabites","id":"147","found":true},"relationships":{},"included":{},"name":"chocolate","slug":"chocolate","taxonomy":"tag","description":null,"featImg":null,"headData":{"title":"chocolate Archives | KQED Bay Area Bites","description":null,"ogTitle":null,"ogDescription":null,"ogImgId":null,"twTitle":null,"twDescription":null,"twImgId":null},"ttid":112,"isLoading":false,"link":"/bayareabites/tag/chocolate"},"bayareabites_2263":{"type":"terms","id":"bayareabites_2263","meta":{"index":"terms_1591234321","site":"bayareabites","id":"2263","found":true},"relationships":{},"included":{},"name":"chocolate chip cookie","slug":"chocolate-chip-cookie","taxonomy":"tag","description":null,"featImg":null,"headData":{"title":"chocolate chip cookie Archives | KQED Bay Area Bites","description":null,"ogTitle":null,"ogDescription":null,"ogImgId":null,"twTitle":null,"twDescription":null,"twImgId":null},"ttid":1687,"isLoading":false,"link":"/bayareabites/tag/chocolate-chip-cookie"},"bayareabites_833":{"type":"terms","id":"bayareabites_833","meta":{"index":"terms_1591234321","site":"bayareabites","id":"833","found":true},"relationships":{},"included":{},"name":"cookies","slug":"cookies","taxonomy":"tag","description":null,"featImg":null,"headData":{"title":"cookies Archives | KQED Bay Area Bites","description":null,"ogTitle":null,"ogDescription":null,"ogImgId":null,"twTitle":null,"twDescription":null,"twImgId":null},"ttid":830,"isLoading":false,"link":"/bayareabites/tag/cookies"},"bayareabites_3015":{"type":"terms","id":"bayareabites_3015","meta":{"index":"terms_1591234321","site":"bayareabites","id":"3015","found":true},"relationships":{},"included":{},"name":"pastry","slug":"pastry","taxonomy":"tag","description":null,"featImg":null,"headData":{"title":"pastry Archives | KQED Bay Area Bites","description":null,"ogTitle":null,"ogDescription":null,"ogImgId":null,"twTitle":null,"twDescription":null,"twImgId":null},"ttid":2105,"isLoading":false,"link":"/bayareabites/tag/pastry"},"bayareabites_8442":{"type":"terms","id":"bayareabites_8442","meta":{"index":"terms_1591234321","site":"bayareabites","id":"8442","found":true},"relationships":{},"included":{},"name":"San Francisco Baking Institute","slug":"san-francisco-baking-institute","taxonomy":"tag","description":null,"featImg":null,"headData":{"title":"San Francisco Baking Institute Archives | KQED Bay Area Bites","description":null,"ogTitle":null,"ogDescription":null,"ogImgId":null,"twTitle":null,"twDescription":null,"twImgId":null},"ttid":2895,"isLoading":false,"link":"/bayareabites/tag/san-francisco-baking-institute"},"bayareabites_63":{"type":"terms","id":"bayareabites_63","meta":{"index":"terms_1591234321","site":"bayareabites","id":"63","found":true},"relationships":{},"included":{},"name":"chefs","slug":"chefs","taxonomy":"category","description":null,"featImg":null,"headData":{"title":"chefs Archives | KQED Bay Area Bites","description":null,"ogTitle":null,"ogDescription":null,"ogImgId":null,"twTitle":null,"twDescription":null,"twImgId":null},"ttid":27,"isLoading":false,"link":"/bayareabites/category/chefs"},"bayareabites_253":{"type":"terms","id":"bayareabites_253","meta":{"index":"terms_1591234321","site":"bayareabites","id":"253","found":true},"relationships":{},"included":{},"name":"baking","slug":"baking","taxonomy":"tag","description":null,"featImg":null,"headData":{"title":"baking Archives | KQED Bay Area Bites","description":null,"ogTitle":null,"ogDescription":null,"ogImgId":null,"twTitle":null,"twDescription":null,"twImgId":null},"ttid":218,"isLoading":false,"link":"/bayareabites/tag/baking"},"bayareabites_8416":{"type":"terms","id":"bayareabites_8416","meta":{"index":"terms_1591234321","site":"bayareabites","id":"8416","found":true},"relationships":{},"included":{},"name":"Kate McDermott","slug":"kate-mcdermott","taxonomy":"tag","description":null,"featImg":null,"headData":{"title":"Kate McDermott Archives | KQED Bay Area Bites","description":null,"ogTitle":null,"ogDescription":null,"ogImgId":null,"twTitle":null,"twDescription":null,"twImgId":null},"ttid":2869,"isLoading":false,"link":"/bayareabites/tag/kate-mcdermott"},"bayareabites_1297":{"type":"terms","id":"bayareabites_1297","meta":{"index":"terms_1591234321","site":"bayareabites","id":"1297","found":true},"relationships":{},"included":{},"name":"peach","slug":"peach","taxonomy":"tag","description":null,"featImg":null,"headData":{"title":"peach Archives | KQED Bay Area Bites","description":null,"ogTitle":null,"ogDescription":null,"ogImgId":null,"twTitle":null,"twDescription":null,"twImgId":null},"ttid":1135,"isLoading":false,"link":"/bayareabites/tag/peach"},"bayareabites_421":{"type":"terms","id":"bayareabites_421","meta":{"index":"terms_1591234321","site":"bayareabites","id":"421","found":true},"relationships":{},"included":{},"name":"seattle","slug":"seattle","taxonomy":"tag","description":null,"featImg":null,"headData":{"title":"seattle Archives | KQED Bay Area Bites","description":null,"ogTitle":null,"ogDescription":null,"ogImgId":null,"twTitle":null,"twDescription":null,"twImgId":null},"ttid":386,"isLoading":false,"link":"/bayareabites/tag/seattle"}},"userAgentReducer":{"userAgent":"Mozilla/5.0 AppleWebKit/537.36 (KHTML, like Gecko; compatible; ClaudeBot/1.0; +claudebot@anthropic.com)","isBot":true},"userPermissionsReducer":{"wpLoggedIn":false},"localStorageReducer":{},"browserHistoryReducer":[],"eventsReducer":{},"fssReducer":{},"tvDailyScheduleReducer":{},"tvWeeklyScheduleReducer":{},"tvPrimetimeScheduleReducer":{},"tvMonthlyScheduleReducer":{},"userAccountReducer":{"routeTo":"","showDeleteConfirmModal":false,"user":{"userId":"","isFound":false,"firstName":"","lastName":"","phoneNumber":"","email":"","articles":[]}},"youthMediaReducer":{},"checkPleaseReducer":{"filterData":{},"restaurantData":[]},"reframeReducer":{"attendee":null},"location":{"pathname":"/bayareabites/tag/pie-crust/","previousPathname":"/"}}